I figured making Halloween treats would mean a tricky mess of colors and shapes. It took about three attempts for my first batch of witch hat brownie pops to look anything like actual hats instead of sad, lopsided triangles with sticks stuck in them. Honestly, I thought a simple brownie pop was just a brownie on a stick, but adding that witchy flair turned out to be a whole different beast. The chocolate-dipped cones, the perfect drizzle of frosting, and those tiny candy details that somehow turn a fudgy bite into a festive delight all demanded a bit more patience and a touch of creativity than I expected.
There was chocolate smudged on my counter and a few fallen candy hats that didn’t make the cut, but the scent of rich cocoa and sweet vanilla filling the kitchen was worth every sticky finger. The contrast between the dense brownie base and the crunchy sugar cone hat was a surprise bonus—something I hadn’t anticipated when I first thought, “How hard can this be?” It’s the kind of treat that looks like you spent hours fussing, but really, it’s just a few smart steps and a little bit of fun.
These witch hat brownie pops stuck with me because they’re easy enough to whip up last minute, but special enough to make Halloween feel a little more magical around the house. Plus, they’re one of those treats I can trust to impress the neighborhood kids without breaking a sweat. If you’re looking for a Halloween recipe that balances spooky charm and straightforward baking, this one will quietly steal the show at your party or family gathering.
Why You’ll Love This Recipe
After testing countless brownie recipes and decorating ideas, let me tell you why these witch hat brownie pops have become my go-to Halloween treat:
- Quick & Easy: You can have these ready in under an hour, which is perfect when you’re juggling costumes, last-minute decorations, and pumpkin carving.
- Simple Ingredients: The recipe uses pantry staples—flour, cocoa powder, sugar, eggs, and a few basic baking supplies—so you won’t need a special trip to the store.
- Perfect for Halloween Parties: The witch hat design makes them a festive centerpiece for any spooky celebration or classroom treat.
- Crowd-Pleaser: Kids love the fun shape and parents appreciate the homemade touch without the hassle of complicated baking.
- Unbelievably Delicious: The fudgy brownie texture pairs perfectly with the crisp sugar cone “hat” and a swirl of chocolate or frosting—talk about a flavor win.
This isn’t just another brownie pop recipe. The secret is in the balance of textures and the creative assembly that turns a simple dessert into a Halloween showstopper. The chocolate coating on the cone adds that slight crunch that contrasts with the soft brownie, and the candy decorations bring that playful vibe kids can’t resist. Honestly, you might find yourself making them year-round once you see how fun and forgiving this recipe is.
Whether you’re a seasoned baker or just someone who likes quick wins in the kitchen, these witch hat brownie pops bring a little spooky joy with minimal fuss. Plus, if you enjoy treats with a chocolate twist, you might also like the cherry chocolate brownies I perfected—not quite Halloween-themed, but equally addictive.
What Ingredients You Will Need
This recipe uses simple, wholesome ingredients to deliver bold flavor and satisfying texture without the fuss. Most of these are pantry staples, and the few extras like sugar cones and candy decorations are easy to find around Halloween.
- For the Brownie Base:
- All-purpose flour – 1 cup (120 g)
- Cocoa powder, unsweetened – ½ cup (50 g), I recommend Hershey’s for rich flavor
- Granulated sugar – ¾ cup (150 g)
- Unsalted butter – ½ cup (115 g), melted and slightly cooled
- Large eggs – 2, room temperature
- Vanilla extract – 1 tsp
- Salt – ¼ tsp
- Baking powder – ½ tsp
- For the Witch Hat “Brim” and Decoration:
- Sugar cones – 12 small-sized cones (the classic ice cream cones work best)
- Chocolate chips or melting chocolate – 1 cup (175 g), dark or semi-sweet
- Colored candy melts or food-safe markers – optional for decorating the hats
- Miniature candy eyes or sprinkles – optional for fun faces
- Wax paper or parchment – for easy cleanup
- For Assembly:
- Wooden lollipop sticks or sturdy cake pop sticks – 12
- Buttercream frosting or cream cheese frosting – about ½ cup (120 ml) to “glue” the hat on top
You can swap out regular flour for a gluten-free blend if needed, and almond flour works well for a nuttier brownie base. If dairy is a concern, use dairy-free butter and substitute the frosting with a coconut cream frosting. For a festive twist, try swapping the sugar cones with chocolate-dipped waffle cones.
Equipment Needed
- Mixing bowls – one large for wet ingredients, one for dry
- Electric mixer or whisk – for beating eggs and mixing batter evenly
- Baking pan – an 8×8 inch (20×20 cm) square pan works perfectly for the brownies
- Cooling rack – useful to cool brownies evenly before cutting
- Sharp knife – for cutting brownies into uniform squares
- Microwave-safe bowl or double boiler – for melting chocolate and candy melts
- Wooden or plastic lollipop sticks – for holding the brownie pops
- Small spatula or butter knife – for spreading frosting as “glue”
- Parchment paper or wax paper – for laying out the pops to dry
If you don’t have a double boiler, melting chocolate in short bursts in the microwave works fine—just be careful not to burn it. A silicone spatula is my favorite for folding and scraping the batter, but a sturdy spoon works in a pinch. For budget-friendly options, store-brand chocolate chips work well and still taste great.
Preparation Method
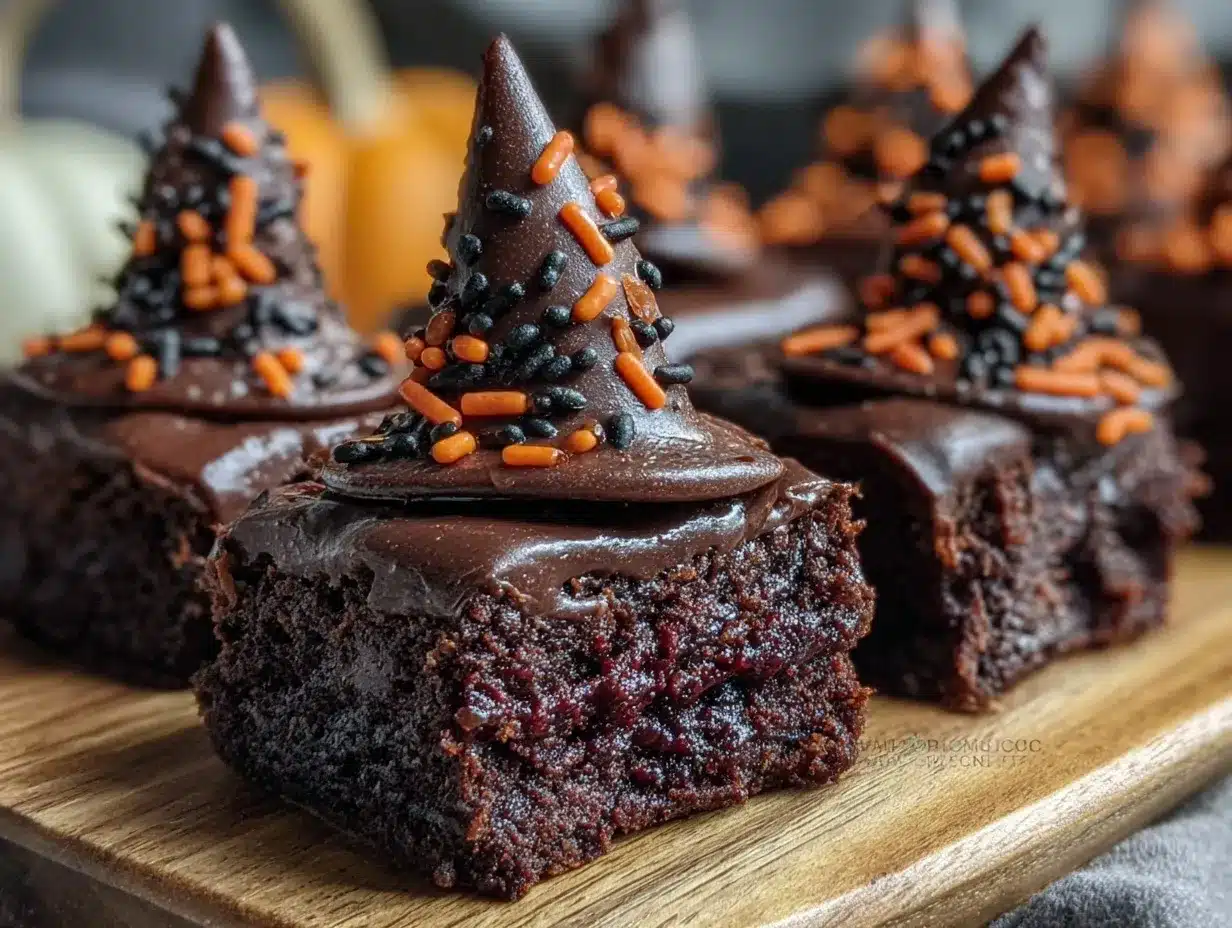
- Preheat the oven and prepare the pan: Set your oven to 350°F (175°C). Line an 8×8 inch (20×20 cm) baking pan with parchment paper, leaving some overhang for easy removal. This step makes getting your brownies out a breeze.
- Mix dry ingredients: In a medium bowl, sift together 1 cup (120 g) of all-purpose flour, ½ cup (50 g) cocoa powder, ½ tsp baking powder, and ¼ tsp salt. Sifting helps avoid lumps and ensures an even batter.
- Combine wet ingredients: In a large bowl, whisk 2 large eggs with ¾ cup (150 g) granulated sugar until pale and slightly thickened—this usually takes about 2-3 minutes. Stir in ½ cup (115 g) melted butter and 1 tsp vanilla extract until smooth.
- Fold dry into wet: Gently fold the dry mixture into the wet ingredients using a spatula. Don’t overmix; stop when you see no streaks of flour. The batter should be thick and fudgy.
- Bake: Pour the batter into the prepared pan and spread evenly. Bake for 20-25 minutes, or until a toothpick inserted in the center comes out with a few moist crumbs. Overbaking kills the fudgy magic here.
- Cool and cut: Allow brownies to cool completely on a rack, about 1 hour. Once cooled, cut into 12 equal squares (about 2-inch/5 cm squares). Use a sharp knife and wipe it clean between cuts for neat edges.
- Insert sticks: Carefully insert a wooden lollipop stick into the side of each brownie square, about halfway through. If the brownies are too crumbly, chill them for 15 minutes first to firm up.
- Prepare witch hats: Melt 1 cup (175 g) chocolate chips or melting chocolate in a microwave-safe bowl in 30-second intervals, stirring in between until smooth. Dip the bottom rim of each sugar cone into melted chocolate and set it upside down on wax paper to dry. This creates the “brim” of the hat.
- Attach hats: Use a small dab of frosting on the top edge of each brownie pop, then gently press the chocolate-dipped sugar cone onto the frosting. Hold for a few seconds to secure, then let them set completely.
- Decorate: Use colored candy melts to add stripes or dots on the cones, or draw fun faces with food-safe markers. Mini candy eyes can turn these into whimsical little witches. Let everything dry fully before serving.
Pro tip: If the chocolate on the cones gets too hard to work with, warm it gently in your hands to soften before dipping. The frosting acts like glue to keep the hats steady, so don’t skimp on that layer. The texture contrast between the fudgy brownie and the crunchy cone makes the first bite so satisfying, you’ll want to make a double batch next time!
Cooking Tips & Techniques
Making witch hat brownie pops can seem fiddly, but a few tricks help keep things smooth:
- Don’t overbake the brownies. You want them moist and fudgy so they hold together on the stick but aren’t gooey and falling apart. Check them at 20 minutes.
- Use room temperature eggs. This helps the batter mix smoothly and gives a better texture.
- Be gentle when inserting sticks. Pushing too hard can crack the brownie, so wiggle it in slowly.
- Let the chocolate-dipped cones set fully. If they’re sticky, they won’t stay put on the brownie pops.
- Store the pops chilled. This keeps the frosting firm and prevents the hats from sliding.
- Practice your decorating on spare cones. It helps avoid mistakes on your main batch and lets you get creative without pressure.
I learned the hard way that frosting is key to attaching the hats securely. Without it, the cones slide right off, no matter how much chocolate you use. Also, melting chocolate in short bursts and stirring keeps it silky and prevents burning, which can ruin the taste.
Multitasking while the brownies bake—like prepping cones and melting chocolate—makes the whole process more efficient. You’ll find that this recipe has a good rhythm once you get into it, and it’s rewarding to see those little witch hats come to life.
Variations & Adaptations
This recipe is pretty forgiving and easy to customize, which is great if you want to switch things up:
- Dietary: Use gluten-free flour blends for a celiac-friendly treat. Swap butter for coconut oil and use dairy-free chocolate for a vegan-friendly version. I once tried coconut cream frosting instead of buttercream, and it worked surprisingly well.
- Seasonal: Swap sugar cones with waffle cones dipped in orange-tinted chocolate for a fall twist. Add crushed peppermint candies on the hats for a spooky-meets-winter vibe.
- Flavor twists: Mix in a teaspoon of espresso powder to the brownie batter for a mocha undertone. Or swirl in some peanut butter before baking for a rich surprise.
- Cooking method: For a no-bake version, try using brownie-flavored cookie dough balls pressed onto sticks, then decorated similarly with cones and chocolate.
One variation I tried was adding a little orange zest to the frosting—it gave the witch hats a subtle citrusy brightness that balanced the chocolate perfectly. Feel free to experiment with your favorite flavors or decorations; these brownie pops are as fun to personalize as they are to eat.
Serving & Storage Suggestions
Serve these witch hat brownie pops slightly chilled or at room temperature. The contrast between the cool frosting and warm room temp brownie is delightful. Arrange them on a festive platter lined with black or orange tissue paper for a Halloween party centerpiece.
They pair wonderfully with a warm cup of spiced cider or a creamy hot chocolate, making them a hit at cozy fall gatherings. If you want to mix up your dessert table, adding pink champagne jello shots nearby (for adult guests) creates a playful contrast between spooky and sophisticated.
Store leftovers in an airtight container in the refrigerator for up to 4 days. When ready to enjoy again, let them sit at room temperature for about 15 minutes to soften slightly. They also freeze well for up to a month—just thaw overnight in the fridge.
Over time, the chocolate on the cone may soften a bit, but the flavor deepens and the brownie becomes even fudgier. These little pops keep their charm and taste long after Halloween night fades.
Nutritional Information & Benefits
Each witch hat brownie pop contains approximately 180-200 calories, with 10-12 grams of fat, 25 grams of carbohydrates, and about 2 grams of protein. The cocoa powder adds some antioxidants, which is a nice little bonus for chocolate lovers.
While these treats aren’t exactly health food, using unsweetened cocoa and real butter gives a richer, more natural flavor compared to processed alternatives. You can also reduce sugar slightly or substitute with more natural sweeteners like coconut sugar if you prefer.
For those with dietary concerns, swapping ingredients as mentioned earlier can make these accessible to a range of diets, from gluten-free to vegan. Just keep in mind the candy decorations may contain allergens like nuts or soy, so check labels if needed.
From my perspective, Halloween is about enjoying treats that bring joy and a little indulgence, and these pops hit that sweet spot without going overboard.
Conclusion
These perfect witch hat brownie pops are a fun, festive way to celebrate Halloween with minimal fuss and maximum charm. They combine simple ingredients with a playful assembly that makes the occasion feel special without demanding hours in the kitchen.
Feel free to tweak the decorations, experiment with flavors, or add your own creative spin. That’s one of the reasons I keep coming back to this recipe—it’s an easy canvas for imagination and a guaranteed crowd-pleaser.
For me, there’s something quietly satisfying about handing out these little witch hats that taste as good as they look. They remind me that with a bit of patience and a few creative touches, homemade treats can really steal the show.
If you try them, I’d love to hear how your witch hat brownie pops turned out or what fun twists you added. Happy baking and spooky snacking!
FAQs
Can I make these witch hat brownie pops ahead of time?
Yes, you can prepare and assemble them a day ahead. Store in the refrigerator in an airtight container and bring to room temperature before serving for the best texture.
What if I can’t find sugar cones for the witch hats?
You can use waffle cones or even make mini ice cream cones at home if you have a cone maker. Chocolate-dipped waffle cones add a nice crunch and a slightly different flavor.
How do I prevent the brownie pops from falling apart on the sticks?
Make sure the brownies are fully cooled and firm before inserting sticks. Chilling the brownies for 15-20 minutes before this step can help. Also, be gentle when pushing the sticks in.
Can I use store-bought brownies for this recipe?
Absolutely! Store-bought brownies can save time. Just cut them into squares, insert sticks, and proceed with the hat decoration as described.
Are there any allergy-friendly options for the frosting and decorations?
Yes, dairy-free frosting options like coconut cream frosting work well. For decorations, choose allergy-friendly candies or skip the extras altogether and decorate with natural cocoa dust or colored sugar.
Pin This Recipe!
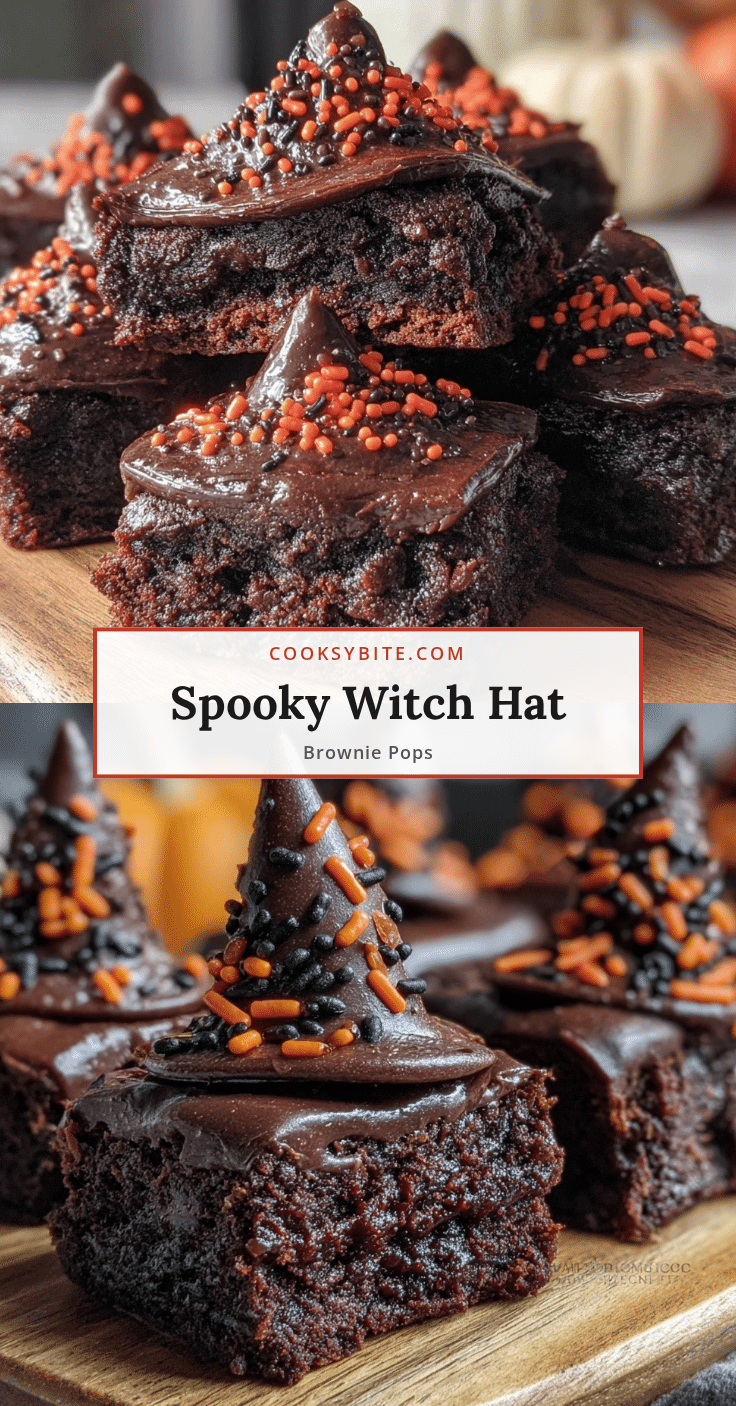
Perfect Witch Hat Brownie Pops Easy Halloween Treats Recipe Ideas
These witch hat brownie pops are a fun and festive Halloween treat combining fudgy brownies with crunchy sugar cone hats, decorated with chocolate and candy details. They are easy to make, perfect for parties, and sure to impress kids and adults alike.
- Prep Time: 20 minutes
- Cook Time: 25 minutes
- Total Time: 1 hour 45 minutes
- Yield: 12 servings 1x
- Category: Dessert
- Cuisine: American
Ingredients
- 1 cup all-purpose flour (120 g)
- ½ cup unsweetened cocoa powder (50 g)
- ¾ cup granulated sugar (150 g)
- ½ cup unsalted butter (115 g), melted and slightly cooled
- 2 large eggs, room temperature
- 1 tsp vanilla extract
- ¼ tsp salt
- ½ tsp baking powder
- 12 small sugar cones
- 1 cup chocolate chips or melting chocolate (175 g), dark or semi-sweet
- Colored candy melts or food-safe markers (optional)
- Miniature candy eyes or sprinkles (optional)
- Wax paper or parchment paper
- 12 wooden lollipop sticks or sturdy cake pop sticks
- ½ cup buttercream frosting or cream cheese frosting (120 ml)
Instructions
- Preheat oven to 350°F (175°C). Line an 8×8 inch baking pan with parchment paper, leaving overhang for easy removal.
- In a medium bowl, sift together flour, cocoa powder, baking powder, and salt.
- In a large bowl, whisk eggs and sugar until pale and thickened (2-3 minutes). Stir in melted butter and vanilla extract until smooth.
- Gently fold dry ingredients into wet ingredients until no streaks remain; do not overmix.
- Pour batter into prepared pan and spread evenly. Bake for 20-25 minutes until a toothpick inserted comes out with a few moist crumbs.
- Cool brownies completely on a rack (about 1 hour). Cut into 12 equal 2-inch squares.
- Insert a wooden lollipop stick halfway into the side of each brownie square. Chill brownies for 15 minutes if too crumbly.
- Melt chocolate chips in microwave-safe bowl in 30-second intervals, stirring until smooth.
- Dip bottom rim of each sugar cone into melted chocolate and set upside down on wax paper to dry, forming the hat brim.
- Use a small dab of frosting on top edge of each brownie pop and press the chocolate-dipped cone onto the frosting. Hold to secure and let set completely.
- Decorate cones with colored candy melts, food-safe markers, or miniature candy eyes as desired. Let dry fully before serving.
Notes
Do not overbake brownies to keep them fudgy and moist. Use room temperature eggs for better batter texture. Be gentle when inserting sticks to avoid cracking brownies. Let chocolate-dipped cones set fully before attaching to prevent sliding. Store pops chilled to keep frosting firm. Practice decorating on spare cones to avoid mistakes. Melting chocolate in short bursts prevents burning.
Nutrition
- Serving Size: 1 witch hat brownie
- Calories: 190
- Sugar: 18
- Sodium: 90
- Fat: 11
- Saturated Fat: 6
- Carbohydrates: 25
- Fiber: 2
- Protein: 2
Keywords: Halloween treats, brownie pops, witch hat brownies, easy Halloween dessert, kid-friendly Halloween recipe, chocolate brownie pops


