The deep, jewel-like purple of the syrup settling in the jar—that’s what I was after. Not the taste, not even the immune boost, but that particular shade of concentrated berry dusk that only comes from simmering elderberries just right. Honestly, everything else is secondary.
I got into making this syrup the way most people fall into things—by accident and a little bit of desperation. It was mid-January, the kind of gray that seeps into your bones, and my kid came home from school with that pre-cough look. You know the one. I was tired of the pharmacy run, tired of the sticky-sweet kids’ medicines that never seemed to work anyway. So I stood in my kitchen, staring at a bag of dried elderberries I’d bought on a whim months earlier, and thought, well, this is either going to be a huge waste of time or the best thing I’ve done all winter.
Turns out, it was the second one. That first batch was a little too thick, a little too tart, but it worked. The cough never really took hold, and I felt like I’d stumbled onto some kind of secret. Now, years later, this homemade elderberry syrup for immune support has become my cold-weather anchor. It’s not a magic potion—let’s be real—but it’s the thing I reach for when I feel that first scratch in my throat. And that deep purple color? It still makes me smile every single time I pour it into a jar.
Why You’ll Love This Recipe
I’ve tested this recipe more times than I can count, tweaking the honey-to-berry ratio and the simmering time until it felt just right. What I ended up with is a syrup that’s potent enough to actually help but tasty enough that my kids don’t fight me on taking it. Here’s why I think you’ll love it too:
- Simple Ingredients: No weird extracts or hard-to-find powders. Just dried elderberries, water, honey, and a few spices you probably already have.
- Quick & Easy: It takes about 45 minutes from start to finish, most of which is hands-off simmering time. You can make a batch while dinner’s cooking.
- Crowd-Pleaser: The flavor is pleasantly tart with warm spice notes—nothing medicinal or off-putting. Even picky eaters will take it without a fight.
- Perfect for Cold Season: This isn’t just for when you’re already sick. A little daily dose during winter months helps keep everyone feeling their best.
- Cost-Effective: A single batch costs a fraction of what you’d pay for store-bought syrups, and you control exactly what goes into it.
What sets this recipe apart is the balance. I spent a lot of time figuring out how to get the immune-boosting benefits without making it taste like cough syrup. The secret is in the spice blend—cinnamon and ginger don’t just add flavor, they actually complement the elderberries’ natural compounds. It’s not just another version of the same recipe; it’s the version that makes you actually want to take your daily dose.
There’s something deeply satisfying about making your own remedies. It’s a small act of control in a world that often feels chaotic. When I pour this syrup into a jar and label it, I feel like I’m doing something real for my family. And honestly, that feeling is almost as good as the immune support itself.
What Ingredients You Will Need
This recipe uses simple, wholesome ingredients that work together to create a powerful immune-supporting syrup. Most of these are pantry staples or easy to find at any grocery store or online. Here’s what you’ll need:
- Dried elderberries: 1 cup (about 150g). These are the star of the show. Look for organic, deep purple-black berries from a trusted source. I prefer Mountain Rose Herbs for consistency, but any reputable brand works. Avoid fresh elderberries—they need to be cooked to be safe.
- Water: 4 cups (960ml). Filtered water is best if you have it, but tap water works fine.
- Raw honey: 1 cup (340g). This is crucial—raw, unfiltered honey retains its natural enzymes and antibacterial properties. Do not use pasteurized honey or give honey to children under 1 year old. For a vegan option, use maple syrup or agave nectar.
- Cinnamon sticks: 2 whole sticks (or 1 teaspoon ground cinnamon). Cinnamon adds warmth and has its own immune-supporting properties. I love the way the sticks look simmering in the pot.
- Fresh ginger: 1-inch piece, sliced (about 15g). Ginger adds a gentle heat and helps with congestion. Don’t peel it—just give it a good scrub and slice it into coins.
- Whole cloves: 1 teaspoon (about 5-6 cloves). Cloves add depth and are known for their antimicrobial properties. A little goes a long way, so don’t overdo it.
- Optional add-ins: A pinch of cayenne pepper for extra kick (skip if making for kids), or a vanilla bean split open for a sweeter, more dessert-like flavor.
I always recommend tasting your honey before adding it. Different honeys have wildly different flavor profiles—some are mild and floral, others are bold and almost spicy. The honey you choose will subtly change the final syrup, so pick one you genuinely like eating on its own.
For the elderberries themselves, I’ve learned to buy in bulk during late summer when they’re harvested. They store beautifully in a cool, dark cabinet for up to a year. If you’re buying from a bulk bin, make sure the berries are dry and not clumped together, which can indicate moisture exposure.
Equipment Needed
You don’t need a fancy setup for this recipe. Here’s what I use every time:
- Medium saucepan: A 3-4 quart pot works perfectly. Stainless steel or enameled cast iron is ideal—avoid aluminum, which can react with the berries and affect the flavor.
- Fine-mesh strainer: This is non-negotiable. You need something that will catch all the tiny berry bits and spice fragments. I use a double-layer strainer for extra insurance.
- Cheesecloth or nut milk bag: If you want an ultra-smooth syrup without any sediment, line your strainer with cheesecloth. I’ve also used a clean, thin kitchen towel in a pinch.
- Glass jars or bottles: Mason jars work great. Make sure they’re sterilized—I run them through the dishwasher on the sanitize cycle or boil them for 10 minutes.
- Wooden spoon or silicone spatula: For stirring and mashing the berries gently.
- Measuring cups and spoons: Standard set for accuracy.
- Funnel: Optional but helpful for pouring the syrup into jars without making a mess.
I’ve made this with a cheap saucepan and a colander before, and it worked fine. The cheesecloth really does make a difference though—those tiny berry fragments can make the syrup gritty. Also, don’t skip sterilizing your jars. I learned that lesson the hard way when a batch molded after two weeks in the fridge.
Preparation Method
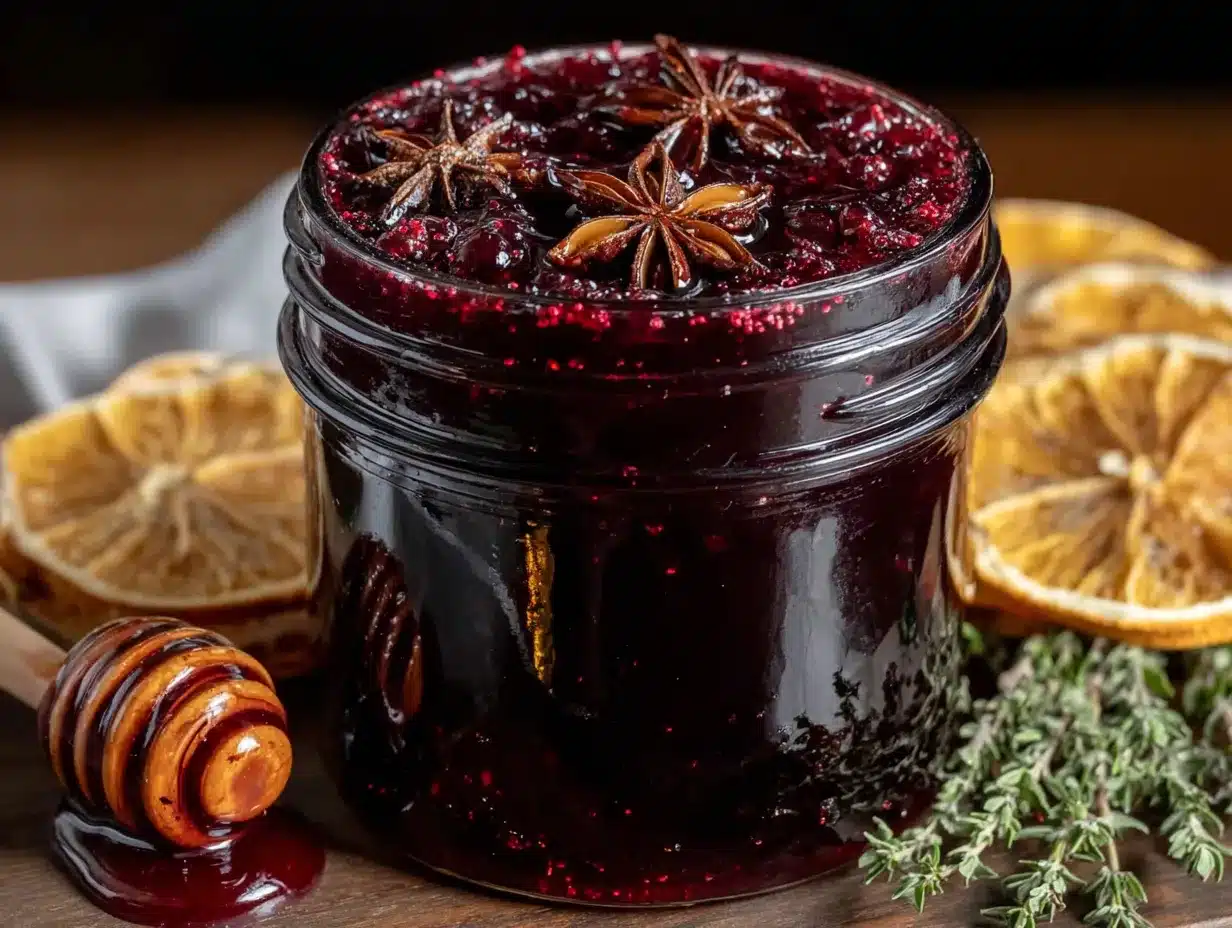
- Combine berries, water, and spices: In your medium saucepan, add the dried elderberries, water, cinnamon sticks, sliced ginger, and whole cloves. Give everything a gentle stir. The water should be a deep, dark purple almost immediately.
- Bring to a boil, then simmer: Place the pot over medium-high heat and bring to a boil. Once it reaches a rolling boil, reduce the heat to low and let it simmer gently. Do not boil vigorously—you want a gentle bubble, not a violent one. Simmer uncovered for 30-40 minutes, or until the liquid has reduced by about half. The berries will have plumped up and look slightly wrinkled.
- Mash the berries: After 30 minutes, use the back of your wooden spoon to gently mash the berries against the side of the pot. This releases the remaining goodness locked inside. Let it simmer for another 5 minutes.
- Strain the liquid: Place your fine-mesh strainer (lined with cheesecloth if using) over a large bowl or heatproof measuring cup. Carefully pour the entire contents of the pot through the strainer. Let it drain naturally for a few minutes—don’t press on the solids unless you want a cloudy syrup. Wear oven mitts—that liquid is hot!
- Cool slightly, then add honey: Let the strained liquid cool for about 10-15 minutes until it’s warm but not hot. This is crucial—if the liquid is too hot, it will destroy the beneficial enzymes in the raw honey. Stir in the honey until it’s fully dissolved. The syrup should be smooth and glossy.
- Bottle and store: Using your funnel, pour the syrup into sterilized glass jars. Leave about ½ inch of headspace. Let the jars cool completely to room temperature before sealing with lids.
- Refrigerate: Store the syrup in the refrigerator. It will thicken slightly as it chills, which is normal.
A few sensory cues to watch for: The syrup is ready to strain when the liquid coats the back of a spoon and feels slightly syrupy. The color should be a deep, almost-black purple. And the smell? It should fill your kitchen with warm, spiced berry goodness—like autumn in a pot.
Cooking Tips & Techniques
I’ve made this recipe at least twenty times, and I’ve made every mistake in the book. Here’s what I’ve learned:
Don’t rush the simmer. The first time I made this, I was impatient and only simmered it for 20 minutes. The syrup was thin and watery, and it didn’t have that concentrated, rich flavor. Let it go the full 40 minutes. Trust the process.
Watch the temperature when adding honey. This is the most common mistake I see people make. If you add honey to boiling liquid, you kill all the good stuff that makes raw honey special. I use an instant-read thermometer now—I wait until the liquid drops to about 120°F (49°C) before stirring in the honey. If you don’t have a thermometer, wait until the liquid is warm to the touch but not hot.
Double-strain for smoothness. Some people like a bit of sediment in their syrup—I don’t. I strain through my fine-mesh strainer first, then through a nut milk bag. It takes an extra two minutes and gives you a crystal-clear syrup that looks beautiful in the jar.
Scale up or down easily. This recipe doubles beautifully for bigger batches. Just use a larger pot and keep the simmer time the same. I often make a triple batch at the start of cold season and freeze half in ice cube trays for later use.
Label your jars. I learned this one the hard way when I found an unlabeled jar in the back of my fridge three months later. Write the date on the lid with a permanent marker—you’ll thank yourself later.
Variations & Adaptations
One of the best things about this recipe is how flexible it is. Here are some variations I’ve tried and loved:
- Spiced Chai Version: Add 2 star anise pods and a strip of orange zest along with the other spices. The orange brightens everything up, and the star anise adds a subtle licorice note that’s surprisingly good.
- Extra Immune Boost: Add 1 tablespoon of dried echinacea root or 3 astragalus slices to the simmering liquid. Strain them out with the berries. This turns the syrup into a real immune powerhouse.
- Kid-Friendly Sweet Version: If your kids find the tartness too strong, add an extra ¼ cup of honey and a splash of vanilla extract after cooling. My youngest calls it “purple honey” and asks for it on pancakes.
- Low-Sugar Version: Replace half the honey with monk fruit sweetener or erythritol. The texture will be slightly thinner, but the immune benefits remain the same.
- Alcohol-Based Tincture Variation: For a shelf-stable version that doesn’t need refrigeration, cover dried elderberries with vodka instead of water and let it steep for 4-6 weeks. Strain and take by the dropperful. This is a completely different product but equally effective.
I once tried a version with dried rose hips added in, thinking it would taste floral and lovely. It was… interesting. Not bad, but definitely not my favorite. The rose hips made it more tart, and the floral notes clashed with the ginger. Sometimes the original really is the best.
Serving & Storage Suggestions
This syrup is incredibly versatile. Here’s how I use it:
Daily maintenance dose: 1 teaspoon for kids, 1 tablespoon for adults, taken straight or stirred into warm water like a tea. I do this every morning during cold and flu season.
At the first sign of illness: Double the dose and take it every 4 hours. I also add a squeeze of lemon and a pinch of cayenne to warm water with the syrup for a soothing, sinus-clearing drink.
In recipes: Drizzle it over pancakes, yogurt, or oatmeal. Use it as a glaze for roasted chicken or pork—the sweet-tart flavor is surprisingly good with savory dishes. Or mix it into sparkling water for a fancy, immune-boosting soda.
Storage: Keep the syrup in the refrigerator at all times. It will stay good for 2-3 months, though I’ve never had a batch last that long because we use it so fast. If you see any mold or off-smells, toss it immediately.
Freezing: Pour the syrup into ice cube trays and freeze. Once solid, pop the cubes into a freezer bag. They’ll keep for up to 6 months. Just thaw a cube or two as needed. This is my favorite method for preserving a big batch.
Flavor development: The syrup actually gets better after a week in the fridge. The spices meld together, and the honey flavor becomes more integrated. I always try to make a batch at least a few days before I plan to use it regularly.
Nutritional Information & Benefits
While I’m not a doctor or nutritionist, I’ve done my research on the ingredients in this syrup. Here’s what the science says:
- Elderberries: Packed with antioxidants called anthocyanins, which give them that deep purple color. Studies suggest they may help reduce the duration and severity of cold and flu symptoms by supporting the immune system’s natural response.
- Raw honey: Contains natural enzymes, antioxidants, and antimicrobial compounds. It’s a natural cough suppressant and soothes sore throats. Local honey may also help with seasonal allergies.
- Ginger: Anti-inflammatory and helps with nausea and congestion. It also warms the body from the inside out.
- Cinnamon: Rich in antioxidants and has anti-inflammatory properties. It also helps regulate blood sugar, which is a nice bonus.
- Cloves: Contain eugenol, a compound with antimicrobial and pain-relieving properties.
Estimated nutrition per tablespoon (15ml): Calories: 45, Carbohydrates: 12g, Sugars: 11g (from honey and natural fruit sugars), Vitamin C: 2mg, Iron: 0.3mg. This is a concentrated syrup, so a little goes a long way.
Dietary considerations: This recipe is naturally gluten-free, dairy-free, and nut-free. It’s not suitable for infants under 1 year due to the honey. For a vegan option, substitute maple syrup for honey.
I personally love that this syrup lets me take a proactive approach to my family’s health without relying on over-the-counter medications. It’s not a replacement for medical care, but it’s a wonderful addition to a healthy lifestyle.
Conclusion
Making your own elderberry syrup is one of those small, satisfying acts that makes you feel like you’ve got things under control. It’s simple enough for a beginner, but the results are genuinely effective. Whether you’re looking to support your immune system during cold season or just want a delicious, natural way to stay healthy, this recipe delivers.
I love that this syrup has become a tradition in my house. When the first chill hits the air, my kids know what’s coming. They groan a little, but they also take their daily dose without complaint—and that’s a win in my book. You can play with the spices, adjust the sweetness, or add your own favorite immune-boosting herbs. Make it your own.
I’d love to hear how your batch turns out! Drop a comment below and let me know if you tried any fun variations, or share your own tips for staying healthy during cold season. And if you loved this recipe, don’t forget to pin it for later and share it with a friend who needs a little immune support. Happy simmering!
Frequently Asked Questions
Can I use fresh elderberries instead of dried?
You can, but you need to be careful. Fresh elderberries must be cooked thoroughly—they contain a compound that can cause nausea if eaten raw. Use 2 cups of fresh berries for every 1 cup of dried, and simmer for an extra 10 minutes to ensure they’re fully broken down.
How long does homemade elderberry syrup last?
Stored in a sealed glass jar in the refrigerator, it will stay good for 2-3 months. If you see any mold, cloudiness, or smell something off, toss it. For longer storage, freeze the syrup in ice cube trays.
Can I give this syrup to my kids?
Yes, but with a few caveats. Do not give honey to children under 1 year old due to the risk of botulism. For older kids, start with a smaller dose—½ teaspoon for toddlers, 1 teaspoon for older children. Always check with your pediatrician before starting any new supplement.
Can I make this without honey?
Absolutely. Maple syrup, agave nectar, or even coconut sugar work as substitutes. Just keep in mind that the immune benefits of raw honey are unique, so you’ll lose that specific advantage. The syrup will still taste great and support your immune system through the elderberries and spices.
How much should I take each day?
For general immune maintenance, 1 tablespoon for adults and 1 teaspoon for kids is a good daily dose. If you feel a cold coming on, you can double that for a few days. Listen to your body—it’s a food, not a medicine, so there’s no strict limit, but more isn’t always better.
Pin This Recipe!
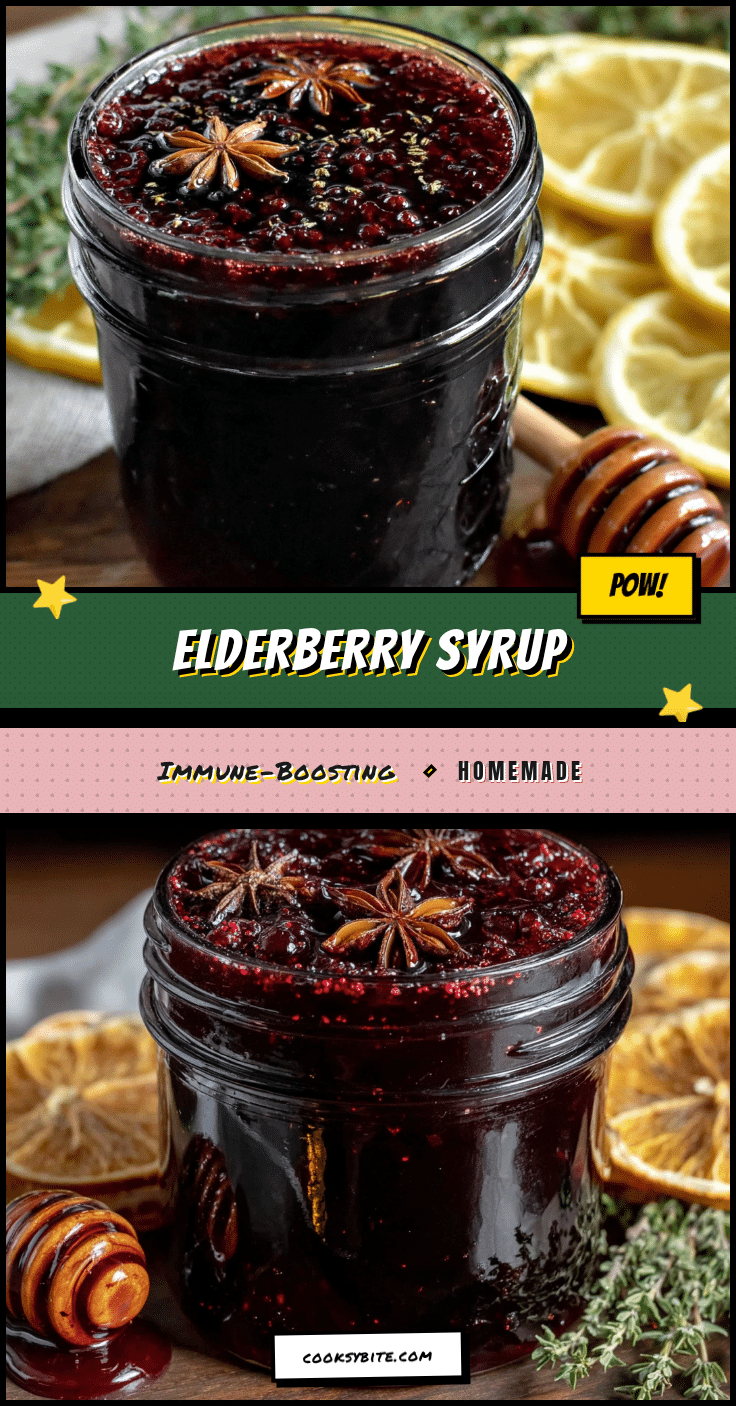
Best Homemade Elderberry Syrup for Immune Support
This homemade elderberry syrup is a potent, delicious immune booster made with simple ingredients like dried elderberries, raw honey, and warming spices. It’s easy to make, cost-effective, and perfect for cold season.
- Prep Time: 10 minutes
- Cook Time: 40 minutes
- Total Time: 50 minutes
- Yield: 4 servings 1x
- Category: Condiment
- Cuisine: American
Ingredients
- 1 cup (150g) dried elderberries
- 4 cups (960ml) water
- 1 cup (340g) raw honey
- 2 whole cinnamon sticks (or 1 teaspoon ground cinnamon)
- 1-inch piece fresh ginger, sliced (about 15g)
- 1 teaspoon whole cloves (about 5–6 cloves)
- Optional: pinch of cayenne pepper or 1 vanilla bean
Instructions
- Combine dried elderberries, water, cinnamon sticks, sliced ginger, and whole cloves in a medium saucepan. Stir gently.
- Bring to a boil over medium-high heat, then reduce heat to low and simmer gently for 30-40 minutes, until liquid is reduced by about half.
- After 30 minutes, mash the berries gently with the back of a wooden spoon. Simmer for another 5 minutes.
- Strain the liquid through a fine-mesh strainer (lined with cheesecloth if desired) into a large bowl or heatproof measuring cup. Let drain naturally.
- Let the strained liquid cool for 10-15 minutes until warm but not hot (about 120°F/49°C).
- Stir in the raw honey until fully dissolved.
- Pour the syrup into sterilized glass jars using a funnel, leaving ½ inch headspace. Cool completely before sealing.
- Refrigerate the syrup. It will thicken slightly as it chills.
Notes
Do not add honey to boiling liquid; wait until it cools to about 120°F to preserve enzymes. For a vegan option, substitute maple syrup for honey. Store in the refrigerator for 2-3 months or freeze in ice cube trays for up to 6 months.
Nutrition
- Serving Size: 1 tablespoon (15ml)
- Calories: 45
- Sugar: 11
- Carbohydrates: 12
Keywords: elderberry syrup, immune support, homemade syrup, cold season, natural remedy, elderberry recipe


