Three cups of flour already dusting the counter and my starter bubbling away when I realized I’d forgotten to buy bread flour. Not exactly the kind of mistake you want to make at 8 PM on a Tuesday with a hungry family waiting. I stood there staring at the all-purpose flour bag, contemplating my life choices, and almost gave up on the whole idea. But that sourdough starter had been fed and waiting all week — tossing it felt like a betrayal.
So I went with it. I adjusted the hydration, crossed my fingers, and hoped for the best. What came out of that oven was honestly better than any focaccia I’d made before. The crust was shatteringly crisp, the inside was pillowy with those irregular air pockets you chase in good bread, and the rosemary — well, it perfumed the whole kitchen in a way that made everyone wander in asking what smelled so good. That accidental batch turned into my go-to recipe, and I’ve been tweaking it ever since. This Perfect Rosemary Sourdough Focaccia with Flaky Sea Salt is the result of all those happy accidents and deliberate improvements combined.
Why You’ll Love This Recipe
Let me tell you why this focaccia is worth every minute of waiting. It’s the kind of bread that makes you feel like a professional baker without the stress.
- Deep, Tangy Flavor: The sourdough starter gives this focaccia a complexity you just can’t get with commercial yeast. It’s subtle but unmistakable — that slight tang that makes you take another bite.
- That Perfect Texture: Crispy, salty edges with a soft, airy interior full of irregular holes. The kind of focaccia that shatters when you tear it apart.
- Simple Ingredients: Flour, water, starter, olive oil, rosemary, and salt. That’s it. No fancy additives or hard-to-find items.
- Make-Ahead Friendly: The cold fermentation means you can prep the dough one day and bake the next. Perfect for busy schedules.
- Naturally Leavened: No commercial yeast needed. Your starter does all the work, and the long fermentation makes it easier to digest.
- Endlessly Customizable: Once you master the base, you can add olives, tomatoes, caramelized onions — whatever your heart desires.
This isn’t just another focaccia recipe. It’s the one I’ve tested more times than I can count, adjusting hydration levels and fermentation times until every batch turned out consistently gorgeous. The first time I made it for a dinner party, someone asked if I’d bought it from a bakery. That moment of pride? Priceless. You deserve that feeling too.
What Ingredients You Will Need
This recipe relies on simple, wholesome ingredients to create something genuinely special. Most of these are probably in your kitchen right now.
- Bread Flour (500g / about 4 cups): I prefer King Arthur Bread Flour for its higher protein content, which gives better structure and those beautiful air pockets. All-purpose works in a pinch — I’ve done it — but bread flour really does make a difference here.
- Water (400g / about 1 ¾ cups, lukewarm): Tap water is fine, but if yours is heavily chlorinated, let it sit out for an hour before using. The temperature matters — around 80°F (27°C) helps the starter work efficiently.
- Sourdough Starter (150g / about ¾ cup, active and bubbly): Feed your starter 4-6 hours before starting. It should be doubled in volume and full of bubbles. A ripe starter is the difference between a good focaccia and a transcendent one.
- Extra Virgin Olive Oil (80g / about ⅓ cup, plus more for the pan): Use good quality olive oil here — it’s a major flavor component. I like California Olive Ranch for everyday baking. The oil goes into the dough and gets generously drizzled on top.
- Fine Sea Salt (10g / about 1 ½ teaspoons): This goes into the dough itself. Don’t skip it — salt controls fermentation and strengthens the gluten structure.
- Fresh Rosemary (3-4 sprigs, leaves stripped and roughly chopped): Fresh is non-negotiable here. Dried rosemary just doesn’t have the same aromatic punch. I grow a small pot on my windowsill specifically for this focaccia.
- Flaky Sea Salt (for topping): Maldon is my go-to. Those delicate crystals provide little bursts of saltiness that contrast beautifully with the olive oil and rosemary. Don’t substitute regular table salt here — the texture matters.
That’s genuinely everything you need. No eggs, no sugar, no dairy. This is bread in its purest, most satisfying form.
Equipment Needed
You don’t need a professional bakery setup for this. Here’s what you’ll actually use:
- Digital Kitchen Scale: I cannot emphasize this enough. Measuring flour by volume is wildly inconsistent. A $15 scale will transform your baking. I use my Escali every single time.
- Large Mixing Bowl: Glass or ceramic works best. Metal can react with the dough over long fermentation periods.
- 9×13 Inch Baking Pan: A quarter sheet pan or a dedicated metal baking pan works beautifully. Darker pans give a crispier bottom crust.
- Bench Scraper: Makes handling the sticky dough infinitely easier. A plastic one won’t scratch your pans.
- Plastic Wrap or a Shower Cap: For covering the dough during fermentation. Reusable shower caps are actually perfect for this — they’re cheap and fit right over bowls.
- Kitchen Towel: A lint-free one for the final proof.
- Cooling Rack: Essential for keeping that crispy bottom from getting soggy.
If you don’t have a bench scraper, a plastic dough scraper from a baking supply store costs about three dollars. Worth every penny for how much easier it makes handling wet dough.
Preparation Method
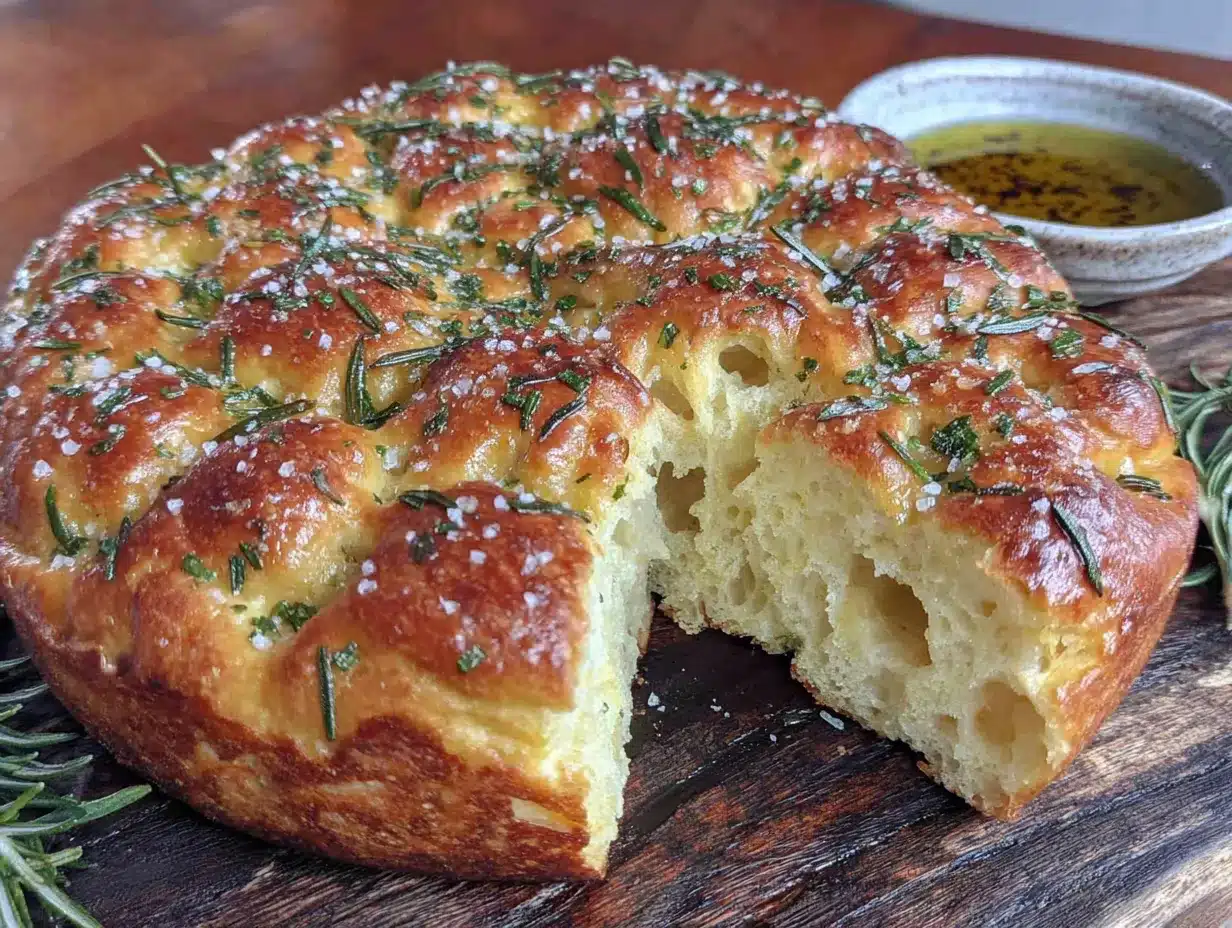
- Mix the Dough (10 minutes): In your large bowl, combine the lukewarm water and active sourdough starter. Stir until the starter disperses — it doesn’t need to be perfectly dissolved. Add the bread flour and fine sea salt. Mix with your hand or a dough whisk until no dry flour remains. The dough will look shaggy and rough. That’s exactly right. Cover with plastic wrap and let it rest for 30 minutes. This autolyse step lets the flour fully hydrate and starts gluten development naturally.
- Perform Stretch and Folds (2 hours): After the rest, wet your hand slightly and grab one corner of the dough. Stretch it up as far as it will go without tearing, then fold it over the top. Rotate the bowl a quarter turn and repeat. Do this 4-6 times total — once around the bowl. Cover and wait 30 minutes. Repeat this stretch and fold process 3 more times at 30-minute intervals. You’ll notice the dough becoming smoother and more elastic with each round. By the fourth set, it should feel alive and springy. After the final fold, pour in the olive oil and gently work it in. The dough might separate slightly — keep folding gently until it comes back together.
- Bulk Fermentation (8-12 hours at room temperature, or overnight in the fridge): Cover the bowl tightly and let it sit at room temperature. In a warm kitchen (around 75°F/24°C), it’ll take about 8 hours. Cooler kitchens need closer to 12. The dough should be doubled in size, bubbly on top, and jiggly when you gently shake the bowl. For the best flavor, I prefer an overnight cold fermentation. After the stretch and folds, pop the covered bowl in the fridge for 12-18 hours. The cold slows fermentation, developing deeper flavor while the dough slowly rises.
- Prepare the Pan (5 minutes): Generously coat your 9×13 inch pan with olive oil — don’t be shy here. Use about 2 tablespoons, making sure the bottom and sides are completely slicked. This oil creates that signature crispy, golden bottom crust.
- Transfer and Stretch (10 minutes): If using cold dough, let it sit at room temperature for 30 minutes first. Gently coax the dough out of the bowl and into the oiled pan. It will be soft and sticky. Don’t try to force it into the corners yet. Just plop it in the center, then let it rest for 20 minutes. Come back and gently stretch it toward the edges. If it resists, let it rest another 10 minutes and try again. Repeat until the dough reaches all four corners. This gentle approach preserves those precious air bubbles.
- Final Proof (2-3 hours): Cover the pan with a kitchen towel or plastic wrap. Let the dough rise until it’s puffy, jiggly, and nearly doubled in height. The surface should look dimpled and alive. In a warm spot, this takes about 2 hours. Cooler kitchens need closer to 3.
- Dimple and Top (5 minutes): About 20 minutes before baking, preheat your oven to 425°F (220°C) with a rack in the middle. Generously drizzle olive oil over the proofed dough. Now the fun part — use your fingertips to press deep dimples all across the surface. Go all the way to the bottom of the pan. These dimples hold the oil and create those iconic focaccia pockets. Sprinkle the chopped fresh rosemary evenly over the top, followed by a generous shower of flaky sea salt. Don’t skimp — the salt crystals are what make each bite sing.
- Bake (25-30 minutes): Place the pan on the middle rack and bake until deeply golden brown. The bottom should be crisp and the internal temperature should reach 200°F (93°C). Rotate the pan halfway through for even browning. If the top is browning too fast but the bottom isn’t done, move the pan to a lower rack for the last 5 minutes.
- Cool (15-20 minutes): Let the focaccia cool in the pan for 5 minutes, then transfer it to a cooling rack. Don’t skip this step — cooling on a rack keeps the bottom from steaming and getting soggy. Let it cool for at least 15 minutes before slicing. I know it’s hard to wait, but the texture really does improve as it sets.
Cooking Tips & Techniques
After dozens of batches, here’s what I’ve learned the hard way so you don’t have to.
Don’t rush the fermentation. I once tried to speed things up by using extra-warm water and placing the bowl near a radiator. The dough rose fast but had zero flavor — flat and boring. Patience is your best friend here. That long, slow fermentation is what builds the complex, tangy flavor that makes sourdough focaccia special.
Wet your hands. This dough is sticky by design — that high hydration is what creates the airy texture. But wrestling with sticky dough is frustrating. Keep a small bowl of water nearby and wet your hands before handling the dough. It’ll slide right off your fingers without sticking.
Watch for over-proofing. If your dough starts to look deflated or smells strongly of alcohol, you’ve gone too far. The focaccia will still bake up, but it’ll be dense and flat. When in doubt, bake it a little early rather than late. A slightly under-proofed focaccia is still delicious.
Use the poke test. Gently press your finger into the proofed dough. If the indentation springs back slowly and leaves a slight mark, it’s ready. If it springs back immediately, it needs more time. If the indentation stays and doesn’t bounce back at all, you’re close to over-proofed.
Oil is not optional. That generous glug of olive oil in the pan and on top isn’t just for flavor — it’s structural. The oil creates a barrier that helps the dough crisp up while keeping the inside tender. I’ve tried cutting back to save calories. Regretted it every time.
One mistake I made early on: dimpling the dough too shallowly. Those dimples need to go all the way to the bottom of the pan. Shallow dimples disappear during baking, and you lose those beautiful oil-filled pockets. Press firmly and confidently.
Variations & Adaptations
Once you’ve got the basic technique down, the possibilities are endless. Here are some of my favorite twists.
Caramelized Onion and Thyme: While the dough does its final proof, slowly cook 2 large sliced onions in olive oil until deeply golden and sweet — about 30 minutes. Spread them over the dimpled dough before baking, along with fresh thyme leaves instead of rosemary. The sweetness against the salty, tangy bread is incredible.
Kalamata Olive and Sun-Dried Tomato: Press halved Kalamata olives and chopped oil-packed sun-dried tomatoes into the dimpled dough. The briny olives and intense tomatoes create a Mediterranean flavor bomb. I make this version when I want something heartier — it pairs beautifully with a simple salad for a light meal.
Garlic and Parmesan: Infuse your olive oil with 3 crushed garlic cloves (warm gently, don’t fry) before using it in the pan and on top. Sprinkle grated Parmesan over the focaccia in the last 5 minutes of baking. The garlic oil permeates every bite, and the Parmesan creates a crispy, cheesy crust. Warning: this version disappears fastest at parties.
Whole Wheat Variation: Substitute 25% of the bread flour with whole wheat flour. You’ll need slightly more water — whole wheat absorbs more liquid. The flavor becomes nuttier and more rustic. I use this version for sandwiches the next day.
Gluten-Free Adaptation: This one’s trickier, but possible. Use a good gluten-free bread flour blend (I like Cup4Cup) and add 1 teaspoon of xanthan gum if your blend doesn’t include it. The texture will be denser and more cake-like, but the flavor is still lovely. Reduce the water slightly — gluten-free flours behave differently.
Serving & Storage Suggestions
This focaccia shines in so many ways. Here’s how to make the most of it.
Serving Temperature: Serve it warm or at room temperature. Warm focaccia has that irresistible contrast between crispy exterior and soft interior. If it’s been sitting for a while, pop it in a 350°F (175°C) oven for 5 minutes to revive the crust.
Ways to Serve: Tear it into pieces and serve alongside soups or salads. Slice it horizontally for sandwiches — it makes the most incredible panini. Cube it for croutons or bread salad. Or honestly, just stand at the counter and eat it with nothing else. No judgment here.
What Pairs Well: A bowl of hearty minestrone or a simple tomato basil soup is perfect. For a party spread, serve it alongside a mini lemon blueberry cheesecake for a sweet-salty contrast. It also goes beautifully with a glass of red wine — try it with the decadent red wine chocolate cake for an indulgent evening.
Storage: Keep leftover focaccia in an airtight container at room temperature for up to 2 days. Do not refrigerate — the fridge dries bread out faster than anything. For longer storage, wrap it tightly in plastic wrap and then foil, and freeze for up to 3 months.
Reheating: From room temperature: 5 minutes in a 350°F (175°C) oven. From frozen: thaw at room temperature, then reheat in the oven. The microwave will make it rubbery — avoid it if you can. I’ve been known to toast slices in a skillet with a drizzle of olive oil for an extra-crispy treat.
Flavor Development: Honestly, this focaccia is even better the next day. The flavors meld and deepen overnight. If you can resist eating it all fresh, save a piece for tomorrow’s breakfast. Toast it and top with a fried egg — you can thank me later.
Nutritional Information & Benefits
Here’s a rough estimate per serving (based on 12 servings):
Calories: 220 | Fat: 8g | Carbohydrates: 32g | Protein: 5g | Fiber: 1g | Sodium: 380mg
This focaccia is naturally vegan and dairy-free. The long fermentation process breaks down phytic acid in the flour, making the minerals more bioavailable and the bread easier to digest. Many people with mild gluten sensitivities find they can enjoy properly fermented sourdough without issues — though obviously consult your doctor if you have celiac disease.
The olive oil provides heart-healthy monounsaturated fats and antioxidants. Rosemary is rich in antioxidants and anti-inflammatory compounds. It’s not health food, exactly, but it’s real food made with real ingredients — and that counts for something.
Conclusion
This Perfect Rosemary Sourdough Focaccia with Flaky Sea Salt has become a staple in my kitchen for good reason. It’s forgiving enough for beginners yet satisfying enough for experienced bakers. The process is meditative — the stretch and folds, the patient waiting, the moment you pull that golden pan from the oven. There’s something deeply rewarding about making bread from scratch with nothing but flour, water, and time.
I hope you give it a try, even if you’re nervous about working with sourdough. Start with a well-fed starter, follow the steps, and trust the process. And please — use that flaky sea salt. It’s not just decoration. It’s the finishing touch that transforms good focaccia into something you’ll crave.
I’d love to hear how it turns out for you. Did you try a variation? Did your family devour it before it cooled? Drop a comment below and let me know. And if you’re looking for more baking inspiration, check out our cherry chocolate brownies for a sweet follow-up to this savory bread. Happy baking, friends!
Frequently Asked Questions
Can I use active dry yeast instead of sourdough starter?
You can, but it won’t be the same recipe. The tangy flavor and distinctive texture come from the sourdough fermentation. If you want a yeast version, reduce the water slightly and use about 1 teaspoon of active dry yeast dissolved in the water. Skip the overnight fermentation — it’ll be ready in about 2 hours at room temperature.
Why is my focaccia dense instead of airy?
This usually means the dough wasn’t fermented long enough, or the gluten wasn’t developed properly. Make sure you’re doing all four sets of stretch and folds, and give the dough enough time to double during bulk fermentation. A warm spot in your kitchen (around 75°F/24°C) helps.
Can I freeze the dough instead of baking it?
Absolutely. After the bulk fermentation and shaping in the pan, wrap the pan tightly in plastic wrap and freeze. When you’re ready to bake, thaw it in the fridge overnight, then let it come to room temperature and finish proofing before baking. The texture is nearly identical to fresh.
How do I know when my starter is active enough?
A ripe starter should double in volume within 4-6 hours of feeding, have a domed top, and be full of bubbles both large and small. It should smell pleasantly sour — like yogurt or ripe fruit. If it smells like nail polish remover, it’s hungry and needs more frequent feedings.
What if I don’t have a 9×13 pan?
You can use a 10-inch cast iron skillet or a round cake pan. The focaccia will be thicker and可能需要 slightly longer baking time. Alternatively, divide the dough between two 8-inch round pans for smaller loaves. Adjust the baking time down by about 5 minutes for smaller pans.
Pin This Recipe!
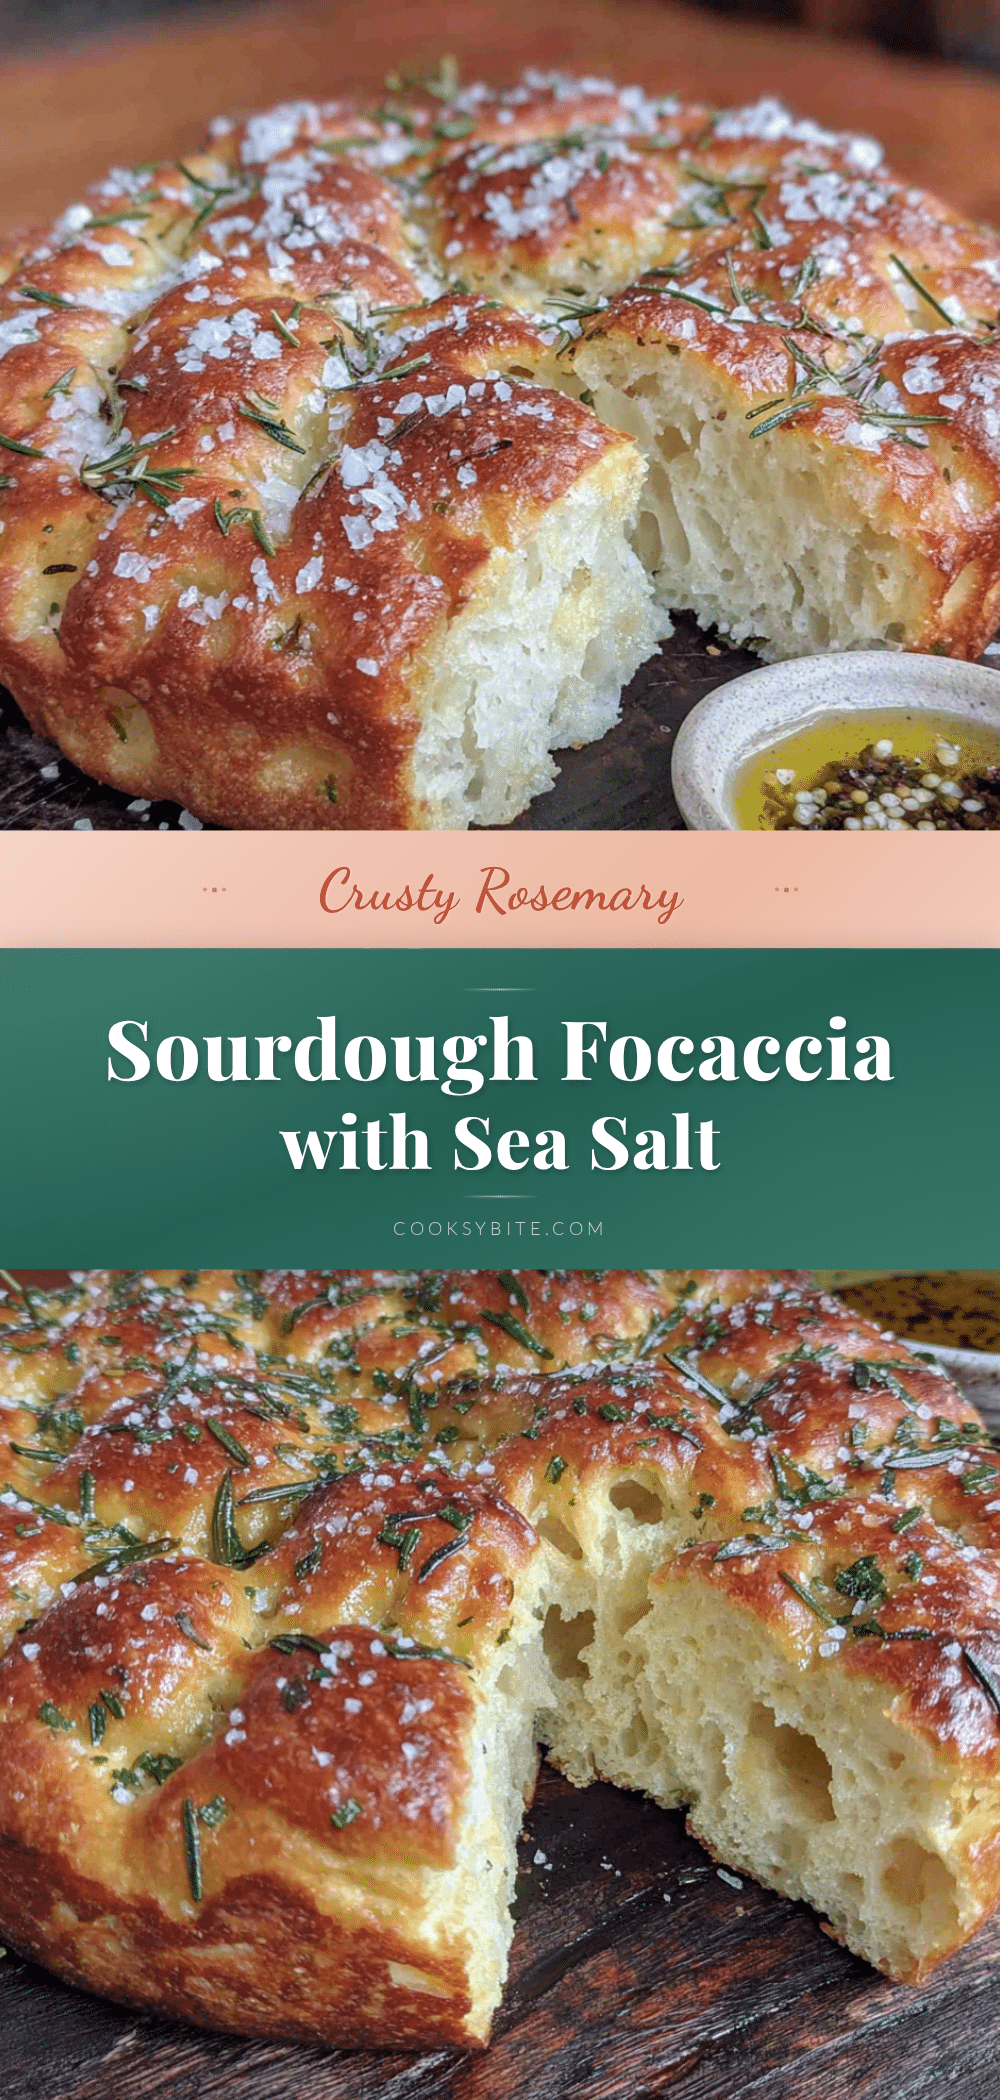
Perfect Rosemary Sourdough Focaccia with Flaky Sea Salt

This Perfect Rosemary Sourdough Focaccia with Flaky Sea Salt is a naturally leavened bread with a shatteringly crisp crust, pillowy interior, and deep tangy flavor from a long fermentation. Made with simple ingredients like bread flour, olive oil, fresh rosemary, and flaky sea salt, it’s forgiving for beginners and endlessly customizable.
- Prep Time: 20 minutes
- Cook Time: 30 minutes
- Total Time: 13 hours 20 minutes (including fermentation)
- Yield: 12 servings 1x
- Category: Bread
- Cuisine: Italian
Ingredients
- 500g (about 4 cups) bread flour
- 400g (about 1 ¾ cups) lukewarm water
- 150g (about ¾ cup) active sourdough starter
- 80g (about ⅓ cup) extra virgin olive oil, plus more for the pan
- 10g (about 1 ½ teaspoons) fine sea salt
- 3–4 sprigs fresh rosemary, leaves stripped and roughly chopped
- Flaky sea salt (e.g., Maldon) for topping
Instructions
- Mix the Dough (10 minutes): In a large bowl, combine the lukewarm water and active sourdough starter. Stir until the starter disperses. Add the bread flour and fine sea salt. Mix with your hand or a dough whisk until no dry flour remains. The dough will look shaggy and rough. Cover with plastic wrap and let it rest for 30 minutes.
- Perform Stretch and Folds (2 hours): After the rest, wet your hand slightly and grab one corner of the dough. Stretch it up as far as it will go without tearing, then fold it over the top. Rotate the bowl a quarter turn and repeat. Do this 4-6 times total. Cover and wait 30 minutes. Repeat this stretch and fold process 3 more times at 30-minute intervals. After the final fold, pour in the olive oil and gently work it in until the dough comes back together.
- Bulk Fermentation (8-12 hours at room temperature, or overnight in the fridge): Cover the bowl tightly and let it sit at room temperature until doubled in size, bubbly on top, and jiggly. For best flavor, refrigerate for 12-18 hours after the stretch and folds.
- Prepare the Pan (5 minutes): Generously coat a 9×13 inch pan with olive oil (about 2 tablespoons), making sure the bottom and sides are completely slicked.
- Transfer and Stretch (10 minutes): If using cold dough, let it sit at room temperature for 30 minutes. Gently coax the dough into the oiled pan. Let it rest for 20 minutes, then gently stretch it toward the edges. Repeat until the dough reaches all four corners.
- Final Proof (2-3 hours): Cover the pan with a kitchen towel or plastic wrap. Let the dough rise until puffy, jiggly, and nearly doubled in height.
- Dimple and Top (5 minutes): About 20 minutes before baking, preheat the oven to 425°F (220°C). Generously drizzle olive oil over the proofed dough. Use your fingertips to press deep dimples all across the surface, going all the way to the bottom of the pan. Sprinkle chopped fresh rosemary evenly over the top, followed by a generous shower of flaky sea salt.
- Bake (25-30 minutes): Place the pan on the middle rack and bake until deeply golden brown. The bottom should be crisp and the internal temperature should reach 200°F (93°C). Rotate the pan halfway through for even browning.
- Cool (15-20 minutes): Let the focaccia cool in the pan for 5 minutes, then transfer it to a cooling rack. Let it cool for at least 15 minutes before slicing.
Notes
Don’t rush the fermentation; long, slow fermentation builds complex flavor. Wet your hands before handling the sticky dough to prevent sticking. Watch for over-proofing—if the dough smells strongly of alcohol, it’s gone too far. Use the poke test: if the indentation springs back slowly, it’s ready. Oil is not optional—it creates a barrier for crispiness and tenderness. Dimple the dough deeply all the way to the bottom of the pan for iconic oil-filled pockets.
Nutrition
- Serving Size: 1 serving (1/12 of r
- Calories: 220
- Sodium: 380
- Fat: 8
- Saturated Fat: 1
- Carbohydrates: 32
- Fiber: 1
- Protein: 5
Keywords: sourdough focaccia, rosemary focaccia, homemade bread, artisan bread, naturally leavened, olive oil bread, flaky sea salt, easy sourdough recipe


