The cooler was packed, the jerseys were laid out, and I had exactly one hour before everyone showed up. My grand plan for some elaborate tailgate dessert had fallen through when I realized I was missing half the ingredients. But I had a bag of chocolate chips, a stick of butter, and that cast iron skillet I use for everything. So I threw together what I had, crossed my fingers, and slid it into the oven. Thirty minutes later, the smell of melted chocolate and toasted sugar pulled everyone into the kitchen before we even made it to the game.
That first bite was pure chaos in the best way. The edges were crisp and buttery, the center was gooey and warm, and everyone just stood around the skillet with spoons, digging in like it was the main event. It wasn’t fancy. It wasn’t planned. But honestly, that’s what made it perfect for tailgating. There’s something about sharing a warm, messy dessert straight from the pan that makes a crowd feel like family. These Ultimate Chocolate Chip Skillet Cookie Bars for Tailgating became the thing I’m asked to bring every single time now, and I never get tired of watching people’s faces light up when they see that skillet hit the table.
Why You’ll Love This Recipe
I’ve tested this skillet cookie bar more times than I can count, tweaking the butter-to-sugar ratio and playing with bake times until it was just right. Here is why this version wins every time.
- Quick & Easy: From bowl to table in under 35 minutes, no chilling or rolling dough required.
- Simple Ingredients: You probably have everything in your pantry right now. No weird extracts or specialty flours.
- Perfect for Tailgating: It travels well, stays warm for a while, and you can eat it right out of the skillet with forks or spoons. No plates needed.
- Crowd-Pleaser: I’ve watched picky eaters and dessert snobs alike go back for thirds. It’s that good.
- Unbelievably Delicious: The contrast between the crispy, caramelized edges and the soft, molten center is next-level comfort food.
What makes this different from every other skillet cookie recipe out there is the technique. I use a slightly higher ratio of brown sugar to white sugar for deeper flavor, and I let the butter brown just a touch before mixing it in. It sounds fancy, but it takes two extra minutes and makes the cookie taste like you spent hours on it. This isn’t just another dessert—it is the kind that makes people close their eyes after the first bite. It’s comfort food reimagined for game day, with the same soul-soothing satisfaction but none of the stress.
What Ingredients You Will Need
This recipe relies on pantry staples to deliver big flavor without a complicated shopping list. Every ingredient plays a specific role in creating that perfect texture and taste.
- Unsalted butter (1 cup, or 2 sticks) — Browning the butter adds a nutty, caramelized depth that you just can’t get from regular melted butter. I prefer using Kerrygold for its higher fat content and richer flavor.
- Light brown sugar (1 cup, packed) — This gives the cookie its chewy texture and molasses-like sweetness. Make sure it’s packed firmly into the measuring cup.
- Granulated sugar (½ cup) — Balances the brown sugar and helps create those crispy edges.
- Large eggs (2, room temperature) — Room temperature eggs incorporate more easily into the butter-sugar mixture, giving you a smoother batter. Pull them out 20 minutes before you start.
- Vanilla extract (2 teaspoons, pure) — Skip the imitation stuff here. Pure vanilla makes a noticeable difference in the overall flavor profile.
- All-purpose flour (2 cups) — Spoon and level your flour rather than scooping directly from the bag to avoid dense cookie bars.
- Baking soda (1 teaspoon) — Helps the cookie spread and rise just enough for that perfect texture.
- Salt (1 teaspoon) — Don’t skip this. Salt balances the sweetness and enhances the chocolate flavor. I use fine sea salt.
- Semi-sweet chocolate chips (2 cups) — I recommend Guittard or Ghirardelli for chips that hold their shape and melt beautifully. You can also chop up a high-quality chocolate bar for bigger puddles of chocolate.
- Flaky sea salt (for finishing, optional but highly recommended) — A sprinkle on top right after baking takes these bars to another level.
If you are out of light brown sugar, you can substitute dark brown sugar for an even deeper molasses flavor. For a dairy-free version, use vegan butter sticks, but avoid margarine spreads as they have too much water content and will affect the texture.
Equipment Needed
You don’t need much for this recipe, which is part of the beauty of it.
- 10-inch cast iron skillet — This is non-negotiable for the best results. The cast iron holds heat evenly and creates those crispy, golden edges. If you don’t have one, a 10-inch oven-safe nonstick skillet works in a pinch, but the edges won’t be as crispy.
- Medium saucepan — For browning the butter. A light-colored pan helps you see when the butter turns amber.
- Large mixing bowl — Any bowl works, but a wide one makes mixing easier.
- Whisk — For combining the wet ingredients smoothly.
- Rubber spatula — For folding in the chocolate chips and scraping every last bit of batter into the skillet.
- Measuring cups and spoons — Precision matters here, especially with the flour and baking soda.
I bought my cast iron skillet at a thrift store for eight dollars, and it works better than any new one I’ve tried. If you are investing in one, look for a pre-seasoned option from Lodge—they are affordable and last forever. Just remember to never wash it with soap, and dry it immediately after cleaning to prevent rust.
Preparation Method
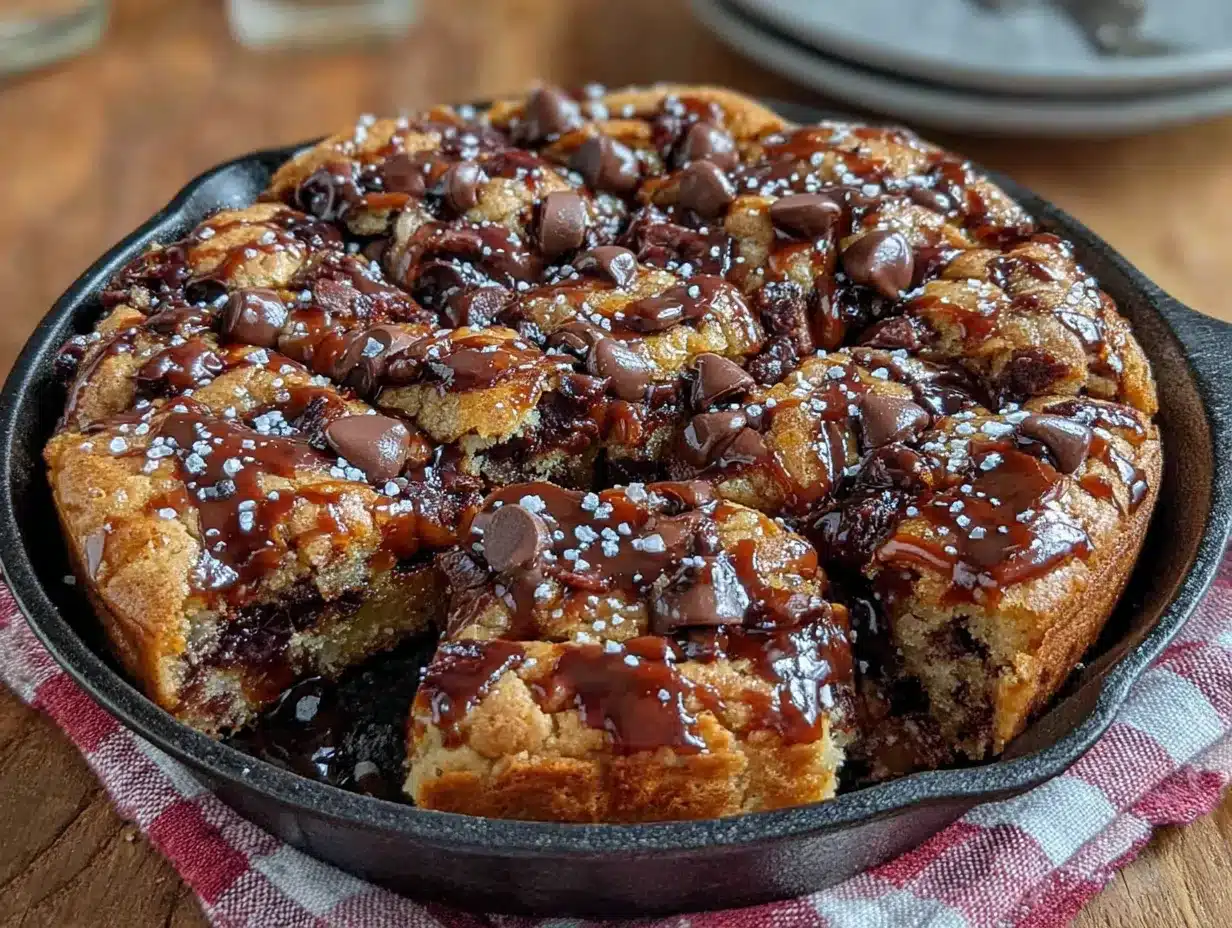
- Preheat your oven to 350°F (175°C). Place your cast iron skillet inside while it preheats. This helps the bottom of the cookie bar start cooking immediately, giving you that golden crust.
- Brown the butter. In your medium saucepan over medium heat, melt the butter. Swirl the pan occasionally as it melts. After a few minutes, the butter will start to foam and you will see small brown specks forming at the bottom. Keep swirling until the butter turns a warm amber color and smells nutty. This takes about 5-7 minutes. Remove from heat immediately and pour into a large mixing bowl to stop the cooking process.
- Cool the butter slightly. Let the browned butter sit for 5 minutes. You want it warm but not hot enough to cook the eggs when you add them.
- Add the sugars. Whisk both the brown sugar and granulated sugar into the warm butter until fully combined. The mixture should look like wet sand and smell incredible.
- Add the eggs and vanilla. Whisk in the eggs one at a time, making sure each is fully incorporated before adding the next. Then stir in the vanilla extract. The mixture should be smooth and glossy.
- Mix the dry ingredients. In a separate small bowl, whisk together the flour, baking soda, and salt. This ensures the baking soda is evenly distributed so your cookie bars rise evenly.
- Combine wet and dry. Gradually add the flour mixture to the wet ingredients, folding gently with your rubber spatula. Mix just until you no longer see streaks of flour. Overmixing will make the cookie bars tough.
- Fold in the chocolate chips. Reserve about ¼ cup of chocolate chips for the top. Gently fold the remaining chips into the batter until evenly distributed.
- Prepare the skillet. Carefully remove the hot skillet from the oven using oven mitts. Spray it lightly with nonstick cooking spray or brush with a little melted butter, even if it is seasoned. This guarantees the bars release easily.
- Spread the batter. Scoop the batter into the hot skillet and spread it evenly with your spatula. It will be thick, so take your time. Press the reserved chocolate chips onto the top of the batter for a prettier presentation.
- Bake. Place the skillet in the oven and bake for 22-25 minutes. The edges should be golden brown and set, but the center will still look slightly soft and puffy. A toothpick inserted in the center should come out with a few moist crumbs, not raw batter.
- Cool slightly. Let the skillet cookie bar cool in the pan for 10 minutes. This allows it to set up enough to slice without falling apart, but it will still be warm and gooey in the center.
- Finish with flaky salt. Sprinkle a pinch of flaky sea salt over the top right before serving. It sounds optional, but trust me, it makes the chocolate sing.
Cooking Tips & Techniques
I’ve burned more than a few batches of butter learning this technique, so let me save you the trouble. When browning butter, watch it like a hawk once it starts foaming. The transition from perfect to burnt happens in about 30 seconds. If you see black specks, you have gone too far and need to start over.
Another mistake I used to make was using cold eggs. Cold eggs seize the warm butter and create a lumpy batter. Just set your eggs on the counter while you preheat the oven, and they will be ready by the time you need them.
For the best texture, do not overbake. The center should look slightly underdone when you pull it out of the oven. It continues cooking in the hot skillet as it cools. If you wait until the center looks fully set, you will end up with a dry, cakey cookie bar instead of that perfect gooey texture.
If you are making this for a big crowd and want to multitask, prep all your dry ingredients and measure your butter and sugars the night before. Then all you have to do on game day is brown the butter and mix everything together. It takes less than 10 minutes of active work.
Variations & Adaptations
One of my favorite things about this recipe is how flexible it is. I have made it so many ways depending on what I have on hand or who I am feeding.
- Peanut Butter Swirl: Drop spoonfuls of creamy peanut butter over the batter before baking and swirl it in with a knife. The salty peanut butter pairs beautifully with the chocolate.
- Double Chocolate: Replace ¼ cup of the flour with unsweetened cocoa powder and use dark chocolate chips. It’s dangerously good and looks impressive with a dusting of powdered sugar on top.
- Nutty Delight: Fold in ½ cup of toasted chopped pecans or walnuts along with the chocolate chips. Toast them in the dry skillet for 3-4 minutes before starting the recipe to bring out their flavor.
- Gluten-Free Option: Substitute the all-purpose flour with a 1:1 gluten-free baking flour blend. I’ve used King Arthur Measure for Measure with great results. Add an extra tablespoon of milk if the batter seems too dry.
- Holiday Twist: Swap half the chocolate chips for white chocolate chips and add ½ cup of dried cranberries or chopped dried cherries. It looks festive and tastes amazing.
I once made a s’mores version by pressing mini marshmallows and crushed graham crackers on top during the last 3 minutes of baking. It was a messy, glorious disaster that disappeared in minutes.
Serving & Storage Suggestions
Serve these cookie bars warm, straight from the skillet, with a stack of spoons or forks for people to dig in. That’s the tailgating way. If you want to get a little fancier, top each serving with a scoop of vanilla ice cream and a drizzle of chocolate sauce. The contrast between the warm cookie and cold ice cream is unbeatable.
For a complete tailgate spread, pair these bars with something refreshing like these Perfect Pink Champagne Jello Shots for a sweet and boozy combo that guests love. Or, if you are in the mood for more chocolate, this Decadent Red Wine Chocolate Cake is another crowd-pleaser that travels well.
To store leftovers (if there are any), cover the skillet tightly with foil or plastic wrap and keep it at room temperature for up to 2 days. The texture stays soft and chewy. For longer storage, wrap individual pieces in plastic wrap and place them in a freezer-safe bag. They freeze beautifully for up to 3 months.
To reheat, pop a piece in the microwave for 15-20 seconds, or warm the whole skillet in a 300°F oven for 10 minutes. The flavors actually deepen after a day or two, so day-old cookie bars are still fantastic.
Nutritional Information & Benefits
While these are definitely a treat, there are a few redeeming qualities worth noting. One serving (about 1/8 of the skillet) contains approximately 480 calories, 26 grams of fat, 58 grams of carbohydrates, and 6 grams of protein.
The dark chocolate chips provide a small dose of antioxidants and magnesium, and the eggs add protein and healthy fats. Using browned butter actually allows you to use less butter overall since the flavor is more concentrated, so you get more taste with less fat compared to a traditional cookie recipe.
If you are watching your sugar intake, you can reduce the granulated sugar to ¼ cup without dramatically affecting the texture. The brown sugar is harder to reduce because it provides moisture and chewiness. For a lower-carb version, try a monk fruit sweetener blend, but expect a slightly different texture.
This recipe contains gluten, dairy, and eggs. For allergen-friendly variations, see the adaptations section above.
Conclusion
These Ultimate Chocolate Chip Skillet Cookie Bars for Tailgating have become my go-to for a reason. They are forgiving, adaptable, and always deliver that warm, gooey, crowd-pleasing magic that makes game day feel special. Whether you are hosting a watch party, heading to the stadium parking lot, or just want a dessert that feels like a hug, this recipe delivers every single time.
I would love to hear how yours turn out. Did you try a variation? Did your friends fight over the last piece? Drop a comment below and let me know. And if you are looking for more easy desserts for your next gathering, check out this Delicious Cherry Chocolate Brownies recipe for another fudgy, shareable treat that disappears fast.
Now go preheat that oven and make something delicious. Your tailgate crew will thank you.
Frequently Asked Questions
Can I use a regular baking pan instead of a cast iron skillet?
Yes, you can use a 9×9 inch square baking pan or a 9-inch round cake pan. Just grease it well and reduce the baking time by 2-3 minutes since the pan won’t hold heat the same way cast iron does. The edges will be softer but still delicious.
Why did my cookie bar turn out cakey instead of chewy?
This usually happens when the batter is overmixed or the butter wasn’t browned properly. Mix the flour in just until it disappears, and make sure your butter reaches that amber color before adding the sugars. Also, pull the skillet out when the center still looks slightly underdone.
Can I make this recipe ahead of time?
Absolutely. You can prepare the batter up to 24 hours ahead, cover it, and refrigerate it. Let it sit at room temperature for 20 minutes before spreading it in the hot skillet and baking. You may need to add 2-3 extra minutes to the bake time.
What if I don’t have a cast iron skillet?
No problem. Use a 10-inch oven-safe nonstick skillet or a 9-inch round cake pan. The texture will be slightly different because the pan won’t get as hot, but the cookie bars will still be delicious. Just keep an eye on the bake time.
How do I keep the cookie bars from sticking to the skillet?
Even if your skillet is well-seasoned, spray it lightly with nonstick cooking spray or brush it with melted butter before adding the batter. This guarantees the bars release cleanly. Let them cool for at least 10 minutes before slicing for best results.
Pin This Recipe!
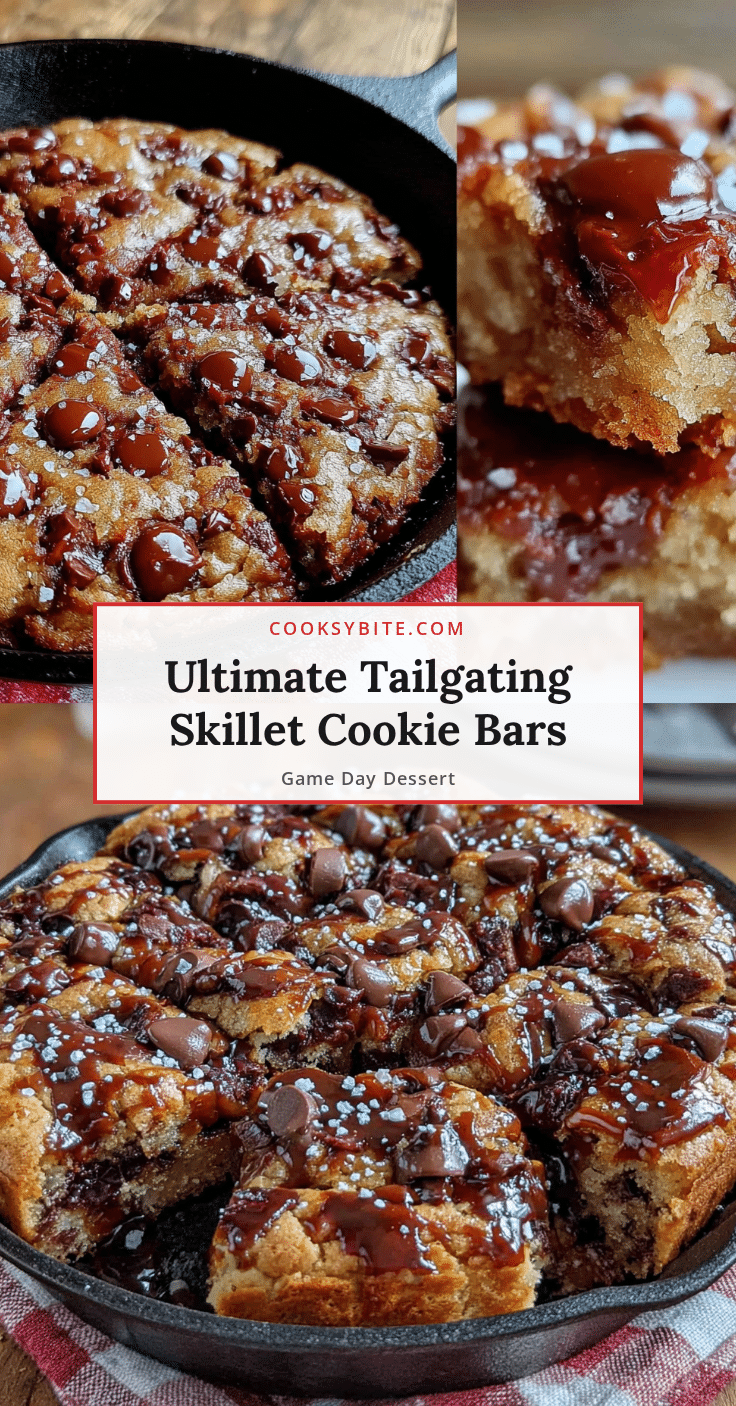
Ultimate Chocolate Chip Skillet Cookie Bars for Tailgating
These Ultimate Chocolate Chip Skillet Cookie Bars are the perfect tailgating dessert—warm, gooey, and made in a cast iron skillet with browned butter for deep flavor. Ready in under 35 minutes, this crowd-pleasing treat features crispy edges and a soft, molten center that everyone will love.
- Prep Time: 10 minutes
- Cook Time: 25 minutes
- Total Time: 35 minutes
- Yield: 8 servings 1x
- Category: Dessert
- Cuisine: American
Ingredients
- 1 cup (2 sticks) unsalted butter
- 1 cup packed light brown sugar
- ½ cup granulated sugar
- 2 large eggs, room temperature
- 2 teaspoons pure vanilla extract
- 2 cups all-purpose flour
- 1 teaspoon baking soda
- 1 teaspoon fine sea salt
- 2 cups semi-sweet chocolate chips
- Flaky sea salt for finishing (optional)
Instructions
- Preheat your oven to 350°F (175°C). Place your cast iron skillet inside while it preheats.
- Brown the butter: In a medium saucepan over medium heat, melt the butter. Swirl occasionally until it foams and turns a warm amber color with a nutty smell, about 5-7 minutes. Pour into a large mixing bowl immediately.
- Cool the butter slightly for 5 minutes until warm but not hot.
- Add the sugars: Whisk both brown sugar and granulated sugar into the warm butter until fully combined.
- Add the eggs and vanilla: Whisk in eggs one at a time, then stir in vanilla extract until smooth and glossy.
- Mix dry ingredients: In a separate bowl, whisk together flour, baking soda, and salt.
- Combine wet and dry: Gradually add flour mixture to wet ingredients, folding gently with a rubber spatula until just combined. Do not overmix.
- Fold in chocolate chips: Reserve ¼ cup of chips for the top, then fold remaining chips into the batter.
- Prepare the skillet: Carefully remove hot skillet from oven. Spray lightly with nonstick cooking spray or brush with melted butter.
- Spread the batter: Scoop batter into hot skillet and spread evenly. Press reserved chocolate chips onto the top.
- Bake for 22-25 minutes until edges are golden brown and center is slightly soft and puffy. A toothpick inserted in center should have moist crumbs.
- Cool slightly for 10 minutes in the pan to set.
- Finish with flaky salt: Sprinkle a pinch of flaky sea salt over the top before serving.
Notes
For best results, use room temperature eggs and watch the butter closely when browning—it can burn in 30 seconds. The center should look slightly underdone when removed from the oven as it continues cooking in the hot skillet. For a dairy-free version, use vegan butter sticks. Store leftovers covered at room temperature for up to 2 days or freeze for up to 3 months.
Nutrition
- Serving Size: 1/8 of skillet
- Calories: 480
- Sugar: 38
- Sodium: 320
- Fat: 26
- Saturated Fat: 15
- Carbohydrates: 58
- Fiber: 3
- Protein: 6
Keywords: chocolate chip skillet cookie, tailgate dessert, cast iron cookie, easy cookie bars, game day dessert


