I didn’t actually like protein balls for years. Not even a little bit. Every one I tried tasted like someone blended a gym bag with peanut butter and called it a snack. They were either chalky, rubbery, or so sweet they might as well have been candy. I gave up on the whole category entirely. Then I made these by accident—trying to use up the sad remnants of a pantry cleanout—and honestly, I couldn’t stop eating them. The first batch disappeared in two days, and I had to make another just to be sure I hadn’t imagined it.
These Easy No-Bake Peanut Butter Protein Balls are the opposite of everything I thought protein balls had to be. They’re soft, not dense. They’re naturally sweet, not fake-tasting. And they only need five ingredients—no weird powders or obscure health food store finds. Just stuff you probably already have sitting in your cabinet right now. I’ve made them at least twenty times since that first accidental batch, tweaking proportions until they hit that perfect balance of chewy, nutty, and just sweet enough to feel like a treat.
Here’s the thing I’ve learned: a good protein ball shouldn’t make you feel virtuous. It should make you feel fed. These do exactly that. They’re the kind of snack you reach for without thinking, the one that actually keeps you full until your next meal, and the one you’ll find yourself craving at 3 PM when that slump hits. I think that’s why this recipe stuck—it solved a real problem without making me work for it.
Why You’ll Love This Recipe
I’ve tested enough recipes to know that “easy” doesn’t always mean “good.” But these protein balls are the rare case where simple actually wins. Here’s why this version stands apart from every other recipe I’ve tried:
- 5 Ingredients Only: No long grocery list, no specialty items. Peanut butter, oats, honey, protein powder, and chocolate chips. That’s it.
- No Baking Required: Zero oven time. You mix, roll, and chill. Even on the hottest summer day, these come together in 10 minutes flat.
- Actually Satisfying: These aren’t those sad little bites that leave you hungry twenty minutes later. The protein and healthy fats keep you full for hours.
- Kid-Approved: My niece calls them “cookie dough balls” and has no idea they’re packed with protein. Perfect for sneaking nutrition into picky eaters.
- Meal Prep Dream: They keep in the fridge for two weeks and freeze beautifully. Make a double batch and you’re set for days.
What makes these different from the hundreds of other protein ball recipes out there? Texture. Most recipes end up either too dry or too sticky. I spent months figuring out the exact ratio that gives you that soft, fudgy bite without falling apart. The secret is letting the oats absorb the moisture before rolling—a tiny step that makes a massive difference.
These are the kind of snack that makes you feel good about eating them, not because they’re “healthy,” but because they genuinely taste like a treat. Close your eyes after the first bite and you might forget they’re good for you. That’s the magic right there.
What Ingredients You Will Need
This recipe relies on simple, pantry-friendly ingredients that work together to create something greater than the sum of their parts. Each one plays a specific role in texture, flavor, and nutrition.
- Peanut Butter (1 cup, creamy): The backbone of the recipe. Use natural peanut butter with no added sugar or oil for best results. I prefer the kind where the oil separates on top—just stir it well before measuring. Avoid the ultra-processed stuff with hydrogenated oils; it makes the balls greasy. If you’re using a brand like Justin’s or Teddie, you’re golden. For a different flavor, almond butter or sunflower seed butter work beautifully.
- Rolled Oats (1 ½ cups): Not instant oats, not steel-cut—rolled oats hit that sweet spot of texture. They absorb moisture without turning to mush. If you’re gluten-sensitive, look for certified gluten-free oats. I’ve used Bob’s Red Mill for years and never had an issue. Quick oats work in a pinch but give a softer, less chewy result.
- Honey (⅓ cup): The natural sweetener that also helps bind everything together. Raw honey adds a subtle floral note, but any liquid honey works. Maple syrup is a great vegan swap, though the texture will be slightly stickier. If your honey is crystallized, warm it gently before mixing.
- Vanilla Protein Powder (½ cup): This is where quality matters. I’ve tested this with a dozen different powders and the vanilla-flavored ones consistently win. Whey protein gives the best texture—smooth and pillowy. Plant-based protein works but can make the balls slightly drier; add an extra tablespoon of peanut butter if needed. My go-to is Orgain vanilla, but any brand you trust will work. Unflavored protein powder is fine too, just add a splash of vanilla extract.
- Mini Chocolate Chips (¼ cup): The little pockets of joy. Mini chips distribute more evenly than regular-sized ones, giving you chocolate in every bite. Dark chocolate chips keep the sugar lower, while milk chocolate makes them taste more indulgent. I’ve used Enjoy Life brand for dairy-free options and they melt perfectly into the mixture.
Optional additions: A pinch of sea salt on top before chilling really makes the flavors pop. If you want extra crunch, add 2 tablespoons of chopped peanuts. For a boost of fiber, throw in a tablespoon of chia seeds or ground flaxseed—just add an extra teaspoon of honey to balance the moisture.
Equipment Needed
You don’t need a fancy kitchen to make these. In fact, you probably already own everything required.
- Large Mixing Bowl: Any medium-to-large bowl works. I prefer glass or stainless steel because they don’t retain odors.
- Wooden Spoon or Rubber Spatula: For mixing the sticky dough. A rubber spatula makes scraping the bowl much easier at the end.
- Measuring Cups and Spoons: Accuracy matters here, especially with the peanut butter and honey. Pack your oats loosely when measuring.
- Cookie Scoop or Tablespoon: For uniform-sized balls. A 1-inch cookie scoop is perfect, but a regular tablespoon works fine. Uniformity helps them chill evenly.
- Parchment Paper or Silicone Mat: For lining your baking sheet or plate. The balls won’t stick, making cleanup a breeze.
- Baking Sheet or Large Plate: To hold the balls while they chill. A plate that fits in your fridge works perfectly.
- Airtight Container: For storage. Glass containers with tight lids keep them freshest, but any sealed container works.
If you don’t have a cookie scoop, wet your hands slightly before rolling—it prevents the mixture from sticking to your palms. Trust me on this, it’s a game-changer.
Preparation Method
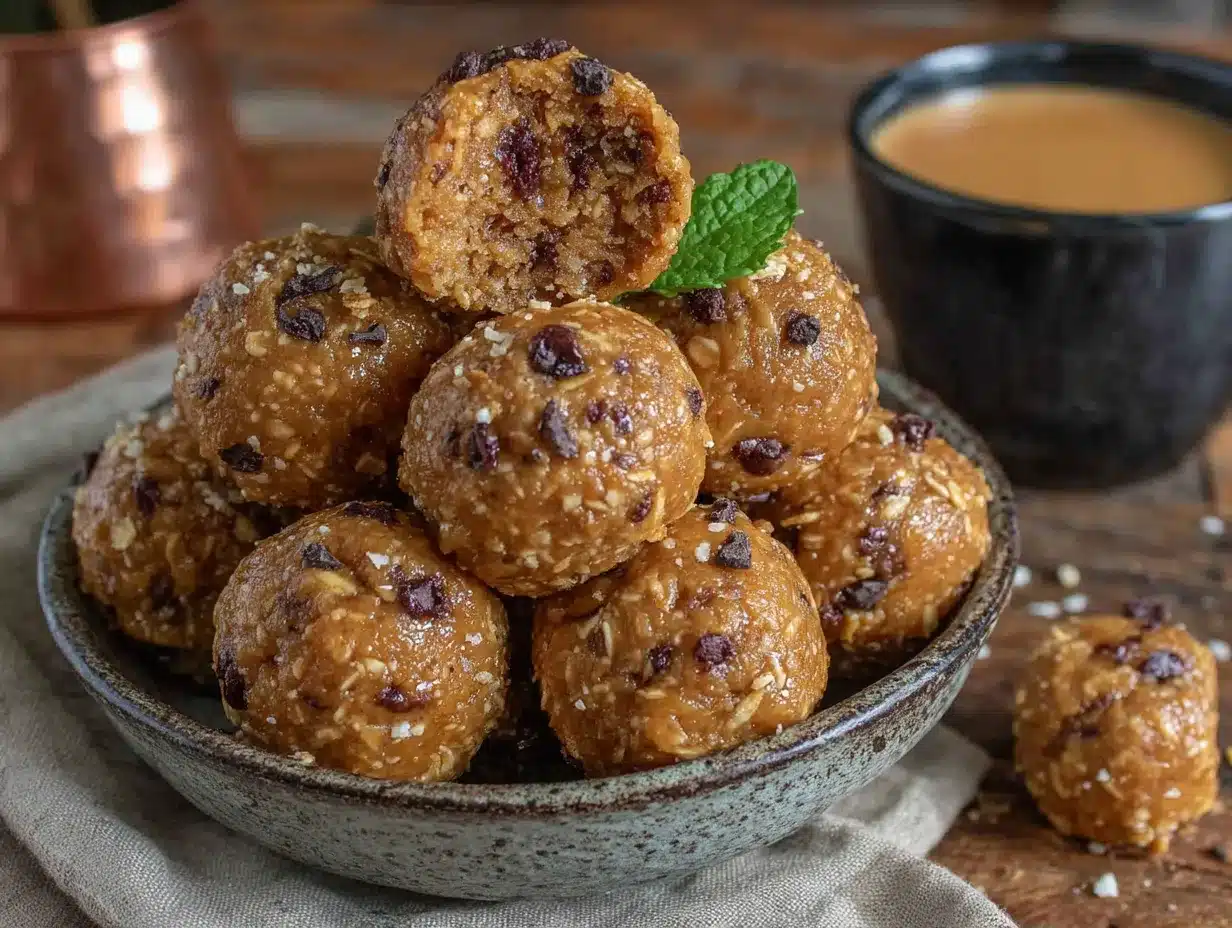
This is where the magic happens. Follow these steps exactly the first time, then feel free to tweak once you know how the dough should feel.
- Combine the wet ingredients: In your large mixing bowl, add 1 cup creamy peanut butter and ⅓ cup honey. Stir them together until fully combined. The mixture should look smooth and glossy. If your peanut butter was cold from the fridge, microwave it for 15 seconds to soften—it makes mixing much easier.
- Add the protein powder: Sprinkle ½ cup vanilla protein powder over the peanut butter mixture. Stir vigorously until no dry streaks remain. This is the thickest part of the mixing process, so don’t be shy with your elbow grease. The mixture will look like a thick, sticky paste—that’s exactly what you want.
- Fold in the oats: Add 1 ½ cups rolled oats to the bowl. Use your spatula to fold them in until every oat is coated. The dough will start coming together into a cohesive mass. If it looks too dry, add a tablespoon of honey or peanut butter. If it’s too sticky, add another tablespoon of oats. You’re looking for a consistency that holds together when squeezed but isn’t wet.
- Let it rest: This is the step most people skip, and it makes all the difference. Let the mixture sit at room temperature for 5-7 minutes. This allows the oats to absorb moisture from the peanut butter and honey, which gives you that perfect soft-yet-firm texture. During this time, the dough will firm up noticeably.
- Fold in chocolate chips: After the rest period, add ¼ cup mini chocolate chips. Fold them in gently so they distribute evenly without melting. If you’re using regular chocolate chips, chop them roughly first for better distribution.
- Roll into balls: Line a baking sheet or plate with parchment paper. Using a cookie scoop or tablespoon, portion out the dough. Roll each portion between your palms into a smooth ball. If the mixture sticks to your hands, lightly wet your palms with water. You should get about 18-20 balls, depending on size.
- Chill: Place the baking sheet in the refrigerator for at least 30 minutes. This firms them up so they hold their shape. I know it’s tempting to eat one right away—I always do—but they really do taste better after chilling. The flavors meld together and the texture becomes perfectly fudgy.
- Store properly: Transfer the chilled balls to an airtight container. Keep them refrigerated for up to two weeks, or freeze for up to three months. If freezing, place them in a single layer on a baking sheet first, then transfer to a freezer bag once solid.
A quick note: If your dough feels crumbly instead of coming together, you might have used a drier protein powder. Add peanut butter one tablespoon at a time until it holds. If it’s too sticky, add oats a tablespoon at a time. The dough should feel like soft Play-Doh—moldable but not greasy.
Cooking Tips & Techniques
After making these more times than I can count, I’ve collected a few hard-won lessons. Here’s what I wish someone had told me from the start.
The protein powder trap: Not all protein powders behave the same. Whey protein absorbs differently than plant-based, and even within those categories, brands vary wildly. If you’re using a new powder, start with ⅓ cup instead of ½ cup and add more if needed. You can always add more, but you can’t take it out. I learned this the hard way with a particularly absorbent pea protein that turned my first batch into dry crumbs.
The sticky hands solution: Wet hands are your best friend. Keep a small bowl of water nearby and dip your fingers before rolling each ball. The water creates a barrier between the dough and your skin. Alternatively, lightly oil your palms with coconut oil—it adds a subtle flavor and prevents sticking beautifully.
Temperature matters: If your kitchen is warm, the dough will be stickier. Pop the entire bowl in the fridge for 10 minutes before rolling if you’re struggling. Cold dough is infinitely easier to handle. On the flip side, if your kitchen is cold, the peanut butter might be too stiff to mix easily. Microwave it in 10-second bursts until soft but not hot.
Size consistency: Use that cookie scoop. I know it seems fussy, but uniform balls chill at the same rate and look more appetizing. Plus, it makes portion control effortless. One scoop equals one serving—no guessing.
The flavor boost: A tiny pinch of flaky sea salt on top before chilling transforms these from good to incredible. Salt amplifies the peanut butter flavor and balances the sweetness. Don’t skip it.
Multitasking pro tip: While the oats are resting during their 5-minute absorption phase, clean up your mixing bowl and measuring cups. It takes exactly that long and leaves you with almost no dishes at the end. Future you will be grateful.
Variations & Adaptations
One of the best things about this recipe is how flexible it is. Here are some variations I’ve tested and loved.
- Chocolate Peanut Butter: Replace ¼ cup of the oats with unsweetened cocoa powder. You’ll need an extra tablespoon of honey to balance the bitterness. It tastes like brownie batter—dangerously good.
- Vegan Version: Swap honey for maple syrup or agave nectar. Use a plant-based protein powder (I like Orgain vanilla or chocolate). Make sure your chocolate chips are dairy-free. The texture will be slightly softer, so chill them for an extra 10 minutes.
- Nut-Free Option: Replace peanut butter with sunflower seed butter or WowButter. The flavor is different but equally delicious. Note that sunflower seed butter can react with baking soda if you add any, but since this is no-bake, you’re fine. The color will turn slightly greenish over time—that’s normal and harmless.
- Low-Carb Adaptation: Replace oats with unsweetened shredded coconut and almond flour (½ cup each). Use a sugar-free protein powder and sugar-free chocolate chips. These are much lower in carbs and still incredibly satisfying.
- Add-In Adventures: Try 2 tablespoons of shredded coconut, chia seeds, hemp hearts, or chopped dried fruit. My personal favorite is adding 1 tablespoon of instant espresso powder for a mocha twist. Start with small amounts and adjust to taste.
- Frozen Treat Version: Roll the balls slightly smaller, insert a toothpick, and freeze until solid. Dip in melted dark chocolate for a healthier frozen treat. My kids go absolutely crazy for these in the summer.
Each variation changes the texture slightly, so don’t be afraid to adjust the liquid-to-dry ratio as needed. The base recipe is forgiving—trust your instincts and taste as you go.
Serving & Storage Suggestions
These protein balls are best served cold, straight from the fridge. The texture is firm but yielding, with that perfect fudgy bite that makes them so addictive. If you prefer a softer texture, let them sit at room temperature for 5-10 minutes before eating.
Serving Ideas:
- Pre-workout snack: Eat one 30 minutes before exercise for steady energy without a sugar crash.
- Post-workout recovery: Pair with a banana for a balanced refuel.
- Lunchbox addition: Perfect for kids’ lunches—they stay intact and don’t make a mess.
- Afternoon pick-me-up: Replace that 3 PM coffee with two balls and a glass of water. You’ll be surprised how alert you feel.
- Dessert alternative: Crumble one over Greek yogurt with berries for a healthier dessert bowl.
Storage Guidelines:
- Refrigerator: Store in an airtight container for up to 2 weeks. Layer them between sheets of parchment paper if stacking to prevent sticking.
- Freezer: Place balls in a single layer on a baking sheet and freeze for 1 hour. Transfer to a freezer-safe bag or container. They keep for up to 3 months. Thaw in the fridge overnight or at room temperature for 15 minutes.
- Room Temperature: Not recommended for more than a few hours. The peanut butter can become oily and the texture suffers. If you’re taking them on a road trip, pack them in a cooler.
Flavor note: These actually get better after a day or two in the fridge. The oats fully absorb the moisture, the chocolate chips firm up, and everything melds together. Make them a day ahead if you can—the patience pays off.
Nutritional Information & Benefits
Here’s the estimated nutrition per ball (based on 20 balls using standard ingredients):
| Nutrient | Amount Per Ball |
|---|---|
| Calories | 145 |
| Protein | 7g |
| Carbohydrates | 16g |
| Fiber | 2g |
| Sugar | 8g |
| Fat | 7g |
| Saturated Fat | 2g |
| Sodium | 85mg |
Health Benefits:
- Peanut butter provides healthy monounsaturated fats and vitamin E, which supports skin health and immune function.
- Rolled oats are rich in beta-glucan, a soluble fiber that helps lower cholesterol and keeps you full longer.
- Honey contains antioxidants and has natural antimicrobial properties. Raw honey also supports seasonal allergy relief for some people.
- Protein powder helps with muscle repair and satiety. Choose a high-quality brand with minimal additives for best results.
- Dark chocolate chips (if using) provide flavonoids that support heart health and mood.
These balls are naturally gluten-free (with certified oats), dairy-free (with dairy-free chocolate chips), and contain no refined sugar. They’re perfect for anyone watching their sugar intake or looking for a clean, portable snack.
Conclusion
These Easy No-Bake Peanut Butter Protein Balls have become a staple in my kitchen for a reason. They solve the eternal snack dilemma: something that tastes indulgent but actually nourishes you. No guilt, no complicated steps, no weird ingredients. Just five simple things that come together in ten minutes and keep you fed for days.
I love that this recipe is forgiving enough for beginners but flexible enough for experienced cooks to customize. Whether you’re making them for post-workout fuel, lunchbox treats, or emergency snacks during a busy week, they deliver every single time. And honestly? They’re the kind of recipe you’ll memorize after making them twice—that’s how simple they are.
If you try these, I’d love to hear how they turn out. Drop a comment below with your favorite variation, or tag me in your photos if you share them online. And if you’re looking for more easy snack ideas, check out my other recipes for inspiration. Happy rolling, friends!
Frequently Asked Questions
Can I use crunchy peanut butter instead of creamy?
Absolutely! Crunchy peanut butter adds a nice texture contrast. Just keep in mind that the balls might be slightly less cohesive since the chunks create small gaps. Add an extra tablespoon of honey if the dough seems dry.
How long do these protein balls last at room temperature?
They’re best kept refrigerated. At room temperature, they’ll last about 4-6 hours before the peanut butter starts to soften and become greasy. If you’re taking them to work or on a hike, pack them in a small cooler or insulated bag.
Can I make these without protein powder?
Yes, but the texture will be different. Replace the protein powder with an equal amount of oat flour (just grind oats in a blender) or almond flour. The protein content will be lower, but they’ll still taste delicious. You might need to add an extra tablespoon of honey to help bind everything.
My dough is too sticky to roll. What should I do?
This usually means there’s too much moisture. Add rolled oats one tablespoon at a time until the dough firms up. Alternatively, chill the entire bowl for 15-20 minutes—cold dough is much easier to handle. If you’re in a humid climate, this is a common issue, so don’t worry.
Can I double this recipe?
Yes, this recipe doubles beautifully. Just make sure your mixing bowl is large enough to handle the volume. The dough will be stiffer, so you might need to use your hands to mix toward the end. Double batches freeze especially well, so go ahead and make a big batch for the month ahead.
Pin This Recipe!
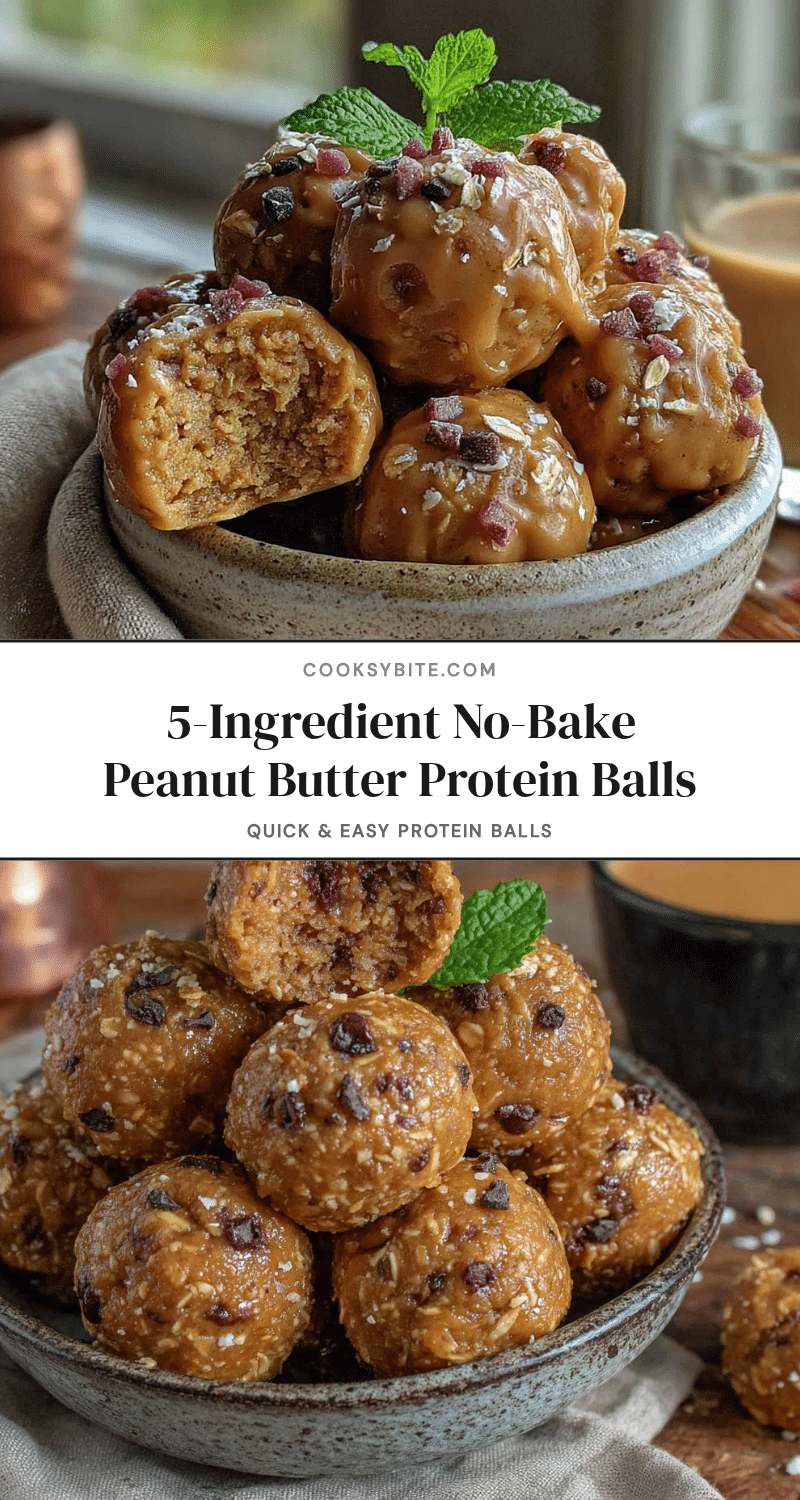
Easy No-Bake Peanut Butter Protein Balls: Best 5-Ingredient Snack

These Easy No-Bake Peanut Butter Protein Balls are soft, naturally sweet, and made with just five simple ingredients. They’re the perfect healthy snack that tastes like a treat, keeping you full and satisfied without any baking required.
- Prep Time: 10 minutes
- Cook Time: 0 minutes
- Total Time: 40 minutes (includes 30 minutes chilling)
- Yield: 18-20 balls 1x
- Category: Snack
- Cuisine: American
Ingredients
- 1 cup creamy peanut butter (natural, no added sugar or oil)
- 1 ½ cups rolled oats (certified gluten-free if needed)
- ⅓ cup honey (or maple syrup for vegan)
- ½ cup vanilla protein powder (whey or plant-based)
- ¼ cup mini chocolate chips (dairy-free if needed)
Instructions
- In a large mixing bowl, combine 1 cup creamy peanut butter and ⅓ cup honey. Stir until smooth and glossy. If peanut butter is cold, microwave for 15 seconds to soften.
- Sprinkle ½ cup vanilla protein powder over the peanut butter mixture. Stir vigorously until no dry streaks remain, forming a thick, sticky paste.
- Add 1 ½ cups rolled oats to the bowl. Fold them in until every oat is coated. The dough should hold together when squeezed but not be wet. Adjust with extra honey or oats if needed.
- Let the mixture rest at room temperature for 5-7 minutes to allow oats to absorb moisture and firm up.
- Fold in ¼ cup mini chocolate chips gently until evenly distributed.
- Line a baking sheet or plate with parchment paper. Using a cookie scoop or tablespoon, portion out the dough and roll into smooth balls (about 18-20 balls). Wet hands slightly if mixture sticks.
- Place the baking sheet in the refrigerator for at least 30 minutes to firm up the balls.
- Transfer chilled balls to an airtight container. Store in the refrigerator for up to 2 weeks or freeze for up to 3 months.
Notes
For best texture, let the mixture rest for 5-7 minutes before rolling to allow oats to absorb moisture. If dough is too sticky, add oats 1 tablespoon at a time; if too dry, add peanut butter or honey. Wet hands slightly to prevent sticking when rolling. A pinch of flaky sea salt on top before chilling enhances flavor. These taste even better after a day in the fridge.
Nutrition
- Serving Size: 1 ball
- Calories: 145
- Sugar: 8
- Sodium: 85
- Fat: 7
- Saturated Fat: 2
- Carbohydrates: 16
- Fiber: 2
- Protein: 7
Keywords: no-bake protein balls, peanut butter protein balls, healthy snack, 5-ingredient recipe, gluten-free snack, meal prep snack, high protein snack


