The sizzle—that sharp, sticky hiss when the chicken hits the hot pan—still makes me stop whatever I’m doing. It’s the sound of a Tuesday night that turned into something I actually looked forward to. I was standing in my tiny kitchen, staring at a pile of meal prep containers I’d just washed for the third time that week, wondering why my healthy lunches always ended up tasting like sad, dry cardboard. Then I remembered that bottle of soy sauce hiding behind the vinegar, and a half-empty jar of honey my sister left last time she visited. That night, I didn’t plan to make a recipe. I just wanted dinner that wouldn’t make me groan when I opened the fridge the next day. What came out of that pan was a sticky, glossy, deeply savory chicken that changed how I think about meal prep. It wasn’t complicated. It wasn’t fancy. It was just good—the kind of good that makes you eat straight from the container standing up. These easy chicken teriyaki meal prep bowls with rice became my Sunday ritual, the one thing I actually get excited to pack on a Sunday night. No dry chicken. No boring rice. Just a bowl that tastes like you actually tried, even when you didn’t.
Why You’ll Love This Recipe
I have tested this recipe more times than I care to admit—through burnt sauce, rubbery chicken, and rice that turned into paste. What I landed on is the version I actually want to eat four days in a row. Here’s why it works:
- Quick & Easy: From cutting board to container in about 30 minutes. That’s less time than it takes to decide what to order for delivery.
- Simple Ingredients: Soy sauce, honey, garlic, ginger, and a few pantry staples. No trips to a specialty store. No ingredient you’ll use once and forget about.
- Perfect for Meal Prep: This chicken actually stays juicy after reheating. No sad microwaved chicken here—just tender, saucy goodness that holds up all week.
- Crowd-Pleaser: My picky-eater nephew asked for seconds. My health-conscious sister asked for the recipe. It’s that rare dish that works for everyone.
- Unbelievably Delicious: That glossy, thick teriyaki sauce clings to every piece of chicken. It’s the kind of meal that makes you close your eyes after the first bite—even if you’re eating it at your desk.
What makes this different from the dozens of teriyaki recipes out there? It’s the technique. I don’t just dump sauce over chicken. I sear the chicken first for that golden crust, then let it simmer in the reduced sauce until every piece is coated in a glaze that’s thick enough to stick but not so thick it’s cloying. It’s comfort food that works for your schedule—healthier, faster, and honestly more satisfying than takeout.
What Ingredients You Will Need
This recipe uses simple, wholesome ingredients that come together to create a deeply savory, slightly sweet teriyaki sauce that clings to every bite of chicken. Most of these are pantry staples, so you’re probably already set.
- Boneless, skinless chicken thighs (about 1.5 lbs) — I prefer thighs for meal prep because they stay juicier after reheating than breasts. Look for uniform pieces so they cook evenly.
- Soy sauce (⅓ cup) — Use low-sodium if you’re watching salt. I personally use Kikkoman for its balanced flavor. Tamari works great for gluten-free.
- Honey (¼ cup) — Adds sweetness and helps create that glossy, sticky glaze. You can substitute maple syrup or brown sugar if needed.
- Rice vinegar (2 tablespoons) — Brightens the sauce and balances the sweetness. Unseasoned is best.
- Fresh garlic (3 cloves, minced) — Don’t use the jarred stuff here. Fresh garlic makes a noticeable difference in the sauce depth.
- Fresh ginger (1 tablespoon, grated) — The warmth of fresh ginger is non-negotiable for authentic flavor. Peel it with a spoon for easy grating.
- Cornstarch (1 tablespoon) — Mixed with 2 tablespoons cold water to create a slurry that thickens the sauce to that perfect glossy consistency.
- Sesame oil (1 teaspoon) — For toasting the chicken. Adds a nutty undertone that makes the dish taste more complex.
- Cooked white rice (about 3 cups) — Short-grain or jasmine rice works best. I use a rice cooker for consistent results, but stovetop is fine.
- Steamed broccoli (about 2 cups) — Adds color, crunch, and nutrients. You can swap in snap peas, edamame, or bell peppers.
- Sesame seeds and sliced green onions — For garnish. Not strictly necessary, but they make the bowls look like they came from a restaurant.
Equipment Needed
You don’t need a professional kitchen for this recipe, but a few tools make the process smoother. Here’s what I use:
- Large non-stick skillet or wok — A 12-inch skillet gives you enough surface area to sear the chicken without overcrowding. I’ve used a cast iron pan too, but non-stick is easier for cleanup with the sticky sauce.
- Sharp chef’s knife — For cutting chicken into even pieces. A dull knife makes the job harder and less safe.
- Cutting board — Preferably two: one for raw chicken, one for vegetables.
- Small bowl — For mixing the cornstarch slurry. A ramekin works too.
- Measuring cups and spoons — Teriyaki sauce is all about balance, so measuring matters here.
- Rice cooker or medium saucepan — For cooking the rice. I’m a rice cooker convert—it’s hands-off and perfect every time. If you don’t have one, a saucepan with a tight lid works just fine.
- Meal prep containers — Glass containers with airtight lids keep the rice from drying out and the chicken from leaking sauce everywhere.
Preparation Method
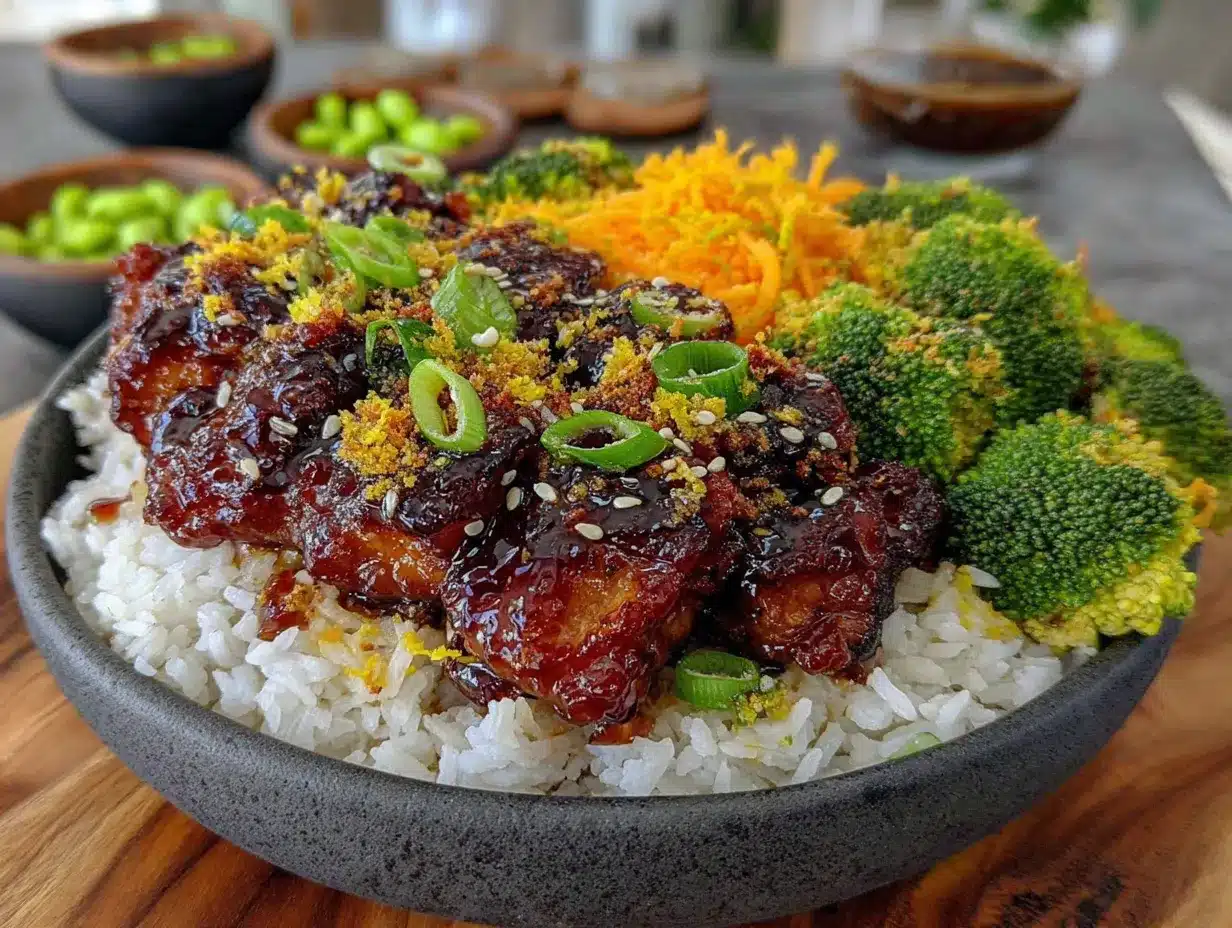
- Cook the rice first — Start your rice before anything else. Rinse 1½ cups of short-grain rice under cold water until the water runs clear. Add to a rice cooker with 2 cups of water and a pinch of salt. If using a saucepan, bring to a boil, then reduce to low, cover, and simmer for 18 minutes. Let it rest off the heat for 5 minutes before fluffing.
- Make the teriyaki sauce — In a small bowl, whisk together ⅓ cup soy sauce, ¼ cup honey, 2 tablespoons rice vinegar, minced garlic, and grated ginger. Set aside. In another small bowl, mix 1 tablespoon cornstarch with 2 tablespoons cold water until smooth. This is your slurry—don’t skip it.
- Prepare the chicken — Pat the chicken thighs dry with paper towels. This is crucial for getting a good sear. Cut them into bite-sized pieces, about 1-inch cubes. Season lightly with salt and pepper.
- Sear the chicken — Heat 1 teaspoon sesame oil in your large skillet over medium-high heat. Add the chicken in a single layer—don’t crowd the pan. Work in batches if needed. Cook for 4-5 minutes without moving it, until the bottom is golden brown and crispy. Flip and cook another 3-4 minutes until cooked through. The chicken should reach 165°F internally. Remove from the pan and set aside.
- Simmer the sauce — Reduce the heat to medium. Pour the teriyaki sauce mixture into the same skillet. Let it bubble for about 2 minutes, scraping up any browned bits from the bottom. This is where all the flavor lives.
- Thicken the sauce — Give your cornstarch slurry a quick stir (it settles fast), then pour it into the simmering sauce while whisking constantly. Within 30 seconds, you’ll see the sauce transform from watery to glossy and thick. It should coat the back of a spoon.
- Combine and glaze — Return the cooked chicken to the skillet. Toss to coat every piece in that glossy sauce. Let it simmer together for 1-2 minutes so the chicken absorbs some of the flavor. The sauce will continue to thicken as it cools.
- Steam the broccoli — While the chicken simmers, steam your broccoli. You can microwave it with a splash of water for 2 minutes, or steam on the stovetop for 3-4 minutes until bright green and tender-crisp. Don’t overcook—it will soften further when reheated.
- Assemble the bowls — Divide the cooked rice evenly among your meal prep containers. Top with the teriyaki chicken and a generous portion of steamed broccoli. Sprinkle with sesame seeds and sliced green onions if you’re feeling fancy.
Cooking Tips & Techniques
I learned most of these the hard way—through burnt sauce and dry chicken. Let me save you the trouble.
Pat the chicken dry. This is the single most important step for getting that golden crust. Wet chicken steams instead of searing, and you’ll end up with pale, rubbery pieces. Take the extra 30 seconds.
Don’t crowd the pan. If you add too much chicken at once, the temperature drops and the chicken releases liquid. You’ll end up boiling it instead of searing. Cook in two batches if needed. It adds 5 minutes but makes a world of difference.
Watch the sauce carefully. Teriyaki sauce goes from perfectly thick to burnt glue in about 45 seconds. Once you add the cornstarch slurry, keep whisking and don’t walk away. If it gets too thick, add a splash of water to thin it out.
Double the sauce if you’re a sauce person. I always make extra because the sauce is the best part. It freezes well too—just thaw and reheat gently.
Let the bowls cool completely before sealing. I know you’re tired. But if you put hot food in airtight containers, condensation builds up and turns everything soggy. Let them sit on the counter for 20-30 minutes uncovered, then seal and refrigerate.
Variations & Adaptations
This recipe is flexible enough to adapt to whatever you have on hand or whatever your week looks like.
- Low-Carb Version: Skip the rice and serve the teriyaki chicken over cauliflower rice or a bed of mixed greens. The sauce works beautifully as a dressing for a hearty salad.
- Spicy Teriyaki: Add 1 tablespoon of sriracha or a teaspoon of red pepper flakes to the sauce before simmering. The heat balances the sweetness perfectly.
- Vegetarian Option: Swap the chicken for extra-firm tofu or tempeh. Press the tofu for 30 minutes to remove excess moisture, then cube and sear exactly like the chicken. The sauce is already vegetarian-friendly.
- Different Vegetables: I’ve made this with roasted bell peppers, snap peas, edamame, and even shredded carrots. Use whatever vegetables you have—just make sure they’re cut to similar sizes for even cooking.
- Gluten-Free: Use tamari or coconut aminos instead of soy sauce. Double-check that your rice vinegar is gluten-free (most are). Everything else in the recipe is naturally gluten-free.
I once made a version with leftover rotisserie chicken and frozen broccoli on a night I had zero energy. It wasn’t as good as the fresh version, but it was still pretty great. That’s the beauty of this recipe—it meets you where you are.
Serving & Storage Suggestions
These bowls are designed for meal prep, but they’re also fantastic served fresh for dinner.
Serving: Serve warm, straight from the skillet. The rice should be fluffy, the chicken glistening with sauce, and the broccoli bright green. A sprinkle of sesame seeds and green onions adds a professional touch that makes the bowls feel special. Pair with a side of miso soup or a simple cucumber salad for a complete meal.
Storage: Divide into airtight glass containers and refrigerate for up to 4 days. I don’t recommend freezing the assembled bowls because the rice gets mushy when thawed. However, the teriyaki chicken freezes beautifully on its own for up to 3 months. Just thaw overnight in the fridge and reheat with fresh rice.
Reheating: The best way to reheat is in a skillet over medium heat with a splash of water to revive the sauce. Microwave works too—just cover the bowl with a damp paper towel to add moisture back. Heat for 2 minutes, stir, then another minute until steaming hot. The chicken stays surprisingly juicy thanks to the sauce coating every piece.
Flavor development: Here’s a secret—these bowls taste even better on day two. The flavors meld overnight, and the sauce soaks into the rice just enough to make every bite delicious. I actually look forward to day-three leftovers more than the first serving.
Nutritional Information & Benefits
These numbers are estimates based on one serving (about 1½ cups of the assembled bowl) and will vary based on specific ingredients and portion sizes.
| Nutrient | Amount Per Serving |
|---|---|
| Calories | 485 |
| Protein | 38g |
| Carbohydrates | 52g |
| Fat | 12g |
| Fiber | 4g |
| Sugar | 18g |
| Sodium | 890mg |
Health Benefits: Chicken thighs provide a good dose of protein and iron, which supports energy levels and muscle repair. Ginger and garlic are known for their anti-inflammatory properties and can aid digestion. Broccoli adds fiber, vitamin C, and antioxidants. The honey provides natural sweetness with a lower glycemic impact than refined sugar. This meal is balanced with protein, carbs, and healthy fats—perfect for keeping you full and focused through a busy day. If you’re watching sodium, use low-sodium soy sauce and reduce the added salt.
Conclusion
This easy chicken teriyaki meal prep bowl recipe is the kind of dish that makes your week better. It’s simple enough for a Sunday cooking session, delicious enough to actually look forward to eating, and flexible enough to adapt to whatever you have in the fridge. I love that it turns a chore—meal prep—into something I genuinely enjoy. No more sad desk lunches. No more spending money on takeout that doesn’t even taste this good. I want you to try this recipe and make it your own. Add extra ginger. Skip the broccoli. Double the sauce. Leave a comment below and tell me how it turned out—I read every single one and I love hearing your twists. Share this recipe with a friend who needs better lunches. And if you’re looking for more easy weeknight inspiration, check out my collection of simple, satisfying recipes that make real life a little easier. Happy cooking, friend. You’ve got this.
Frequently Asked Questions
Can I use chicken breast instead of thighs?
Yes, you absolutely can. Just be aware that chicken breast tends to dry out faster, especially after reheating. To keep it moist, cook it only until it reaches 160°F internally (it will continue cooking as it rests). Slice it against the grain for the most tender texture.
How do I prevent the rice from getting hard in the fridge?
This is a common meal prep problem. The key is to let the rice cool completely before sealing the container, and add a tiny splash of water before reheating. I also recommend using short-grain rice—it holds moisture better than long-grain varieties. If your rice does get hard, just sprinkle a tablespoon of water over it before microwaving and cover with a damp paper towel.
Can I make the teriyaki sauce from scratch ahead of time?
Absolutely. The sauce keeps well in the refrigerator for up to a week in an airtight jar. Just don’t add the cornstarch slurry until you’re ready to cook. If you’ve already thickened it, the sauce will turn into a gelatinous block in the fridge—still usable, but you’ll need to reheat it gently with a splash of water to loosen it up.
What’s the best way to reheat these bowls without drying out the chicken?
Skillet reheating is your best bet. Add the chicken and a tablespoon of water to a non-stick pan over medium heat, cover, and let it steam for 2-3 minutes. The water revives the sauce and keeps the chicken moist. If you’re in a rush, the microwave works fine—just cover the bowl with a damp paper towel and heat in 30-second intervals, stirring between each.
Can I freeze the assembled bowls for longer storage?
I don’t recommend freezing the fully assembled bowls because the rice and broccoli get mushy when thawed. However, you can freeze the teriyaki chicken on its own for up to 3 months. Thaw overnight in the fridge, then make fresh rice and steam fresh broccoli. It takes 20 minutes and tastes significantly better than frozen assembled bowls.
Pin This Recipe!
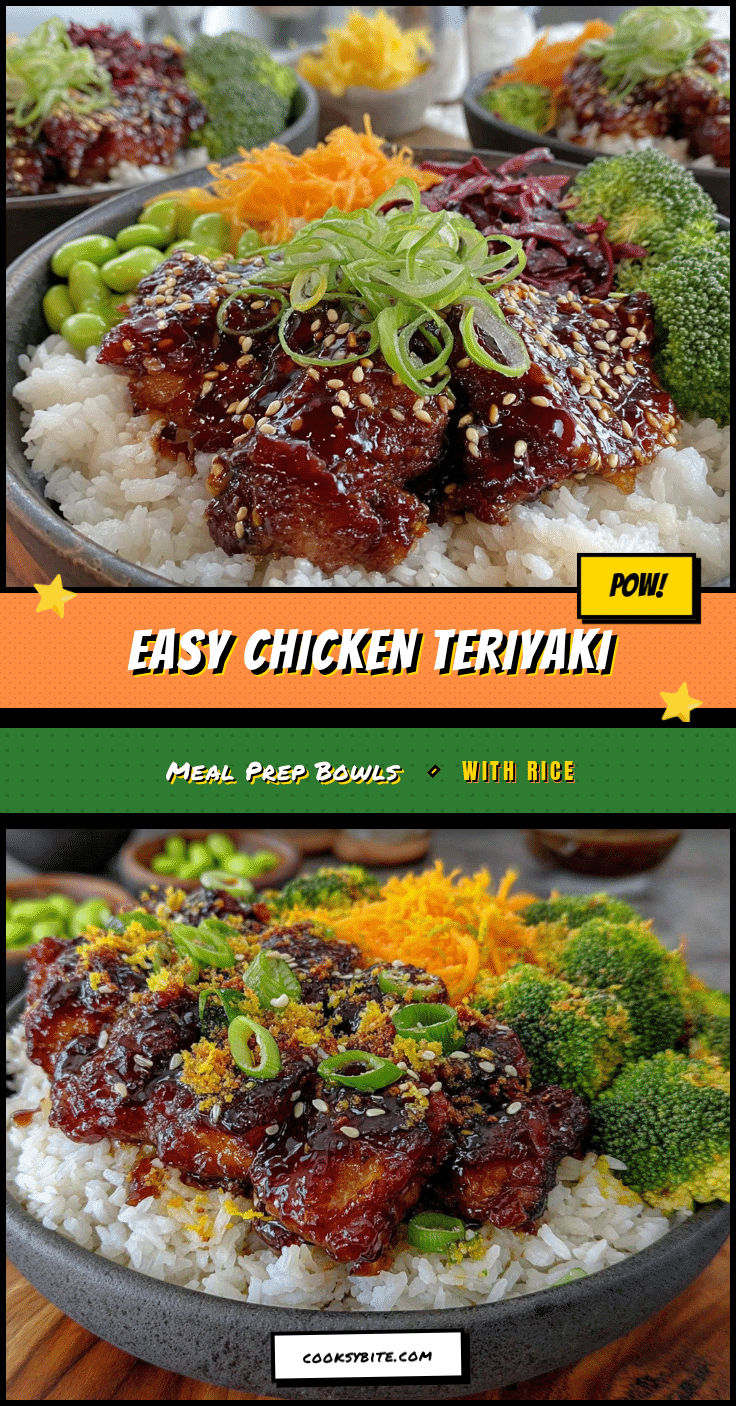
Easy Chicken Teriyaki Meal Prep Bowls
These easy chicken teriyaki meal prep bowls with rice are the perfect solution for healthy, delicious lunches all week. Juicy chicken thighs are coated in a glossy, savory-sweet homemade teriyaki sauce and served with fluffy rice and tender-crisp broccoli.
- Prep Time: 15 minutes
- Cook Time: 20 minutes
- Total Time: 35 minutes
- Yield: 4 servings 1x
- Category: Main Course
- Cuisine: Japanese
Ingredients
- 1.5 lbs boneless, skinless chicken thighs
- ⅓ cup soy sauce (low-sodium recommended)
- ¼ cup honey
- 2 tablespoons rice vinegar (unseasoned)
- 3 cloves fresh garlic, minced
- 1 tablespoon fresh ginger, grated
- 1 tablespoon cornstarch
- 2 tablespoons cold water
- 1 teaspoon sesame oil
- 3 cups cooked white rice (short-grain or jasmine)
- 2 cups steamed broccoli
- Sesame seeds and sliced green onions for garnish
Instructions
- Cook the rice first: Rinse 1½ cups short-grain rice under cold water until clear. Add to a rice cooker with 2 cups water and a pinch of salt. If using a saucepan, bring to a boil, reduce to low, cover, and simmer for 18 minutes. Let rest off heat for 5 minutes before fluffing.
- Make the teriyaki sauce: In a small bowl, whisk together ⅓ cup soy sauce, ¼ cup honey, 2 tablespoons rice vinegar, minced garlic, and grated ginger. Set aside. In another small bowl, mix 1 tablespoon cornstarch with 2 tablespoons cold water until smooth to make a slurry.
- Prepare the chicken: Pat chicken thighs dry with paper towels. Cut into bite-sized pieces (about 1-inch cubes). Season lightly with salt and pepper.
- Sear the chicken: Heat 1 teaspoon sesame oil in a large skillet over medium-high heat. Add chicken in a single layer (work in batches if needed). Cook for 4-5 minutes without moving until golden brown, then flip and cook another 3-4 minutes until cooked through (internal temperature 165°F). Remove from pan and set aside.
- Simmer the sauce: Reduce heat to medium. Pour the teriyaki sauce mixture into the same skillet. Let it bubble for about 2 minutes, scraping up browned bits from the bottom.
- Thicken the sauce: Stir the cornstarch slurry, then pour it into the simmering sauce while whisking constantly. Cook for about 30 seconds until the sauce becomes glossy and thick enough to coat the back of a spoon.
- Combine and glaze: Return the cooked chicken to the skillet. Toss to coat every piece in the sauce. Let simmer together for 1-2 minutes so the chicken absorbs flavor.
- Steam the broccoli: While chicken simmers, steam broccoli until bright green and tender-crisp (microwave with a splash of water for 2 minutes, or stovetop for 3-4 minutes).
- Assemble the bowls: Divide cooked rice evenly among meal prep containers. Top with teriyaki chicken and steamed broccoli. Garnish with sesame seeds and sliced green onions if desired.
Notes
Pat the chicken dry for the best sear. Don’t crowd the pan—cook in batches if needed. Watch the sauce carefully as it can go from thick to burnt quickly. Let bowls cool completely before sealing to prevent sogginess. These bowls taste even better on day two as flavors meld.
Nutrition
- Serving Size: 1 bowl (about 1½ cup
- Calories: 485
- Sugar: 18
- Sodium: 890
- Fat: 12
- Saturated Fat: 3
- Carbohydrates: 52
- Fiber: 4
- Protein: 38
Keywords: chicken teriyaki, meal prep, easy dinner, healthy lunch, teriyaki bowls, Asian recipe, weeknight dinner


