Crumbled up a bag of peanut butter cups into a bowl of brownie batter on a Tuesday afternoon when the whole plan was supposed to be simple. My nephew’s flag football championship was that weekend, and I’d promised dessert for the team party. The original idea was just regular brownies—nothing fancy, nothing football-shaped. But then I spotted that bag of mini peanut butter cups sitting on the counter, half-eaten from snack time, and something clicked.
Honestly, I was winging it. The brownie batter was already mixed, the oven was preheating, and I had about thirty minutes before carpool. I dumped the crushed peanut butter cups in, poured half the batter into a football-shaped pan I’d impulse-bought last season, and crossed my fingers. The result? These Ultimate Chocolate Peanut Butter Football Brownies that disappeared faster than the touchdown passes at the game.
There’s something about that chocolate-peanut butter combo that just works, especially when it’s baked into a fudgy brownie shaped like a football. The kids went crazy for them, the parents asked for the recipe, and I ended up making three more batches that season. It’s one of those happy accidents that turned into a game day tradition. You know how some recipes just feel like they were meant to happen? This was one of those moments.
Why You’ll Love This Recipe
I’ve tested this recipe more times than I care to admit—through trial and error, through batches that were too cakey or too dry, through the time I forgot the eggs entirely (don’t ask). What I landed on is a brownie that’s impossibly fudgy, perfectly sweet, and packed with peanut butter in every single bite. Let me tell you why this one’s a keeper:
- Game Day Ready in Under an Hour: From mixing bowl to serving platter in about 45 minutes. You can whip these up during halftime and still catch the fourth quarter.
- Pantry-Friendly Ingredients: Nothing fancy here. Butter, sugar, eggs, cocoa powder, flour, and peanut butter cups. You probably have most of it already.
- Perfect for Parties and Tailgates: The football shape makes them an instant conversation starter. Kids love them, adults sneak extra ones when nobody’s looking.
- Fudgy, Not Cakey: This is the texture that brownie lovers dream about. Dense, rich, and slightly gooey in the center—every single time.
- Customizable for Any Crowd: Swap in dark chocolate peanut butter cups, use crunchy peanut butter for texture, or add a drizzle of melted peanut butter on top. It’s your call.
What sets these apart from every other brownie recipe out there is the ratio. I spent weeks tweaking the butter-to-cocoa ratio, the egg count, the baking time. The result is a brownie that stays moist for days (if they last that long) and has that signature crackly top that brownie enthusiasts go crazy for. Plus, the peanut butter cups melt into little pockets of gooey goodness throughout the batter. It’s not just another brownie—it’s the brownie that’ll have people asking for the recipe before the game even ends.
What Ingredients You Will Need
This recipe uses simple, everyday ingredients that come together to create something truly special. The magic is in how they work together—the richness of the cocoa, the saltiness of the peanut butter, the sweetness of the sugar. Here’s what you’ll need:
For the Brownie Base
- 1 cup (226g) unsalted butter, melted and slightly cooled (I use Kerrygold for the richness, but any good-quality butter works)
- 2 cups (400g) granulated sugar (adds sweetness and helps create that crackly top)
- 4 large eggs, room temperature (cold eggs will seize the melted butter)
- 1 tablespoon vanilla extract (pure, not imitation—trust me on this)
- ¾ cup (90g) unsweetened cocoa powder (I prefer Dutch-process for a deeper flavor, but natural works too)
- 1 cup (125g) all-purpose flour (spoon and level it—don’t scoop directly from the bag)
- ½ teaspoon salt (balances the sweetness and enhances the chocolate)
- ½ teaspoon baking powder (just enough for structure without making them cakey)
For the Peanut Butter Swirl & Mix-Ins
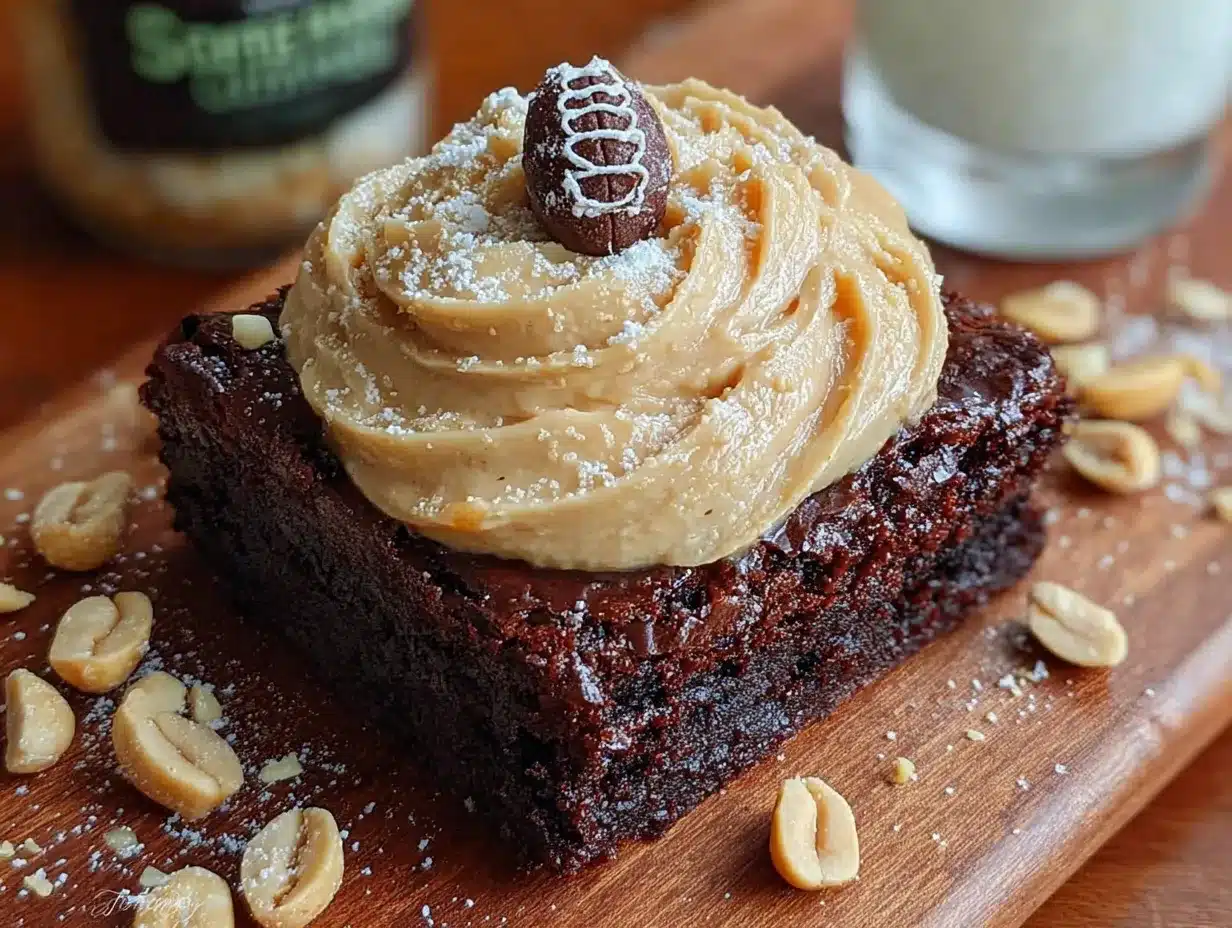
- ½ cup (130g) creamy peanut butter (I use Skippy natural—avoid the super oily natural brands that separate too much)
- 1 cup (about 12-15) mini peanut butter cups, roughly chopped (Reese’s are my go-to, but any brand works)
- Optional: ¼ cup chocolate chips for extra chocolatey pockets (semi-sweet or dark, your preference)
For the Topping (Optional but Recommended)
- ¼ cup (65g) creamy peanut butter, melted for drizzling
- White chocolate drizzle (melt ½ cup white chocolate chips with 1 teaspoon coconut oil)
- Crushed peanuts for garnish (adds a nice crunch)
A few notes on ingredients: If you’re using natural peanut butter that’s been sitting in the fridge and has separated, give it a good stir before measuring. The oil separation can throw off the texture of the swirl. For the peanut butter cups, I like to freeze them for about 10 minutes before chopping—they break into cleaner pieces and don’t melt into the batter as much. And if you’re feeling fancy, you can use dark chocolate peanut butter cups for a more sophisticated flavor profile.
Equipment Needed
You don’t need a professional bakery setup for these brownies. Here’s what I use and what you can substitute if you’re improvising:
- Football-shaped brownie pan (9×13 inch works perfectly if you don’t have a football pan—just cut them into football shapes with a cookie cutter after baking)
- Large mixing bowl (glass or stainless steel—avoid plastic as it can absorb odors)
- Whisk (a hand mixer works too, but whisking by hand gives you more control over the texture)
- Rubber spatula (for folding in the peanut butter cups without overmixing)
- Parchment paper (non-negotiable if you want clean release from the pan)
- Small microwave-safe bowl (for melting the peanut butter drizzle)
- Cooling rack (prevents soggy bottoms—I learned this the hard way)
If you’re using a football pan for the first time, here’s a tip I picked up: grease it generously with butter or cooking spray, then dust it with cocoa powder instead of flour. The cocoa powder prevents white flour spots from showing on your finished brownies. It’s a small detail that makes them look bakery-quality.
Preparation Method
Alright, let’s get into the kitchen. Here’s the step-by-step process that’ll give you perfect football brownies every single time:
- Preheat and Prep: Preheat your oven to 350°F (175°C). Line your football pan (or 9×13 pan) with parchment paper, leaving some overhang on the sides for easy lifting. Grease the parchment lightly with butter or non-stick spray.
- Melt the Butter: In a large microwave-safe bowl, melt the butter in 30-second intervals, stirring between each, until fully melted. Let it cool for about 5 minutes—you don’t want it hot enough to cook the eggs when you add them.
- Mix Sugar and Butter: Add the granulated sugar to the melted butter and whisk vigorously for about 2 minutes. This step is crucial—it helps create that crackly top. The mixture should look glossy and slightly thickened.
- Add Eggs and Vanilla: Crack the eggs into the bowl one at a time, whisking well after each addition. Add the vanilla extract and whisk until everything is smooth and well combined. The batter should look thick and shiny at this point.
- Sift Dry Ingredients: In a separate bowl, sift together the cocoa powder, flour, salt, and baking powder. Sifting prevents lumps and ensures even distribution of the leavening agent. Add the dry ingredients to the wet mixture in two additions, folding gently with a rubber spatula until just combined. Do not overmix—stop as soon as you don’t see any more streaks of flour.
- Add the Peanut Butter Swirl: Drop spoonfuls of the ½ cup peanut butter over the batter. Use a knife or skewer to swirl it through the batter in a figure-eight motion. You want ribbons of peanut butter running through the brownies, not fully incorporated.
- Fold in the Peanut Butter Cups: Gently fold in the chopped peanut butter cups and chocolate chips (if using). Reserve about ¼ cup of the chopped cups to sprinkle on top before baking.
- Pour and Top: Pour the batter into your prepared pan and spread it evenly. Sprinkle the reserved chopped peanut butter cups on top. If you’re feeling extra, add a few whole mini peanut butter cups pressed gently into the surface.
- Bake: Bake for 25-30 minutes if using a football pan, or 30-35 minutes for a 9×13 pan. The brownies are done when a toothpick inserted into the center comes out with a few moist crumbs attached—not clean, not wet batter. This is the sweet spot for fudgy brownies.
- Cool Completely: Let the brownies cool in the pan on a wire rack for at least 30 minutes. Then lift them out using the parchment overhang and let them cool completely before cutting. This is the hardest part—I know you want to dig in immediately—but cutting warm brownies is a mess you don’t want to deal with.
- Drizzle and Decorate: Once completely cool, melt the remaining ¼ cup peanut butter in the microwave (20-second intervals, stirring between). Drizzle it over the brownies using a fork or a piping bag. If using white chocolate, melt it the same way and drizzle in thin lines across the brownies. Sprinkle crushed peanuts on top while the drizzle is still wet.
Cooking Tips & Techniques
After making these brownies more times than I can count, here are the things I wish someone had told me from the start:
The Egg Temperature Thing: I cannot stress this enough—use room temperature eggs. Cold eggs will cause the melted butter to seize up, giving you a greasy, separated batter. If you forgot to take them out of the fridge, place them in a bowl of warm water for 5 minutes before cracking.
The Toothpick Test: This is where most people go wrong. You want a few moist crumbs clinging to the toothpick, not a clean stick. Clean means overbaked. Wet batter means underbaked. The brownies will continue to cook from residual heat after you pull them out of the oven, so err on the side of slightly underdone.
My Biggest Failure: The first time I made these for a Super Bowl party, I used a dark metal pan and didn’t adjust the baking time. The edges were burnt and the center was raw. Lesson learned—dark pans absorb more heat, so reduce your oven temperature by 25°F if you’re using one. Light-colored metal or glass pans are more forgiving.
Multitasking Strategy: While the butter is melting, chop your peanut butter cups. While the brownies are baking, clean up your workspace and melt your drizzle ingredients. This way, you’re not scrambling when the brownies come out of the oven.
Consistency Tip: For the most even bake, rotate the pan halfway through the baking time. Ovens have hot spots, and this simple step prevents one side from getting too dark while the other side stays underdone.
Variations & Adaptations
One of the best things about this recipe is how adaptable it is. Here are some variations I’ve tried and loved:
Gluten-Free Version: Swap the all-purpose flour with a 1:1 gluten-free baking flour blend. I’ve used Bob’s Red Mill and King Arthur with great results. Add an extra tablespoon of cocoa powder to compensate for the different texture of gluten-free flour.
Peanut Butter Explosion: For the ultimate peanut butter lover, add a layer of peanut butter cookie dough on the bottom of the pan before pouring in the brownie batter. Press it into an even layer, then proceed with the recipe. The contrast between the cookie layer and the fudgy brownie is incredible.
Healthier-ish Option: Substitute half the butter with unsweetened applesauce and use coconut sugar instead of granulated sugar. The texture will be slightly less fudgy, but the flavor is still amazing. My sister-in-law swears by this version for her kids’ soccer games.
Seasonal Twist: For fall, add ½ teaspoon of cinnamon and a pinch of cayenne pepper to the dry ingredients. The warmth of the spices pairs beautifully with the chocolate and peanut butter. For summer, fold in fresh raspberries along with the peanut butter cups—the tartness cuts through the richness perfectly.
Nut-Free Alternative: Use sunflower seed butter instead of peanut butter and skip the peanut butter cups. Replace them with chopped chocolate bars or caramel candies. The flavor profile changes, but it’s still delicious and safe for nut-free environments.
Serving & Storage Suggestions
These brownies are best served at room temperature, but I’ve been known to sneak one straight from the fridge when nobody’s looking. Here’s how to make the most of them:
Serving Temperature: Let the brownies sit at room temperature for about 15 minutes before serving. This softens the chocolate and peanut butter just enough to make them perfectly gooey. If you’re serving them warm, pop individual brownies in the microwave for 10-15 seconds—just enough to melt the drizzle slightly.
Presentation Ideas: Arrange the football-shaped brownies on a platter lined with green tissue paper or a green napkin to look like a football field. Add small flags made from toothpicks and paper triangles for a fun game day touch. If you’re serving them at a party, place them on a bed of crushed graham crackers to look like grass.
Storage: Store the brownies in an airtight container at room temperature for up to 5 days. Layer them between sheets of parchment paper to prevent sticking. Do not refrigerate them—the cold will dry them out and make the texture dense.
Freezer Instructions: These freeze beautifully. Wrap individual brownies tightly in plastic wrap, then place them in a freezer-safe bag or container. They’ll keep for up to 3 months. To thaw, leave them at room temperature for about 30 minutes, or microwave for 15-20 seconds for that fresh-from-the-oven taste.
Flavor Development: Here’s a little secret—these brownies actually taste better the next day. The flavors meld together overnight, and the texture becomes even more fudgy. If you can resist eating them all on day one, you’re in for a treat on day two.
Nutritional Information & Benefits
I’m not a nutritionist, but I’ve crunched the numbers based on the standard recipe. Per brownie (assuming 16 servings):
- Calories: Approximately 380-420
- Fat: 22g (12g saturated)
- Carbohydrates: 45g
- Protein: 8g
- Sugar: 32g
- Fiber: 3g
While these aren’t health food, there are some redeeming qualities. The peanuts in the peanut butter provide protein and healthy monounsaturated fats. Dark cocoa powder is rich in antioxidants called flavonoids, which can support heart health. And the eggs add a good dose of protein and B vitamins.
If you’re watching your sugar intake, you can reduce the sugar to 1½ cups without sacrificing too much texture. The brownies will be slightly less sweet and won’t have quite as crackly a top, but they’ll still be delicious. For a lower-fat option, substitute half the butter with Greek yogurt—just know the texture will be more cake-like than fudgy.
Allergen note: This recipe contains dairy, eggs, wheat, and peanuts. For a nut-free version, see the variations section above.
Frequently Asked Questions
Can I use natural peanut butter in the swirl?
Yes, but you’ll need to stir it really well first. Natural peanut butter tends to separate, and if you use the oily top layer without mixing, the swirl won’t hold its shape. I recommend using a processed peanut butter like Skippy or Jif for the most consistent results.
How do I prevent my brownies from being too cakey?
The key is not overmixing the batter and pulling them out of the oven at the right time. Mix until the flour is just incorporated, and use the toothpick test I mentioned earlier. If you want extra insurance, reduce the flour by 2 tablespoons and add an extra egg yolk.
Can I make these in advance for a party?
Absolutely! These are actually better made a day ahead. Bake them, let them cool completely, and store them in an airtight container at room temperature. Add the drizzle and decorations just before serving for the freshest look.
What if I don’t have a football-shaped pan?
No problem at all. Bake the brownies in a regular 9×13 pan, let them cool completely, and use a football-shaped cookie cutter to cut out shapes. You’ll have some scraps left over, but those are perfect for snacking (or crumbling over ice cream).
How do I get clean cuts without the brownies crumbling?
Use a sharp knife and wipe it clean between each cut. For the cleanest edges, chill the brownies in the refrigerator for about 30 minutes before cutting. Use a sawing motion rather than pressing straight down through the brownies.
Conclusion
These Ultimate Chocolate Peanut Butter Football Brownies have become a staple in my kitchen for good reason. They’re the kind of recipe that makes you look like a hero without spending hours in the kitchen. The combination of fudgy chocolate, creamy peanut butter, and those little pockets of melted peanut butter cups is just unbeatable—especially when they’re shaped like footballs for game day.
I love that this recipe is forgiving enough for beginners but impressive enough for seasoned bakers. You can dress them up with drizzles and toppings, or keep them simple for a weeknight treat. Either way, they’re going to disappear fast.
If you make these, I’d love to hear how they turn out. Drop a comment below and let me know if you stuck with the classic version or tried one of the variations. And if you’re looking for more game day inspiration, you might enjoy these perfect pink champagne jello shots or this decadent red wine chocolate cake for your next party spread. Happy baking, and go team!
Pin This Recipe!
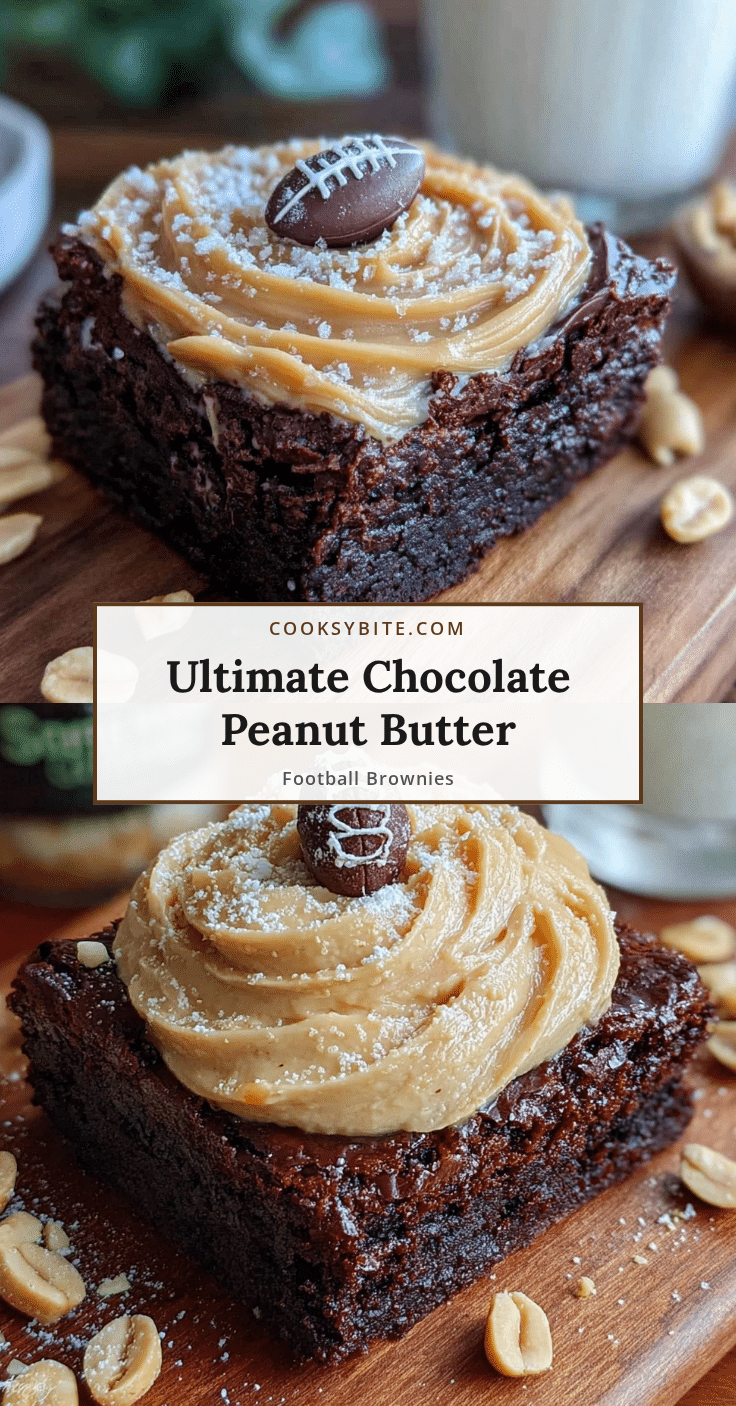
Ultimate Chocolate Peanut Butter Football Brownies
Fudgy chocolate brownies packed with peanut butter cups and swirled with creamy peanut butter, baked into a football shape for the perfect game day treat. These easy brownies come together in under an hour and are guaranteed to be a touchdown at any party.
- Prep Time: 15 minutes
- Cook Time: 30 minutes
- Total Time: 45 minutes
- Yield: 16 servings 1x
- Category: Dessert
- Cuisine: American
Ingredients
- 1 cup (226g) unsalted butter, melted and slightly cooled
- 2 cups (400g) granulated sugar
- 4 large eggs, room temperature
- 1 tablespoon vanilla extract
- ¾ cup (90g) unsweetened cocoa powder
- 1 cup (125g) all-purpose flour
- ½ teaspoon salt
- ½ teaspoon baking powder
- ½ cup (130g) creamy peanut butter
- 1 cup (about 12-15) mini peanut butter cups, roughly chopped
- ¼ cup chocolate chips (optional)
- ¼ cup (65g) creamy peanut butter, melted for drizzling (optional)
- ½ cup white chocolate chips (optional, for drizzle)
- 1 teaspoon coconut oil (optional, for white chocolate drizzle)
- Crushed peanuts for garnish (optional)
Instructions
- Preheat your oven to 350°F (175°C). Line your football pan (or 9×13 pan) with parchment paper, leaving some overhang on the sides for easy lifting. Grease the parchment lightly with butter or non-stick spray.
- In a large microwave-safe bowl, melt the butter in 30-second intervals, stirring between each, until fully melted. Let it cool for about 5 minutes.
- Add the granulated sugar to the melted butter and whisk vigorously for about 2 minutes until glossy and slightly thickened.
- Crack the eggs into the bowl one at a time, whisking well after each addition. Add the vanilla extract and whisk until smooth and well combined.
- In a separate bowl, sift together the cocoa powder, flour, salt, and baking powder. Add the dry ingredients to the wet mixture in two additions, folding gently with a rubber spatula until just combined. Do not overmix.
- Drop spoonfuls of the ½ cup peanut butter over the batter. Use a knife or skewer to swirl it through the batter in a figure-eight motion.
- Gently fold in the chopped peanut butter cups and chocolate chips (if using). Reserve about ¼ cup of the chopped cups to sprinkle on top before baking.
- Pour the batter into your prepared pan and spread it evenly. Sprinkle the reserved chopped peanut butter cups on top.
- Bake for 25-30 minutes if using a football pan, or 30-35 minutes for a 9×13 pan. The brownies are done when a toothpick inserted into the center comes out with a few moist crumbs attached.
- Let the brownies cool in the pan on a wire rack for at least 30 minutes. Then lift them out using the parchment overhang and let them cool completely before cutting.
- Once completely cool, melt the remaining ¼ cup peanut butter in the microwave (20-second intervals, stirring between). Drizzle it over the brownies using a fork or a piping bag. If using white chocolate, melt it the same way with coconut oil and drizzle in thin lines across the brownies. Sprinkle crushed peanuts on top while the drizzle is still wet.
Notes
Use room temperature eggs to prevent the melted butter from seizing. For the most even bake, rotate the pan halfway through baking. Dark metal pans absorb more heat, so reduce oven temperature by 25°F if using one. These brownies taste even better the next day as flavors meld together. Store in an airtight container at room temperature for up to 5 days. Freeze individual brownies wrapped in plastic wrap for up to 3 months.
Nutrition
- Serving Size: 1 brownie
- Calories: 400
- Sugar: 32
- Sodium: 200
- Fat: 22
- Saturated Fat: 12
- Carbohydrates: 45
- Fiber: 3
- Protein: 8
Keywords: football brownies, chocolate peanut butter brownies, game day dessert, fudgy brownies, peanut butter cup brownies, football shaped brownies, easy brownie recipe


