By the fourth batch in as many days, I finally stopped trying to fix them. The first batch came out too flat. The second? I over-browned the butter and got a bitter edge that lingered in a weird way. Batch three was closer—soft, tender, with that faint nuttiness I was chasing—but the pumpkin flavor had all but disappeared. It was batch four, made at 11 p.m. on a Tuesday with a sink full of dishes and no one to impress, where I finally let the cookie be what it wanted. And honestly? That was the one. The edges were slightly crisp, the centers were pillowy, and the combination of brown butter and pumpkin and cinnamon-sugar was so good I ate three standing over the counter. These Brown Butter Pumpkin Snickerdoodle Cookies aren’t a recipe I perfected in one go. They’re a recipe I wore out through repetition—and I’m not sorry about it.
There’s something about the way brown butter changes a cookie. It adds a depth that regular butter just can’t touch, a toasty richness that makes you slow down and actually taste what you’re eating. And when you pair that with pumpkin puree and a heavy roll in cinnamon sugar? You get a cookie that feels like fall in a way that’s honest and unpretentious. Not fancy. Just really, really good.
I kept coming back to this cookie because it solved a problem I didn’t know I had: how to make a pumpkin cookie that actually tastes like pumpkin and butter and spice, without any one flavor dominating. The brown butter gives it a savory edge. The pumpkin keeps it moist. And the snickerdoodle treatment—that classic cinnamon-sugar coating—adds a little crunch and a lot of nostalgia. It’s a cookie that knows exactly what it is, and what it is, is worth making again and again.
Why You’ll Love This Recipe
- Rich, nutty flavor from brown butter – Browning the butter is a small extra step that makes a huge difference. It adds a toasty, caramel-like depth that elevates these cookies way beyond a standard snickerdoodle.
- Soft and tender texture – The pumpkin puree keeps these cookies incredibly moist and pillowy, almost like a soft-baked bakery cookie. They stay that way for days, too.
- Perfect balance of fall spices – Cinnamon is the star, but there’s a subtle warmth from nutmeg and cloves that makes every bite taste like autumn. It’s not overwhelming—just right.
- No stand mixer required – You can mix the dough by hand with a whisk and a spatula. Less cleanup, more cookies. That’s a win in my book.
- Crowd-pleasing and easy to share – I brought a batch to a friend’s pumpkin carving party and they disappeared in under twenty minutes. Kids, adults, everyone went back for seconds.
- Made with simple, everyday ingredients – Nothing fancy here. Butter, sugar, pumpkin, flour, eggs, and spices. You probably already have most of it in your pantry.
What Ingredients You Will Need
This recipe relies on a short list of pantry staples, but a few key ingredients do the heavy lifting. Let’s talk about what you’ll need and why each one matters.
- Unsalted butter – 1 cup (2 sticks), cut into tablespoons. Browning butter concentrates its flavor and removes some water content, so using unsalted gives you full control over the salt level. I prefer Kerrygold for its richer taste, but any good-quality unsalted butter works.
- Light brown sugar – 1 cup, packed. Brown sugar adds moisture and a subtle molasses flavor that pairs beautifully with brown butter and pumpkin. Dark brown sugar works too, but it will make the cookies slightly darker and more caramel-like.
- Granulated sugar – ½ cup for the dough, plus ⅓ cup for rolling. The granulated sugar in the dough helps with spreading and structure, while the sugar coating creates that signature snickerdoodle crunch.
- Pumpkin puree – ½ cup. Make sure you’re using 100% pure pumpkin puree, not pumpkin pie filling. The filling has added sugar and spices that will throw off the balance. I like Libby’s for consistent texture, but store brands work fine too.
- Large egg – 1, at room temperature. A room-temperature egg mixes more evenly into the butter-sugar mixture, creating a smoother dough.
- Vanilla extract – 1 teaspoon. Pure vanilla extract adds warmth and rounds out the flavors. Imitation vanilla works in a pinch, but the real stuff makes a noticeable difference here.
- All-purpose flour – 2 cups, spooned and leveled. Spooning the flour into your measuring cup and leveling it off with a knife prevents packing, which can lead to dry cookies. If you scoop directly from the bag, you might end up with too much flour.
- Baking soda – 1 teaspoon. This helps the cookies spread and rise slightly, giving them that soft, tender crumb.
- Baking powder – ½ teaspoon. Adds a little extra lift and helps the cookies stay puffy in the center.
- Salt – ½ teaspoon. Salt enhances all the flavors and balances the sweetness. Don’t skip it.
- Cinnamon – 1½ teaspoons in the dough, plus 1 tablespoon for the coating. Cinnamon is the backbone of a snickerdoodle, so use a fresh, high-quality one. I really like McCormick or Simply Organic.
- Nutmeg – ½ teaspoon, freshly grated if possible. Nutmeg adds warmth and complexity. Pre-ground works fine, but freshly grated has a brighter, more aromatic flavor.
- Cloves – ¼ teaspoon, ground. Just a pinch. Cloves are potent, but they add that deep, almost spicy note that makes these cookies taste like fall.
Equipment Needed
- Medium saucepan – For browning the butter. A light-colored pan helps you see the color change as the butter browns.
- Large mixing bowl – For combining wet and dry ingredients.
- Medium mixing bowl – For whisking together the dry ingredients.
- Whisk – For mixing the dry ingredients and the brown butter mixture.
- Rubber spatula or wooden spoon – For folding the dry ingredients into the wet.
- Measuring cups and spoons – Accurate measurements are key for consistent results.
- Baking sheets – Two standard half-sheet pans work well. If you only have one, let it cool completely between batches.
- Parchment paper or silicone baking mat – Prevents sticking and makes cleanup effortless.
- Cooling rack – For cooling the cookies evenly after baking.
- Small shallow bowl – For the cinnamon-sugar coating.
- Cookie scoop (about 1.5 tablespoons) – Not essential, but it helps you get evenly sized cookies. I use a #40 scoop.
If you don’t have a cookie scoop, you can use two spoons to portion the dough. And if you don’t have a cooling rack, a clean cutting board works in a pinch—just flip the cookies after a minute or two so they don’t steam.
Preparation Method
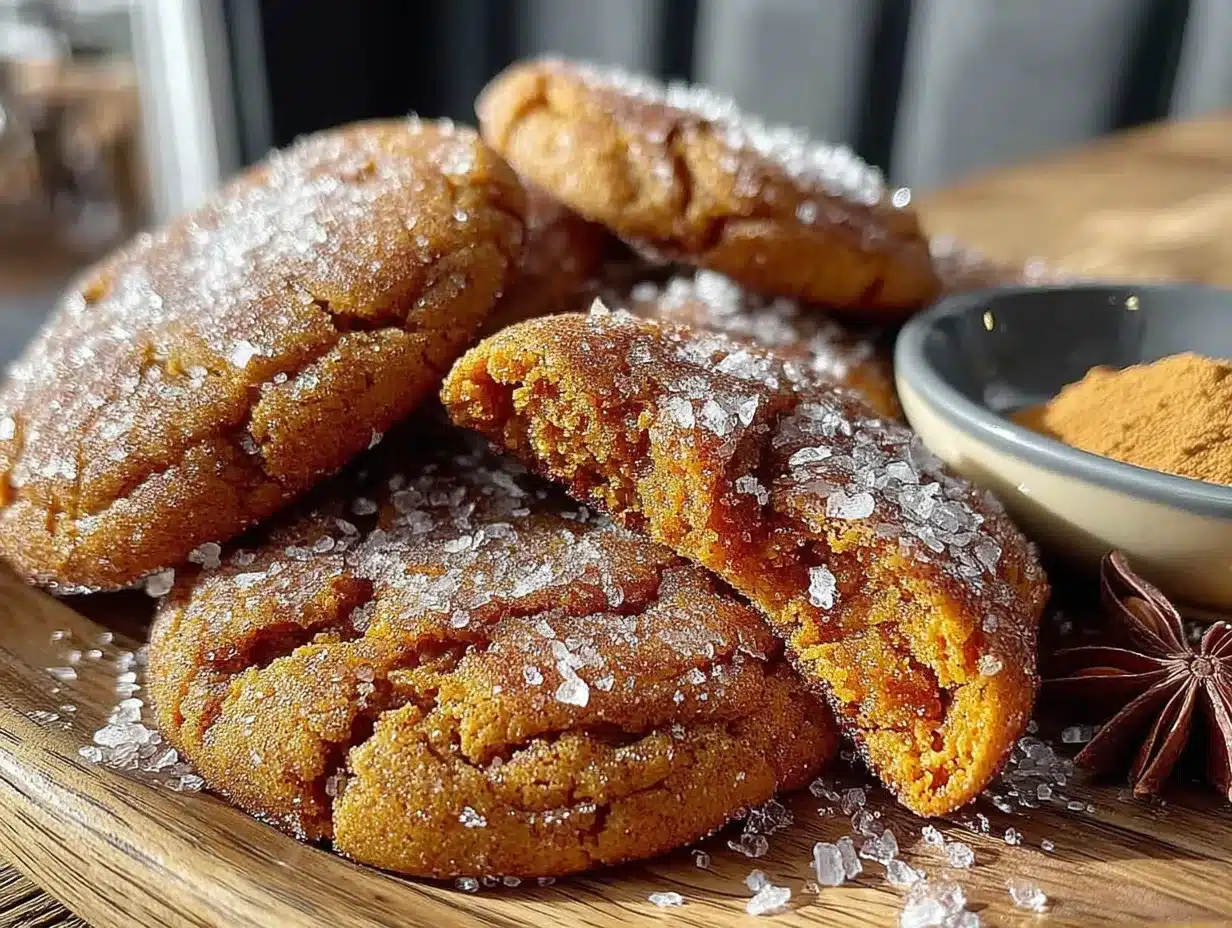
- Brown the butter. Place the cubed butter in a medium saucepan over medium heat. Stir frequently with a rubber spatula or wooden spoon as the butter melts. It will foam up, then subside, and you’ll start to see brown specks forming at the bottom of the pan. Keep stirring. Once the butter turns a deep amber color and smells nutty and toasty—about 5 to 7 minutes—remove it from the heat immediately. Pour it into a large mixing bowl to stop the cooking process. Let it cool for 10 to 15 minutes. It should be warm but not hot when you add the sugars.
- Mix the wet ingredients. Add the brown sugar and ½ cup granulated sugar to the bowl with the browned butter. Whisk vigorously for about 1 minute until the mixture looks smooth and slightly thickened. Add the pumpkin puree, egg, and vanilla extract. Whisk again until fully combined and glossy. The mixture might look a little separated at first—keep whisking, it will come together.
- Combine the dry ingredients. In a medium bowl, whisk together the flour, baking soda, baking powder, salt, 1½ teaspoons cinnamon, nutmeg, and cloves. Make sure there are no clumps. This step is important for even distribution of the leaveners and spices.
- Fold the dry into the wet. Add the dry ingredients to the wet mixture in two additions, folding gently with a rubber spatula after each. Mix just until no streaks of flour remain. Overmixing will develop the gluten and make the cookies tough. The dough will be soft and slightly sticky—this is normal.
- Chill the dough. Cover the bowl with plastic wrap and refrigerate for at least 30 minutes, or up to 24 hours. Chilling is non-negotiable here. It firms up the butter, prevents excessive spreading, and allows the flavors to meld. If you skip this step, your cookies will spread into flat, greasy puddles. Trust me, I learned that the hard way with batch one.
- Preheat and prepare. About 10 minutes before you’re ready to bake, preheat your oven to 350°F (175°C). Line two baking sheets with parchment paper or silicone mats.
- Make the cinnamon-sugar coating. In a small shallow bowl, whisk together the remaining ⅓ cup granulated sugar and 1 tablespoon cinnamon.
- Shape and coat the cookies. Using a 1.5-tablespoon cookie scoop or two spoons, portion the chilled dough into balls. Roll each ball between your palms until smooth, then drop it into the cinnamon-sugar mixture. Roll it around to coat evenly, then place it on the prepared baking sheet. Space the dough balls about 2 inches apart—they spread a little, but not excessively.
- Bake. Bake one sheet at a time for 10 to 12 minutes. The cookies should look puffed and set around the edges but still soft and slightly underdone in the center. They will continue to set as they cool. For softer, chewier cookies, pull them at 10 minutes. For slightly crisper edges, go to 12.
- Cool. Let the cookies rest on the baking sheet for 5 minutes. This allows them to firm up enough to transfer without breaking. Then move them to a cooling rack to cool completely. If you try to move them too early, they’ll fall apart. Patience, my friend.
Cooking Tips & Techniques
Don’t walk away from the browning butter. I know it seems like you can multitask, but butter goes from perfectly browned to burnt in about 30 seconds. Stay at the stove, keep stirring, and watch for that amber color and nutty aroma. If you see black specks forming, you’ve gone too far—start over.
Use room-temperature ingredients. The egg and pumpkin puree should be at room temperature so they blend smoothly into the brown butter mixture. Cold ingredients can cause the butter to seize up, leaving you with a lumpy dough. If you forget to take the egg out ahead of time, place it in a bowl of warm water for 5 minutes.
Measure your flour correctly. This is the most common mistake in cookie baking. Spoon the flour into your measuring cup and level it off with a knife. Scooping directly from the bag packs the flour and can add up to 25% more than the recipe calls for, leading to dry, crumbly cookies.
Chill the dough—really. I cannot stress this enough. The first time I made these, I was impatient and baked them right after mixing. They spread into thin, greasy discs that looked nothing like snickerdoodles. Chilling solidifies the brown butter and gives the flour time to hydrate, resulting in thicker, softer cookies with better structure.
Rotate the baking sheet halfway through. Ovens have hot spots. Halfway through baking, quickly rotate the sheet 180 degrees to ensure even browning. Your cookies will thank you.
Underbake slightly for the best texture. Pull the cookies when the centers still look a little soft and puffy. They will continue to bake on the hot sheet as they cool. If you wait until they look fully done in the oven, they’ll be overbaked and dry by the time they cool.
Variations & Adaptations
Gluten-free version: Substitute the all-purpose flour with a 1:1 gluten-free baking flour blend that contains xanthan gum. I’ve tested this with King Arthur Measure for Measure and the results were excellent—slightly more delicate, but still soft and delicious.
Dairy-free option: Use a high-quality vegan butter stick (like Miyoko’s or Earth Balance) in place of the unsalted butter. Brown it the same way—it works surprisingly well and still develops a nutty flavor.
Spice it up: Add ¼ teaspoon of cardamom or ginger to the dough for an extra layer of warmth. Cardamom pairs beautifully with pumpkin and cinnamon, while ginger adds a little zing.
Make it a sandwich cookie: Once the cookies are cool, spread a thin layer of cream cheese frosting or maple buttercream on the flat side of one cookie and top with another. It’s indulgent, but absolutely worth it for a special occasion.
Pumpkin seed crunch: Before baking, press a few pepitas (pumpkin seeds) into the top of each coated dough ball. They add a nice crunch and make the cookies look prettier, too.
My favorite variation: I once swapped ¼ cup of the all-purpose flour with oat flour and added ½ cup of white chocolate chips. The oat flour gave the cookies a slightly chewier texture, and the white chocolate added little pockets of sweetness that worked perfectly with the brown butter and pumpkin. I’ve made that version at least five times since.
Serving & Storage Suggestions
These cookies are best served slightly warm, when the edges are still a little crisp and the center is soft and tender. Let them cool on the baking sheet for 5 minutes, then transfer to a cooling rack. If you can wait that long, give them another 5 minutes on the rack before digging in. The texture really shines at room temperature, too.
They’re wonderful on their own, but I love serving them with a glass of cold milk or a warm mug of chai tea. For a more decadent dessert, sandwich two cookies with a scoop of vanilla bean ice cream and roll the edges in extra cinnamon sugar. It’s messy and glorious.
If you’re planning a fall gathering, these cookies pair beautifully with other seasonal treats. Consider adding them to a dessert spread alongside a decadent red wine chocolate cake with berries for a sophisticated finish, or keep things playful with a batch of perfect pink champagne jello shots for the adults.
Storage: Keep the cookies in an airtight container at room temperature for up to 5 days. To maintain their soft texture, add a slice of plain bread to the container—it absorbs excess air and releases moisture, keeping the cookies tender. Replace the bread slice every other day.
Freezing: You can freeze the baked cookies for up to 3 months. Layer them between sheets of parchment paper in a freezer-safe container. Thaw at room temperature for about 30 minutes before serving. For longer storage, freeze the unbaked dough balls after rolling them in the cinnamon-sugar coating. Place them on a baking sheet and freeze until solid, then transfer to a freezer bag. Bake directly from frozen, adding 2 to 3 minutes to the baking time.
Flavor development: Honestly, these cookies taste even better on day two. The brown butter flavor deepens, the pumpkin mellows, and the spices settle into a perfect balance. If you can resist eating them all the first day, you’re in for a treat.
Nutritional Information & Benefits
Per cookie (based on 24 cookies):
- Calories: 165
- Fat: 8g
- Saturated Fat: 5g
- Carbohydrates: 22g
- Sugar: 14g
- Fiber: 1g
- Protein: 2g
- Sodium: 95mg
These cookies are a treat, no doubt about it, but there are a few redeeming qualities worth mentioning. Pumpkin puree is rich in vitamin A and fiber, which supports eye health and digestion. The cinnamon in the coating has anti-inflammatory properties and may help regulate blood sugar levels. And while brown butter isn’t exactly a health food, using it means you get maximum flavor from a relatively small amount—so you feel satisfied with one or two cookies instead of a whole batch.
If you’re looking for a lighter option, you can reduce the sugar in the coating by half and still get plenty of flavor. For a lower-carb version, substitute the all-purpose flour with almond flour and use a sugar substitute like monk fruit in the dough. The texture will be denser, but the taste is still wonderful.
Note: Nutritional values are estimates and may vary based on ingredient brands and portion sizes.
Conclusion
These Brown Butter Pumpkin Snickerdoodle Cookies are the kind of recipe that makes you want to bake just for the joy of it. The brown butter adds a nutty depth that feels sophisticated without being fussy, the pumpkin keeps everything soft and tender, and that cinnamon-sugar coating gives you the perfect little crunch with every bite. They’re cozy, they’re comforting, and they taste like everything good about fall.
I love how forgiving this recipe is once you get the basics right. You can play with the spices, swap in different flours, or add mix-ins like chocolate chips or dried cranberries. It’s a cookie that welcomes experimentation, and I hope you’ll make it your own.
If you try these cookies, I’d love to hear how they turned out. Leave a comment below, tag me in your photos, or share your favorite variation. And if you’re looking for more seasonal baking inspiration, don’t miss our delicious cherry chocolate brownies or these mini lemon blueberry cheesecakes for another crowd-pleasing dessert. Happy baking, friends!
Frequently Asked Questions
Can I use pumpkin pie filling instead of pumpkin puree?
No, please don’t. Pumpkin pie filling is pre-sweetened and spiced, which will throw off the sugar and spice balance in this recipe. Stick with 100% pure pumpkin puree for the best results. If you only have pumpkin pie filling on hand, you’d need to adjust the sugar and spices significantly—honestly, it’s easier to just buy the right thing.
Why did my cookies spread too much?
This usually happens for one of three reasons: the dough wasn’t chilled long enough, the butter was too warm when you mixed it, or the flour was under-measured. Make sure you chill the dough for at least 30 minutes (longer is better), let the browned butter cool before adding the sugars, and spoon-and-level your flour for accuracy.
Can I make the dough ahead of time?
Absolutely. The dough can be refrigerated for up to 24 hours before baking. In fact, the flavor improves with time as the spices meld and the brown butter deepens. You can also freeze the shaped, coated dough balls for up to 3 months and bake them directly from frozen—just add 2 to 3 minutes to the baking time.
How do I know when the butter is properly browned?
Look for a deep amber color and a nutty, toasty aroma. The butter will foam up as it melts, then the foam will subside, and you’ll see brown specks forming at the bottom of the pan. That’s the milk solids toasting. Keep stirring the whole time and remove the pan from heat as soon as the color turns amber. It happens fast, so don’t walk away.
Can I use salted butter instead of unsalted?
You can, but reduce the added salt in the recipe to ¼ teaspoon. Salted butter can vary widely in salt content between brands, so it’s harder to control the final flavor. I recommend unsalted for consistency, but if salted is all you have, it’ll still work—just adjust the salt accordingly.
Pin This Recipe!
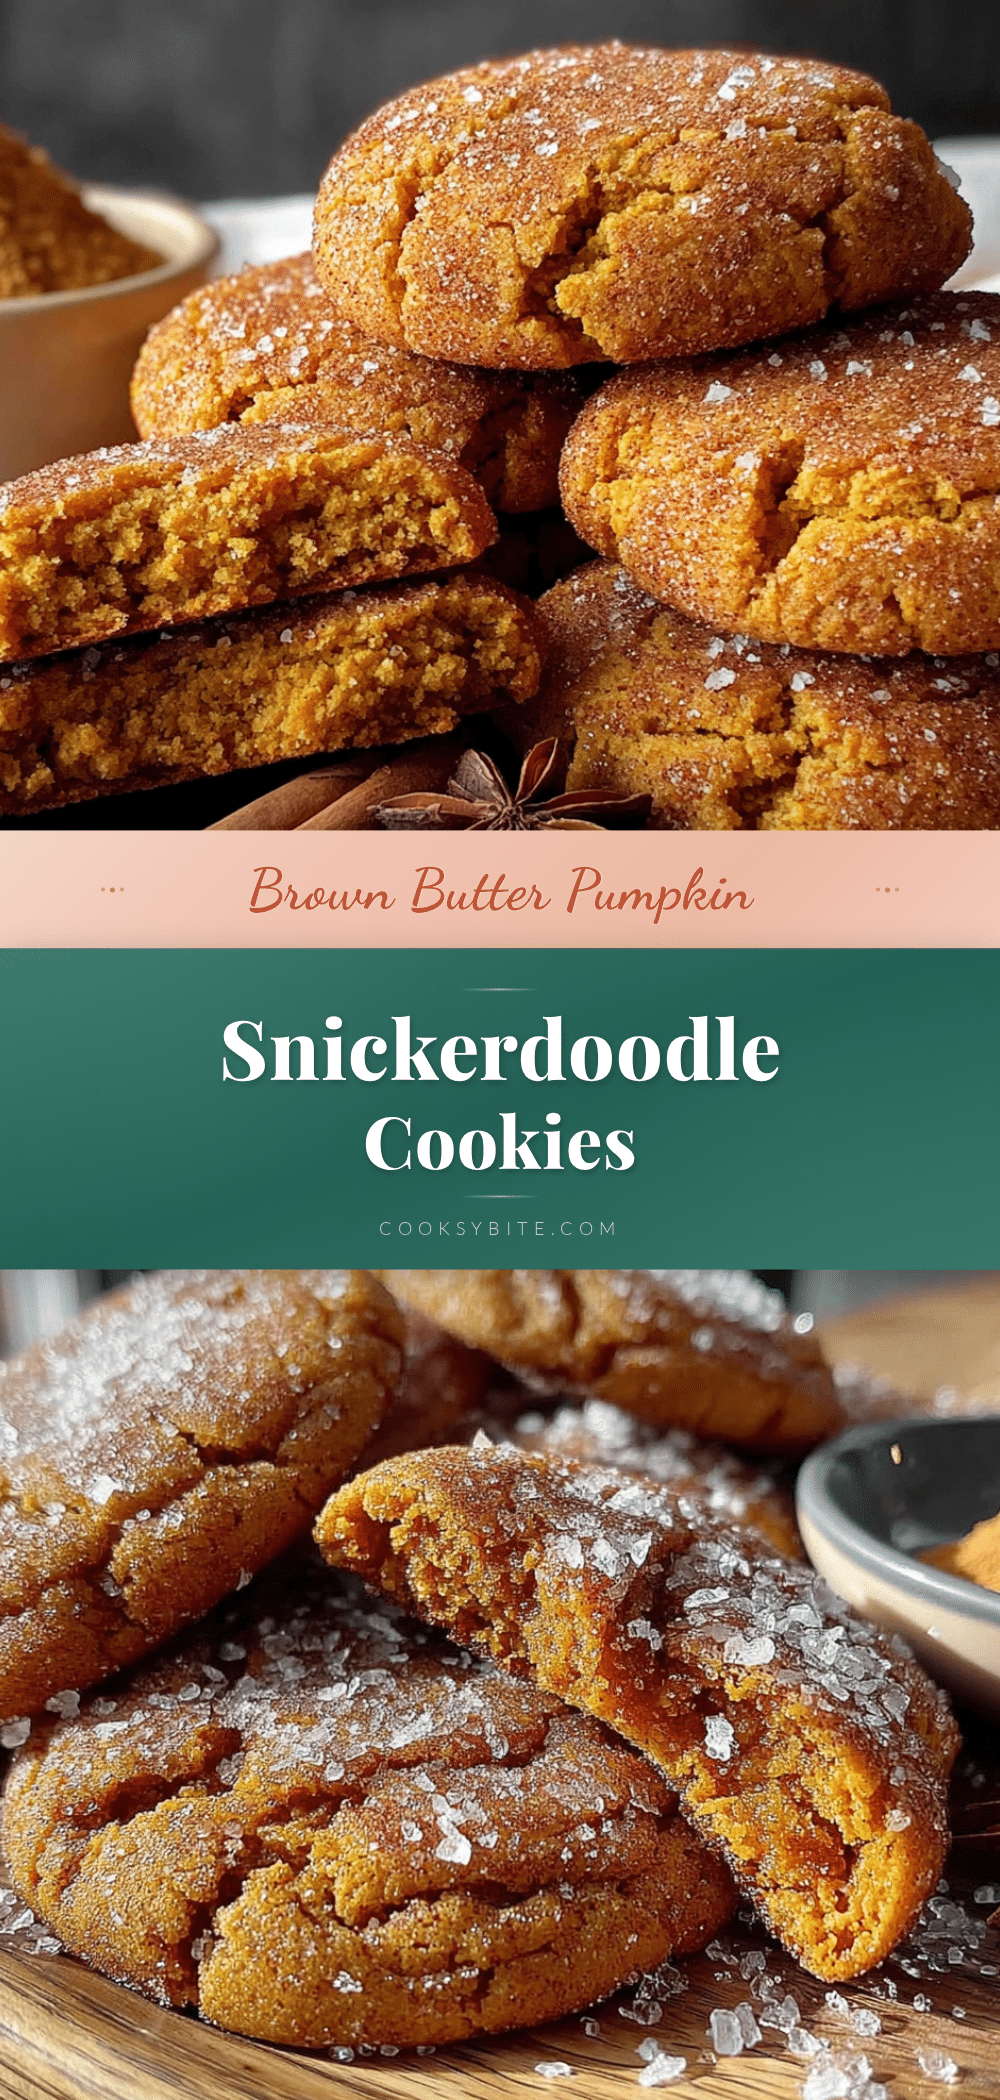
Brown Butter Pumpkin Snickerdoodle Cookies
These Brown Butter Pumpkin Snickerdoodle Cookies combine nutty brown butter, moist pumpkin puree, and a classic cinnamon-sugar coating for a soft, tender cookie that tastes like fall. Perfectly balanced with warm spices, they’re easy to make and even better on day two.
- Prep Time: 15 minutes
- Cook Time: 12 minutes
- Total Time: 1 hour 2 minutes (including 30 minutes chilling)
- Yield: 24 cookies 1x
- Category: Dessert
- Cuisine: American
Ingredients
- 1 cup (2 sticks) unsalted butter, cut into tablespoons
- 1 cup packed light brown sugar
- ½ cup granulated sugar (for dough)
- ⅓ cup granulated sugar (for coating)
- ½ cup 100% pure pumpkin puree
- 1 large egg, at room temperature
- 1 teaspoon vanilla extract
- 2 cups all-purpose flour, spooned and leveled
- 1 teaspoon baking soda
- ½ teaspoon baking powder
- ½ teaspoon salt
- 1½ teaspoons ground cinnamon (for dough)
- 1 tablespoon ground cinnamon (for coating)
- ½ teaspoon ground nutmeg (freshly grated if possible)
- ¼ teaspoon ground cloves
Instructions
- Brown the butter: Place cubed butter in a medium saucepan over medium heat. Stir frequently until butter melts, foams, and turns a deep amber color with a nutty aroma (about 5-7 minutes). Immediately pour into a large mixing bowl to stop cooking. Let cool for 10-15 minutes until warm but not hot.
- Mix the wet ingredients: Add brown sugar and ½ cup granulated sugar to the browned butter. Whisk vigorously for 1 minute until smooth and thickened. Add pumpkin puree, egg, and vanilla extract. Whisk until fully combined and glossy.
- Combine the dry ingredients: In a medium bowl, whisk together flour, baking soda, baking powder, salt, 1½ teaspoons cinnamon, nutmeg, and cloves until no clumps remain.
- Fold dry into wet: Add dry ingredients to wet mixture in two additions, folding gently with a rubber spatula until just combined. Do not overmix. Dough will be soft and slightly sticky.
- Chill the dough: Cover bowl with plastic wrap and refrigerate for at least 30 minutes, or up to 24 hours.
- Preheat and prepare: About 10 minutes before baking, preheat oven to 350°F (175°C). Line two baking sheets with parchment paper or silicone mats.
- Make cinnamon-sugar coating: In a small shallow bowl, whisk together remaining ⅓ cup granulated sugar and 1 tablespoon cinnamon.
- Shape and coat cookies: Using a 1.5-tablespoon cookie scoop or two spoons, portion chilled dough into balls. Roll each ball smooth, then coat in cinnamon-sugar mixture. Place on prepared baking sheets, spacing 2 inches apart.
- Bake: Bake one sheet at a time for 10-12 minutes. Cookies should look puffed and set around edges but soft in center. For softer cookies, bake 10 minutes; for crisper edges, bake 12 minutes.
- Cool: Let cookies rest on baking sheet for 5 minutes, then transfer to a cooling rack to cool completely.
Notes
Chilling the dough is essential to prevent spreading. Brown butter can burn quickly; watch carefully. For best texture, slightly underbake cookies. Cookies taste even better on day two. Store in an airtight container at room temperature for up to 5 days; add a slice of bread to maintain softness. Freeze baked cookies for up to 3 months or unbaked dough balls for up to 3 months (bake from frozen, adding 2-3 minutes).
Nutrition
- Serving Size: 1 cookie
- Calories: 165
- Sugar: 14
- Sodium: 95
- Fat: 8
- Saturated Fat: 5
- Carbohydrates: 22
- Fiber: 1
- Protein: 2
Keywords: brown butter, pumpkin, snickerdoodle, cookies, fall, cinnamon sugar, easy, no mixer


