I ruined a batch of these brownies the first time I made them. Not a little burnt around the edges—like, completely inedible, hockey-puck-level disaster. I was so focused on making them look “Halloween-y” that I forgot black cocoa powder behaves nothing like regular cocoa powder, and my batter turned into this weird, dusty paste that refused to come together. I sat there staring at this failed pan of what was supposed to be my signature Halloween dessert, and honestly, I almost gave up. But something about the deep, dark color—even in its failed state—felt like it had potential. So I went back to the drawing board, adjusted the fat and liquid ratios, and the second batch? That one worked. The third batch was even better. And now, this recipe for the Best Black Cocoa Halloween Brownies with Orange Frosting is the one I bring to every fall gathering, every costume party, every year. It took a few failures to get here, but that’s exactly why I trust it so much.
Why You’ll Love This Recipe
These aren’t just brownies with food coloring slapped on top. The black cocoa powder gives them that dramatic, midnight-dark crumb that looks like it came from a professional bakery, while the orange frosting adds a bright, citrusy punch that cuts through the richness. Here’s why this recipe stands out:
- Quick & Easy: From start to finish, you’re looking at about 45 minutes. No complicated techniques, no fancy equipment—just straightforward baking that works.
- Simple Ingredients: You probably already have most of these in your pantry. The only specialty item is black cocoa powder, and I’ll tell you where to find it.
- Perfect for Halloween: These brownies are basically made for costume parties, trick-or-treat gatherings, or any spooky-themed event. They look impressive without requiring any artistic skill.
- Crowd-Pleaser: I’ve brought these to three different Halloween parties now, and every single time, someone asks for the recipe. Kids love the color; adults love the flavor.
- Unbelievably Delicious: The black cocoa gives these brownies a deep, almost Oreo-like flavor that regular cocoa just can’t match. Paired with that bright orange frosting, it’s a combo that makes you close your eyes after the first bite.
What makes this recipe different from every other Halloween brownie out there is the balance. Most black cocoa recipes end up dry or bland because the cocoa is so alkaline. I’ve tested the ratios to keep these fudgy, moist, and intensely chocolatey without being bitter. And that frosting? It’s not too sweet, not too tart—it’s just right.
What Ingredients You Will Need
This recipe uses simple, wholesome ingredients to deliver that dramatic black color and rich flavor without any artificial nonsense. Most of these are pantry staples, so you might only need to pick up the black cocoa powder.
- For the Brownies:
- 1/2 cup unsalted butter, melted (use good quality—it matters for flavor)
- 1 cup granulated sugar
- 2 large eggs, room temperature (cold eggs will seize the batter)
- 1 teaspoon vanilla extract
- 1/2 cup black cocoa powder (I recommend Rodelle or King Arthur Flour brands)
- 1/4 cup all-purpose flour
- 1/4 teaspoon salt
- 1/4 cup semi-sweet chocolate chips, melted (optional but recommended for extra fudginess)
- For the Orange Frosting:
- 1/2 cup unsalted butter, softened
- 2 cups powdered sugar, sifted
- 2 tablespoons fresh orange juice (from about 1 medium orange)
- 1 teaspoon orange zest
- 1/4 teaspoon vanilla extract
- Pinch of salt
- Orange gel food coloring (optional, for that vibrant Halloween look)
- For Decoration (optional):
- Black sprinkles or orange jimmies
- Candy eyeballs
- Mini chocolate chips
A quick note on black cocoa powder: it’s not the same as regular Dutch-processed cocoa. It’s been heavily alkalized, which gives it that jet-black color and a milder, more mellow chocolate flavor. You can find it at specialty baking stores or online. If you can’t find it, you can substitute with Dutch-processed cocoa, but the color won’t be as dramatic—they’ll be dark brown instead of black.
Equipment Needed
Nothing too fancy here. You’ll need:
- 8×8 inch baking pan (glass or metal both work, but metal gives slightly crispier edges)
- Parchment paper (trust me, this makes cleanup so much easier)
- Mixing bowls (one large, one medium)
- Whisk and rubber spatula
- Electric hand mixer or stand mixer for the frosting (you can do it by hand, but your arm will thank you)
- Cooling rack
- Offset spatula for spreading frosting (a butter knife works in a pinch)
- Microplane or zester for the orange zest
If you don’t have an 8×8 pan, a 9×9 will work—just reduce the baking time by 3-5 minutes and watch closely. I’ve also used a disposable aluminum pan for parties, and it works fine, though the edges don’t get as crispy.
Preparation Method
- Preheat and prep the pan. Preheat your oven to 350°F (175°C). Line your 8×8 pan with parchment paper, leaving some overhang on two sides. This creates handles so you can lift the whole block of brownies out later. Lightly grease the parchment with butter or non-stick spray.
- Melt the butter and chocolate. In a medium microwave-safe bowl, melt the 1/2 cup butter and 1/4 cup chocolate chips together. Do this in 30-second bursts, stirring between each, until smooth. Don’t overheat—you just want it melted, not bubbling. Set aside to cool for 2-3 minutes.
- Mix the wet ingredients. In a large bowl, whisk together the melted butter-chocolate mixture with the granulated sugar. It should look glossy and slightly grainy. Add the eggs one at a time, whisking vigorously after each addition until fully incorporated. Stir in the vanilla extract. The mixture should be thick and shiny at this point.
- Sift in the dry ingredients. This step is crucial with black cocoa—it’s prone to clumping. Sift the black cocoa powder, all-purpose flour, and salt directly into the wet mixture. Fold gently with a rubber spatula until just combined. Do not overmix! You want to see the last streaks of flour disappear, then stop. Overmixing will make the brownies tough and cakey instead of fudgy.
- Bake to perfection. Pour the batter into your prepared pan and spread it evenly. It will be thick—that’s normal. Bake for 20-25 minutes. The top should look set and slightly cracked, and a toothpick inserted in the center should come out with a few moist crumbs (not wet batter). For fudgier brownies, pull them at 20 minutes. For cakier edges, go to 25. Let them cool in the pan for 10 minutes, then use the parchment handles to lift them onto a cooling rack. Cool completely before frosting—about 1 hour. I know it’s tempting, but warm brownies will melt the frosting into a puddle.
- Make the orange frosting. While the brownies cool, make the frosting. In a medium bowl, beat the softened butter with an electric mixer until creamy and pale, about 2 minutes. Gradually add the sifted powdered sugar, 1/2 cup at a time, beating on low speed to avoid a sugar cloud. Add the fresh orange juice, orange zest, vanilla extract, and salt. Beat on medium-high for 2-3 minutes until light, fluffy, and spreadable. If it’s too thick, add a teaspoon more orange juice. If it’s too thin, add a tablespoon more powdered sugar. Add a drop or two of orange gel food coloring if you want that vibrant Halloween orange—I usually do, but the zest gives it a nice natural color too.
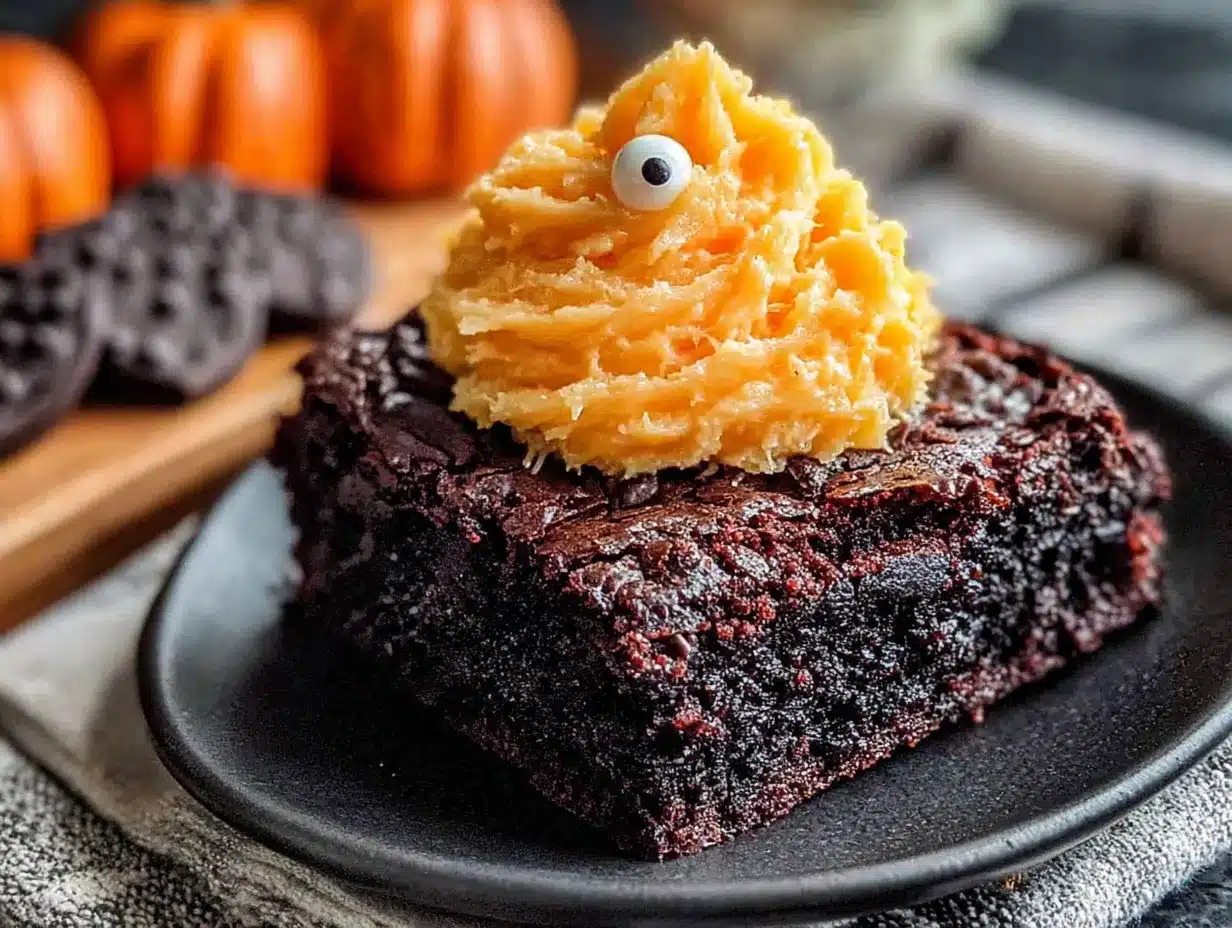
- Frost and decorate. Once the brownies are completely cool, spread the orange frosting evenly over the top using your offset spatula. Go all the way to the edges for a clean look. Add your decorations—black sprinkles, candy eyeballs, or mini chocolate chips—while the frosting is still soft so they stick. Let the frosting set for about 15 minutes before slicing.
- Slice cleanly. For clean cuts, use a sharp knife and wipe it clean between each slice. I like to cut these into 16 squares for parties, but 9 larger squares work if you want bigger portions. Run the knife under hot water, dry it, then slice—this helps the knife glide through without dragging the frosting.
Cooking Tips & Techniques
I learned most of these the hard way, so you don’t have to. Here’s what I wish someone had told me before I ruined that first batch:
Black cocoa is thirsty. It absorbs more liquid than regular cocoa, which is why my first batch was so dry. The melted chocolate chips in this recipe add back that moisture. Don’t skip them, and don’t reduce the butter thinking you’re making it healthier—you’ll just end up with dry brownies.
Room temperature eggs matter. If you add cold eggs to the melted butter, the butter will seize up and create a lumpy, greasy batter. Let your eggs sit on the counter for 30 minutes before starting, or place them in a bowl of warm water for 5 minutes.
Don’t overbake. This is the number one mistake people make with brownies. They look underdone in the pan, but they continue cooking from residual heat after you pull them out. The toothpick test is your friend—moist crumbs mean done, wet batter means more time.
Fresh orange juice makes a difference. Bottled juice has a flat, sugary taste that doesn’t brighten the frosting the same way. Squeeze one orange—it takes 30 seconds and the flavor is worlds better. And don’t skip the zest—that’s where the real orange oil lives.
Let the frosting set. If you try to stack these brownies or wrap them too soon, the frosting will smear everywhere. Give it at least 30 minutes at room temperature, or pop the pan in the fridge for 15 minutes to speed things up.
Variations & Adaptations
This recipe is flexible, and I’ve tried a few variations myself. Here are some of my favorites:
Gluten-Free Version: Substitute the all-purpose flour with a 1:1 gluten-free baking flour blend. I’ve used Bob’s Red Mill and King Arthur Flour blends with great results. The texture will be slightly more tender, but the fudginess remains.
Vegan Option: Replace the butter with vegan butter (I like Miyoko’s), use flax eggs (1 tablespoon ground flaxseed + 3 tablespoons water per egg, let sit for 5 minutes), and use a vegan chocolate chip brand like Enjoy Life. The frosting will work with vegan butter too—just make sure it’s softened properly.
Spooky Swirl: Before baking, drop spoonfuls of cream cheese or white chocolate mixture on top of the batter and swirl with a knife. It creates a ghostly white marbling effect that’s perfect for Halloween. I did this for a party last year and it was a hit.
Peppermint Twist: Add 1/2 teaspoon peppermint extract to the brownie batter and swap the orange frosting for a white peppermint frosting. Top with crushed candy canes for a wintery version.
Extra Dark: If you love intensely dark chocolate, add 1/2 teaspoon espresso powder to the dry ingredients. It doesn’t make it taste like coffee—it just deepens the chocolate flavor without adding bitterness.
Serving & Storage Suggestions
These brownies are best served at room temperature, which lets the frosting soften and the brownie texture relax. If you’ve refrigerated them, let them sit out for 20-30 minutes before serving.
For presentation, I like to arrange them on a black platter or a wooden board with some mini pumpkins and candy corn scattered around. The contrast between the black brownies, orange frosting, and dark background is very Halloween-y.
These pair beautifully with a cold glass of milk, a hot cup of coffee, or even a dark stout beer for the adults. If you’re serving them at a party, consider adding a bowl of whipped cream on the side for dipping—sounds extra, but trust me.
Storage: Store leftover brownies in an airtight container at room temperature for up to 3 days. If your kitchen is warm, refrigerate them to prevent the frosting from getting too soft. They actually taste even better on day two—the flavors meld together and the texture becomes more fudgy.
Freezing: These freeze beautifully. Wrap the unfrosted brownies tightly in plastic wrap, then foil, and freeze for up to 3 months. When ready to serve, thaw overnight in the refrigerator, then bring to room temperature before frosting. You can also freeze the frosted brownies, but place them in a single layer in a freezer-safe container with parchment between layers to prevent sticking.
Reheating: For that fresh-from-the-oven experience, microwave a single brownie for 10-15 seconds. The frosting will get slightly melty, and the brownie will be warm and gooey. Just don’t overdo it or the frosting will slide off.
Nutritional Information & Benefits
Let’s be real—these are a treat, not a health food. But here’s the estimated nutritional breakdown per serving (based on 16 servings):
- Calories: 245
- Fat: 14g
- Carbohydrates: 30g
- Protein: 3g
- Fiber: 2g
- Sugar: 22g
On the bright side, black cocoa powder contains antioxidants called flavonoids, which are linked to heart health. The orange juice and zest provide a small dose of vitamin C. And honestly, sometimes you just need a dessert that makes you smile—these brownies are that dessert.
If you’re watching your sugar intake, you can reduce the sugar in the brownies to 3/4 cup without affecting the texture too much. The frosting is harder to adjust without changing the consistency, but you can use a powdered sugar substitute like Swerve confectioners’ sugar if needed.
Conclusion
These Best Black Cocoa Halloween Brownies with Easy Orange Frosting have become my go-to fall dessert for a reason. They look dramatic and impressive, but they’re actually one of the simplest recipes I make. The black cocoa gives them that mysterious, dark flavor that pairs so perfectly with the bright, citrusy frosting. Every time I bring them somewhere, someone asks for the recipe—and now you have it.
I’d love to hear how yours turn out. Did you add any fun decorations? Try a different frosting flavor? Leave a comment below and let me know—I read every single one, and your feedback helps me keep improving these recipes. And if you’re looking for more Halloween dessert inspiration, check out my decadent red wine chocolate cake for another showstopper, or these mini lemon blueberry cheesecakes if you want something lighter. For more sweet treats, browse all my recipes.
Happy Halloween, and happy baking!
Frequently Asked Questions
Can I use regular cocoa powder instead of black cocoa?
Yes, but the color will be dark brown instead of black, and the flavor will be more intense and slightly bitter. If you’re using regular cocoa, reduce it to 1/3 cup and add 2 tablespoons of all-purpose flour to compensate for the missing volume. The texture will still be fudgy, just not as dramatically dark.
How do I get the frosting to be that vibrant orange color?
Fresh orange zest gives it a natural pale orange hue, but for that bright Halloween orange, you’ll need gel food coloring. Start with one drop, mix well, and add more until you get the shade you want. Liquid food coloring works too, but it can thin out the frosting, so add it sparingly.
Can I make these brownies ahead of time?
Absolutely. You can bake the brownies up to 2 days ahead and store them unfrosted at room temperature. Frost them the day you plan to serve for the freshest appearance. Or freeze the unfrosted brownies for up to 3 months—just thaw and frost when ready.
Why did my brownies turn out dry?
You likely overbaked them or overmixed the batter. Black cocoa absorbs more moisture than regular cocoa, so it’s especially important to pull them from the oven when the toothpick comes out with moist crumbs, not clean. Also, make sure you’re measuring your flour correctly—spoon it into the measuring cup and level it off, don’t scoop directly from the bag.
Can I use a different frosting flavor?
Of course! Cream cheese frosting is fantastic with these brownies—the tangy flavor balances the dark cocoa beautifully. A simple vanilla buttercream works too. Or try a peppermint frosting for a wintery twist. Just keep the frosting light in color to contrast with the dark brownies for that visual pop.
Pin This Recipe!
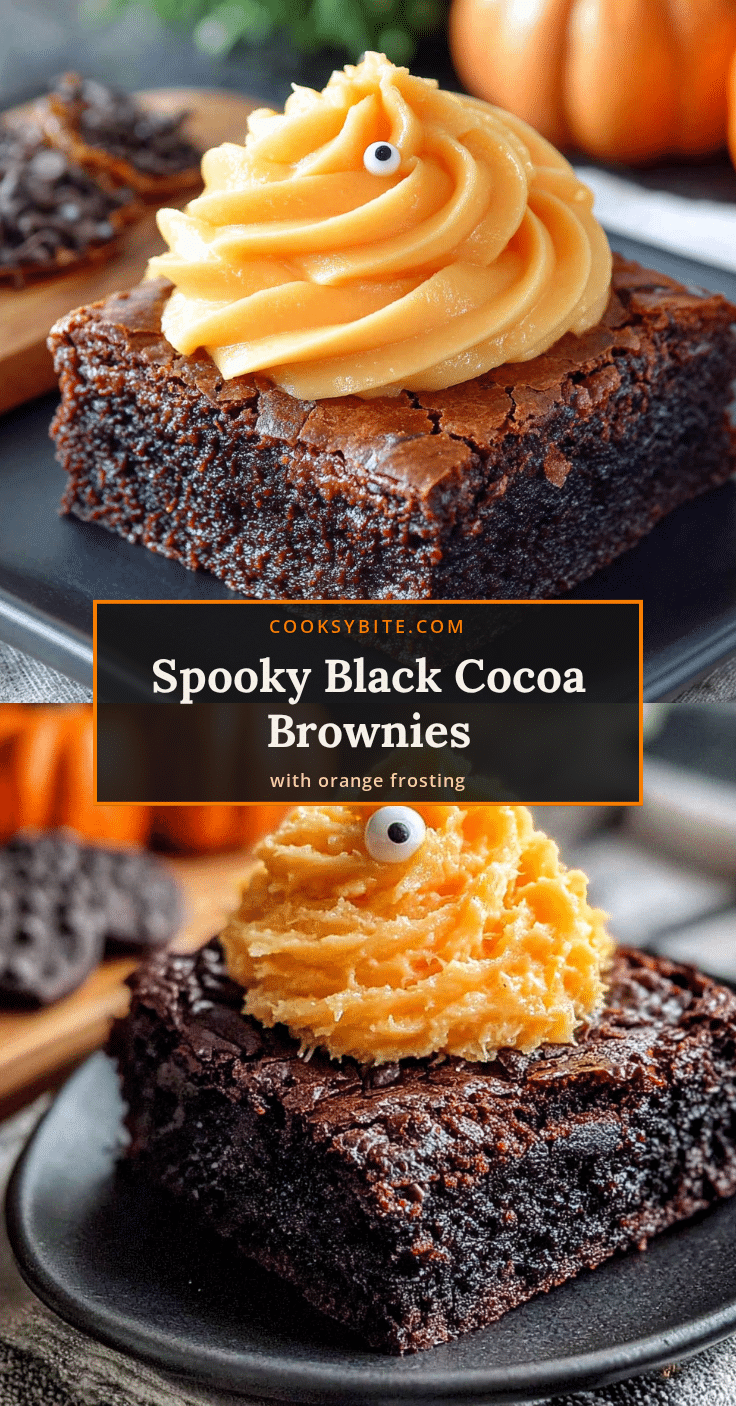
Best Black Cocoa Halloween Brownies with Easy Orange Frosting
These fudgy black cocoa brownies are topped with a bright orange frosting, making them the perfect dramatic and delicious Halloween dessert. Quick to make with simple ingredients, they’re a guaranteed crowd-pleaser.
- Prep Time: 15 minutes
- Cook Time: 25 minutes
- Total Time: 1 hour 40 minutes (includes cooling)
- Yield: 16 servings 1x
- Category: Dessert
- Cuisine: American
Ingredients
- 1/2 cup unsalted butter, melted
- 1 cup granulated sugar
- 2 large eggs, room temperature
- 1 teaspoon vanilla extract
- 1/2 cup black cocoa powder
- 1/4 cup all-purpose flour
- 1/4 teaspoon salt
- 1/4 cup semi-sweet chocolate chips, melted (optional but recommended)
- 1/2 cup unsalted butter, softened (for frosting)
- 2 cups powdered sugar, sifted (for frosting)
- 2 tablespoons fresh orange juice (for frosting)
- 1 teaspoon orange zest (for frosting)
- 1/4 teaspoon vanilla extract (for frosting)
- Pinch of salt (for frosting)
- Orange gel food coloring (optional, for frosting)
- Black sprinkles or orange jimmies (optional, for decoration)
- Candy eyeballs (optional, for decoration)
- Mini chocolate chips (optional, for decoration)
Instructions
- Preheat oven to 350°F (175°C). Line an 8×8 inch baking pan with parchment paper, leaving overhang on two sides. Lightly grease the parchment.
- In a medium microwave-safe bowl, melt the 1/2 cup butter and 1/4 cup chocolate chips together in 30-second bursts, stirring between each, until smooth. Set aside to cool for 2-3 minutes.
- In a large bowl, whisk together the melted butter-chocolate mixture with the granulated sugar until glossy and slightly grainy. Add the eggs one at a time, whisking vigorously after each addition. Stir in the vanilla extract.
- Sift the black cocoa powder, all-purpose flour, and salt directly into the wet mixture. Fold gently with a rubber spatula until just combined. Do not overmix.
- Pour the batter into the prepared pan and spread evenly. Bake for 20-25 minutes, until the top looks set and a toothpick inserted in the center comes out with a few moist crumbs. Cool in the pan for 10 minutes, then lift onto a cooling rack to cool completely (about 1 hour).
- While brownies cool, make the frosting: In a medium bowl, beat the softened butter with an electric mixer until creamy and pale, about 2 minutes. Gradually add the sifted powdered sugar, 1/2 cup at a time, beating on low speed. Add the fresh orange juice, orange zest, vanilla extract, and salt. Beat on medium-high for 2-3 minutes until light and fluffy. Add orange gel food coloring if desired.
- Once brownies are completely cool, spread the orange frosting evenly over the top. Add decorations while frosting is still soft. Let frosting set for about 15 minutes before slicing.
- For clean slices, use a sharp knife wiped clean between each cut. Cut into 16 squares.
Notes
Black cocoa powder absorbs more liquid than regular cocoa; do not skip the melted chocolate chips. Use room temperature eggs to prevent the butter from seizing. Do not overbake; the toothpick should come out with moist crumbs. For gluten-free, substitute all-purpose flour with a 1:1 gluten-free baking flour blend. For vegan, use vegan butter, flax eggs, and vegan chocolate chips. Store in an airtight container at room temperature for up to 3 days, or refrigerate if warm. Freeze unfrosted brownies for up to 3 months.
Nutrition
- Serving Size: 1 brownie
- Calories: 245
- Sugar: 22
- Sodium: 95
- Fat: 14
- Saturated Fat: 8
- Carbohydrates: 30
- Fiber: 2
- Protein: 3
Keywords: black cocoa brownies, Halloween brownies, orange frosting brownies, fudgy brownies, Halloween dessert


