The first Sunday of December, snow falling in that lazy way it does when the world has nowhere to be, and all I wanted was these cookies. Not the ones from the bakery down the street. Not the ones my grandmother used to make. These specific ones — the ones that hadn’t existed yet, the ones I had to invent because nothing else would scratch the particular itch of that afternoon.
I had a half-eaten bar of peppermint bark on the counter (the good kind, with the dark chocolate base and the white chocolate swirl, not that waxy stuff from the drugstore), and a batch of cookie dough chilling in the fridge. The two things just belonged together. You know how sometimes an idea feels less like a choice and more like a discovery? That was this.
I crushed the bark into uneven chunks — some powdery, some chunky — and folded it into the dough with my hands because the spatula wasn’t getting the job done. The kitchen smelled like butter and mint and something that felt suspiciously like Christmas morning. Honestly, I wasn’t sure it would work. Peppermint bark in cookies sounds obvious, but there’s a fine line between “festive” and “toothpaste.”
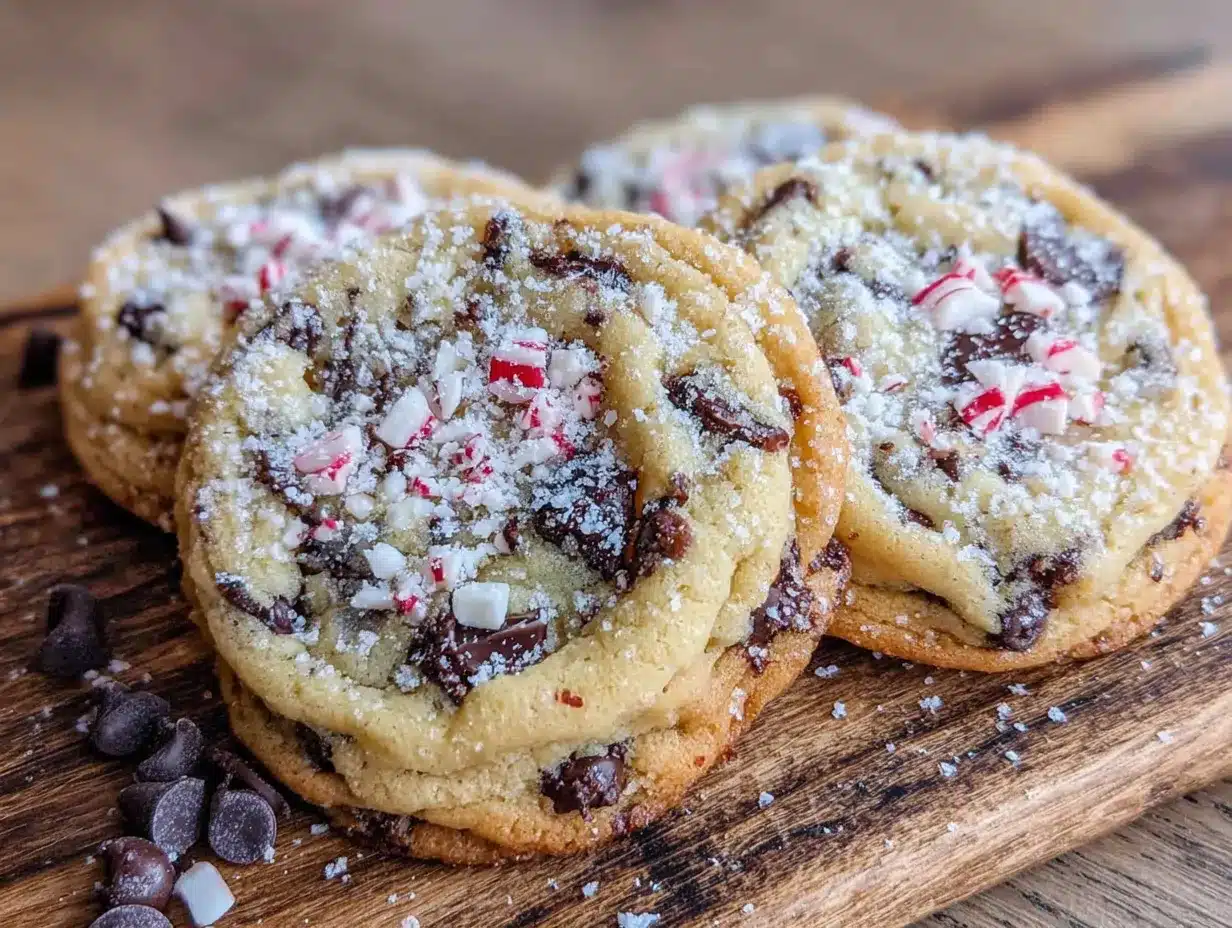
These cookies landed on the right side of that line. The edges got that perfect crinkly-chewy thing, the middle stayed soft, and the peppermint bark melted into pockets of chocolate and mint that hit you in waves. Not aggressive. Just there. Like the quiet promise of a good holiday season.
I’ve made them every December since. Sometimes for parties, sometimes just for me on a snowy Sunday. They’re the kind of cookie that doesn’t need an occasion — but somehow makes any moment feel like one.
Why You’ll Love This Recipe
Let me be real with you — I’ve tested a lot of holiday cookie recipes over the years. Some are too fussy. Some look better than they taste. These peppermint bark chocolate chip cookies hit that sweet spot where impressive meets doable.
- No Chilling Required — Mix, scoop, bake. That’s it. No waiting around for the dough to firm up, because we’re using a technique that keeps the cookies from spreading without the fridge time.
- Simple Ingredients — Butter, sugar, eggs, flour, and a bar of good peppermint bark. You probably have everything except the bark already.
- Perfect for Cookie Exchanges — These stand out on any holiday platter. The red and white peppermint pieces make them look like you spent hours, when really it took about 20 minutes of active work.
- Crowd-Pleaser — I brought these to a cookie swap last year and three people asked for the recipe before the coffee was poured. Kids love them. Adults love them. The mint-chocolate combo is basically universal.
- That Texture Though — Crispy edges, soft centers, and those melty pockets of peppermint bark that surprise you with every bite. It’s the kind of cookie that makes you close your eyes on the first bite. Not even exaggerating.
What makes these different from every other chocolate chip cookie recipe out there? It’s the peppermint bark itself. Most recipes use crushed candy canes, which can get sticky and weird when baked. Peppermint bark has that chocolate coating that melts into the dough, creating these little fudge-like pockets. The mint flavor is there, but it’s balanced. It doesn’t scream “holiday” in an obnoxious way. It just whispers it.
This is comfort food reimagined — familiar enough to feel nostalgic, but different enough to feel special.
What Ingredients You Will Need
This recipe keeps things simple. No weird extracts, no specialty flours, no hunting down obscure ingredients. You want to make these cookies on a whim, and the ingredient list respects that.
- Unsalted butter, softened to room temperature (1 cup / 2 sticks / 226g) — Butter gives these cookies their richness and that perfect edge texture. I use unsalted so I control the salt level. If you only have salted, just skip the added salt in the recipe.
- Granulated sugar (¾ cup / 150g) — White sugar helps the cookies spread just enough and gives them those crispy edges. Don’t substitute brown sugar here — we’re using it in combination with the next ingredient.
- Light brown sugar, packed (¾ cup / 165g) — Brown sugar adds moisture and that chewy texture. The molasses in it also deepens the flavor. I’ve tried all brown sugar, and the cookies were too dense. Stick with the mix.
- Large eggs (2, room temperature) — Room temperature eggs incorporate better into the butter-sugar mixture. If you forgot to take them out of the fridge, place them in a bowl of warm water for 5 minutes.
- Vanilla extract (2 teaspoons) — Pure vanilla is better, but imitation works fine. The vanilla rounds out the mint flavor and keeps it from tasting artificial.
- All-purpose flour (2¼ cups / 280g) — Spoon and level your flour. Scooping directly from the bag packs in too much flour and makes dry cookies. I learned this the hard way after a batch of hockey pucks.
- Baking soda (1 teaspoon) — Helps the cookies spread and brown. Make sure it’s fresh — test it by dropping a bit in vinegar; if it fizzes, you’re good.
- Salt (½ teaspoon) — Salt balances the sweetness and enhances the chocolate. Don’t skip it.
- Semi-sweet chocolate chips (1 cup / 175g) — I use Ghirardelli or Guittard. The semi-sweet bitterness cuts through the sweetness of the peppermint bark. Milk chocolate makes these too sweet, in my opinion.
- Peppermint bark, chopped (1½ cups / about 225g) — This is the star. Use good quality peppermint bark — the kind with a dark chocolate base and white chocolate top. Trader Joe’s has a great one. Williams Sonoma too. Chop it into uneven pieces — some fine, some chunky. The fine pieces melt into the dough, the chunks stay intact for texture.
For the topping (optional but recommended):
- Extra peppermint bark pieces (¼ cup) — Press these on top of the dough balls right before baking. It makes the cookies look bakery-worthy.
- Flaky sea salt — A tiny sprinkle on top right when they come out of the oven. Trust me on this one. The salt makes the mint pop.
Equipment Needed
Nothing fancy here. Most of this you already have.
- Large mixing bowl — For the wet ingredients. I use a ceramic one because it doesn’t conduct heat, but glass or metal works fine.
- Medium mixing bowl — For the dry ingredients.
- Electric hand mixer or stand mixer — You can do this by hand with a wooden spoon, but the mixer makes creaming the butter and sugar much easier. I’ve done both. The mixer saves your arm.
- Rubber spatula — For folding in the chocolate chips and peppermint bark. Also for scraping the bowl because wasting dough is a crime.
- Cookie scoop (2-tablespoon size) — For uniform cookies. If you don’t have one, use two spoons. The scoop just makes it faster and gives you evenly sized cookies that bake at the same rate.
- Baking sheets (2) — Light-colored metal sheets work best. Dark sheets absorb more heat and can over-brown the bottoms.
- Parchment paper or silicone baking mats — Parchment is cheaper and disposable. Silicone mats are reusable and non-stick. Both work. Just don’t use greased foil — it makes the cookies spread too much.
- Wire cooling rack — For cooling the cookies properly. Leaving them on the hot sheet continues cooking them.
- Sharp knife and cutting board — For chopping the peppermint bark. A chef’s knife works better than a food processor, which turns it into dust.
Preparation Method
- Preheat your oven to 350°F (175°C). Line two baking sheets with parchment paper or silicone mats. While the oven heats, chop your peppermint bark into uneven pieces — some fine, some chunky. Set aside ¼ cup for topping.
- Cream the butter and sugars together. In a large bowl, beat the softened butter, granulated sugar, and brown sugar together on medium speed for 2-3 minutes until light and fluffy. The mixture should look pale and slightly increased in volume. Don’t rush this step — proper creaming incorporates air that helps the cookies rise.
- Add the eggs and vanilla. Beat in the eggs one at a time, mixing well after each addition. Scrape down the sides of the bowl with a spatula. Add the vanilla and mix until combined. The mixture might look slightly curdled at this point — that’s normal, especially if your eggs were cold.
- Combine the dry ingredients. In a separate medium bowl, whisk together the flour, baking soda, and salt. Whisking aerates the flour and distributes the leavening agent evenly. No clumps allowed.
- Mix the dry into the wet. Gradually add the dry ingredients to the wet mixture, mixing on low speed just until combined. Stop when you no longer see streaks of flour. Overmixing develops gluten and makes tough cookies. Trust me, I’ve made that mistake more times than I’d like to admit.
- Fold in the chocolate chips and peppermint bark. Using a rubber spatula, gently fold in the semi-sweet chocolate chips and the chopped peppermint bark (except the reserved ¼ cup for topping). Fold just until evenly distributed. The dough will be thick and slightly sticky — that’s exactly what you want.
- Scoop the dough. Using a 2-tablespoon cookie scoop, portion the dough onto the prepared baking sheets, spacing them about 2 inches apart. You should get about 24-26 cookies. Press a few pieces of the reserved peppermint bark onto the top of each dough ball. This makes them look intentional and pretty.
- Bake. Bake one sheet at a time for 10-12 minutes. The edges should be lightly golden and set, but the centers will still look slightly underdone and puffy. That’s the sweet spot. They continue cooking on the hot sheet after you pull them out.
- Cool on the baking sheet. Let the cookies rest on the baking sheet for 5 minutes. This is crucial — they’re too fragile to move right away. During this time, sprinkle a tiny pinch of flaky sea salt on top of each cookie if you’re using it.
- Transfer to a wire rack. After 5 minutes, use a thin spatula to transfer the cookies to a wire rack to cool completely. If you can resist eating them warm, they’ll set up perfectly in about 15 minutes. I usually eat at least two warm because that’s the whole point of making cookies.
Cooking Tips & Techniques
Don’t overbake. This is the number one mistake I see with these cookies. The edges should be golden, but the centers should look slightly underdone and puffy when you pull them out. They’ll continue baking on the hot sheet. If you wait until the centers look fully set, you’ll have crunchy cookies instead of soft ones.
Chop the bark unevenly on purpose. I know it sounds weird, but hear me out. Some fine pieces melt into the dough and flavor the whole cookie. Some chunky pieces stay intact and give you those satisfying bites of peppermint bark. If you chop everything the same size, you lose that textural contrast.
Room temperature ingredients matter. Cold butter doesn’t cream properly. Cold eggs seize up the butter mixture. I know it’s annoying to wait, but it makes a real difference. If you’re in a rush, cut the butter into small cubes and let it sit for 15 minutes. Put the eggs in a bowl of warm water for 5 minutes. You’ll thank me later.
Use a cookie scoop for consistent sizing. Uniform cookies bake evenly. If some are bigger than others, the small ones burn while the big ones are still raw. A 2-tablespoon scoop gives you the perfect size — not too big, not too small.
Chill if you want thicker cookies. I said this recipe doesn’t require chilling, and it doesn’t. But if you prefer thicker, puffier cookies, chill the scooped dough balls for 30 minutes before baking. The cold butter spreads slower, giving you a taller cookie. I do this when I want them to look extra bakery-style.
I once forgot the baking soda. True story. I was making these for a cookie exchange and realized halfway through baking that the cookies were flat and dense. I’d left out the baking soda entirely. The cookies still tasted good, but they were basically peppermint bark discs. Moral of the story: double-check your ingredients before you start mixing.
Variations & Adaptations
Gluten-Free Version: Substitute the all-purpose flour with a 1:1 gluten-free baking flour blend that contains xanthan gum. I’ve used Bob’s Red Mill 1-to-1 with great results. The texture is slightly more delicate, but the flavor is spot on. Make sure your peppermint bark is also gluten-free — some brands use wheat-based additives.
Dark Chocolate Lovers: Swap the semi-sweet chocolate chips for dark chocolate chips (60-70% cacao). Use dark chocolate peppermint bark instead of the milk/white combo. The bitterness balances the sweetness even more. This is my personal favorite variation for when I want something less sweet.
Peppermint White Chocolate: Use white chocolate chips instead of semi-sweet, and use white chocolate peppermint bark. The cookies turn out sweeter and more candy-like. Great for kids or anyone with a serious sweet tooth. I’d recommend reducing the sugar by 2 tablespoons if you go this route.
No Peppermint Bark? If you can’t find peppermint bark, use 1 cup of semi-sweet chocolate chips plus ½ cup of crushed candy canes. The texture will be different — the candy cane pieces stay crunchy rather than melting in — but the flavor is still there. Just note that candy canes can get sticky in the oven, so keep an eye on them.
Extra Minty: Add ½ teaspoon of peppermint extract along with the vanilla. Be careful though — peppermint extract is potent. Too much and your cookies will taste like toothpaste. Start with ¼ teaspoon and taste the dough (yes, raw dough — I won’t tell).
I tried a version with crushed Oreos once. It was good, but it wasn’t these cookies. Sometimes the original really is the best.
Serving & Storage Suggestions
These cookies are best served slightly warm, when the chocolate chips are still melty and the peppermint bark is soft. Let them cool for about 10 minutes after baking if you can wait that long. The texture is perfect at room temperature too — the edges stay crisp and the centers stay chewy for days.
For a holiday cookie platter, arrange these alongside some decadent red wine chocolate cake and cherry chocolate brownies for a chocolate lover’s dream spread. The peppermint adds a festive touch that pairs beautifully with the rich chocolate flavors.
They also go great with a cup of coffee or a glass of cold milk. For an adult twist, serve them with peppermint hot chocolate or a peppermint martini. The mint-chocolate combo is basically made for holiday entertaining.
Storage: Store the cookies in an airtight container at room temperature for up to 5 days. Layer them between sheets of parchment paper to prevent sticking. The cookies actually get better on day two — the flavors meld together and the texture softens slightly.
Freezing: These freeze beautifully. You have two options:
- Freeze baked cookies: Cool completely, then layer in a freezer-safe container with parchment between layers. Freeze for up to 3 months. Thaw at room temperature for about 30 minutes.
- Freeze dough balls: Scoop the dough onto a parchment-lined baking sheet and freeze until solid (about 1 hour). Transfer to a freezer bag. Bake from frozen, adding 2-3 minutes to the baking time. This is my go-to for last-minute holiday guests.
Reheating: Pop a cookie in the microwave for 10-15 seconds for that fresh-from-the-oven experience. Or warm them in a 300°F oven for 5 minutes if you’re reheating a batch.
Nutritional Information & Benefits
Per cookie (based on 24 cookies): Approximately 210 calories, 11g fat, 28g carbohydrates, 3g protein, 18g sugar. These are estimates and will vary based on your specific ingredients and portion sizes.
While these are definitely a treat, there are a few redeeming qualities. The dark chocolate in the peppermint bark contains antioxidants and flavonoids that support heart health. The peppermint itself can aid digestion — which is nice after a heavy holiday meal. And honestly, sometimes the mental health benefit of a really good cookie is worth more than any nutritional metric.
Dietary Considerations:
- Contains gluten, dairy, and eggs
- Can be made gluten-free with a 1:1 flour blend (see variations)
- Not suitable for vegan diets without significant modifications
- Can be made lower sugar by using sugar-free chocolate chips and reducing the sugar by ¼ cup, though texture will be affected
Frequently Asked Questions
Can I use crushed candy canes instead of peppermint bark?
Yes, but the texture will be different. Candy canes stay crunchy in the cookies and don’t melt like peppermint bark does. They also tend to dissolve and create sticky spots. If you use candy canes, crush them finely and mix them into the dough along with extra chocolate chips to compensate for the missing chocolate from the bark.
Why did my cookies spread too much?
Several possible reasons: your butter was too soft or melted, your baking sheet was too warm (always use a cool sheet), or you didn’t use enough flour. Make sure you’re spooning and leveling your flour rather than scooping directly from the bag. If your kitchen is warm, chill the dough balls for 20 minutes before baking.
Can I make these cookies ahead of time?
Absolutely. You can make the dough up to 3 days ahead and keep it covered in the refrigerator. Let it sit at room temperature for 15 minutes before scooping and baking. Or freeze the dough balls for up to 3 months — bake from frozen, adding 2-3 minutes to the bake time.
How do I get the perfect crinkly top?
That crinkly look comes from the right ratio of white to brown sugar and not overmixing the dough. The brown sugar keeps the centers soft while the white sugar helps the edges spread and crinkle. Also, don’t flatten the dough balls before baking — let them spread naturally in the oven.
Can I double this recipe?
Yes, this recipe doubles beautifully. Just make sure you have enough oven space and don’t overcrowd the baking sheets. Bake one sheet at a time for the most even results. The dough keeps well in the fridge for up to 3 days, so you can bake half now and half later.
Final Thoughts
These peppermint bark chocolate chip cookies have become my December tradition for a reason. They’re not complicated. They don’t require special skills or expensive ingredients. They just work — the way a good holiday cookie should.
What I love most about them is how they make people feel. I’ve watched friends take that first bite and visibly relax. I’ve seen kids carefully pick out the peppermint chunks and eat them first. I’ve had neighbors knock on my door asking if I’m baking those cookies again. There’s something about the combination of familiar chocolate chip cookie and unexpected peppermint that just hits right.
Maybe you’ll make these for a cookie exchange or a holiday party. Maybe you’ll make them just for yourself on a quiet Sunday afternoon, the way I did that first time. Either way, I hope they bring you the same quiet joy they’ve brought me.
If you try them, I’d love to hear how they turned out. Drop a comment below, tag me in your photos, or tell me your favorite variation. And if you’re looking for more holiday inspiration, check out our full collection of recipes — there’s plenty more where these came from.
Happy baking, friends. And happy holidays.
Pin This Recipe!

Perfect Peppermint Bark Chocolate Chip Cookies Recipe

These peppermint bark chocolate chip cookies combine the classic chocolate chip cookie with festive peppermint bark for a holiday treat that’s crispy on the edges, soft in the center, and full of melty chocolate-mint pockets.
- Prep Time: 20 minutes
- Cook Time: 12 minutes
- Total Time: 32 minutes
- Yield: 24-26 cookies 1x
- Category: Dessert
- Cuisine: American
Ingredients
- 1 cup (2 sticks / 226g) unsalted butter, softened to room temperature
- 3/4 cup (150g) granulated sugar
- 3/4 cup (165g) light brown sugar, packed
- 2 large eggs, room temperature
- 2 teaspoons vanilla extract
- 2 1/4 cups (280g) all-purpose flour
- 1 teaspoon baking soda
- 1/2 teaspoon salt
- 1 cup (175g) semi-sweet chocolate chips
- 1 1/2 cups (about 225g) peppermint bark, chopped
- 1/4 cup extra peppermint bark pieces (for topping, optional)
- Flaky sea salt (for topping, optional)
Instructions
- Preheat your oven to 350°F (175°C). Line two baking sheets with parchment paper or silicone mats. Chop peppermint bark into uneven pieces; set aside 1/4 cup for topping.
- In a large bowl, beat the softened butter, granulated sugar, and brown sugar together on medium speed for 2-3 minutes until light and fluffy.
- Beat in the eggs one at a time, mixing well after each addition. Scrape down the sides of the bowl. Add vanilla and mix until combined.
- In a separate medium bowl, whisk together the flour, baking soda, and salt.
- Gradually add the dry ingredients to the wet mixture, mixing on low speed just until combined. Do not overmix.
- Using a rubber spatula, gently fold in the semi-sweet chocolate chips and chopped peppermint bark (except reserved 1/4 cup).
- Using a 2-tablespoon cookie scoop, portion dough onto prepared baking sheets, spacing 2 inches apart. Press reserved peppermint bark pieces onto tops of dough balls.
- Bake one sheet at a time for 10-12 minutes, until edges are lightly golden and centers look slightly underdone.
- Let cookies rest on baking sheet for 5 minutes. Sprinkle with flaky sea salt if desired.
- Transfer to a wire rack to cool completely.
Notes
Don’t overbake; edges should be golden but centers slightly underdone. Chop peppermint bark unevenly for best texture. Room temperature ingredients matter. For thicker cookies, chill dough balls for 30 minutes before baking. Store in airtight container at room temperature for up to 5 days. Freeze baked cookies or dough balls for up to 3 months.
Nutrition
- Serving Size: 1 cookie
- Calories: 210
- Sugar: 18
- Sodium: 120
- Fat: 11
- Saturated Fat: 7
- Carbohydrates: 28
- Fiber: 1
- Protein: 3
Keywords: peppermint bark cookies, chocolate chip cookies, holiday cookies, Christmas cookies, peppermint cookies


