My daughter didn’t say a word for a full ten seconds after her first sip. She just stared into the mug, then looked up at me with these wide eyes, and whispered, “Mom. This tastes like Christmas threw up in my mouth—but in the best way.” And honestly? She wasn’t wrong.
That was the moment I knew this Ultimate Peppermint Hot Cocoa Bar with Homemade Marshmallows was going to be our new holiday tradition. Not because I’d carefully tested the ratios or sourced the perfect peppermint extract (though I did, eventually). But because that ridiculous, honest reaction told me everything I needed to know. This wasn’t just another hot chocolate. This was the one that made people stop talking and just feel it.
I’d spent the afternoon setting up a little station on our kitchen counter—jars of toppings, a stack of mugs, and a batch of those pillowy homemade marshmallows I’d been tinkering with for weeks. I wasn’t trying to impress anyone. I just wanted something cozy to sip while we decorated the tree. But watching her face change like that? That’s when I realized I’d accidentally created something worth sharing.
This isn’t a complicated recipe. It’s not fancy or fussy. It’s just really, really good hot cocoa with a cool peppermint kick and marshmallows that melt into silky clouds instead of that weird rubbery film you get from the bagged kind. And the best part? You can set it up as a bar and let everyone build their own perfect cup. Which, let’s face it, is half the fun.
Why You’ll Love This Recipe
I’ve tested this setup at three different holiday gatherings now, and it never fails. People hover around that cocoa bar like it’s the main attraction—and honestly, it kind of is. Here’s why this recipe works so well:
- Comes together in under 30 minutes: The cocoa itself is stove-top fast, and the marshmallows need about 15 minutes of active work. Perfect for when guests are on their way and you’re still in your pajamas.
- Simple, real ingredients: No powdered mixes, no artificial flavors, no weird stabilizers. Just milk, chocolate, cream, peppermint, and sugar. Stuff you probably already have.
- Perfect for holiday gatherings: Whether it’s a cookie swap, a tree-trimming party, or just a quiet night with the family, this cocoa bar makes everything feel special without making you stress.
- Totally customizable: Everyone builds their own cup. That means no complaints, no compromises, and way less work for you.
- Unbelievably rich and creamy: The secret is using real chocolate instead of cocoa powder. It makes a velvety texture that coats your tongue and lingers in the best way.
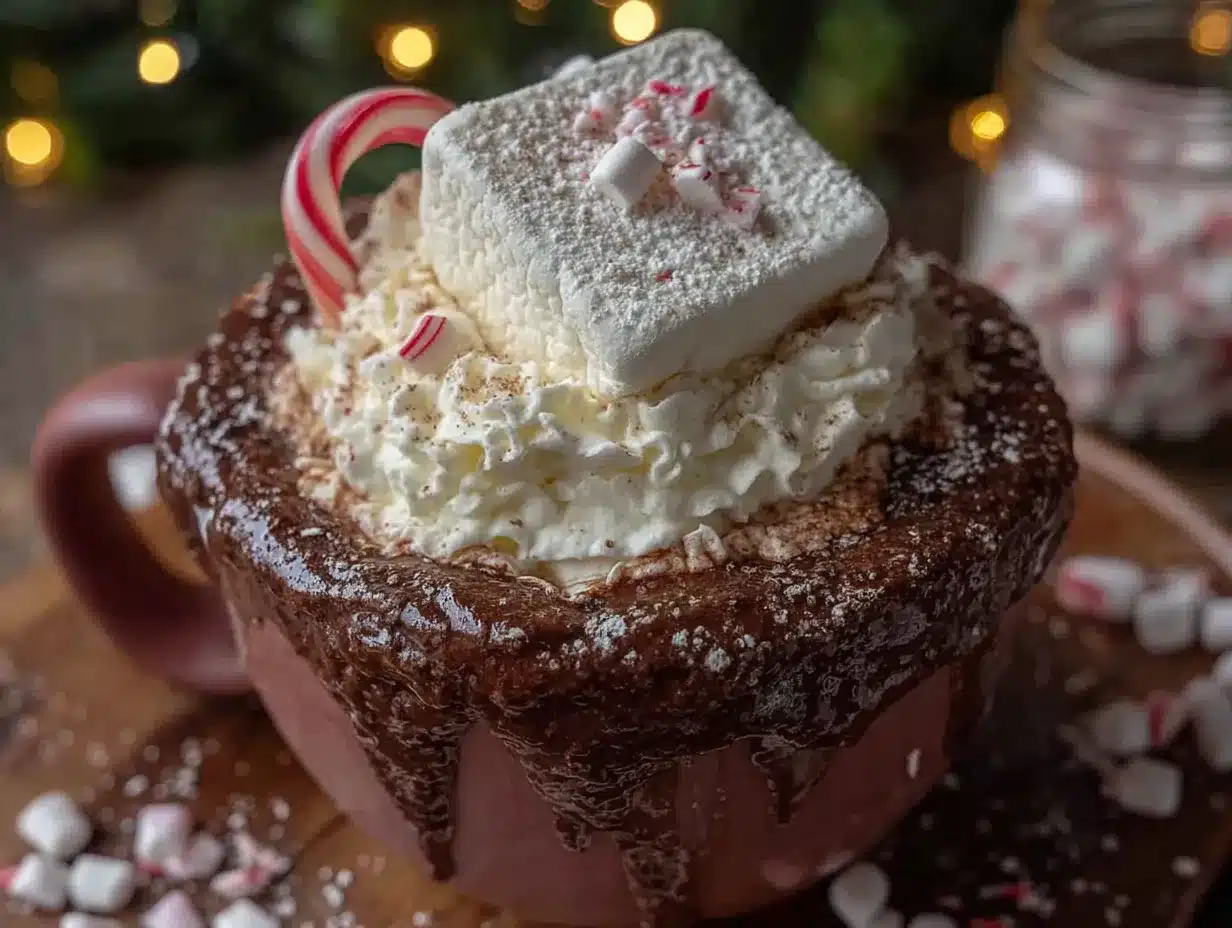
What makes this different from every other hot cocoa recipe out there? Two things. First, the homemade marshmallows. They’re not just a topping—they’re a whole experience. They melt into the hot milk and create this silky, vanilla-scented richness that store-bought marshmallows just can’t touch. Second, the peppermint isn’t overpowering. It’s there, you taste it, but it doesn’t smack you in the face. It’s balanced, like a candy cane that learned some manners.
This is the kind of recipe that makes people close their eyes after the first sip. The kind that makes them ask for the recipe before they’ve even finished their mug. And the kind that makes you feel like a kitchen wizard even though it’s honestly pretty simple.
What Ingredients You Will Need
This recipe uses straightforward ingredients that work together to create something truly special. Nothing obscure, nothing expensive—just good, honest components that do their job beautifully.
For the Hot Cocoa Base
- Whole milk, 4 cups (960 ml): Full-fat gives the creamiest texture, but 2% works in a pinch. Don’t use skim—it’ll be watery and sad.
- Heavy cream, 1 cup (240 ml): This is what makes it luxuriously thick. You can substitute half-and-half if you’re watching calories, but honestly, live a little.
- Semi-sweet chocolate, 8 oz (225 g), finely chopped: I prefer Ghirardelli or Guittard bars for consistent melting. Avoid chocolate chips—they have stabilizers that prevent smooth melting.
- Unsweetened cocoa powder, 2 tablespoons (15 g): Dutch-processed gives a deeper, more mellow chocolate flavor. Natural cocoa works too, but the taste will be slightly sharper.
- Granulated sugar, 3 tablespoons (40 g): Adjust to your sweetness preference. The marshmallows add sweetness too, so don’t overdo it.
- Vanilla extract, 1 teaspoon (5 ml): Pure vanilla, not imitation. It makes a noticeable difference.
- Peppermint extract, ½ teaspoon (2.5 ml): Start with less and add more to taste. This stuff is potent.
- Pinch of salt: Sounds weird, but salt intensifies chocolate flavor and balances sweetness.
For the Homemade Marshmallows
- Granulated sugar, 1 cup (200 g): Regular white sugar works best. Don’t substitute with brown sugar—it changes the texture.
- Light corn syrup, ½ cup (170 g): This prevents crystallization and gives marshmallows their signature bounce. No substitutes here.
- Water, ½ cup (120 ml), divided: You’ll use some for the gelatin and some for the sugar syrup.
- Unflavored gelatin, 3 tablespoons (about 3 packets): Knox brand is reliable and widely available.
- Vanilla extract, 1 teaspoon (5 ml): Again, pure vanilla please.
- Pinch of salt: Balances the sweetness.
- Powdered sugar, for dusting: Keeps the marshmallows from sticking together.
- Cornstarch, for dusting: Mixed with powdered sugar, this creates the perfect non-stick coating.
For the Topping Bar (Optional but Recommended)
- Crushed candy canes, ½ cup (60 g): For that festive crunch and extra peppermint punch.
- Whipped cream: Homemade if you’re feeling ambitious, store-bought is fine too.
- Chocolate shavings: Use a vegetable peeler on a chocolate bar for pretty curls.
- Mini chocolate chips: For texture and extra chocolate goodness.
- Caramel sauce: A drizzle adds a lovely buttery note.
- Cinnamon sticks: For stirring and a subtle warmth.
I recommend using Nielsen-Massey vanilla and peppermint extracts if you can find them. They’re pricier, but the flavor is noticeably cleaner and more intense. For the chocolate, don’t skimp—your cocoa is only as good as the chocolate you put in it.
Equipment Needed
You don’t need a professional kitchen to pull this off. Here’s what you’ll actually use:
- Medium saucepan: For heating the milk and cream. A heavy-bottomed one prevents scorching.
- Whisk: A silicone-coated whisk won’t scratch your pan and is easier to clean.
- Stand mixer or hand mixer: For whipping the marshmallow mixture. A stand mixer is easier, but a hand mixer works fine—you’ll just need to hold it steady for longer.
- Candy thermometer: Crucial for the marshmallows. You need to hit exactly 240°F (115°C) for the sugar syrup. No guesswork.
- 8×8 inch (20×20 cm) baking pan: For setting the marshmallows. Line it with parchment paper for easy removal.
- Small bowls and jars: For setting up your topping bar. Mason jars look adorable.
- Mugs: The bigger, the better. Nobody wants a tiny hot cocoa.
If you don’t have a candy thermometer, you can use the cold water test—drop a bit of syrup into cold water and see if it forms a firm ball. But honestly, thermometers are cheap and take the guesswork out. I ruined my first batch of marshmallows because I thought I could eyebit it. Spoiler: I could not.
Preparation Method
Step 1: Make the Homemade Marshmallows
Start these first because they need time to set. Line your 8×8 pan with parchment paper, letting it hang over the sides. Mix equal parts powdered sugar and cornstarch, then dust the pan generously.
In the bowl of your stand mixer, sprinkle the gelatin over ¼ cup (60 ml) of cold water. Let it sit and bloom while you make the syrup—about 5 minutes.
In a small saucepan, combine the sugar, corn syrup, and remaining ¼ cup (60 ml) of water. Stir gently until the sugar dissolves, then stop stirring. Clip your candy thermometer to the side and bring the mixture to a boil. Cook without stirring until it reaches 240°F (115°C). This takes about 8-10 minutes. Don’t walk away—sugar syrup can go from perfect to burnt in seconds.
Once it hits temperature, immediately remove from heat. Turn your mixer on low with the whisk attachment, and slowly pour the hot syrup into the blooming gelatin. Be careful—it’s extremely hot and splatters easily. Gradually increase the speed to high and whip for about 10-12 minutes. The mixture will transform from a thin liquid into a thick, glossy, marshmallowy cloud. It should hold stiff peaks and look like marshmallow creme.
Add the vanilla and salt during the last minute of whipping. Then scrape the mixture into your prepared pan, spreading it evenly with an offset spatula (spray it with non-stick spray first—trust me). Dust the top with more of the powdered sugar mixture. Let it set uncovered at room temperature for at least 4 hours, but overnight is better.
Step 2: Make the Hot Cocoa Base
In a medium saucepan over medium heat, combine the milk and heavy cream. Heat until it’s steaming but not boiling—you’ll see small bubbles around the edges. This takes about 5-7 minutes.
Whisk in the cocoa powder and sugar until fully dissolved. Then add the chopped chocolate and whisk continuously until it’s completely melted and smooth. This should take about 2-3 minutes. The mixture will be thick and velvety.
Remove from heat and stir in the vanilla extract, peppermint extract, and a pinch of salt. Taste it. If you want more peppermint, add a drop at a time. Remember, the flavor intensifies as it sits, so go easy.
Step 3: Cut and Prepare the Marshmallows
Once set, lift the marshmallow block out of the pan using the parchment paper. Dust a sharp knife or pizza cutter with the powdered sugar mixture and cut the marshmallows into cubes. I like 1-inch (2.5 cm) cubes for hot cocoa, but you can go bigger if you’re feeling generous. Toss the cubes in more powdered sugar mixture to prevent sticking.
Step 4: Set Up Your Cocoa Bar
Pour the hot cocoa into a slow cooker or a large thermos to keep it warm. Arrange your toppings in small bowls or jars: crushed candy canes, chocolate shavings, whipped cream, caramel sauce, and of course, a generous pile of homemade marshmallows. Provide small tongs or spoons for each topping.
Place the mugs nearby and let everyone build their own creation. I like to start with a marshmallow or two, then add the crushed candy cane, then pour the cocoa over everything. The marshmallows will start melting immediately, creating that silky texture I mentioned.
Cooking Tips & Techniques
I learned most of these the hard way. Here’s what I wish I’d known from the start:
- Don’t rush the marshmallow whipping: The mixture needs the full 10-12 minutes to develop that stable, fluffy structure. If you stop early, your marshmallows will be dense and weepy.
- Oil your spatula: Before you try to spread the marshmallow mixture in the pan, spray your spatula with non-stick spray. Otherwise, it’ll stick like glue and you’ll end up with a mess.
- Keep the cocoa warm, not boiling: If you’re using a slow cooker, set it to warm, not low. Boiling will make the milk separate and the chocolate become grainy.
- Crush candy canes in a bag: Put them in a zip-top bag and whack them with a rolling pin. Way less mess than using a food processor, and you get more control over the texture.
- Make the marshmallows a day ahead: They actually get better after a day. The texture firms up and the vanilla flavor becomes more pronounced.
My biggest failure? The first time I made these marshmallows, I didn’t use a candy thermometer. I guessed at the temperature, ended up with a syrup that was too cool, and my marshmallows never set. I had a pan of sticky, goopy sugar mess that I tried to pass off as “artisan marshmallow creme.” My daughter was not fooled. Learn from my mistakes—get the thermometer.
Variations & Adaptations
- Dairy-Free Version: Substitute the whole milk with full-fat oat milk or coconut milk (from a can, not the carton). Use a dairy-free dark chocolate. The texture will be slightly different but still delicious.
- Mexican Hot Cocoa Twist: Add ½ teaspoon of cinnamon and a pinch of cayenne pepper to the cocoa base. It’s warm, spicy, and absolutely incredible with the marshmallows.
- White Chocolate Peppermint: Replace the semi-sweet chocolate with white chocolate. The result is sweeter and creamier, with a more pronounced peppermint flavor. Top with pink marshmallows for extra cuteness.
- Mint Chocolate Chip Version: Add mini chocolate chips to the topping bar. The combination of cool mint and tiny chocolate chunks is a crowd-pleaser.
- Spiked Adult Version: Add a shot of peppermint schnapps or crème de menthe to each mug. It’s dangerous because it goes down way too easy.
I tried a version with coconut milk once, and honestly, it was surprisingly good. The coconut flavor didn’t clash with the chocolate and peppermint—it actually added a lovely tropical note that worked. Not traditional, but worth trying if you’re dairy-free.
Serving & Storage Suggestions
Serve the cocoa piping hot in large mugs. I like to pre-warm the mugs by filling them with hot water for a minute before pouring the cocoa—it keeps everything hot longer. The marshmallows should be added right before serving so they stay fluffy and don’t completely dissolve.
For a full presentation, serve alongside cherry chocolate brownies or pink velvet bundt cake. The fruity notes in both pair beautifully with the peppermint and chocolate.
Storage: The hot cocoa base can be refrigerated in an airtight container for up to 3 days. Reheat gently on the stove or in the microwave, whisking to recombine. The marshmallows will keep in an airtight container at room temperature for up to 2 weeks—if they last that long. Don’t refrigerate them; they’ll get weepy.
Freezer: Marshmallows freeze beautifully. Place them in a single layer on a baking sheet, freeze until solid, then transfer to a freezer bag. They’ll keep for up to 3 months. Thaw at room temperature for about 10 minutes before using.
The flavors actually develop and deepen over time. Day-old cocoa is often better than fresh because the chocolate and peppermint have had time to meld. Just saying.
Nutritional Information & Benefits
Per serving (1 cup cocoa with 2 marshmallows and basic toppings):
- Calories: approximately 380
- Fat: 22g
- Carbohydrates: 45g
- Protein: 8g
- Fiber: 3g
- Sugar: 35g
Let’s be honest—this isn’t health food. But it does have some redeeming qualities. The dark chocolate is rich in antioxidants and flavonoids, which are good for heart health. The milk provides calcium and vitamin D. And the peppermint can aid digestion—which you might need after all those marshmallows.
For a lighter version, use 2% milk and reduce the heavy cream to ½ cup. You’ll lose some richness but save about 100 calories per serving. Or just accept that some things are meant to be indulgent and enjoy it in moderation.
This recipe contains dairy, gluten (in the candy canes—check labels), and gelatin. It’s not suitable for vegans or vegetarians (due to gelatin), but the dairy-free adaptation above works beautifully.
Conclusion
Look, I know setting up a hot cocoa bar sounds like something you’d see on Pinterest and think, “That’s cute, but I’ll never actually do that.” But here’s the thing: this is genuinely easy. The marshmallows take a little effort the first time, but once you make them once, you’ll wonder why you ever bought the bagged kind. They’re that much better.
This recipe has become our go-to for holiday mornings, snow days, and any evening when we need a little extra cozy. It’s the kind of thing that makes people gather in the kitchen and linger over their mugs. And honestly? That’s the whole point.
I’d love to hear how yours turns out. Did you add something weird that worked? Did your kids have the same ridiculous reaction mine did? Drop a comment below and let me know. And if you’re looking for more cozy winter recipes, check out our full recipe collection—there’s plenty more where this came from.
Go make some cocoa. You deserve it.
Frequently Asked Questions
Can I make the marshmallows without a stand mixer?
Yes, absolutely. A hand mixer works fine—you’ll just need to hold it steady for the full 10-12 minutes. It’s a good arm workout. Alternatively, you can use a strong food processor with a whisk attachment, though I haven’t tested that myself.
Can I use store-bought marshmallows instead?
You can, but you’ll be missing out. Homemade marshmallows melt into a silky, creamy texture that store-bought ones just can’t match. They also don’t have that weird aftertaste that bagged marshmallows sometimes have. If you’re short on time, though, go for it—no judgment here.
Why did my marshmallows turn out too sticky?
Most likely, your sugar syrup didn’t reach the right temperature. It needs to hit exactly 240°F (115°C). If it’s too low, the marshmallows won’t set properly and will be sticky. Also, make sure you’re dusting generously with the powdered sugar-cornstarch mixture—that coating is what keeps them from sticking to everything.
Can I make this recipe ahead for a party?
Absolutely. The marshmallows can be made up to 2 weeks ahead and stored in an airtight container. The hot cocoa base can be made 3 days ahead and refrigerated. On party day, just reheat the cocoa and set up your bar. I often make the marshmallows a week before and the cocoa the morning of.
What if I don’t have a candy thermometer?
You can use the cold water test: drop a small amount of the hot syrup into a bowl of very cold water. If it forms a firm, pliable ball that holds its shape when you press it, it’s ready. It’s less precise than a thermometer, but it works in a pinch. Just be careful—that syrup is dangerously hot.
Pin This Recipe!
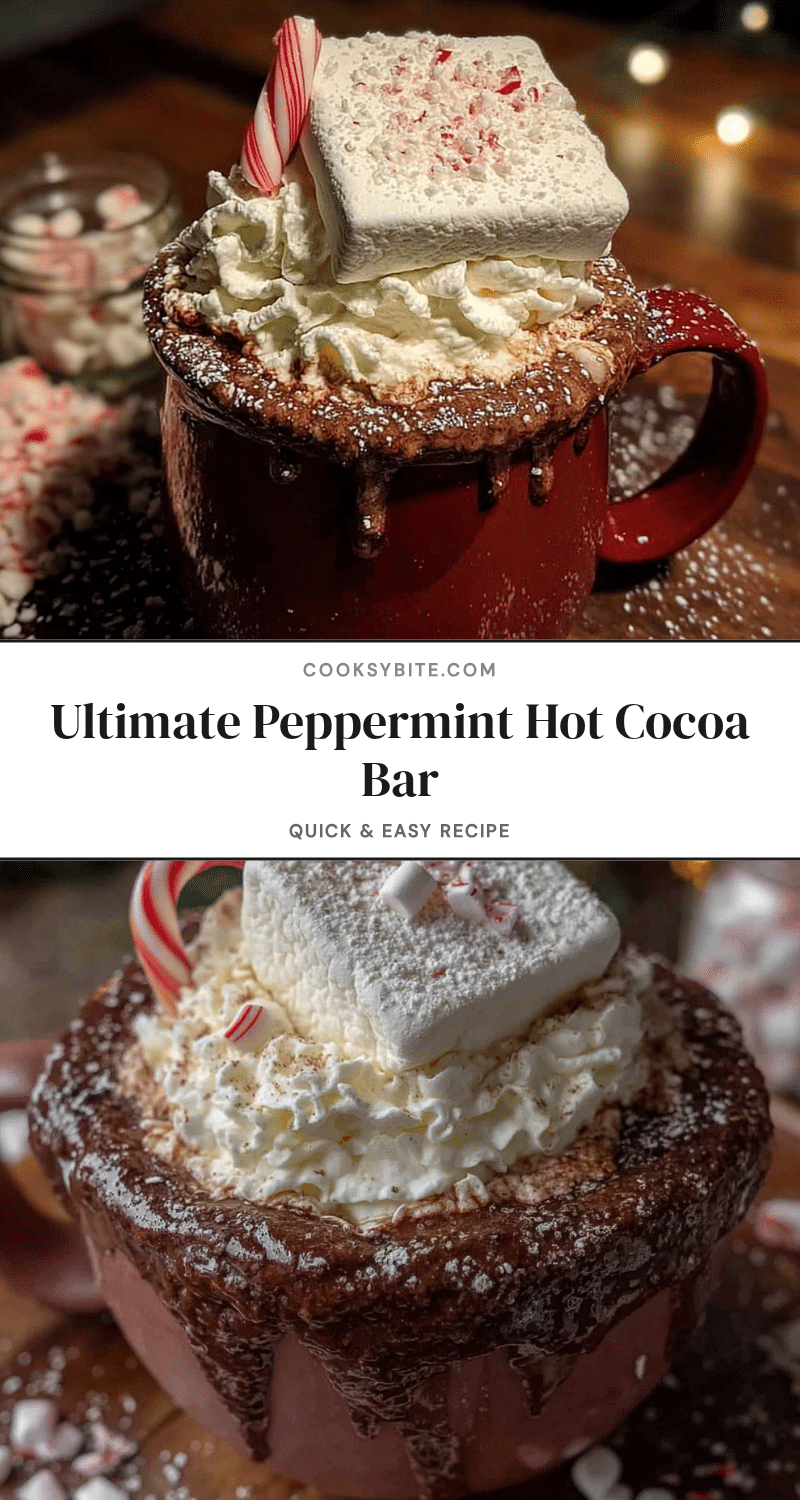
Ultimate Peppermint Hot Cocoa Bar with Easy Homemade Marshmallows

This rich and creamy hot cocoa with a cool peppermint kick is topped with pillowy homemade marshmallows that melt into silky clouds. Set up as a customizable bar for holiday gatherings, it’s a festive treat that comes together in under 30 minutes.
- Prep Time: 15 minutes
- Cook Time: 20 minutes
- Total Time: 4 hours 35 minutes (includes setting time)
- Yield: 4 servings
- Category: Beverage
- Cuisine: American
Ingredients
- Whole milk, 4 cups (960 ml)
- Heavy cream, 1 cup (240 ml)
- Semi-sweet chocolate, 8 oz (225 g), finely chopped
- Unsweetened cocoa powder, 2 tablespoons (15 g)
- Granulated sugar, 3 tablespoons (40 g)
- Vanilla extract, 1 teaspoon (5 ml)
- Peppermint extract, ½ teaspoon (2.5 ml)
- Pinch of salt
- Granulated sugar, 1 cup (200 g) (for marshmallows)
- Light corn syrup, ½ cup (170 g)
- Water, ½ cup (120 ml), divided
- Unflavored gelatin, 3 tablespoons (about 3 packets)
- Vanilla extract, 1 teaspoon (5 ml) (for marshmallows)
- Pinch of salt (for marshmallows)
- Powdered sugar, for dusting
- Cornstarch, for dusting
- Crushed candy canes, ½ cup (60 g) (optional)
- Whipped cream (optional)
- Chocolate shavings (optional)
- Mini chocolate chips (optional)
- Caramel sauce (optional)
- Cinnamon sticks (optional)
Instructions
- Make the Homemade Marshmallows: Line an 8×8 inch baking pan with parchment paper, letting it hang over the sides. Mix equal parts powdered sugar and cornstarch, then dust the pan generously.
- In the bowl of a stand mixer, sprinkle the gelatin over ¼ cup (60 ml) of cold water. Let it sit and bloom for about 5 minutes.
- In a small saucepan, combine the sugar, corn syrup, and remaining ¼ cup (60 ml) of water. Stir gently until the sugar dissolves, then stop stirring. Clip a candy thermometer to the side and bring the mixture to a boil. Cook without stirring until it reaches 240°F (115°C), about 8-10 minutes.
- Immediately remove from heat. Turn the mixer on low with the whisk attachment, and slowly pour the hot syrup into the blooming gelatin. Gradually increase the speed to high and whip for about 10-12 minutes until the mixture is thick, glossy, and holds stiff peaks.
- Add the vanilla and salt during the last minute of whipping. Scrape the mixture into the prepared pan, spreading evenly with an oiled spatula. Dust the top with more powdered sugar mixture. Let set uncovered at room temperature for at least 4 hours or overnight.
- Make the Hot Cocoa Base: In a medium saucepan over medium heat, combine the milk and heavy cream. Heat until steaming but not boiling, about 5-7 minutes.
- Whisk in the cocoa powder and sugar until fully dissolved. Add the chopped chocolate and whisk continuously until completely melted and smooth, about 2-3 minutes.
- Remove from heat and stir in the vanilla extract, peppermint extract, and a pinch of salt. Taste and adjust peppermint if desired.
- Cut and Prepare the Marshmallows: Once set, lift the marshmallow block out of the pan using the parchment paper. Dust a sharp knife or pizza cutter with the powdered sugar mixture and cut into 1-inch cubes. Toss cubes in more powdered sugar mixture to prevent sticking.
- Set Up Your Cocoa Bar: Pour the hot cocoa into a slow cooker or large thermos to keep warm. Arrange toppings in small bowls: crushed candy canes, chocolate shavings, whipped cream, caramel sauce, and marshmallows. Provide small tongs or spoons for each topping.
- Place mugs nearby and let everyone build their own creation. Start with a marshmallow or two, add crushed candy cane, then pour the cocoa over everything.
Notes
Don’t rush the marshmallow whipping; it needs the full 10-12 minutes. Oil your spatula before spreading marshmallow mixture. Keep cocoa warm, not boiling. Crush candy canes in a bag with a rolling pin. Make marshmallows a day ahead for best texture.
Nutrition
- Serving Size: 1 cup cocoa with 2 m
- Calories: 380
- Sugar: 35
- Sodium: 150
- Fat: 22
- Saturated Fat: 13
- Carbohydrates: 45
- Fiber: 3
- Protein: 8
Keywords: hot cocoa, peppermint, homemade marshmallows, holiday, Christmas, hot chocolate bar


