A neighbor’s kid asked me last week why I couldn’t just crush up some Oreos and call it a day. I was mid-explanation about proper chocolate pudding consistency and the importance of layering when I stopped. She was right.
I’d been overthinking it. Honestly, that happens a lot with holiday recipes. We get so caught up in making things impressive that we forget simple is usually better. This Easy Halloween Dirt Cups with Gummy Worms recipe came from that moment of realizing I was the one making things complicated.
There I was, standing in my kitchen with a bag of Oreos in one hand and a box of instant pudding in the other, feeling a little silly. I’d spent twenty minutes explaining to a ten-year-old why her idea wouldn’t work when it absolutely would. The pudding was cooling on the counter, and I’d already dirtied three bowls unnecessarily.
So I handed her the rolling pin and let her go to town on those cookies. She crushed them with this fierce determination that only kids have, and honestly? The texture was better than anything I’d achieved with my food processor. Maybe you’ve been there — overcomplicating a recipe that should be pure fun.
These Halloween dirt cups aren’t fancy. They’re not going to win any baking awards. But they’re the kind of dessert that makes kids’ eyes light up and adults sneak seconds when they think no one’s watching. That’s the whole point of Halloween, isn’t it? A little spooky, a little silly, and completely delicious.
Why You’ll Love This Recipe
Let me tell you why these Easy Halloween Dirt Cups with Gummy Worms have become my go-to for every Halloween gathering. I’ve tested this recipe through three different parties, two classroom celebrations, and one very rainy October afternoon when my niece needed cheering up.
- Quick & Easy: Comes together in under 15 minutes of active prep time. The hardest part is waiting for the pudding to set, and that’s just patience.
- Simple Ingredients: You probably have most of these in your kitchen right now. No special Halloween-themed products needed.
- Perfect for Parties: Great for classroom celebrations, Halloween potlucks, or a spooky movie night with the family.
- Crowd-Pleaser: Kids absolutely love them, and adults appreciate the nostalgic factor. I’ve never brought these anywhere without getting asked for the recipe.
- Unbelievably Fun: The gummy worms peeking out of the “dirt” never gets old. Every single person smiles when they see these.
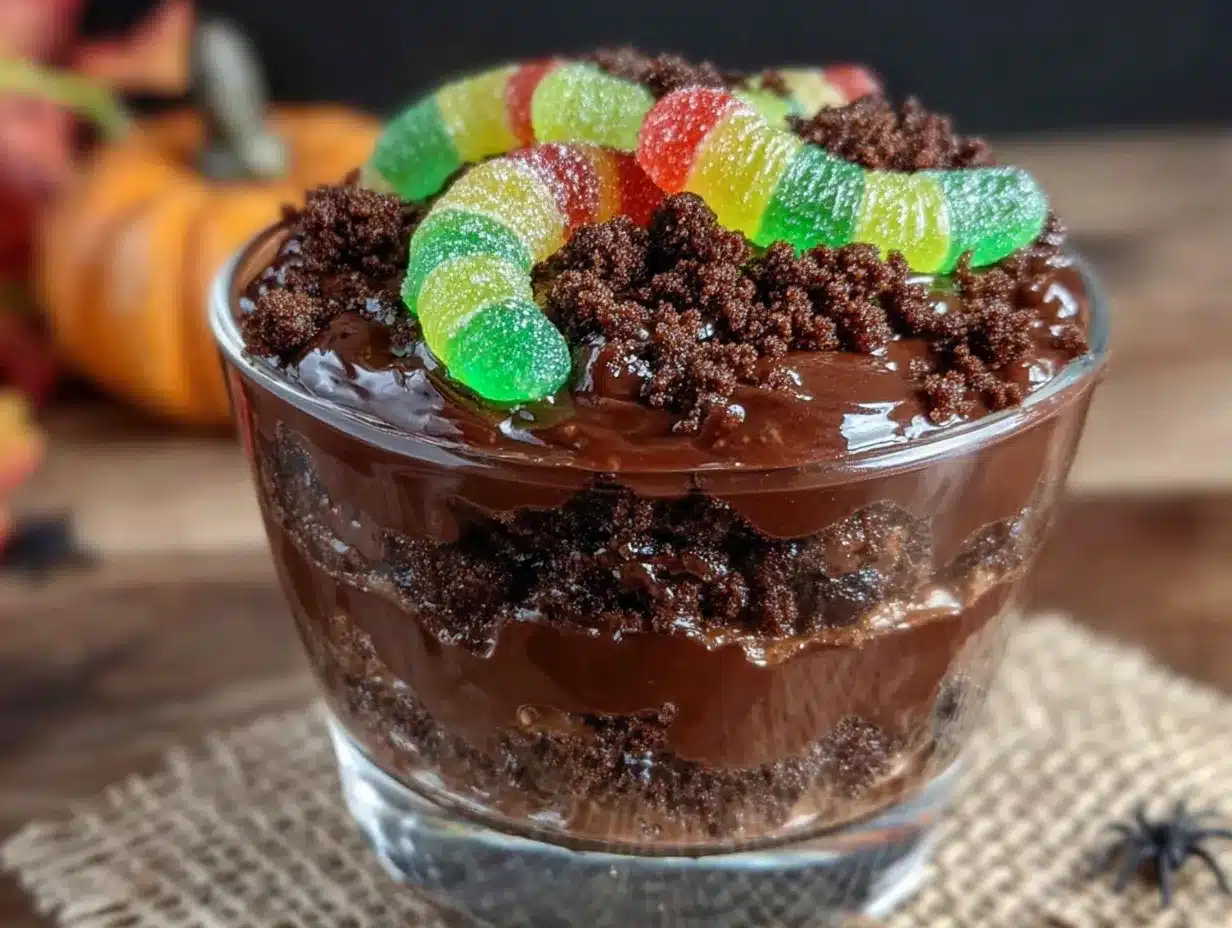
What makes these different from other dirt cup recipes? It’s the texture. I use a specific ratio of crushed cookies to pudding that gives you that perfect “dirt” consistency — not too wet, not too dry. The gummy worms stay visible without sliding down into the pudding, and the whole thing holds together beautifully when you eat it.
This is the kind of dessert that brings back childhood memories. It’s comfort food dressed up in Halloween costume. You get the creamy, chocolatey satisfaction of pudding with the crunch of cookies, and then surprise — there’s a gummy worm hiding in there. It’s simple joy in a cup.
What Ingredients You Will Need
This recipe uses everyday ingredients that transform into something magical. The beauty of these Easy Halloween Dirt Cups with Gummy Worms is that you don’t need anything fancy.
For the Pudding Layer
- 2 boxes (3.9 ounces each) instant chocolate pudding mix (I prefer Jell-O brand for consistent results)
- 3 cups cold whole milk (2% works fine too, but whole milk gives creamier pudding)
- 1 teaspoon vanilla extract (optional, but adds depth)
For the Dirt Topping
- 1 package (14.3 ounces) Oreo cookies (about 36 cookies) — regular, not double-stuff
- 2 tablespoons melted butter (optional, but helps the “dirt” stay crunchy longer)
For Decoration
- 1 bag (5 ounces) gummy worms (I use Trolli or Black Forest brands)
- Optional: candy eyeballs, Halloween sprinkles, or small plastic spiders for extra spookiness
Let’s talk about ingredient choices for a minute. The instant pudding mix is non-negotiable here — cook-and-serve pudding takes too long and doesn’t set up the same way. Trust me, I tried it once thinking I’d be fancy, and the results were a sad, soupy mess.
For the Oreos, regular ones work best. Double-stuff has too much cream filling, which makes the “dirt” clump together instead of staying crumbly. If you’re feeling ambitious, you can scrape out some of the cream before crushing, but honestly? I never bother. The extra cream just makes the dirt taste better.
When it comes to gummy worms, get the colorful ones. The red, green, and yellow worms look best against the dark chocolate dirt. I’ve tried the sour ones before, and while they’re tasty, the regular sweet worms work better for kids.
For a dairy-free version, use almond milk or oat milk with a dairy-free instant pudding mix. Coconut milk works too, but it adds a slight coconut flavor that might clash with the chocolate.
Equipment Needed
You don’t need much for this recipe, which is part of why I love it. Here’s what you’ll need:
- Large mixing bowl for the pudding — any size works, but bigger is better for whisking
- Whisk — a wire whisk works best, but a fork in a pinch
- Rolling pin or food processor for crushing Oreos. I’ve used both, and honestly, the rolling pin method is more fun and less cleanup
- Ziploc bag — put the Oreos inside and crush away. Double bag it to avoid explosions
- Small cups or glasses — 8-ounce plastic cups work great for parties, but small mason jars or wine glasses look fancier for adults
- Spatula for scraping every last bit of pudding
- Measuring cups — though honestly, I eyeball the milk these days
My favorite trick? Use clear plastic cups so everyone can see the layers. The visual of the dirt, pudding, and worms is half the fun. I found a pack of 50 at the dollar store that lasted me through three Halloweens.
If you don’t have a rolling pin, a heavy-bottomed glass works fine. Just be careful not to break the glass. I may or may not have learned that the hard way.
Preparation Method
Making these Easy Halloween Dirt Cups with Gummy Worms is straightforward, but a few tips make all the difference. Let me walk you through it step by step.
- Make the pudding. In a large bowl, whisk together the instant pudding mix and cold milk. Whisk for about 2 minutes until it starts to thicken. Add the vanilla extract if you’re using it. The mixture will be thin at first — don’t panic, that’s normal. It needs time to set.
- Let the pudding set. Cover the bowl with plastic wrap and refrigerate for at least 5 minutes, but 10-15 minutes is better. The pudding should be thick but still spoonable. If it sets too long and becomes solid, just whisk it a little to loosen it up.
- Crush the Oreos. While the pudding sets, put the Oreos in a large Ziploc bag. Seal it tight — and I mean tight. Use a rolling pin to crush them into fine crumbs. You want a mix of fine dirt and small chunks. Don’t pulverize them completely; texture is your friend here.
- Optional: Toast the crumbs. If you want extra crunch, spread the Oreo crumbs on a baking sheet and toast at 350°F for 5 minutes. Let them cool completely before using. This step is optional but makes a noticeable difference in texture.
- Layer the cups. Spoon about 2 tablespoons of pudding into each cup. You want a layer about 1 inch thick. Tap the cup gently on the counter to settle the pudding.
- Add the worms. Press 2-3 gummy worms into the pudding, letting their heads poke out. This is the fun part — arrange them so they look like they’re crawling out of the dirt.
- Add more pudding. Spoon another layer of pudding over the worms, about 1-2 tablespoons. You don’t want to completely cover the worms — leave their heads visible.
- Top with dirt. Sprinkle a generous layer of Oreo crumbs over the top. Use about 2 tablespoons per cup. The crumbs should completely cover the pudding.
- Add final decorations. Place one more gummy worm on top of the dirt, maybe half-buried. Add candy eyeballs or sprinkles if you’re using them.
- Chill before serving. Refrigerate for at least 30 minutes before serving. This lets everything set together. The cups will keep in the fridge for up to 2 days, though the Oreo crumbs will soften over time.
A few things I’ve learned the hard way: Don’t overmix the pudding. It’ll get gummy and weird. Also, crush the Oreos while they’re still in the package if you’re short on time — just be careful not to tear the bag.
The texture should be smooth and creamy from the pudding, with that satisfying crunch from the cookie dirt. When you dig your spoon in, you should hit a gummy worm within the first few bites. That surprise is what makes these so fun.
Cooking Tips & Techniques
After making these Easy Halloween Dirt Cups with Gummy Worms more times than I care to count, I’ve picked up a few tricks. Let me share the ones that actually matter.
The milk temperature matters. Cold milk helps the instant pudding set properly. If your milk is room temperature, the pudding won’t thicken as well. I keep my milk in the fridge until the last minute.
Double bag your Oreos. I cannot stress this enough. The first time I crushed Oreos in a Ziploc bag, a rogue crumb escaped and flew across the kitchen. My dog was very confused. Put the Oreo bag inside another bag, and you’ll avoid a crumb explosion.
Don’t skip the chilling step. I know you’re excited. I know the kids are waiting. But if you serve these immediately, the pudding will be runny and the dirt will slide right off. Thirty minutes in the fridge makes everything come together.
Make extra dirt. You’ll always need more than you think. Kids love adding extra Oreo crumbs on top, and having leftovers means you can refresh the cups before serving.
Gummy worm placement is key. Push them deep enough that they stay put, but leave enough exposed that they look like they’re crawling out. About halfway is the sweet spot.
One mistake I made early on was using too much pudding. The cups should be about 2/3 pudding and 1/3 dirt. Too much pudding and the worms slide down into oblivion. Too much dirt and it’s dry and hard to eat.
If you’re making these for a classroom party, assemble them in the morning and refrigerate until it’s time to go. They travel well if you keep them level. I once transported 24 cups in a milk crate and only lost one to a pothole.
Variations & Adaptations
These Easy Halloween Dirt Cups with Gummy Worms are incredibly adaptable. Here are some variations I’ve tried and loved.
Chocolate Peanut Butter Dirt Cups
Add 2 tablespoons of peanut butter to the pudding mix before whisking. The peanut butter adds richness and pairs beautifully with the chocolate. My nephew declared these “the best thing I’ve ever eaten” and he’s not easily impressed.
Vegan Dirt Cups
Use a vegan instant chocolate pudding mix (many brands are accidentally vegan) and plant-based milk. Check the Oreo package — regular Oreos are actually vegan, which surprised me too. Use vegan gummy worms, which are available at most health food stores.
Pumpkin Spice Dirt Cups
Swap the chocolate pudding for vanilla pudding and add 1 teaspoon of pumpkin pie spice. Use crushed graham crackers instead of Oreos for the dirt. Top with candy corn instead of gummy worms for a fall twist.
Gluten-Free Version
Use gluten-free chocolate sandwich cookies (K-Toos are my favorite brand) and confirm your pudding mix is gluten-free. Most instant pudding is, but always check the label. The texture is slightly different but still delicious.
Adult Halloween Dirt Cups
Add a tablespoon of Kahlua or Baileys to the pudding before setting. Use dark chocolate pudding mix for a more sophisticated flavor. Top with chocolate shavings instead of gummy worms for a grown-up presentation.
My personal favorite variation? I once made these with crushed chocolate graham crackers instead of Oreos, and the lighter color looked more like actual dirt. The kids were confused but the adults appreciated the novelty.
Serving & Storage Suggestions
These Easy Halloween Dirt Cups with Gummy Worms are best served cold, straight from the refrigerator. The contrast between the cold, creamy pudding and the crunchy Oreo dirt is what makes them special.
For presentation, I like to arrange the cups on a platter with a few extra gummy worms scattered around. Add some fake spiderwebs or plastic spiders for that extra Halloween touch. If you’re serving these at a party, label them with a cute sign — “Worm Dirt” always gets a laugh.
These pair wonderfully with warm apple cider or hot chocolate. For an adult gathering, they go surprisingly well with a dark stout beer. The bitterness of the beer balances the sweetness of the dessert.
Storage instructions: Keep the cups covered with plastic wrap or lids in the refrigerator for up to 3 days. The Oreo crumbs will soften over time, so they’re best within the first 24 hours. If you’re making them ahead, store the pudding and crushed Oreos separately and assemble right before serving.
Freezer instructions: You can freeze these, but the texture changes. The pudding becomes icy and the Oreos get soggy when thawed. If you must freeze them, do it without the gummy worms and add those after thawing.
Reheating: Don’t. These are meant to be served cold. If they’ve been sitting out too long, just pop them back in the fridge for 15 minutes.
The flavors actually develop over time. The pudding absorbs some of the cookie flavor, and the gummy worms soften slightly. Day-old dirt cups have a different but equally delicious texture.
Nutritional Information & Benefits
Let’s be real — these Easy Halloween Dirt Cups with Gummy Worms are a treat, not a health food. But here’s what you’re working with per serving (one cup):
| Nutrient | Amount Per Serving |
|---|---|
| Calories | 280-320 |
| Total Fat | 12g |
| Saturated Fat | 5g |
| Carbohydrates | 45g |
| Sugar | 32g |
| Protein | 4g |
| Calcium | 8% DV |
| Iron | 6% DV |
The milk in the pudding provides some calcium and vitamin D. The Oreos contain a small amount of iron. The gummy worms? Pure sugar and happiness, honestly.
For those with dietary concerns, this recipe contains dairy (milk), gluten (Oreos), and soy (in the pudding mix). Check labels carefully for allergens. The vegan version I mentioned earlier addresses most of these concerns.
My personal take? Halloween is one night a year. These dirt cups are about fun, not nutrition. I serve them alongside a healthy dinner and don’t stress about the sugar content. Balance is everything.
Conclusion
These Easy Halloween Dirt Cups with Gummy Worms have become a tradition in my house, and I hope they become one in yours too. They’re the kind of recipe that proves you don’t need fancy techniques or expensive ingredients to create something special.
What I love most about this recipe is how it brings people together. Kids get to help crush the Oreos and arrange the worms. Adults get to reminisce about their own childhood Halloween treats. Everyone gets to enjoy a dessert that’s as fun to make as it is to eat.
Feel free to customize these however you like. Add different candies, try different pudding flavors, or experiment with the toppings. The base recipe is forgiving and adaptable. That’s the beauty of simple recipes — they leave room for creativity.
I’d love to hear how your dirt cups turn out! Drop a comment below and let me know what variations you tried. Did your kids love them? Did you add something unexpected? Share your photos on social media and tag me — I love seeing your creations.
Here’s to a Halloween filled with chocolate, gummy worms, and the kind of simple joy that only a cup of dirt can bring. Happy Halloween, friends!
Frequently Asked Questions
Can I make these dirt cups ahead of time?
Absolutely! You can assemble them up to 24 hours in advance. Just keep them covered in the refrigerator. The Oreo crumbs will soften slightly, but they’ll still taste great. For best results, add the gummy worms right before serving so they stay chewy.
How many cups does this recipe make?
This recipe makes about 8-10 cups, depending on the size of your cups. I use 8-ounce cups and get exactly 8 servings. If you’re using smaller cups, like the 5-ounce ones, you’ll get closer to 12 servings.
Can I use sugar-free pudding mix?
Yes, sugar-free instant pudding works perfectly. The texture is slightly different — a bit less creamy — but it sets up just fine. Use sugar-free Oreos if you want to reduce the sugar even further.
My pudding didn’t set. What went wrong?
This usually happens for one of three reasons: your milk was too warm, you didn’t whisk long enough, or you didn’t let it set long enough. Make sure your milk is cold, whisk for the full 2 minutes, and give it at least 10 minutes in the fridge.
Can I use homemade chocolate pudding instead of instant?
You can, but it changes the recipe. Homemade pudding is thinner and takes longer to set. If you use homemade pudding, let it set completely — about 2 hours — before assembling the cups. The texture will be richer but the cups won’t hold together as well.
Pin This Recipe!
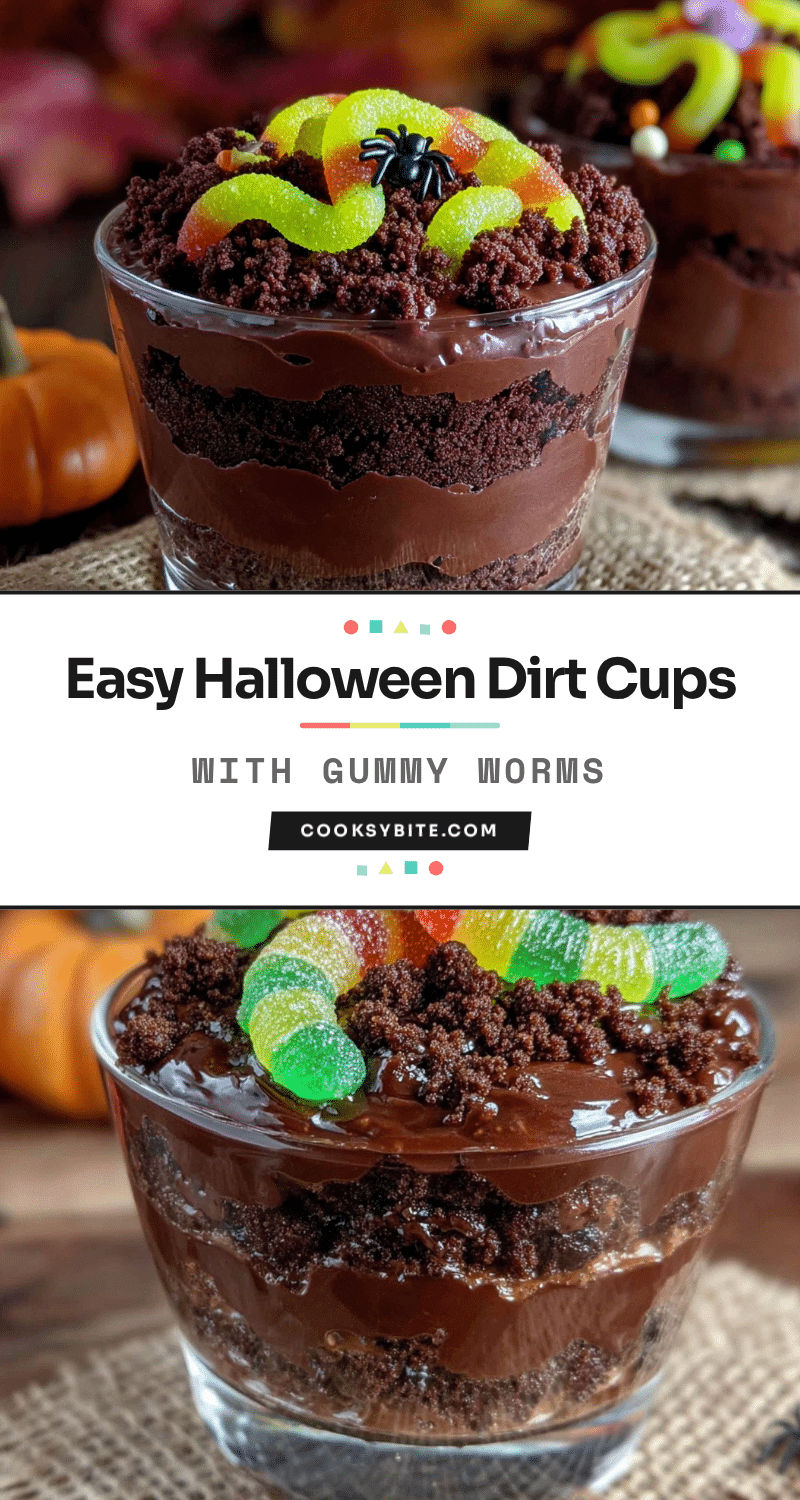
Easy Halloween Dirt Cups with Gummy Worms
These Easy Halloween Dirt Cups with Gummy Worms are a quick, fun, and kid-friendly dessert made with creamy chocolate pudding, crushed Oreo ‘dirt,’ and gummy worms peeking out. Perfect for Halloween parties, classroom celebrations, or a spooky movie night.
- Prep Time: 15 minutes
- Cook Time: 0 minutes
- Total Time: 45 minutes (includes chilling time)
- Yield: 8-10 servings 1x
- Category: Dessert
- Cuisine: American
Ingredients
- 2 boxes (3.9 ounces each) instant chocolate pudding mix
- 3 cups cold whole milk
- 1 teaspoon vanilla extract (optional)
- 1 package (14.3 ounces) Oreo cookies (about 36 cookies), regular, not double-stuff
- 2 tablespoons melted butter (optional)
- 1 bag (5 ounces) gummy worms
- Optional: candy eyeballs, Halloween sprinkles, or small plastic spiders for decoration
Instructions
- Make the pudding: In a large bowl, whisk together the instant pudding mix and cold milk. Whisk for about 2 minutes until it starts to thicken. Add the vanilla extract if using. The mixture will be thin at first; it needs time to set.
- Let the pudding set: Cover the bowl with plastic wrap and refrigerate for at least 5 minutes, but 10-15 minutes is better. The pudding should be thick but still spoonable. If it sets too long and becomes solid, whisk it a little to loosen it up.
- Crush the Oreos: While the pudding sets, put the Oreos in a large Ziploc bag. Seal it tight. Use a rolling pin to crush them into fine crumbs. You want a mix of fine dirt and small chunks. Don’t pulverize them completely; texture is your friend.
- Optional: Toast the crumbs: If you want extra crunch, spread the Oreo crumbs on a baking sheet and toast at 350°F for 5 minutes. Let them cool completely before using.
- Layer the cups: Spoon about 2 tablespoons of pudding into each cup. You want a layer about 1 inch thick. Tap the cup gently on the counter to settle the pudding.
- Add the worms: Press 2-3 gummy worms into the pudding, letting their heads poke out. Arrange them so they look like they’re crawling out of the dirt.
- Add more pudding: Spoon another layer of pudding over the worms, about 1-2 tablespoons. You don’t want to completely cover the worms — leave their heads visible.
- Top with dirt: Sprinkle a generous layer of Oreo crumbs over the top. Use about 2 tablespoons per cup. The crumbs should completely cover the pudding.
- Add final decorations: Place one more gummy worm on top of the dirt, maybe half-buried. Add candy eyeballs or sprinkles if using.
- Chill before serving: Refrigerate for at least 30 minutes before serving. This lets everything set together. The cups will keep in the fridge for up to 2 days, though the Oreo crumbs will soften over time.
Notes
Use cold milk for the pudding to set properly. Double bag the Oreos when crushing to avoid mess. Don’t skip the chilling step; it helps the layers set. For best results, add gummy worms right before serving to keep them chewy. Store covered in the refrigerator for up to 3 days; Oreo crumbs will soften over time.
Nutrition
- Serving Size: 1 cup
- Calories: 300
- Sugar: 32
- Sodium: 380
- Fat: 12
- Saturated Fat: 5
- Carbohydrates: 45
- Fiber: 1
- Protein: 4
Keywords: Halloween dirt cups, gummy worms, Oreo dirt, chocolate pudding, easy Halloween dessert, kid-friendly, no-bake dessert


