I was standing in line at the post office, of all places, the Tuesday before Halloween last year. My arms were full of packages, and I was mentally running through a list of everything I still needed to do for my annual costume party. The woman ahead of me, maybe seventy years old with silver hair and a sensible raincoat, turned around and caught me sighing.
“You look like you’re planning a party,” she said. I admitted I was, and that I was still trying to figure out a dessert that wouldn’t melt in the chaos of a crowded living room. She laughed and said, “Honey, you need my ghost cookies. Three ingredients, twenty minutes, and they look like they floated right out of a haunted house.”
I honestly thought she was going to give me some complicated family recipe passed down for generations. But no. She scribbled on the back of an envelope she pulled from her purse—three simple ingredients, no oven thermometer, no fuss. I thanked her, stuffed the envelope in my pocket, and didn’t think much of it until I got home that night. Let me tell you, I was skeptical. Meringue can be finicky, right? But I had eggs, sugar, and vanilla, and I figured I had nothing to lose. The result? These ghost meringue cookies were so light, so perfectly spooky, and so ridiculously easy that they’ve become my go-to Halloween treat every single year since.
Maybe you’ve been there, staring at complicated Halloween dessert recipes that require specialty pans or food coloring that stains your fingers for days. These ghost meringue cookies are the opposite of that. They’re the recipe you didn’t know you needed until a stranger at the post office handed it to you on a scrap of paper. And honestly? I’m so glad she did.
Why You’ll Love This Recipe
I’ve tested a lot of meringue recipes over the years, and I can tell you with confidence that this one is different. It’s not just another version of the same thing—it’s the version that actually works every single time. Here’s why these ghost meringue cookies deserve a spot in your Halloween baking rotation:
- Only 3 Ingredients: Eggs, sugar, and vanilla extract. That’s it. No cream of tartar, no cornstarch, no complicated stabilizers. You probably have everything in your kitchen right now.
- Comes Together in Under 30 Minutes: The actual prep time is about 10 minutes. The oven does the rest of the work while you focus on other party prep or wrangling excited kids.
- Perfect for Halloween Gatherings: These little ghosts are the ideal treat for a dinner party, potluck, or festive get-together. They’re light enough to serve after a heavy meal, and they look impressive without any fancy decorating skills.
- Naturally Gluten-Free and Low-Fat: If you have guests with dietary restrictions, these cookies are a lifesaver. No butter, no flour, no dairy—just pure, airy sweetness.
- They Steal the Show: I’ve served these alongside elaborate chocolate cakes and decorated sugar cookies, and the ghost meringue cookies always get the most comments and photos. There’s something about their tiny, ghostly shapes that makes people smile.
What makes this recipe different from every other meringue recipe out there? It’s the method. Most recipes tell you to beat the egg whites until stiff peaks form, then pipe and bake. But the trick I learned from that woman at the post office is to add the sugar gradually and beat until the mixture is glossy and holds its shape perfectly—no weeping, no cracking, no flat ghosts. It’s a small detail, but it makes all the difference between a cookie that looks like a ghost and one that looks like a sad, deflated blob.
This is the kind of recipe that makes you close your eyes after the first bite. The outside is crisp and delicate, the inside is soft and marshmallowy, and the whole thing dissolves on your tongue like a sweet little cloud. It’s comfort food for the Halloween season—simple, nostalgic, and absolutely delightful.
What Ingredients You Will Need
This recipe uses three simple, wholesome ingredients to create something that feels almost magical. The beauty of ghost meringue cookies is that you don’t need any fancy baking supplies or hard-to-find items. Here’s what you’ll need and why each ingredient matters:
For the Meringue Base
- 3 large egg whites, at room temperature (about 90g or 3.2 oz). Room temperature egg whites whip up higher and more stable than cold ones. I usually take my eggs out of the fridge about 30 minutes before I start. If you’re in a hurry, place the eggs in a bowl of warm water for 5 minutes.
- ¾ cup granulated sugar (150g or 5.3 oz). Regular white sugar works best here. Don’t use powdered sugar or brown sugar—they’ll change the texture and stability of the meringue. The fine granules dissolve easily into the egg whites, creating that smooth, glossy finish.
- ½ teaspoon vanilla extract (2.5 ml). Pure vanilla extract gives the cookies a warm, sweet flavor. You can use imitation vanilla in a pinch, but the flavor won’t be as rich. For a fun twist, try peppermint extract for a wintery version.
For the Ghost Faces (Optional but Recommended)
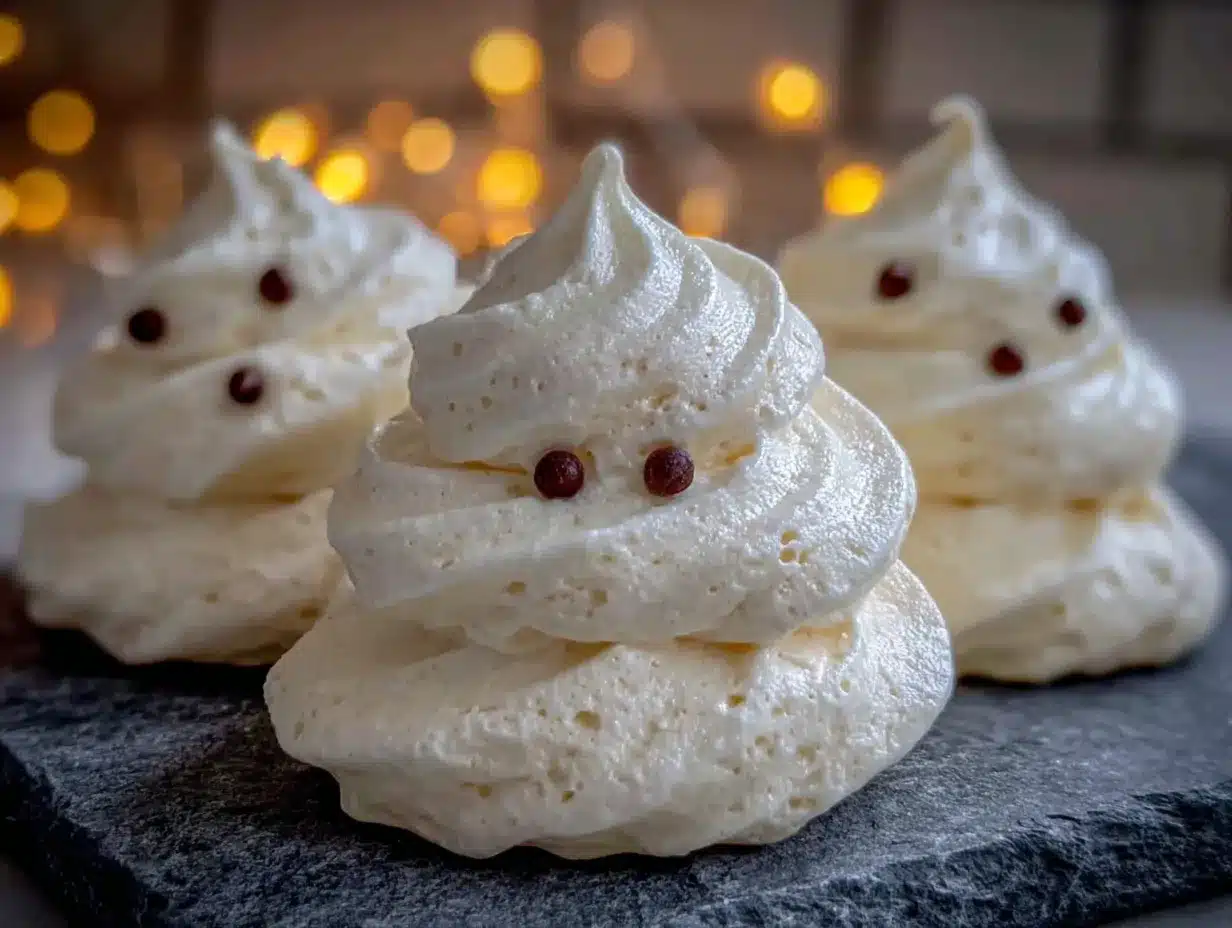
- Mini chocolate chips or black gel food coloring. I prefer mini chocolate chips because they’re easy to press into the meringue and they add a little chocolate flavor. Black gel food coloring works too if you want to paint on faces with a toothpick. Just be careful not to use too much liquid coloring, as it can deflate the meringue.
Ingredient Selection Tips
I recommend using fresh eggs for the best volume. Older egg whites don’t whip up as well because they’ve lost some of their structure. If you’re not sure how fresh your eggs are, place them in a bowl of water—fresh eggs sink, older eggs float.
For the sugar, I’ve tested this with organic cane sugar and regular granulated sugar, and both work fine. Just make sure the sugar is fine and not coarse. If your sugar has clumps, sift it before adding it to the egg whites.
Vanilla extract is where you can get creative. I usually use McCormick pure vanilla extract because it’s reliable and widely available. But I’ve also made these with vanilla bean paste (use ½ teaspoon) for those beautiful little vanilla specks that look like ghostly freckles.
Substitution Guidance
If you need a vegan version, you can try aquafaba (the liquid from a can of chickpeas) instead of egg whites. Use 3 tablespoons of aquafaba per egg white. The texture will be slightly different, but it works surprisingly well. For a sugar-free option, use a granulated monk fruit sweetener that measures like sugar. Keep in mind that the texture may be a bit less crisp.
And here’s a little tip I learned from trial and error: if you want your ghosts to be pure white, use clear vanilla extract instead of the dark brown stuff. Regular vanilla will give your meringues a slight beige tint, which honestly makes them look even more ghost-like and spooky. I kind of prefer it that way.
Equipment Needed
You don’t need a lot of fancy equipment to make ghost meringue cookies, which is part of why I love this recipe. Here’s what you’ll need:
- Electric mixer: A stand mixer with a whisk attachment is ideal, but a hand mixer works just as well. You’ll be beating the egg whites for about 8-10 minutes, so doing it by hand with a whisk is possible but your arm will definitely feel it. I’ve done it both ways, and honestly, the electric mixer is worth the effort.
- Large mixing bowl: Make sure it’s completely clean and dry. Any trace of grease or egg yolk will prevent your egg whites from whipping up properly. I wipe my bowl with a little lemon juice or vinegar before starting to be safe.
- Piping bag with a round tip: A piping bag makes it easy to create the ghost shapes. If you don’t have one, you can use a zip-top bag with the corner snipped off. I’ve used both, and the piping bag gives you more control, but the zip-top bag works in a pinch.
- Baking sheet lined with parchment paper: Parchment paper is non-negotiable here. The meringues will stick to a greased baking sheet, and they’re too delicate to peel off easily. Silicone baking mats also work great.
- Cooling rack: You’ll need this to let the meringues cool completely after baking. They continue to dry out and crisp up as they cool.
If you’re on a budget, skip the piping bag and use a spoon to drop dollops of meringue onto the baking sheet. They won’t look as perfectly ghost-shaped, but they’ll taste just as good. I’ve done this when I was in a hurry, and my guests didn’t complain one bit.
Preparation Method
Making ghost meringue cookies is surprisingly simple, but there are a few key steps that make the difference between perfect ghosts and flat puddles. Follow these steps carefully, and you’ll have a batch of adorable, spooky cookies in no time.
- Preheat your oven to 200°F (93°C). Yes, that’s a very low temperature. We’re not baking the meringues so much as drying them out. Line a large baking sheet with parchment paper and set it aside.
- Separate your eggs while they’re cold. Cold eggs separate more easily, and you want to make sure absolutely no yolk gets into the whites. Even a tiny bit of yolk can prevent the whites from whipping up. I separate each egg into a small bowl first, then add the white to my mixing bowl. That way, if I accidentally break a yolk, I only lose one egg instead of the whole batch.
- Let the egg whites come to room temperature. This takes about 30 minutes. Room temperature egg whites whip up higher and more stable. If you’re short on time, place the bowl of egg whites in a larger bowl of warm water for 5-10 minutes, stirring occasionally.
- Start whipping the egg whites on medium speed. After about 2 minutes, they’ll become frothy and start to increase in volume. This is when you can add a pinch of salt if you want, though it’s not necessary for this recipe.
- Gradually add the sugar, about 1 tablespoon at a time, with the mixer running on medium-high speed. This is the most important step. Adding the sugar too quickly can deflate the egg whites and result in a flat, weeping meringue. Take your time—about 30 seconds between each addition.
- Add the vanilla extract after all the sugar is incorporated. Beat for another 30 seconds to distribute the flavor evenly.
- Continue beating until stiff peaks form. This usually takes about 8-10 minutes total. You’ll know it’s ready when the meringue is glossy, thick, and holds a stiff peak when you lift the whisk. If you rub a little between your fingers, it should feel smooth, not gritty. If it feels gritty, keep beating until the sugar dissolves completely.
- Transfer the meringue to a piping bag fitted with a round tip. I use a ½-inch (1.3 cm) tip for ghosts that are about 2 inches (5 cm) tall. If you don’t have a piping bag, spoon the meringue into a zip-top bag and snip off one corner.
- Pipe the ghost shapes onto the prepared baking sheet. Hold the piping bag straight up and down, about ½ inch (1.3 cm) above the parchment. Squeeze gently to create a round base, then lift the bag straight up while continuing to squeeze. Release pressure and pull away to create a little peak on top. Space the ghosts about 1 inch (2.5 cm) apart—they don’t spread much, but they need a little breathing room.
- Add the faces while the meringue is still wet. Gently press two mini chocolate chips into each ghost for eyes, and one for a mouth. If you’re using gel food coloring, dip a toothpick into the gel and carefully paint on the faces. Work quickly so the meringue doesn’t start to dry.
- Bake for 60-75 minutes at 200°F (93°C). The meringues are done when they’re dry to the touch and easily lift off the parchment paper. They should be crisp on the outside but still slightly soft on the inside. If they start to brown, your oven is too hot—open the door slightly to lower the temperature.
- Turn off the oven and let the meringues cool inside for at least 1 hour. This gradual cooling helps prevent cracking. After an hour, transfer them to a wire rack to cool completely.
A few things to watch for: If your meringue starts to weep (little beads of liquid form on the surface), your sugar didn’t dissolve completely, or your oven temperature fluctuated. If the ghosts collapse, the egg whites were over-beaten or under-beaten. Don’t worry if your first batch isn’t perfect—mine certainly wasn’t. The second batch will be better.
Cooking Tips & Techniques
Over the years, I’ve made more batches of ghost meringue cookies than I can count, and I’ve learned a few things the hard way. Here are my best tips for getting perfect results every time:
Cleanliness is crucial. Any trace of grease or egg yolk will ruin your meringue. I wash my mixing bowl and whisk attachment with hot, soapy water, then wipe them down with a little white vinegar or lemon juice to remove any lingering residue. It sounds fussy, but it makes a real difference.
Don’t over-beat the egg whites. Stiff peaks mean the meringue holds its shape when you lift the whisk, but it’s still glossy and smooth. If you keep beating past this point, the meringue will become dry and grainy, and it will collapse during baking. I’ve done this more times than I’d like to admit, and the result is always flat, sad ghosts.
Humidity is your enemy. Meringue is essentially sugar and egg whites, and sugar attracts moisture. If you live in a humid climate, you might need to bake the cookies a little longer to ensure they’re completely dried out. I’ve had batches that looked perfect coming out of the oven but turned sticky and soft within hours because the humidity was high. Store them in an airtight container immediately after they cool.
Use a low oven temperature. I know 200°F (93°C) seems ridiculously low, but it’s the perfect temperature for drying out meringues without browning them. If your oven runs hot, use an oven thermometer to check the actual temperature. My oven tends to run about 25°F (14°C) hotter than the dial says, so I set it to 175°F (79°C) and check the thermometer.
Let them cool in the oven. This is the trick that took me from okay meringues to great meringues. Turning off the oven and leaving the cookies inside to cool gradually prevents the sudden temperature change that causes cracking. I usually leave them in for at least an hour, sometimes longer if I’m busy with other party prep.
Multitasking strategy: While the meringues are baking, you can prepare other Halloween treats or set up your party decorations. The long, slow bake time means you don’t have to hover over the oven. Just set a timer and go about your business.
Variations & Adaptations
One of the best things about ghost meringue cookies is how easy they are to customize. Here are some variations I’ve tried and loved:
Flavor Variations
Peppermint Ghosts: Substitute the vanilla extract with ½ teaspoon of peppermint extract. The cool, minty flavor is perfect for a wintery twist, and the white meringue looks like snow ghosts. I made these for a Christmas party once, and they were a hit.
Chocolate Ghosts: Sift 1 tablespoon of unsweetened cocoa powder into the sugar before adding it to the egg whites. The meringue will be a pale brown color, which actually looks pretty cool for Halloween. You can also drizzle melted dark chocolate over the cooled cookies for extra richness.
Lemon Ghosts: Add 1 teaspoon of lemon zest along with the vanilla extract. The bright, citrusy flavor cuts through the sweetness and makes these feel a little lighter. I’ve served these at a spring brunch with great success.
Dietary Adaptations
Vegan Ghosts: Replace the egg whites with aquafaba (the liquid from a can of chickpeas). Use 3 tablespoons of aquafaba per egg white. Whip it the same way you would egg whites, and add a pinch of cream of tartar to help stabilize it. The texture is slightly different—a bit more chewy—but still delicious.
Sugar-Free Ghosts: Use a granulated monk fruit sweetener that measures like sugar. The texture won’t be as crisp, but the flavor is still great. I’ve tested this with Swerve and Lakanto, and both work reasonably well.
Decorative Variations
Colored Ghosts: Add a few drops of gel food coloring to the meringue before piping. Purple, green, or orange ghosts are perfect for Halloween. Just be careful not to add too much liquid, as it can deflate the meringue.
Sparkly Ghosts: Sprinkle edible glitter or sanding sugar over the piped ghosts before baking. They come out of the oven looking magical and festive.
My personal favorite variation is the peppermint version. I made them for a Halloween party that also happened to fall on a chilly October evening, and the minty flavor felt perfect for the season. Plus, the white ghosts with dark chocolate chip eyes looked especially spooky against a dark plate.
Serving & Storage Suggestions
Ghost meringue cookies are best served at room temperature, straight from the cooling rack. They have a delicate, airy texture that’s perfect for snacking, and they look adorable arranged on a platter or piled in a bowl.
For a Halloween party, arrange the ghosts on a dark platter or a black cake stand. You can scatter some fake spiderwebs or plastic spiders around them for a spooky effect. I like to serve them alongside other Halloween treats like pumpkin cupcakes or caramel apples for a dessert table that’s both beautiful and delicious.
For a dinner party, serve the ghosts as a light, palate-cleansing dessert after a heavy meal. They pair beautifully with a cup of hot tea or coffee. The sweetness is just enough to satisfy without being overwhelming.
Storage: Store the ghost meringue cookies in an airtight container at room temperature for up to 2 weeks. Do not refrigerate them, as the moisture in the fridge will make them sticky and soft. If you live in a humid climate, add a silica gel packet to the container to absorb excess moisture.
Freezing: You can freeze the baked meringues for up to 3 months. Place them in a single layer in a freezer-safe container with parchment paper between layers. Thaw at room temperature for about 30 minutes before serving. They won’t be quite as crisp as fresh, but they’re still delicious.
Reheating: If your meringues have lost their crispness, you can re-crisp them in a 200°F (93°C) oven for 10-15 minutes. Let them cool completely before serving.
One thing I’ve noticed is that the flavors actually develop over time. The vanilla becomes more pronounced after a day or two, and the texture becomes even more delicate. I actually prefer these cookies on day two or three, when they’ve had a chance to fully dry out and the flavors have melded together.
Nutritional Information & Benefits
These ghost meringue cookies are surprisingly light compared to most Halloween treats. Here’s the estimated nutritional breakdown per cookie (based on a batch of 24):
- Calories: 25-30
- Fat: 0g
- Carbohydrates: 6g
- Sugar: 6g
- Protein: 1g
Because these cookies are made with only egg whites and sugar, they’re naturally low in fat and free of cholesterol. Egg whites are a good source of protein and contain essential amino acids. They’re also naturally gluten-free, dairy-free, and nut-free, making them a safe option for guests with common food allergies.
Dietary Considerations: This recipe is naturally gluten-free, dairy-free, and nut-free. For a vegan version, use aquafaba instead of egg whites. For a sugar-free version, use a granulated monk fruit sweetener. Always check your ingredients if you’re serving guests with severe allergies.
From a wellness perspective, I love that these cookies allow me to indulge in a sweet treat without the heaviness of butter, flour, or cream. They’re perfect for satisfying a sugar craving without derailing a healthy eating plan. Plus, the portion control is built in—each cookie is small and satisfying, so you can enjoy a few without overdoing it.
Conclusion
These ghost meringue cookies are proof that the best recipes often come from the most unexpected places. A chance encounter at the post office, a scrap of paper, and three simple ingredients turned into one of my most beloved Halloween traditions. They’re easy enough for a beginner baker, impressive enough for a party, and so delicious that you’ll find yourself making them long after Halloween is over.
I encourage you to make these your own. Experiment with different flavors, try different face designs, or add a sprinkle of edible glitter for extra sparkle. The beauty of this recipe is its simplicity—it’s a blank canvas for your creativity.
I’d love to hear how your ghost meringue cookies turn out! Leave a comment below with your favorite variation or tag me in your photos on social media. Happy Halloween, and happy baking!
Frequently Asked Questions
Can I make ghost meringue cookies in advance?
Absolutely! These cookies store beautifully in an airtight container at room temperature for up to 2 weeks. In fact, they often taste better on day two or three after the flavors have had time to develop. Just make sure they’re completely cool before storing them.
Why did my meringue collapse?
Meringue can collapse for several reasons: the egg whites were over-beaten or under-beaten, there was a trace of grease or egg yolk in the bowl, or the oven temperature was too high. Make sure your bowl and whisk are completely clean, and beat the egg whites just until stiff peaks form. Also, check your oven temperature with an oven thermometer to ensure it’s accurate.
Can I use liquid food coloring for the faces?
I don’t recommend liquid food coloring because it can deflate the meringue. Instead, use mini chocolate chips, black gel food coloring (applied with a toothpick), or edible markers. These options won’t affect the texture of the cookies.
How do I know when the meringues are done baking?
The meringues are done when they’re dry to the touch and easily lift off the parchment paper. They should be crisp on the outside but still slightly soft on the inside. If they start to brown, your oven is too hot. The low, slow baking process is key to getting that perfect texture.
Can I double this recipe?
Yes, you can easily double or triple this recipe. Just make sure your mixing bowl is large enough to accommodate the increased volume. You may need to bake the cookies in batches or on multiple baking sheets. Rotate the baking sheets halfway through the baking time for even drying.
Pin This Recipe!
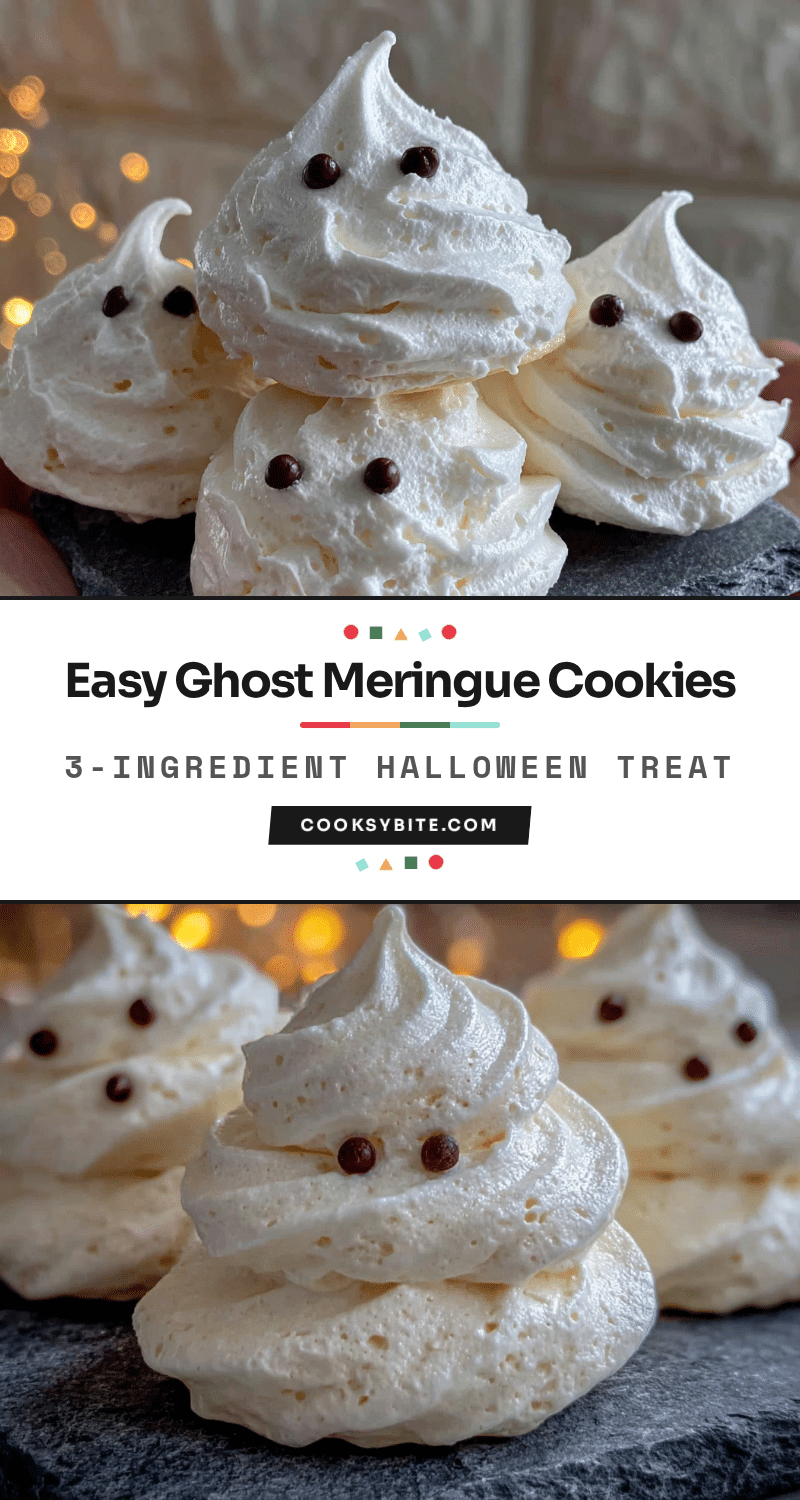
Ghost Meringue Cookies: The Easiest 3-Ingredient Halloween Treat
These ghost meringue cookies are light, perfectly spooky, and ridiculously easy to make with just 3 ingredients. They’re the perfect Halloween treat that looks impressive without any fancy decorating skills.
- Prep Time: 10 minutes
- Cook Time: 60-75 minutes
- Total Time: 1 hour 10 minutes to 1 hour 25 minutes (plus 1 hour cooling)
- Yield: 24 cookies 1x
- Category: Dessert
- Cuisine: American
Ingredients
- 3 large egg whites, at room temperature (about 90g or 3.2 oz)
- ¾ cup granulated sugar (150g or 5.3 oz)
- ½ teaspoon vanilla extract (2.5 ml)
- Mini chocolate chips or black gel food coloring (for ghost faces, optional)
Instructions
- Preheat your oven to 200°F (93°C). Line a large baking sheet with parchment paper and set it aside.
- Separate your eggs while they’re cold. Make sure absolutely no yolk gets into the whites.
- Let the egg whites come to room temperature, about 30 minutes.
- Start whipping the egg whites on medium speed. After about 2 minutes, they’ll become frothy.
- Gradually add the sugar, about 1 tablespoon at a time, with the mixer running on medium-high speed. Take about 30 seconds between each addition.
- Add the vanilla extract after all the sugar is incorporated. Beat for another 30 seconds.
- Continue beating until stiff peaks form, about 8-10 minutes total. The meringue should be glossy, thick, and hold a stiff peak when you lift the whisk.
- Transfer the meringue to a piping bag fitted with a round tip (½-inch or 1.3 cm tip recommended).
- Pipe ghost shapes onto the prepared baking sheet. Hold the piping bag straight up and down, squeeze gently to create a round base, then lift the bag straight up while continuing to squeeze. Release pressure and pull away to create a little peak on top. Space ghosts about 1 inch (2.5 cm) apart.
- Add faces while the meringue is still wet. Gently press two mini chocolate chips for eyes and one for a mouth, or use gel food coloring with a toothpick.
- Bake for 60-75 minutes at 200°F (93°C). Meringues are done when dry to the touch and easily lift off the parchment paper.
- Turn off the oven and let the meringues cool inside for at least 1 hour. Then transfer to a wire rack to cool completely.
Notes
Cleanliness is crucial—any trace of grease or egg yolk will ruin the meringue. Humidity is your enemy; store in an airtight container immediately after cooling. Let meringues cool in the oven to prevent cracking. For vegan version, use aquafaba (3 tablespoons per egg white). For sugar-free version, use granulated monk fruit sweetener.
Nutrition
- Serving Size: 1 cookie
- Calories: 2530
- Sugar: 6
- Sodium: 10
- Carbohydrates: 6
- Protein: 1
Keywords: ghost meringue cookies, Halloween cookies, 3-ingredient cookies, meringue cookies, easy Halloween dessert, gluten-free cookies, low-fat cookies


