I was standing in the grocery store parking lot last Tuesday, juggling my keys and a bag of overripe bananas that had somehow escaped the produce section, when the smell hit me. It wasn’t the bananas themselves—it was the warm, sweet scent of something baking, drifting from the little bakery inside the store. And just like that, I was seven years old again, standing on a step stool in my Aunt Rita’s tiny kitchen, watching her mash bananas with a fork like it was the most important job in the world.
Aunt Rita wasn’t a fancy cook. She used the same chipped yellow mixing bowl for everything, and she never measured anything—just dumped and stirred until it “felt right.” Her banana bread was legendary in our family, not because it was complicated, but because it was exactly what you wanted. Moist, tender, studded with walnuts she’d crushed with a rolling pin because she didn’t own a food processor. She passed away a few years back, and I still haven’t found a banana bread that tastes like hers. Honestly, I stopped looking for a while. It felt like chasing a ghost.
But last week, with those bananas staring at me from the counter—brown-spotted and begging to be used—I decided to try. Not to replicate her recipe exactly, because I never actually wrote it down (who does at seven?), but to capture that feeling. That simple, no-fuss, one-bowl kind of baking that doesn’t require a mixer or a degree in pastry arts. And you know what? I think I came pretty close. Maybe you’ve been there—standing in your kitchen with a bunch of sad bananas, wondering if you have the energy for a whole production. This recipe is for those days. It’s for the days when you just want to stir, pour, and wait for something good to happen.
Why You’ll Love This Recipe
Let me tell you why this banana bread has become my go-to, and why I think it’ll become yours too. I’ve tested this recipe at least a dozen times—sometimes with my own kids hovering around, sometimes late at night when the house is quiet. Every single time, it delivers.
- Quick & Easy: From start to oven in under 15 minutes. No mixer, no sifting, no complicated steps. Just a bowl, a fork, and some elbow grease.
- Simple Ingredients: You probably have everything in your pantry right now. Butter, sugar, eggs, flour, baking soda, salt—and those bananas you were about to toss.
- Perfect for Busy Families: This is the kind of recipe you can whip up while helping with homework or unloading the dishwasher. It’s forgiving, patient, and doesn’t demand your full attention.
- Crowd-Pleaser: My kids devour it. My neighbor, who claims she doesn’t like banana bread, ate three slices. It’s that good.
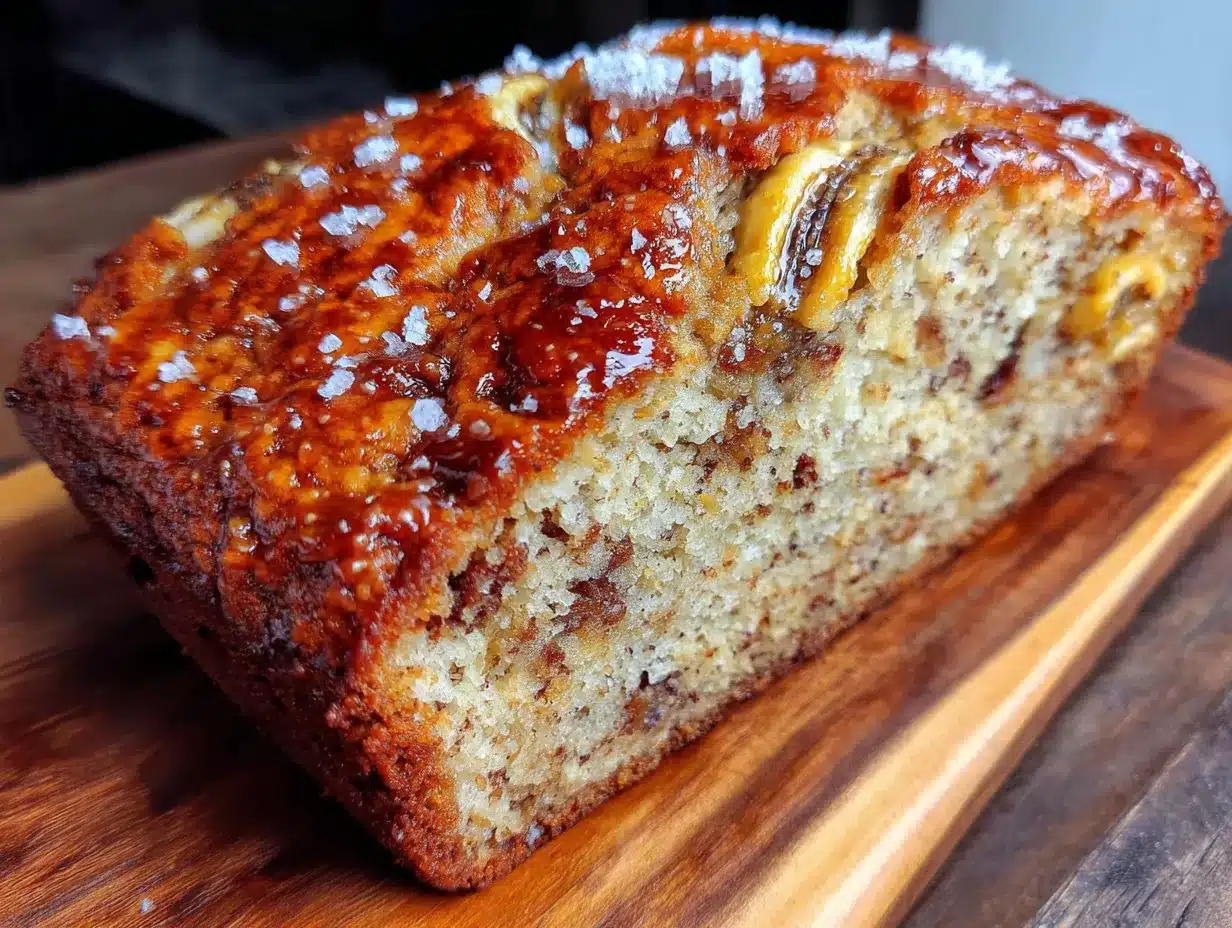
- Unbelievably Delicious: The texture is exactly what you want—moist but not gummy, tender but with a nice crumb. The top gets that perfect crackly crust, and the inside stays soft and almost custard-like.
What makes this recipe different from all the others? It’s the ratio, honestly. I spent weeks tweaking the butter-to-banana ratio, testing different amounts of sugar, and even playing with the mixing method. Most recipes have you cream the butter and sugar first, which requires a mixer. Not this one. You melt the butter, mix everything in one bowl, and you’re done. The result is a bread that’s denser and more moist than the traditional creamed version—almost like a banana pound cake. It’s comfort food at its finest, and it’s the kind of recipe that makes you close your eyes after the first bite.
What Ingredients You Will Need
This recipe uses simple, wholesome ingredients to deliver that classic banana bread flavor without any fuss. Most of these are pantry staples, so you probably won’t need a special trip to the store.
- 3 large ripe bananas, mashed (about 1 ½ cups or 340g)—The riper, the better. Look for bananas with lots of brown spots. They’re sweeter and easier to mash. I’ve even used bananas that were mostly black on the outside—they work perfectly.
- ½ cup (113g) unsalted butter, melted—I use salted butter in a pinch and just reduce the added salt to ¼ teaspoon. Melted butter gives that rich, tender texture without needing a mixer.
- ¾ cup (150g) granulated sugar—You can reduce this to ½ cup if your bananas are very sweet, but ¾ cup gives that classic sweetness. I’ve tried coconut sugar here too, and it works, though the bread is a bit darker.
- 2 large eggs, room temperature—Cold eggs can seize the melted butter. If you forgot to take them out, place them in a bowl of warm water for 5 minutes.
- 1 teaspoon vanilla extract—Pure vanilla is best, but imitation works fine. I’ve also used vanilla bean paste for those pretty specks.
- 1 ½ cups (190g) all-purpose flour—Spoon and level your flour. Scooping directly from the bag can pack in too much, making the bread dry. I’ve tested this with 1:1 gluten-free flour blend, and it works great.
- 1 teaspoon baking soda—Make sure it’s fresh. Baking soda is what gives banana bread its rise, and old baking soda won’t do the job.
- ½ teaspoon salt—I use fine sea salt. If you’re using kosher salt, increase to ¾ teaspoon.
- Optional: ½ cup (60g) chopped walnuts or chocolate chips—I’m a purist who loves walnuts, but my kids prefer chocolate chips. Sometimes I do half and half. You do you.
Ingredient Selection Tips: For the best texture, I recommend using organic all-purpose flour if you can—I find it gives a slightly better crumb. And for the bananas, if yours aren’t ripe enough, you can place them on a baking sheet in a 300°F oven for 15-20 minutes until the skins turn black. Let them cool before mashing.
Equipment Needed
One of the best things about this recipe is how little equipment it requires. Here’s what you’ll need:
- One large mixing bowl—Any medium-to-large bowl works. I use a glass mixing bowl because I can see when everything is combined.
- A fork or potato masher—For mashing the bananas. A fork works perfectly, but a potato masher makes it even faster.
- A whisk or wooden spoon—For mixing the batter. A whisk works well for the wet ingredients, but a wooden spoon is better for folding in the flour.
- A 9×5-inch loaf pan—Standard size. If you use an 8×4-inch pan, your bread will be taller and可能需要 bake a few minutes longer.
- Parchment paper—Not strictly necessary, but it makes lifting the bread out so much easier. I’ve also greased the pan with butter and floured it, and that works fine too.
- Cooling rack—For cooling the bread evenly. If you don’t have one, you can let it cool in the pan for 10 minutes, then transfer to a cutting board.
Budget-Friendly Tip: Don’t have a loaf pan? You can bake this in an 8×8-inch square pan for about 30-35 minutes, or even in a muffin tin for banana bread muffins (bake for 18-22 minutes). I’ve done all three, and they all work beautifully.
Preparation Method
Alright, let’s get to it. This is the easy part—I promise.
- Preheat your oven to 350°F (175°C). Position the rack in the center of the oven. While it’s heating, line your loaf pan with parchment paper, leaving some overhang on the long sides. This will be your “handle” for lifting the bread out later.
- Mash the bananas. In your large mixing bowl, add the three ripe bananas. Use your fork or potato masher to mash them until they’re mostly smooth with a few small lumps. You want some texture—completely smooth bananas can make the bread a bit gummy. I like to leave a few pea-sized chunks for little pockets of banana flavor.
- Add the melted butter. Pour the melted (but not hot) butter over the bananas and stir until combined. The butter should be warm but not piping hot—you don’t want to cook the eggs later. I usually let mine cool for a minute or two after melting.
- Mix in the sugar, eggs, and vanilla. Add the sugar and stir vigorously for about 30 seconds until the mixture looks smooth and slightly lighter in color. Then crack in the eggs, add the vanilla, and whisk until everything is well combined. The batter will look a bit thin at this point—that’s normal.
- Add the dry ingredients. Sprinkle the flour, baking soda, and salt over the wet ingredients. Use a wooden spoon or spatula to fold everything together gently. Stir just until you no longer see streaks of flour—about 10 to 15 strokes. Overmixing will develop the gluten and make your bread tough. A few small lumps are perfectly fine.
- Fold in your add-ins. If you’re using walnuts or chocolate chips, gently fold them in now. I usually set aside a small handful to sprinkle on top for a prettier presentation.
- Pour the batter into the prepared pan. Use your spatula to scrape every last bit of batter into the pan. Smooth the top gently, then sprinkle any reserved walnuts or chocolate chips on top. Give the pan a gentle tap on the counter to release any air bubbles.
- Bake for 55 to 65 minutes. Place the pan in the preheated oven and bake until the top is golden brown and a toothpick inserted into the center comes out clean or with just a few moist crumbs. If the top is browning too quickly after 40 minutes, tent loosely with aluminum foil. My oven runs hot, so I usually start checking at 50 minutes.
- Cool in the pan for 10 minutes. Place the pan on a wire rack and let it cool for exactly 10 minutes. This allows the bread to set without sticking to the pan.
- Transfer to a wire rack to cool completely. Use the parchment paper handles to lift the bread out of the pan. Place it directly on the wire rack and let it cool completely before slicing—about 1 hour. I know it’s tempting to slice into it warm, but it will be too tender and may crumble. Trust me, I’ve learned this the hard way.
Sensory Cue: When it’s done, the kitchen will smell like heaven—warm, sweet, and buttery. The top should be a deep golden brown, and the bread will feel firm to the touch but spring back slightly when pressed.
Cooking Tips & Techniques
Over the years, I’ve made this banana bread more times than I can count, and I’ve picked up a few tricks along the way. Here are the ones that matter most:
Don’t overmix the batter. This is the number one mistake people make with quick breads. When you overmix, you develop the gluten in the flour, which leads to a tough, dense loaf. Stir just until the flour disappears. A few small lumps are your friend.
Use room temperature eggs. I know I mentioned this, but it’s worth repeating. Cold eggs can cause the melted butter to seize up, creating little hard bits of fat in your batter. If you’re in a hurry, place the eggs in a bowl of warm water for 5 minutes before using them.
Check for doneness with a thermometer. If you have an instant-read thermometer, the internal temperature of the bread should be around 200°F to 205°F when it’s done. This is more reliable than the toothpick test, especially if you’re new to baking.
Let it cool completely. I know I sound like a broken record, but this step is crucial. Slicing warm banana bread is like trying to cut through wet sand. The bread needs time to set its structure. I once cut into it after 20 minutes because I couldn’t wait, and it was a crumbly mess. Learn from my mistakes.
Toast leftover slices. If your banana bread is a day or two old, toast a slice and spread a little butter on it. It’s a whole new experience—the outside gets crispy, the inside stays soft, and the butter melts into all the nooks and crannies. My kids actually prefer it this way.
Double the recipe. This bread freezes beautifully. I often make two loaves at once—one for now, one for later. Just wrap the cooled loaf tightly in plastic wrap, then in foil, and freeze for up to 3 months.
Variations & Adaptations
One of the best things about this recipe is how adaptable it is. Here are some variations I’ve tried and loved:
Chocolate Chip Banana Bread: My kids’ favorite. Fold in ½ cup of semi-sweet chocolate chips. I like to use mini chocolate chips because they distribute more evenly. Sometimes I swirl in a tablespoon of cocoa powder for a double-chocolate version.
Vegan Banana Bread: Substitute the butter with ½ cup of coconut oil (melted) or vegetable oil. Use 2 flax eggs (2 tablespoons ground flaxseed mixed with 6 tablespoons water, let sit for 5 minutes) instead of regular eggs. The texture is slightly denser but still delicious. I’ve made this for my vegan friends, and they always ask for the recipe.
Gluten-Free Banana Bread: Use a 1:1 gluten-free flour blend that contains xanthan gum. I’ve tested this with Bob’s Red Mill 1:1 Baking Flour, and it works perfectly. No one in my family could tell the difference.
Spiced Banana Bread: Add 1 teaspoon of cinnamon, ½ teaspoon of nutmeg, and ¼ teaspoon of ground ginger to the flour mixture. It gives the bread a warm, cozy flavor that’s perfect for fall. I sometimes add a pinch of cardamom too.
Nut-Free Version: Simply omit the walnuts. The recipe works beautifully without them. You can replace them with sunflower seeds for a bit of crunch, or just leave it plain.
My Personal Favorite: I love adding a handful of toasted coconut flakes and a tablespoon of lime zest. It sounds weird, but the lime brightens up the banana flavor in a way that’s absolutely addictive. I discovered this accidentally when I ran out of walnuts and had some leftover coconut from a Thai recipe. Sometimes the best variations come from happy accidents.
Serving & Storage Suggestions
This banana bread is incredibly versatile when it comes to serving. Here’s how I like to enjoy it:
Serving Temperature: It’s delicious at room temperature, but I also love it slightly warm. If you’re serving it the same day, let it cool completely, then pop individual slices in the microwave for 10-15 seconds. The butter melts into the bread, and it’s pure comfort.
Presentation Ideas: For a simple breakfast, serve slices with a pat of butter and a drizzle of honey. For dessert, top with a scoop of vanilla ice cream and a drizzle of caramel sauce. My kids love it spread with cream cheese and a sprinkle of cinnamon sugar.
Complementary Dishes: This banana bread pairs beautifully with a cup of coffee or a glass of cold milk. For brunch, serve it alongside scrambled eggs and fresh fruit. It’s also wonderful with a dollop of Greek yogurt and some fresh berries.
Storage Instructions: Store the cooled banana bread wrapped tightly in plastic wrap or in an airtight container at room temperature for up to 4 days. The bread actually gets more moist and flavorful on the second day—if it lasts that long.
Freezing Instructions: To freeze, wrap the cooled loaf tightly in plastic wrap, then in a layer of aluminum foil. Freeze for up to 3 months. To thaw, leave it at room temperature for several hours or overnight. You can also freeze individual slices wrapped in plastic wrap—perfect for grabbing one for a quick breakfast.
Reheating Tips: For a single slice, microwave for 10-15 seconds. For a whole loaf, wrap in foil and warm in a 300°F oven for 10-15 minutes. The aroma will fill your kitchen all over again.
Flavor Development: I’ve noticed that the banana flavor becomes more pronounced on the second day. Something about the moisture redistributing and the flavors melding together makes it even better. So don’t be disappointed if you can’t eat it all on day one—it’s actually saving the best for later.
Nutritional Information & Benefits
Here’s the nutritional breakdown for one slice (based on 12 slices per loaf, without add-ins):
| Nutrient | Amount per Slice |
|---|---|
| Calories | 210 |
| Total Fat | 9g |
| Saturated Fat | 5g |
| Cholesterol | 50mg |
| Sodium | 220mg |
| Total Carbohydrates | 30g |
| Dietary Fiber | 1g |
| Sugars | 16g |
| Protein | 3g |
Health Benefits of Key Ingredients: Bananas are packed with potassium, which helps regulate blood pressure and supports muscle function. They also contain vitamin B6 and vitamin C. The eggs provide high-quality protein, and the butter adds a small amount of vitamin A. If you use walnuts, you’ll get a dose of omega-3 fatty acids.
Dietary Considerations: This recipe is vegetarian. For a lower-sugar version, reduce the sugar to ½ cup and use very ripe bananas. For a lower-fat version, substitute half the butter with unsweetened applesauce—the texture will be slightly different, but it still works.
Potential Allergens: This recipe contains wheat (gluten), eggs, and dairy. If you add walnuts, it also contains tree nuts. See the variations section for substitutions.
My Personal Wellness Perspective: Look, this isn’t health food. It’s a treat. But I believe that baking from scratch with real ingredients is always better than anything store-bought. You control what goes in, there are no preservatives, and there’s something nourishing about the process itself. Plus, sharing a warm slice with your family? That’s good for the soul.
Conclusion
This one-bowl banana bread is the kind of recipe that earns a permanent spot in your rotation. It’s simple enough for a Tuesday afternoon, special enough for a Sunday brunch, and forgiving enough for a beginner baker. The best part? It brings people together. My kids fight over the last slice, my neighbor texts me when she’s made it, and every time I bake it, I think of Aunt Rita and her chipped yellow bowl.
I hope you’ll make this your own. Maybe you’ll add chocolate chips because that’s what your kids love. Maybe you’ll double the cinnamon because that’s your thing. Or maybe you’ll leave it exactly as written and discover that sometimes the simplest recipes are the ones that stick. That’s the beauty of baking—it’s personal, it’s forgiving, and it always, always makes the kitchen smell like home.
So go ahead, grab those spotty bananas and that one bowl. You’ve got this. And when you take that first warm slice, slathered with butter, and you close your eyes for just a second—that’s the moment it all makes sense. Happy baking, friend.
Frequently Asked Questions
Can I use frozen bananas for this recipe?
Absolutely! Frozen bananas are actually perfect for banana bread. Thaw them completely, then drain off any excess liquid before mashing. The thawed bananas will be very soft and almost liquid, which is fine. They actually make the bread even more moist.
Why did my banana bread sink in the middle?
This usually happens for one of three reasons: the bread was underbaked, the oven temperature was too low, or the batter was overmixed. Make sure your oven is properly preheated to 350°F, and bake until a toothpick inserted in the center comes out clean. Also, resist the urge to open the oven door during the first 30 minutes of baking.
Can I make this recipe into muffins?
Yes! This batter makes about 12 standard muffins. Line a muffin tin with paper liners, fill each cup about ¾ full, and bake at 350°F for 18-22 minutes. Check for doneness with a toothpick. Muffins bake faster than a loaf, so start checking at 18 minutes.
How do I know when the bananas are ripe enough?
Look for bananas that are heavily speckled with brown spots or even mostly brown. The skin should be thin and easy to pierce with your fingernail. The banana itself should be soft and smell sweet. If your bananas are still yellow with green tips, they’re not ready. You can speed up ripening by placing them in a paper bag with an apple overnight.
Can I reduce the sugar in this recipe?
Yes, you can reduce the sugar to ½ cup (100g) without significantly affecting the texture. The bread will be slightly less sweet, which some people prefer. If you reduce it further than that, the bread may be less moist and have a denser texture. I’ve also successfully used ½ cup of maple syrup, but you’ll need to reduce the butter by 2 tablespoons to compensate for the extra liquid.
Pin This Recipe!
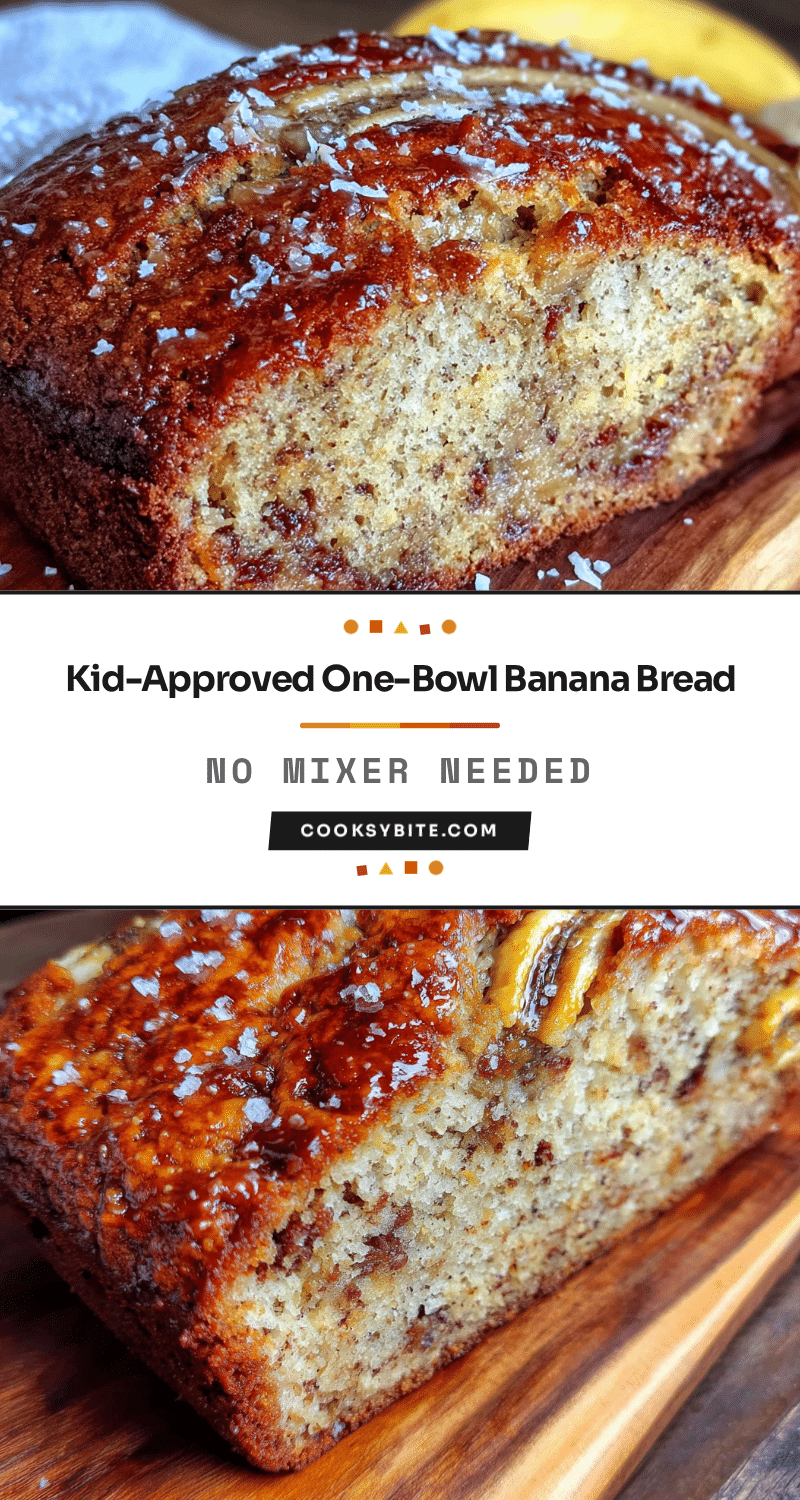
Best Easy One-Bowl Banana Bread Recipe Kids Love
This one-bowl banana bread is moist, tender, and studded with walnuts or chocolate chips. It’s quick, easy, and perfect for busy families—a comforting treat that brings people together.
- Prep Time: 15 minutes
- Cook Time: 55-65 minutes
- Total Time: 1 hour 10-20 minutes
- Yield: 12 servings 1x
- Category: Dessert
- Cuisine: American
Ingredients
- 3 large ripe bananas, mashed (about 1 ½ cups or 340g)
- ½ cup (113g) unsalted butter, melted
- ¾ cup (150g) granulated sugar
- 2 large eggs, room temperature
- 1 teaspoon vanilla extract
- 1 ½ cups (190g) all-purpose flour
- 1 teaspoon baking soda
- ½ teaspoon salt
- Optional: ½ cup (60g) chopped walnuts or chocolate chips
Instructions
- Preheat your oven to 350°F (175°C). Position the rack in the center of the oven. Line your loaf pan with parchment paper, leaving some overhang on the long sides.
- In your large mixing bowl, mash the bananas with a fork or potato masher until mostly smooth with a few small lumps.
- Pour the melted (but not hot) butter over the bananas and stir until combined.
- Add the sugar and stir vigorously for about 30 seconds until the mixture looks smooth and slightly lighter in color. Then crack in the eggs, add the vanilla, and whisk until well combined.
- Sprinkle the flour, baking soda, and salt over the wet ingredients. Fold together gently with a wooden spoon or spatula until no streaks of flour remain—about 10 to 15 strokes. Do not overmix.
- If using walnuts or chocolate chips, gently fold them in now. Set aside a small handful to sprinkle on top.
- Pour the batter into the prepared pan. Smooth the top gently, then sprinkle any reserved walnuts or chocolate chips on top. Tap the pan gently on the counter to release air bubbles.
- Bake for 55 to 65 minutes, until the top is golden brown and a toothpick inserted into the center comes out clean or with a few moist crumbs. If the top browns too quickly after 40 minutes, tent loosely with aluminum foil.
- Cool in the pan on a wire rack for exactly 10 minutes.
- Use the parchment paper handles to lift the bread out of the pan. Transfer to a wire rack and cool completely before slicing—about 1 hour.
Notes
Don’t overmix the batter. Use room temperature eggs. Check for doneness with a thermometer (internal temp 200°F-205°F). Let cool completely before slicing. Toast leftover slices for a crispy exterior. Double the recipe to freeze one loaf.
Nutrition
- Serving Size: 1 slice
- Calories: 210
- Sugar: 16
- Sodium: 220
- Fat: 9
- Saturated Fat: 5
- Carbohydrates: 30
- Fiber: 1
- Protein: 3
Keywords: banana bread, easy banana bread, one-bowl banana bread, moist banana bread, kid-friendly banana bread


