Marta wasn’t trying to throw a party. I’d stopped by her place on a drizzly Tuesday afternoon to pick up a book I’d lent her, and the sight of her kitchen counter stopped me cold before I even got past the entryway. There, laid out on a big wooden cutting board, was the most delightfully creepy spread I’d ever seen — a skull-shaped charcuterie board, if you can believe it, surrounded by little bowls of olives, cheese cubes, and what looked like tiny pretzel bones. And Marta, God bless her, just shrugged and said, “Oh, that? The kids have a half-day tomorrow. Figured I’d throw something together.”
Throw something together. Honestly, I almost laughed. Here was this gorgeous, spooky, completely budget-friendly Halloween snack that looked like it belonged on a magazine cover, and she was acting like she’d just made a peanut butter sandwich. The skull board itself? A dollar-store plastic serving platter she’d spray-painted white. The “brains” were just mozzarella balls with a drizzle of balsamic. The “bones” were pretzel sticks. I mean, come on.
That Tuesday afternoon changed how I think about Halloween snacks forever. Maybe you’ve been there — scrambling for something festive that doesn’t cost a fortune or require a culinary degree. I kept coming back to that moment in Marta’s kitchen, the way she made something so clever look so effortless. So I recreated it, tweaked it a bit, and now I’m sharing it with you. This budget-friendly Halloween skull charcuterie board is proof that spooky doesn’t have to be expensive, and impressive doesn’t have to be complicated.
Why You’ll Love This Recipe
Let me tell you why this skull charcuterie board has become my go-to for Halloween gatherings, and why it’ll probably become yours too.
- Incredibly Budget-Friendly: The whole board comes together for under $20. I’m serious. You can use store-brand cheeses, seasonal sale items, and stuff you probably already have in your pantry. No fancy ingredients required.
- Takes Less Than 20 Minutes: No cooking, no baking, no complicated steps. Just arrange, garnish, and serve. Perfect for last-minute Halloween parties or when the kids come home from trick-or-treating and want a snack before the sugar rush.
- Customizable for Picky Eaters: Got a kid who only eats cheese? A spouse who loves olives? A guest with dietary restrictions? This board adapts to whatever your family actually likes. You’re in control.
- Visually Stunning: The skull shape makes it an instant conversation starter. People will think you spent hours on it. I’ve had guests ask if I ordered it from a caterer. Nope — just me, a cutting board, and some clever arranging.
- Zero Food Waste: Because you’re using what you have and what your family will actually eat. No weird ingredients that’ll sit in your fridge until January.
What makes this different from every other Halloween snack board out there? It’s the skull shape, sure, but it’s also the mindset. This isn’t about perfection. It’s about making something fun and festive without breaking the bank or stressing yourself out. I’ve tested this with my own family — three kids with wildly different tastes, a husband who claims he “doesn’t like appetizers,” and a neighbor who’s gluten-free — and it worked for everyone.
Honestly, this recipe is for the parent who wants to do something special for Halloween but doesn’t have the time, money, or energy for elaborate projects. It’s comfort food made spooky, affordable, and totally doable on a Tuesday night.
What Ingredients You Will Need
Here’s the beautiful thing about this budget-friendly Halloween skull charcuterie board — you don’t need anything fancy. Most of these ingredients are everyday items you might already have in your fridge or pantry. And if you don’t, they’re all easy to find at any grocery store without a special trip to a specialty shop.
For the Skull Base
- 1 large round or oval cutting board or platter (about 14-16 inches) — Dollar stores often have these for $3-5. Or use a baking sheet lined with parchment paper. No one will know.
- 1 cup cream cheese, softened (use full-fat for better spreading, but low-fat works too)
- 1/2 cup sour cream (Greek yogurt works as a substitute)
- 1/4 cup shredded cheddar cheese, finely grated (adds color and flavor to the skull shape)
- 1 tablespoon milk (to thin the mixture if needed)
- Salt and pepper to taste
For the “Blood” and “Brains” Details
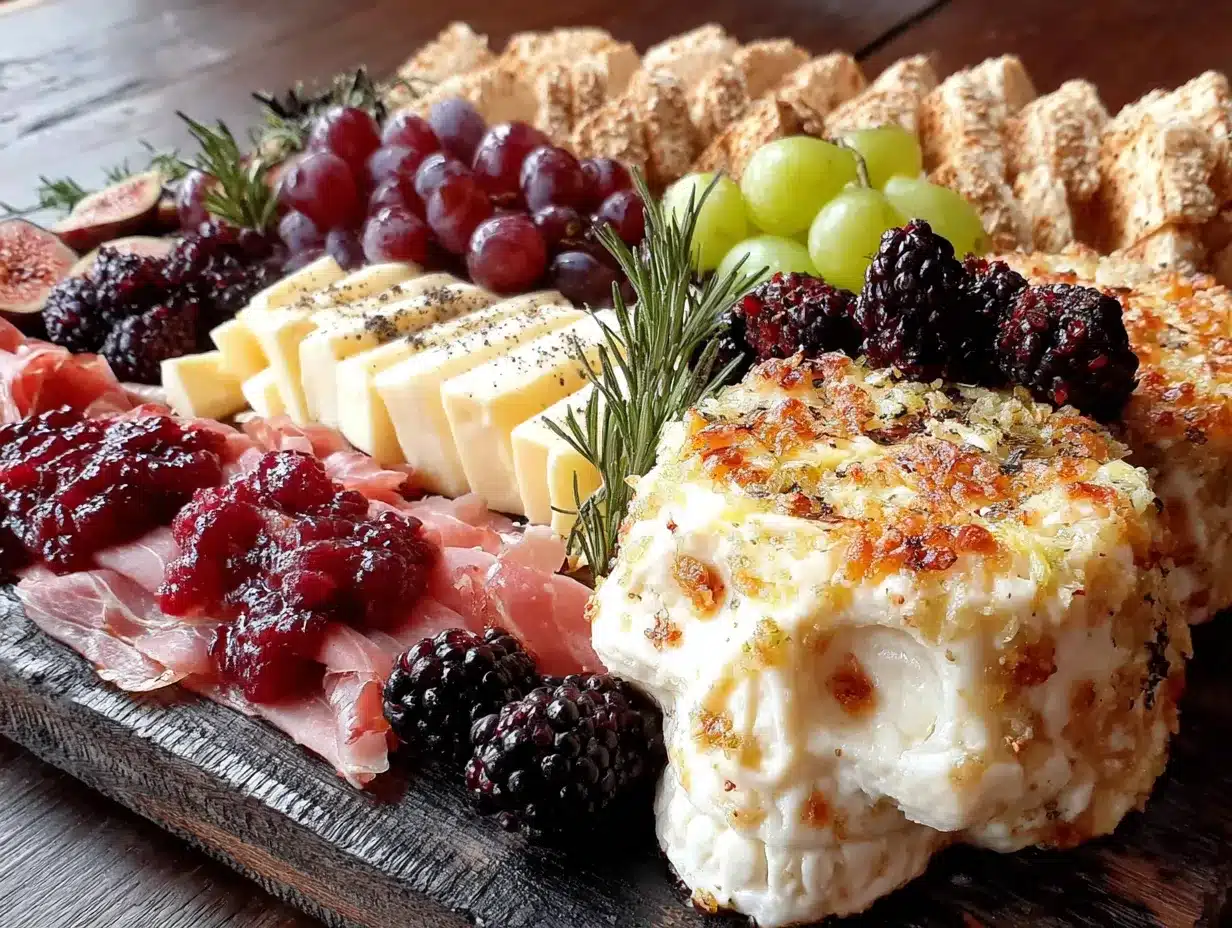
- 1/2 cup marinara sauce or salsa (for the bloody effect — I prefer a thicker sauce so it doesn’t drip)
- 1/2 cup mozzarella pearls or small mozzarella balls (these become the “brains” — genius, right?)
- 1 tablespoon balsamic glaze (optional, for drizzling over the cheese for a gory look)
For the Board Fillers (Choose 4-5 based on what’s on sale)
- 1 cup pretzel sticks (these become “bones” — I recommend the thin ones for better visual effect)
- 1 cup cheddar cheese cubes (orange cheese fits the Halloween vibe perfectly)
- 1 cup pepperoni slices (fold them in half for a creepy, veiny look)
- 1 cup green or black olives (for “eyeballs” — stuff them with pimento for extra creepiness)
- 1 cup red grapes (they look like little eyeballs too, and kids love them)
- 1 cup baby carrots or cucumber slices (for crunch and color contrast)
- 1/2 cup pumpkin seeds (roasted and salted — seasonal and budget-friendly)
- 1/2 cup dark chocolate chips or M&Ms (for a sweet touch — use Halloween colors if available)
Ingredient Tips from My Kitchen: I’ve found that Philadelphia cream cheese gives the smoothest texture for the skull base, but store brands work fine — just let it soften fully before mixing. For the marinara, Rao’s is my favorite for thickness, but again, whatever you have works. And here’s a pro tip: if you’re feeding a crowd, double the cream cheese mixture. It goes fast, and people love scooping it up with crackers.
Substitution Guide: Gluten-free? Use gluten-free pretzels or omit them. Dairy-free? Swap the cream cheese and sour cream for plant-based versions — Kite Hill makes excellent alternatives. Nut-free? Skip the pumpkin seeds and add more veggies. The beauty of this board is its flexibility.
Equipment Needed
You don’t need much to pull this off. Here’s what I use, along with some budget-friendly alternatives.
- Large cutting board or serving platter — I use a wooden board from IKEA that cost $8. A baking sheet lined with parchment works just as well. Or check your local dollar store.
- Mixing bowl — For combining the cream cheese base. Any medium bowl will do.
- Rubber spatula — Helps scrape every bit of the cream cheese mixture onto the board. Also useful for shaping the skull.
- Small bowls or ramekins — For holding dips, olives, or smaller items. I use 4-ounce mason jars or even clean yogurt containers in a pinch.
- Cheese knife or butter knife — For spreading and shaping the skull. A butter knife works perfectly.
- Tongs or small spoons — For arranging items without getting your hands messy.
Personal Experience: I’ve made this board on a flimsy plastic cutting board from the dollar store, and it worked fine. Don’t overthink the equipment. The only thing I’d recommend is something with a slight lip or edge so items don’t roll off. Also, if you’re using a baking sheet, line it with parchment or foil for easier cleanup — trust me on this one.
Preparation Method
Okay, let’s get to the fun part. Here’s how to build your budget-friendly Halloween skull charcuterie board step by step.
- Make the cream cheese skull base (5 minutes)
In a medium mixing bowl, combine 1 cup softened cream cheese, 1/2 cup sour cream, 1/4 cup finely shredded cheddar cheese, and 1 tablespoon milk. Add a pinch of salt and pepper. Mix with a rubber spatula until smooth and spreadable. Taste it — you want it creamy and slightly tangy. If it’s too thick, add another splash of milk. If it’s too thin, add a bit more cream cheese. This mixture will form the skull’s shape, so it needs to hold its form.
- Shape the skull (3 minutes)
Scoop the cream cheese mixture onto the center of your cutting board or platter. Using a butter knife or spatula, shape it into an oval about 6 inches long and 4 inches wide. This is the skull’s head. Then, gently press and taper the bottom to form a slightly narrower jaw area. Don’t stress about perfection — skulls are supposed to look a little rough. I’ve made skulls that looked more like potatoes, and they still got compliments.
- Add the “blood” details (2 minutes)
Spoon 1/4 cup of marinara sauce or salsa into a small bowl or ramekin. Place it near the top of the skull’s “head” area — this will look like a bloody wound or gash. You can also drizzle a little along the side of the skull for a drippy effect. If you’re using balsamic glaze, drizzle a small amount over the mozzarella pearls for a gory “brain” look.
- Create the “brains” (2 minutes)
Arrange the mozzarella pearls on top of the cream cheese skull, clustered together near the center and top. These are the brains. Press them gently into the cream cheese so they stay put. If you want them extra creepy, drizzle a tiny bit of balsamic glaze over them — it looks like blood vessels. My kids thought this was both disgusting and hilarious, which is exactly the reaction you want.
- Add the “bones” and “eyeballs” (3 minutes)
Place pretzel sticks around the skull area to look like bones. I like to arrange them in a cross pattern or scattered around the board as if they’re scattered remains. For eyeballs, place green or black olives (pimento-stuffed ones work great) in the eye socket area of the skull. Press them gently into the cream cheese. If you want extra creepiness, use a small dot of marinara on each olive to look like bloodshot eyes.
- Fill the board with the rest of the ingredients (5 minutes)
Now comes the fun part — filling in the empty spaces. Arrange the cheddar cheese cubes, pepperoni slices, red grapes, baby carrots, pumpkin seeds, and dark chocolate chips around the skull. Use small bowls or ramekins for anything that might roll away, like olives or grapes. Try to create visual balance — spread colors evenly, and don’t leave big empty spots. I like to create little “pockets” of ingredients so people can grab a bit of everything.
- Final touches and garnish (2 minutes)
Take a step back and look at your board. Fill any obvious gaps with extra pretzels, pumpkin seeds, or even fresh herbs like rosemary sprigs (they look like little trees and add a nice green contrast). If you have edible flowers or dried orange slices, those make great Halloween decorations too. Serve immediately or cover with plastic wrap and refrigerate for up to 4 hours before serving.
Sensory Cues: When you’re shaping the cream cheese, it should feel smooth and pliable, not stiff or crumbly. The mozzarella pearls should be soft and slightly springy. The pretzel sticks should snap cleanly if you need to break them for smaller pieces. And the whole board should look like a spooky, colorful landscape — that’s when you know you’ve nailed it.
Cooking Tips & Techniques
I’ve made this board about a dozen times now, and I’ve learned a few things the hard way. Here are my best tips to save you time and frustration.
Keep the cream cheese at room temperature. Cold cream cheese is impossible to spread smoothly and will leave lumpy patches in your skull shape. Take it out of the fridge 30 minutes before you start. If you forget, microwave it for 10-15 seconds — but watch it carefully, because melted cream cheese is a disaster.
Don’t overmix the cream cheese base. You want it smooth, but if you mix too vigorously, it’ll become thin and runny. Fold it gently with a spatula until just combined. I learned this the hard way when my first skull melted into a puddle on the board.
Use a template if you’re nervous about the skull shape. I’ve traced a skull outline on a piece of parchment paper, placed it under the board, and used it as a guide. You can also find free skull templates online — print one, cut it out, and use it as a stencil.
Layer strategically. Put heavier items like cheese cubes and pepperoni closer to the center of the board, and lighter items like pretzels and pumpkin seeds toward the edges. This prevents the board from looking top-heavy and keeps everything stable.
Prep everything before you start arranging. Cut your cheese, open your olives, measure your pretzels. Once you start shaping the skull, you don’t want to stop and search for something. I learned this when I had cream cheese all over my hands and realized I’d forgotten to take the olives out of the can.
Make it ahead if you need to. You can prepare the cream cheese skull base up to 24 hours in advance and keep it covered in the fridge. Just let it sit at room temperature for 15 minutes before adding the other ingredients. The crackers and pretzels should be added just before serving so they stay crunchy.
Variations & Adaptations
One of the best things about this board is how easily it adapts to different diets, tastes, and occasions. Here are some variations I’ve tried and loved.
Vegetarian Version: Skip the pepperoni and add more cheese varieties — try smoked gouda, brie, or aged cheddar. Roasted red peppers and artichoke hearts also add great flavor and color. I made this for a vegetarian friend’s Halloween party, and she said it was the best board she’d ever seen.
Gluten-Free Version: Use gluten-free pretzels (they’re available at most grocery stores now) or replace pretzels with rice crackers, veggie sticks, or even roasted chickpeas. Everything else on the board is naturally gluten-free. My neighbor with celiac disease was thrilled to have something she could eat without worry.
Dairy-Free Version: Use plant-based cream cheese and sour cream — Kite Hill and Follow Your Heart make excellent options. Replace cheddar cheese cubes with dairy-free cheese or marinated tofu cubes. Skip the mozzarella pearls or use dairy-free mozzarella. I tested this version for a friend who’s lactose intolerant, and it worked beautifully.
Kid-Friendly Version: Swap olives for more grapes or apple slices. Use mild cheddar instead of sharp. Add candy corn or Halloween-themed M&Ms for a sweet touch. My kids love this version because they can pick and choose what goes on their plates.
Spicy Version: Add jalapeño slices, spicy pepperoni, or a drizzle of hot honey over the cream cheese. Use salsa with extra heat for the “blood.” I made this for a grown-up Halloween party, and it was gone in 20 minutes.
Seasonal Adaptations: In the fall, add roasted pumpkin seeds, sliced apples, and caramel dip. In winter, use pomegranate seeds and dark chocolate. In spring, add fresh berries and edible flowers. The skull shape works year-round — just change the colors and flavors to match the season.
Serving & Storage Suggestions
Serving Temperature: This board is best served at room temperature. Take it out of the fridge about 15-20 minutes before serving so the cream cheese softens slightly and the flavors come through. If you’re serving it outside on a warm Halloween evening, keep it in the shade or serve it in smaller batches.
Presentation Tips: Place the board in the center of your table or counter so everyone can reach it. Provide small plates and napkins, plus a few small spreaders for the cream cheese. I like to add a few sprigs of fresh rosemary or thyme around the edges for a pop of green — it contrasts beautifully with the spooky theme.
Complementary Dishes: This board pairs beautifully with warm apple cider, pumpkin soup, or a simple salad. If you’re serving it as part of a Halloween meal, try it alongside my crispy garlic chicken for a main course that’s both comforting and festive. For a sweet finish, serve with pumpkin bread or caramel apples.
Storage Instructions: If you have leftovers (unlikely, but possible), cover the board tightly with plastic wrap and refrigerate for up to 2 days. The cream cheese base will firm up, but it’ll still be delicious. Store crackers and pretzels separately to keep them crunchy. The mozzarella pearls might release some liquid, so drain them before serving again.
Reheating Tips: You don’t really reheat a charcuterie board, but if the cream cheese has firmed up in the fridge, let it sit at room temperature for 20 minutes before serving. The flavors actually meld together overnight, so leftovers might taste even better the next day.
Flavor Development: Here’s a secret — this board tastes best about an hour after you assemble it. The cream cheese absorbs the flavors from the surrounding ingredients, and the marinara seeps into the cheese slightly. It’s like a flavor party that gets better as it goes.
Nutritional Information & Benefits
While I’m not a nutritionist, I can share what I’ve learned about the ingredients in this board. The exact nutritional values will depend on what you choose, but here’s a rough estimate per serving (assuming 8 servings).
- Calories: Approximately 350-450 per serving (varies based on cheese and meat choices)
- Protein: 12-15 grams (from cheese, pepperoni, and cream cheese)
- Carbohydrates: 20-25 grams (from pretzels, grapes, and chocolate)
- Fat: 25-30 grams (mostly from cheese and cream cheese — the good kind)
- Fiber: 2-3 grams (from veggies and pumpkin seeds)
Health Benefits: The cream cheese provides calcium and protein. Olives offer healthy monounsaturated fats. Pumpkin seeds are packed with magnesium and zinc. Grapes contain antioxidants. And the veggies add fiber and vitamins. It’s not a health food, but it’s also not junk — it’s real food, and that counts for something.
Dietary Considerations: This recipe can be made gluten-free, dairy-free, vegetarian, or nut-free with simple substitutions. It’s naturally low in added sugar (unless you add candy). The main allergens are dairy and gluten, so be mindful if you’re serving guests with sensitivities.
My Personal Take: I love that this board lets me feed my family something fun and festive without resorting to processed Halloween candy. It’s a snack that actually has some nutritional value, and my kids don’t even notice because they’re too busy eating “brains” and “bones.” Win-win.
Conclusion
So there you have it — a budget-friendly Halloween skull charcuterie board that looks like a million bucks but costs less than a pizza delivery. It’s spooky, it’s fun, and it’s completely doable even on a busy weeknight.
What I love most about this recipe is how it brings people together. My kids invite their friends over just to see the “gross” board, and my husband actually helps arrange the pretzel bones. It’s become our little Halloween tradition, and every year, we tweak it a bit — new ingredients, different shapes, more gory details. It never gets old.
I’d love to hear how yours turns out. Did you add something weird? Did your kids love the brains? Did you make it gluten-free or dairy-free? Drop a comment below and share your creation — I read every single one, and I promise I’ll respond. And if you snap a photo, tag me on social media so I can see your spooky masterpiece.
Go ahead, make this board. Your family will thank you. And honestly? You’ll thank yourself for keeping it simple, affordable, and absolutely unforgettable. Happy Halloween, friends!
Frequently Asked Questions
Can I make this board ahead of time?
Yes! You can prepare the cream cheese skull base up to 24 hours in advance and keep it covered in the fridge. Add the crackers, pretzels, and other crunchy items just before serving to keep them fresh. The cheese cubes and olives can be arranged a few hours ahead — just cover everything with plastic wrap.
What if I can’t find a skull-shaped platter?
No problem at all! You don’t need a skull-shaped platter. Just use any large cutting board, baking sheet, or serving tray. The skull shape is created with the cream cheese mixture, not the board itself. I’ve used a round wooden board, a rectangular baking sheet, and even a large ceramic platter — they all work great.
How do I keep the pretzels from getting soggy?
Add pretzels and other crunchy items right before serving. If you’re making the board ahead, store pretzels in a separate airtight container and scatter them on the board just before guests arrive. Also, keep pretzels away from any wet ingredients like marinara or olives — give them their own dry zone on the board.
Can I use different meats instead of pepperoni?
Absolutely! Salami, prosciutto, ham, or even turkey slices work wonderfully. For a non-meat option, try marinated tofu slices or roasted mushrooms. Just make sure whatever you use is easy to pick up and eat with your hands — that’s the whole point of a charcuterie board.
How many people does this board serve?
This board serves about 6-8 people as a snack or appetizer. If you’re serving it as a main course for a light meal, plan for 4-6 people. For a larger crowd, simply double the ingredients and use a bigger board or two separate boards. Leftovers keep well in the fridge for 2 days.
Pin This Recipe!
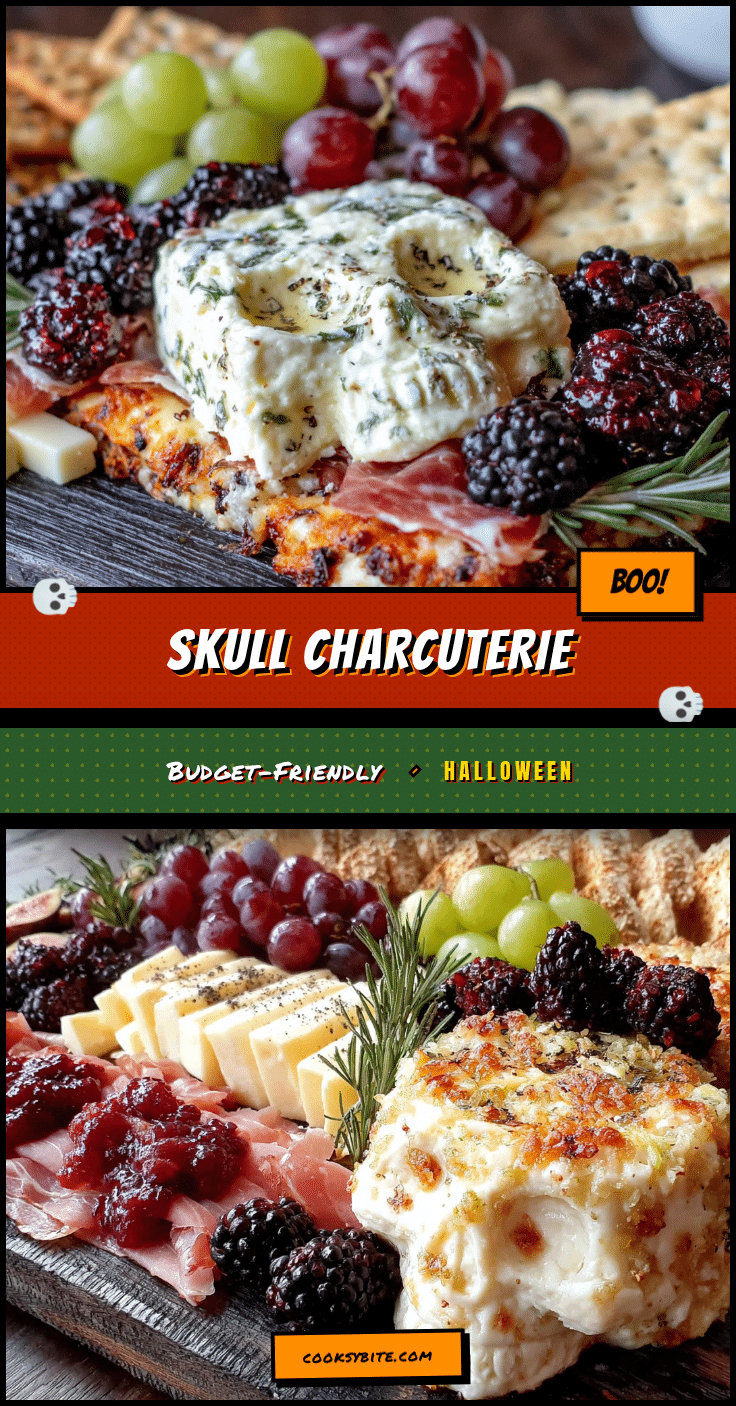
Budget-Friendly Halloween Skull Charcuterie Board: Easy Spooky Snack
A spooky, budget-friendly Halloween snack board shaped like a skull, made with cream cheese, mozzarella ‘brains’, pretzel ‘bones’, and other easy-to-find ingredients. Perfect for last-minute parties or family fun.
- Prep Time: 20 minutes
- Cook Time: 0 minutes
- Total Time: 20 minutes
- Yield: 6-8 servings 1x
- Category: Appetizer
- Cuisine: American
Ingredients
- 1 large round or oval cutting board or platter (about 14–16 inches)
- 1 cup cream cheese, softened
- 1/2 cup sour cream
- 1/4 cup shredded cheddar cheese, finely grated
- 1 tablespoon milk
- Salt and pepper to taste
- 1/2 cup marinara sauce or salsa
- 1/2 cup mozzarella pearls or small mozzarella balls
- 1 tablespoon balsamic glaze (optional)
- 1 cup pretzel sticks
- 1 cup cheddar cheese cubes
- 1 cup pepperoni slices
- 1 cup green or black olives
- 1 cup red grapes
- 1 cup baby carrots or cucumber slices
- 1/2 cup pumpkin seeds, roasted and salted
- 1/2 cup dark chocolate chips or M&Ms
Instructions
- Make the cream cheese skull base: In a medium mixing bowl, combine 1 cup softened cream cheese, 1/2 cup sour cream, 1/4 cup finely shredded cheddar cheese, and 1 tablespoon milk. Add a pinch of salt and pepper. Mix with a rubber spatula until smooth and spreadable.
- Shape the skull: Scoop the cream cheese mixture onto the center of your cutting board or platter. Using a butter knife or spatula, shape it into an oval about 6 inches long and 4 inches wide. Gently press and taper the bottom to form a slightly narrower jaw area.
- Add the ‘blood’ details: Spoon 1/4 cup of marinara sauce or salsa into a small bowl or ramekin. Place it near the top of the skull’s ‘head’ area. Optionally, drizzle a little along the side for a drippy effect.
- Create the ‘brains’: Arrange the mozzarella pearls on top of the cream cheese skull, clustered near the center and top. Press them gently into the cream cheese. Drizzle with balsamic glaze if desired.
- Add the ‘bones’ and ‘eyeballs’: Place pretzel sticks around the skull to look like bones. For eyeballs, place green or black olives in the eye socket area, pressing gently into the cream cheese.
- Fill the board with the rest of the ingredients: Arrange cheddar cheese cubes, pepperoni slices, red grapes, baby carrots, pumpkin seeds, and dark chocolate chips around the skull. Use small bowls for items that might roll.
- Final touches and garnish: Fill any gaps with extra pretzels, pumpkin seeds, or fresh herbs. Serve immediately or cover and refrigerate for up to 4 hours.
Notes
Keep cream cheese at room temperature for easy spreading. Don’t overmix the cream cheese base. Use a template if nervous about skull shape. Layer heavier items near center. Prep everything before arranging. Can make cream cheese base up to 24 hours ahead.
Nutrition
- Serving Size: 1 serving (based on
- Calories: 350450
- Sugar: 810
- Sodium: 600800
- Fat: 2530
- Saturated Fat: 1215
- Carbohydrates: 2025
- Fiber: 23
- Protein: 1215
Keywords: Halloween, charcuterie board, skull, spooky, budget-friendly, snack, party, easy, no-cook


