My neighbor, Mrs. Kowalski, watched me hauling a grocery bag overflowing with candy into my building last October and didn’t say anything at first. Then she just shook her head and pointed at her door. “Come here,” she said, and I followed her into her kitchen where she was pulling the most beautiful thing out of her fridge. It was this massive, round tray of vegetables arranged like a spider web, with a big black olive spider sitting right in the middle. She’d been making it for her grandkids’ Halloween parties for years because, honestly, she got tired of them bouncing off the walls from sugar highs. She handed me a baby carrot and said, “Taste that. It’s better than candy anyway.” And you know what? She was right. I mean, I still bought candy for the trick-or-treaters, but this veggie tray became the thing I actually looked forward to eating all night. Let me tell you, there’s something about that crisp crunch of a cold pepper strip dipped in ranch that just hits different when you’re surrounded by fake cobwebs and spooky decorations.
I’ve been making her version ever since, tweaking it just a little to fit my own style. I swapped out the plain ranch for a homemade dip that has a little extra kick, and I started using different colored veggies to make the web pop even more. The first time I brought it to a Halloween potluck, someone actually asked if the spider was real. That’s how good the presentation is. It’s one of those recipes that looks like you spent hours on it, but honestly, it comes together in about twenty minutes. Maybe you’ve been there, scrambling for a last-minute Halloween dish that isn’t just another bag of chips. This is it. This is the one that stays with you because it’s clever without being complicated, and it actually makes people eat their vegetables without complaining. That’s a Halloween miracle right there.
Why You’ll Love This Recipe
I’ve tested this veggie tray at five different Halloween events over the last three years, from kid-packed birthday parties to adult costume gatherings, and it never fails. Here’s why this recipe stands out from every other party platter out there.
- Quick & Easy: You can put this together in under 20 minutes. Seriously, the hardest part is just washing the vegetables. It’s perfect for those days when you’re running around getting costumes ready and suddenly remember you need to bring something to the party.
- Simple Ingredients: No fancy grocery trips needed. Everything on this tray is something you can find at any regular supermarket. You probably already have most of the veggies in your fridge right now.
- Perfect for Halloween Parties: This is the ultimate crowd-pleaser for spooky gatherings. It works for school parties, office potlucks, family get-togethers, or just a fun night in watching scary movies.
- Crowd-Pleaser: Even the pickiest eaters will grab these veggies because they look so fun. I’ve watched kids who swear they hate vegetables eat an entire plate of pepper rings because they thought they were part of the web.
- Unbelievably Delicious: The combination of fresh, crunchy vegetables with a creamy, herby dip is just next-level snacking. It’s the kind of thing where you think you’ll just have a few pieces, and then suddenly the whole tray is empty.
What makes this recipe different from all the other veggie trays out there is the presentation technique. Instead of just tossing vegetables on a plate, you actually arrange them in concentric circles to mimic a spider web. It sounds fancy, but once you see how it works, you’ll wonder why you never thought of it before. Plus, I use a simple trick with a piping bag for the dip that makes the web lines look incredibly clean and professional. It’s comfort food reimagined—healthier, faster, but with the same satisfying crunch that makes you close your eyes after the first bite. Perfect for impressing guests without stress, or turning a simple snack table into something memorable.
What Ingredients You Will Need
This recipe uses simple, wholesome ingredients to deliver that satisfying crunch and bold flavor without any fuss. Most of these are pantry staples or regular grocery items you can grab in five minutes.
For the Veggie Web:
- 1 large round platter or pizza pan (about 12-14 inches)
- 1 cup ranch dressing (I prefer Hidden Valley for that classic taste, but any brand works)
- 1/2 cup sour cream (adds extra creaminess and tang)
- 1 tablespoon dried dill weed (gives that herby, fresh flavor)
- 1 teaspoon garlic powder
- 1/2 teaspoon black pepper
- 1/4 teaspoon salt
- 1 large red bell pepper (sliced into thin rings, about 1/4 inch thick)
- 1 large yellow bell pepper (sliced into thin rings)
- 1 large orange bell pepper (sliced into thin rings)
- 1 large green bell pepper (sliced into thin rings)
- 2 cups broccoli florets (cut into small, bite-sized pieces)
- 2 cups cauliflower florets (cut into small pieces)
- 1 cup cherry tomatoes (whole, or halved if large)
- 1 cup snap peas or snow peas (trimmed)
- 1 cup baby carrots (whole, or cut into sticks if large)
- 1 cup celery sticks (cut into 3-inch lengths)
- 1 cup cucumber slices (cut into half-moons or rounds)
For the Spider:
- 1 large black olive (for the body)
- 8 small black olives (for the legs, sliced in half lengthwise)
- 1 small dollop of cream cheese or ranch dip (to attach the spider to the tray)
I recommend using firm, fresh vegetables for the best texture. If you’re buying pre-cut veggies from the store, look for ones that still have a good crunch. For the peppers, try to get ones that are uniform in size so the rings look even when you arrange them. You can swap out any vegetable based on what’s in season or what your family prefers. In summer, I sometimes add zucchini slices or yellow squash. In winter, I might use more root vegetables like jicama sticks or radish slices. For a gluten-free option, just make sure your ranch dressing is certified gluten-free, which most brands are. Use dairy-free ranch and coconut-based sour cream if you need a dairy-free version.
Equipment Needed
You don’t need any fancy kitchen gadgets for this recipe, which is part of why I love it. Here’s what you’ll need:
- Large round platter or pizza pan: This is the most important piece. You need something at least 12 inches in diameter to create the web effect. I use a white porcelain pizza pan I found at a thrift store for three dollars, and it works perfectly. A large cutting board or even a clean cardboard circle covered in foil works too.
- Piping bag or zip-top bag: For the dip. You can use a real piping bag with a small round tip, but honestly, a regular sandwich bag with the corner snipped off works just as well. I’ve done it both ways, and the zip-top bag is actually easier to clean up.
- Sharp knife and cutting board: For slicing the vegetables into uniform pieces. A mandoline slicer can speed things up if you have one, but it’s not necessary.
- Small bowl: For mixing the dip if you’re making it from scratch. Any small mixing bowl works.
- Measuring spoons: For the dill, garlic powder, salt, and pepper. Eyeballing it works too if you’re confident, but measuring gives you consistent results every time.
If you don’t have a piping bag, just use a sturdy zip-top freezer bag. The regular sandwich bags can sometimes split at the corner when you squeeze, so go for the thicker ones. Also, wash your platter right before you start assembling so it’s completely dry and clean. Any moisture can make the veggies slide around.
Preparation Method
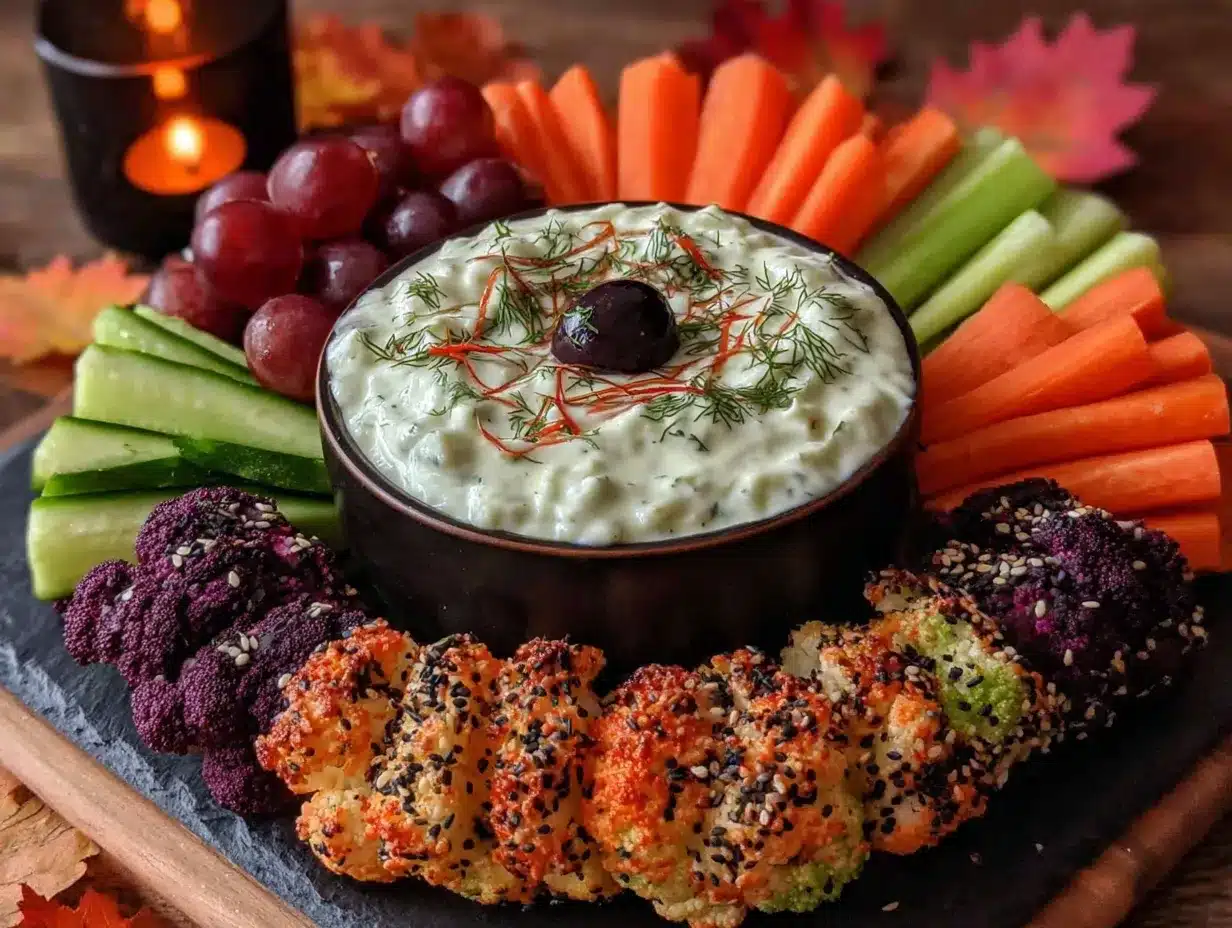
Let me walk you through this step by step. It looks complicated, but once you get the rhythm, you’ll breeze through it.
- Make the dip (5 minutes): In a small bowl, combine 1 cup of ranch dressing with 1/2 cup of sour cream. Add 1 tablespoon of dried dill weed, 1 teaspoon of garlic powder, 1/2 teaspoon of black pepper, and 1/4 teaspoon of salt. Stir everything together until it’s smooth and well combined. Taste it and adjust the seasoning if you want. I sometimes add an extra pinch of dill because I love that flavor. Set the dip aside in the fridge while you prep the veggies. This lets the flavors meld together.
- Prep the vegetables (10 minutes): Wash all your vegetables thoroughly. Slice the bell peppers into thin rings, about 1/4 inch thick. Try to keep the rings intact because they’ll form the circles of your web. Cut the broccoli and cauliflower into small florets, about the size of a quarter. Halve the cherry tomatoes if they’re large. Trim the snap peas. Cut the celery into 3-inch sticks. Slice the cucumber into rounds or half-moons. Keep everything organized on a cutting board or in separate bowls so you can grab them easily when assembling.
- Create the dip web base (3 minutes): Take your clean, dry round platter. Spoon the dip into your piping bag or zip-top bag. Snip off a tiny corner of the bag, about 1/8 inch wide. Starting from the center of the platter, pipe a small circle of dip about 2 inches in diameter. This will be the center of your web where the spider sits. Then, pipe a larger circle around it, about 3 inches out from the center. Keep going, piping concentric circles of dip all the way to the edge of the platter. You want about 5 or 6 circles total, each one getting progressively larger. Don’t worry if they’re not perfect—the veggies will cover most of it anyway.
- Pipe the web spokes (2 minutes): Using the same piping bag, pipe straight lines from the center circle out to the edge of the platter, like spokes on a wheel. Space them about 2 inches apart at the outer edge. You should get about 8 to 10 spokes. This creates the classic spider web pattern. If the lines look a little messy, that’s okay. The vegetables will add texture and color that distracts from any imperfections.
- Arrange the pepper rings (5 minutes): Start with the largest pepper rings and place them on the platter, following the circles of dip. Use a mix of colors—red, yellow, orange, green—to create a vibrant pattern. Place the largest rings near the outer edge and work your way inward with smaller rings. Don’t overlap them too much; leave a little space so the dip shows through. This is what creates the web effect. I like to alternate colors, so it looks like a rainbow web.
- Fill in with other vegetables (5 minutes): Arrange the broccoli florets, cauliflower florets, cherry tomatoes, snap peas, baby carrots, celery sticks, and cucumber slices around the pepper rings. Place them in the spaces between the spokes and circles. Try to distribute the colors evenly so the whole tray looks balanced. You can pile some veggies on top of others for height and texture. The goal is to cover most of the platter so it looks full and abundant.
- Make the spider (2 minutes): Take the large black olive for the body. Cut the small black olives in half lengthwise to create the legs. Place a small dollop of cream cheese or a bit of the dip in the center of the platter. Press the large olive onto it to hold it in place. Arrange the 8 olive halves around the body like spider legs—four on each side, slightly curved to look like they’re crawling. You can adjust the legs to make them look more realistic or more playful, depending on your vibe.
- Final touches (2 minutes): Take a step back and look at your tray. Fill in any empty spots with extra veggies. If some areas look bare, add a few more pepper rings or broccoli florets. The key is to make it look full and inviting. Once you’re happy with it, cover the tray with plastic wrap and refrigerate until you’re ready to serve. You can make this up to 4 hours ahead of time, which is perfect for parties.
One time, I forgot to snip the corner of the piping bag big enough, and the dip came out in a thin, stringy mess. It still worked, honestly, it just looked a little more abstract. So don’t stress if it’s not perfect. The veggies cover up most of the mistakes anyway.
Cooking Tips & Techniques
After making this veggie tray more times than I can count, I’ve picked up a few tricks that make the process smoother and the final result more impressive.
Use a template if you’re nervous about the web pattern. I actually traced a round cake pan on a piece of parchment paper and drew concentric circles with a marker. Then I placed the paper under my clear glass platter and used it as a guide for piping the dip. It sounds extra, but it works beautifully if you want perfect circles. Just remove the paper before serving.
Cut your veggies the night before. This is the biggest time-saver. Wash and slice everything the evening before your party, store them in separate zip-top bags in the fridge, and then assembly takes less than 10 minutes the next day. Just make sure the veggies are completely dry before you store them, or they’ll get soggy. Pat them with paper towels before bagging.
Don’t skip the sour cream in the dip. I tried making this with just straight ranch one time because I was out of sour cream, and the dip was too thin. It didn’t hold its shape when I piped it, and the web lines just melted into each other. The sour cream thickens it up perfectly and adds that extra tang that makes the veggies taste so good.
Arrange the spider last. I learned this the hard way. One year, I placed the spider in the center first, and then when I was adding the pepper rings, I accidentally knocked it over. The olive rolled right off the platter and onto the floor. My dog was very happy, but I had to remake the spider. Save it for the very end so it stays intact.
Keep a damp paper towel handy. The dip can sometimes smear on the platter if you’re not careful. A damp paper towel lets you wipe away any mistakes without leaving streaks. I keep one right next to my cutting board while I’m working.
Variations & Adaptations
This recipe is incredibly flexible, and I’ve tried several different versions over the years. Here are some of my favorites.
Spicy Southwest Version: Instead of ranch, use a creamy chipotle dip. Mix 1 cup of sour cream with 1/2 cup of mayonnaise, 2 tablespoons of adobo sauce from a can of chipotle peppers, 1 teaspoon of cumin, and the juice of half a lime. It gives the whole tray a smoky, spicy kick that pairs amazingly with the fresh veggies. I add black beans and corn kernels to the veggie mix for extra texture.
Kid-Friendly Monster Version: Make little monster faces on the veggies using cream cheese dots for eyes and olive slices for mouths. You can also use cookie cutters to cut the bell peppers into Halloween shapes like bats, ghosts, and pumpkins. My nephew’s friends went absolutely crazy for this version at his school party last year. They were actually fighting over who got the bat-shaped pepper.
Low-Carb Keto Version: Skip the carrots and snap peas, which are higher in carbs, and load up on cucumber, celery, bell peppers, broccoli, and cauliflower. Use a high-fat dip made with cream cheese, full-fat sour cream, and herbs. This version is perfect for anyone watching their carb intake during the Halloween festivities. I’ve served this at a keto-friendly potluck and it was the first thing to disappear.
Dessert Version: Okay, this isn’t really a veggie tray anymore, but it’s fun. Use the same spider web pattern but with fruit. Arrange apple slices, pear slices, grapes, strawberries, and melon balls in the web pattern. Use a sweet cream cheese dip made with honey and vanilla instead of ranch. The spider is made from a large blackberry and small blueberries for the legs. It’s a healthier alternative to candy that still feels like a treat.
Serving & Storage Suggestions
This veggie tray is best served cold, straight from the fridge. The crispness of the vegetables contrasts beautifully with the creamy dip, and the cold temperature makes everything taste fresher. I like to take it out of the fridge about 10 minutes before serving so it’s not ice-cold, but still nicely chilled.
For presentation, place the tray in the center of your snack table surrounded by other Halloween treats. It makes a fantastic centerpiece because the spider web pattern is so eye-catching. I sometimes add a few fake spiders around the tray for extra spooky vibes. Just make sure no one mistakes them for the real olive spider.
This dish pairs wonderfully with other Halloween snacks like spooky Halloween popcorn mix, creamy pumpkin dip with ginger snaps, or mini mummy pizzas. For drinks, a crisp apple cider or a sparkling water with a splash of pomegranate juice complements the fresh vegetable flavors perfectly.
Storage: If you have leftovers, cover the tray tightly with plastic wrap and store it in the refrigerator for up to 2 days. The dip may separate slightly, but just give it a stir before serving again. The vegetables will lose some crunch after the first day, so it’s best to eat this within 24 hours. I don’t recommend freezing this dish—the vegetables will turn into a soggy mess when thawed.
Reheating: You don’t need to reheat anything here. If the dip has thickened up in the fridge, let the tray sit at room temperature for about 15 minutes before serving. The veggies will warm up just enough to take the chill off without losing their crunch.
The flavors actually develop nicely over time. The dill and garlic in the dip meld together more as it sits, so if you make this a few hours ahead, it might taste even better. Just keep it covered in the fridge until you’re ready to serve.
Nutritional Information & Benefits
This veggie tray is a nutritional powerhouse disguised as a fun Halloween snack. Here’s a rough breakdown per serving (about 1 cup of veggies with 2 tablespoons of dip):
- Calories: 120-150
- Fat: 8-10g (mostly from the dip)
- Carbohydrates: 10-12g
- Fiber: 3-4g
- Protein: 3-4g
- Sugar: 4-5g (natural from vegetables)
- Sodium: 300-400mg
The health benefits here are impressive. Bell peppers are loaded with vitamin C—one red bell pepper has more vitamin C than an orange. Broccoli and cauliflower are packed with fiber, vitamin K, and antioxidants that support immune health. Carrots provide beta-carotene, which is great for eye health. And the dip, while higher in fat, uses sour cream which contains probiotics that are good for gut health.
This recipe is naturally gluten-free (just check your ranch dressing label) and can be made dairy-free with simple substitutions. It’s low in added sugars and high in fiber, making it a smart choice for anyone watching their blood sugar or trying to eat more vegetables. The variety of colors means you’re getting a wide range of phytonutrients, which is always a good thing.
Conclusion
This spooky easy spider web veggie tray has become my go-to Halloween dish for a reason. It’s fun, it’s festive, and it actually makes people excited to eat their vegetables. Mrs. Kowalski would be proud of how far her little idea has traveled. Every time I bring this to a party, someone asks for the recipe, and I love watching their face when I tell them how simple it is.
I encourage you to make this your own. Swap in your family’s favorite vegetables, experiment with different dips, or get creative with how you arrange the spider. The beauty of this recipe is that it’s a template, not a rigid set of rules. You can adapt it to whatever you have on hand or whatever your crowd loves.
I’d love to hear how yours turns out! Drop a comment below and tell me what variations you tried, or tag me in your photos on social media. Did you make a dessert version? Did your kids love the vegetable monsters? Let me know. And if you’re looking for more Halloween snack ideas, check out our Halloween party snack ideas collection for more spooky inspiration.
Happy Halloween, and happy snacking! Remember, the best treats don’t always come in a wrapper. Sometimes they come on a platter, covered in ranch, shaped like a web.
Frequently Asked Questions
Can I make this spider web veggie tray a day ahead?
Yes, you can absolutely make this a day ahead. Just assemble the entire tray, cover it tightly with plastic wrap, and store it in the refrigerator. The dip will thicken slightly overnight, but it will still taste great. Add the spider just before serving so it stays intact.
What if I don’t have a round platter?
No problem! You can use a large rectangular cutting board or baking sheet instead. Just pipe the web pattern in an oval or rectangle shape. It won’t look exactly like a spider web, but the concentric circles and spokes will still create a fun effect. You can also use a large round pizza pan if you have one.
How do I keep the vegetables from getting soggy?
The key is to make sure all your vegetables are completely dry before you arrange them on the platter. After washing, pat them dry with paper towels or a clean kitchen towel. Also, don’t assemble the tray more than 24 hours in advance, and keep it covered in the fridge until serving. The cold temperature helps maintain crunch.
Can I use a different dip?
Absolutely! This recipe works with almost any creamy dip. Try hummus, guacamole, tzatziki, or a creamy balsamic vinaigrette. Just make sure the dip is thick enough to pipe through a bag. If it’s too thin, it will just spread into a puddle instead of holding the web shape. You can thicken thin dips by adding a little cream cheese or Greek yogurt.
How many people does this serve?
This recipe serves about 8 to 10 people as a party snack. If it’s the main appetizer at a small gathering, it might serve 6. For larger parties, I recommend making two trays or doubling the recipe. It goes fast, especially when kids are involved. I’ve seen a full tray disappear in under 30 minutes at a busy Halloween party.
Pin This Recipe!
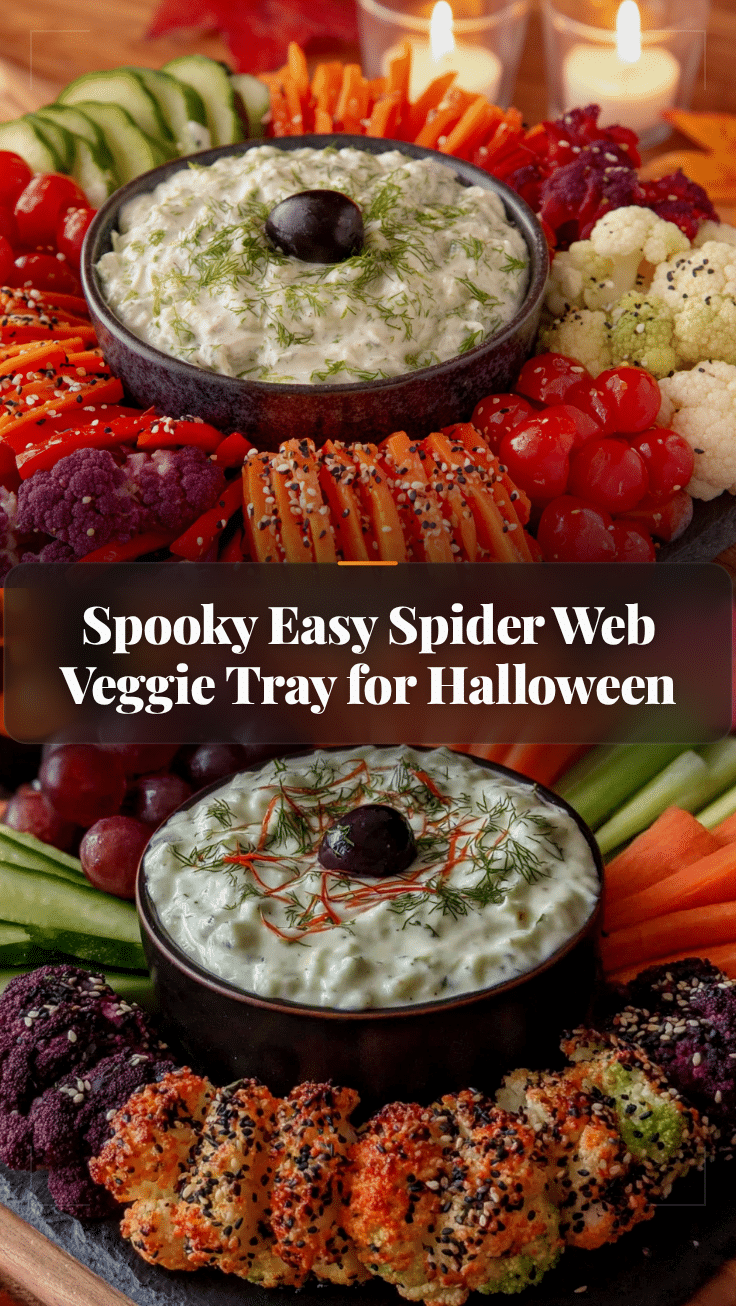
Spooky Easy Spider Web Veggie Tray for Halloween Fun
A fun and festive Halloween veggie tray arranged like a spider web with a creamy ranch dip and a black olive spider. Quick to assemble in under 20 minutes, it’s a crowd-pleasing, healthier alternative to candy.
- Prep Time: 20 minutes
- Cook Time: 0 minutes
- Total Time: 20 minutes
- Yield: 8-10 servings 1x
- Category: Appetizer
- Cuisine: American
Ingredients
- 1 large round platter or pizza pan (about 12–14 inches)
- 1 cup ranch dressing (preferably Hidden Valley)
- 1/2 cup sour cream
- 1 tablespoon dried dill weed
- 1 teaspoon garlic powder
- 1/2 teaspoon black pepper
- 1/4 teaspoon salt
- 1 large red bell pepper (sliced into thin rings, about 1/4 inch thick)
- 1 large yellow bell pepper (sliced into thin rings)
- 1 large orange bell pepper (sliced into thin rings)
- 1 large green bell pepper (sliced into thin rings)
- 2 cups broccoli florets (cut into small, bite-sized pieces)
- 2 cups cauliflower florets (cut into small pieces)
- 1 cup cherry tomatoes (whole, or halved if large)
- 1 cup snap peas or snow peas (trimmed)
- 1 cup baby carrots (whole, or cut into sticks if large)
- 1 cup celery sticks (cut into 3-inch lengths)
- 1 cup cucumber slices (cut into half-moons or rounds)
- 1 large black olive (for the spider body)
- 8 small black olives (for the legs, sliced in half lengthwise)
- 1 small dollop of cream cheese or ranch dip (to attach the spider)
Instructions
- Make the dip: In a small bowl, combine 1 cup ranch dressing, 1/2 cup sour cream, 1 tablespoon dried dill weed, 1 teaspoon garlic powder, 1/2 teaspoon black pepper, and 1/4 teaspoon salt. Stir until smooth. Refrigerate while prepping veggies.
- Prep the vegetables: Wash all vegetables. Slice bell peppers into thin rings (about 1/4 inch thick). Cut broccoli and cauliflower into small florets. Halve cherry tomatoes if large. Trim snap peas. Cut celery into 3-inch sticks. Slice cucumber into rounds or half-moons.
- Create the dip web base: Spoon dip into a piping bag or zip-top bag. Snip a tiny corner (about 1/8 inch wide). On a clean, dry round platter, pipe a small circle of dip (about 2 inches in diameter) in the center. Pipe concentric circles around it, spaced about 3 inches apart, until you reach the edge (about 5-6 circles total).
- Pipe the web spokes: Using the same bag, pipe straight lines from the center circle to the edge, like spokes on a wheel, spaced about 2 inches apart at the outer edge (about 8-10 spokes).
- Arrange the pepper rings: Place the largest pepper rings on the platter following the circles of dip, using a mix of colors. Start with the largest rings near the outer edge and work inward with smaller rings. Leave space so the dip shows through.
- Fill in with other vegetables: Arrange broccoli, cauliflower, cherry tomatoes, snap peas, baby carrots, celery sticks, and cucumber slices around the pepper rings, filling the spaces between spokes and circles. Distribute colors evenly.
- Make the spider: Cut small black olives in half lengthwise for legs. Place a small dollop of cream cheese or dip in the center of the platter. Press the large black olive onto it. Arrange the 8 olive halves around the body like spider legs (four on each side, slightly curved).
- Final touches: Fill any empty spots with extra veggies. Cover with plastic wrap and refrigerate until serving. Can be made up to 4 hours ahead.
Notes
Use a template (e.g., traced cake pan on parchment) under a clear platter for perfect circles. Cut veggies the night before to save time. Don’t skip sour cream in the dip—it thickens it for piping. Add the spider last to avoid knocking it over. Keep a damp paper towel handy to clean up dip smears.
Nutrition
- Serving Size: 1 cup of veggies wit
- Calories: 120150
- Sugar: 45
- Sodium: 300400
- Fat: 810
- Saturated Fat: 23
- Carbohydrates: 1012
- Fiber: 34
- Protein: 34
Keywords: Halloween, veggie tray, spider web, party snack, healthy, appetizer, vegetable platter, ranch dip


