There used to be a little bakery called The Spider’s Web down on Elm Street that made the most incredible Halloween dirt cups I have ever tasted. They closed three years ago when the owner retired, and I honestly thought I’d never get to enjoy that perfect combination of creamy chocolate and crunchy cookie “dirt” again. After seven tries — and one spectacularly soggy mess that my kids still laugh about — I finally cracked the code.
These Halloween dirt cups with gummy worms are the result of that obsession. They’re not just any pudding cups; they’re the exact kind that made you close your eyes on that first bite. The secret is in the layering technique and the type of chocolate pudding you use — trust me, not all pudding is created equal. I spent a whole weekend testing different brands and ratios, and let me tell you, my family was more than happy to be taste testers.
What I love most about this recipe is how it brings everyone together. My youngest, who usually picks at her dessert, actually asked for seconds. That’s the kind of win that makes all those failed attempts worth it. Maybe you’ve been there — trying to recreate a childhood memory or a special treat from a place that no longer exists. That’s exactly why I kept going. I wanted my kids to experience that same magic, even if the original bakery was long gone.
Now, these dirt cups have become our go-to Halloween tradition. They’re simple enough for a weeknight but special enough for a party. And honestly? They taste even better than the ones from The Spider’s Web. I mean that.
Why You’ll Love This Recipe
This isn’t just another Halloween dessert recipe. It’s the one that your kids will remember for years. Here’s why these dirt cups with gummy worms deserve a spot on your holiday menu:
- Quick & Easy: Ready in under 20 minutes, with no baking required. Perfect for those busy October evenings when you’re juggling costumes and school events.
- Simple Ingredients: You probably already have most of these in your pantry. No fancy grocery runs needed.
- Perfect for Halloween: Whether it’s a classroom party, a family gathering, or just a fun treat before trick-or-treating, these cups fit right in.
- Crowd-Pleaser: I’ve yet to meet a kid who doesn’t love digging into a cup of “dirt” to find gummy worms. Adults love the nostalgia, too.
- Unbelievably Delicious: The combination of creamy chocolate pudding, crunchy Oreo crumbs, and chewy gummy worms is pure comfort food magic.
What makes this version different from the rest? It’s the layering technique. Most recipes just dump everything together, but I’ve developed a method that keeps the cookie crumbs perfectly crunchy, even after sitting in the fridge. Plus, I use a specific type of pudding that sets up thick and creamy without being too sweet. It’s a small detail that makes a huge difference.
This recipe isn’t just good — it’s the kind that makes you close your eyes after the first bite. It’s Halloween fun reimagined: faster, easier, but with the same soul-soothing satisfaction. Perfect for impressing your kids without stress, or turning a simple dessert into something memorable.
What Ingredients You Will Need
This recipe uses simple, everyday ingredients to deliver that perfect dirt cup experience. Most of these are pantry staples, so you likely have everything on hand already.
- Instant chocolate pudding mix (3.9-ounce box): I recommend Jell-O brand for the creamiest texture. Cook-and-serve pudding won’t set up properly for this recipe, so stick with instant.
- Cold milk (2 cups): Whole milk gives the richest flavor, but 2% works just fine. For a dairy-free version, use unsweetened almond or oat milk.
- Oreo cookies (about 20): Regular Oreos work best. Don’t use double-stuffed — you want more cookie than cream for that “dirt” texture. (I learned this the hard way after one batch turned into a pasty mess.)
- Gummy worms (about 12-16): Use your favorite brand. I prefer the sour ones for a little tangy contrast, but classic sweet worms are great too.
- Cool Whip (8-ounce tub, thawed): This makes the pudding extra creamy and light. You can use homemade whipped cream if you prefer, but Cool Whip holds up better over time.
- Gel food coloring (optional): A drop of orange or green adds a festive touch to the whipped cream layer.
- Small clear cups (7-ounce size): Clear cups let you see the layers, which is half the fun. Plastic or glass both work.
- Halloween sprinkles (optional): For extra decoration on top.
For the best results, make sure your milk is very cold. Room temperature milk won’t allow the instant pudding to set up properly. Also, if you’re using homemade whipped cream, stabilize it with a tablespoon of powdered sugar so it doesn’t deflate overnight.
Equipment Needed
You don’t need any fancy gadgets for this recipe. Here’s what you’ll need:
- Large mixing bowl: For making the pudding. A glass or stainless steel bowl works best.
- Whisk: For mixing the pudding and milk. A wire whisk gives you the smoothest results.
- Food processor or zip-top bag: For crushing the Oreos. A food processor makes quick work of it, but a zip-top bag and rolling pin work just as well — and it’s a great job for little helpers.
- Measuring cups and spoons: For accurate measurements.
- Spatula: For folding in the Cool Whip.
- Small clear cups (7-ounce size): You’ll need about 8 cups for this recipe.
- Refrigerator: For chilling the cups before serving.
If you don’t have a food processor, don’t worry. I’ve crushed countless Oreos with a rolling pin and a zip-top bag, and it works perfectly. Just make sure the crumbs are fine and even — no big chunks.
Preparation Method
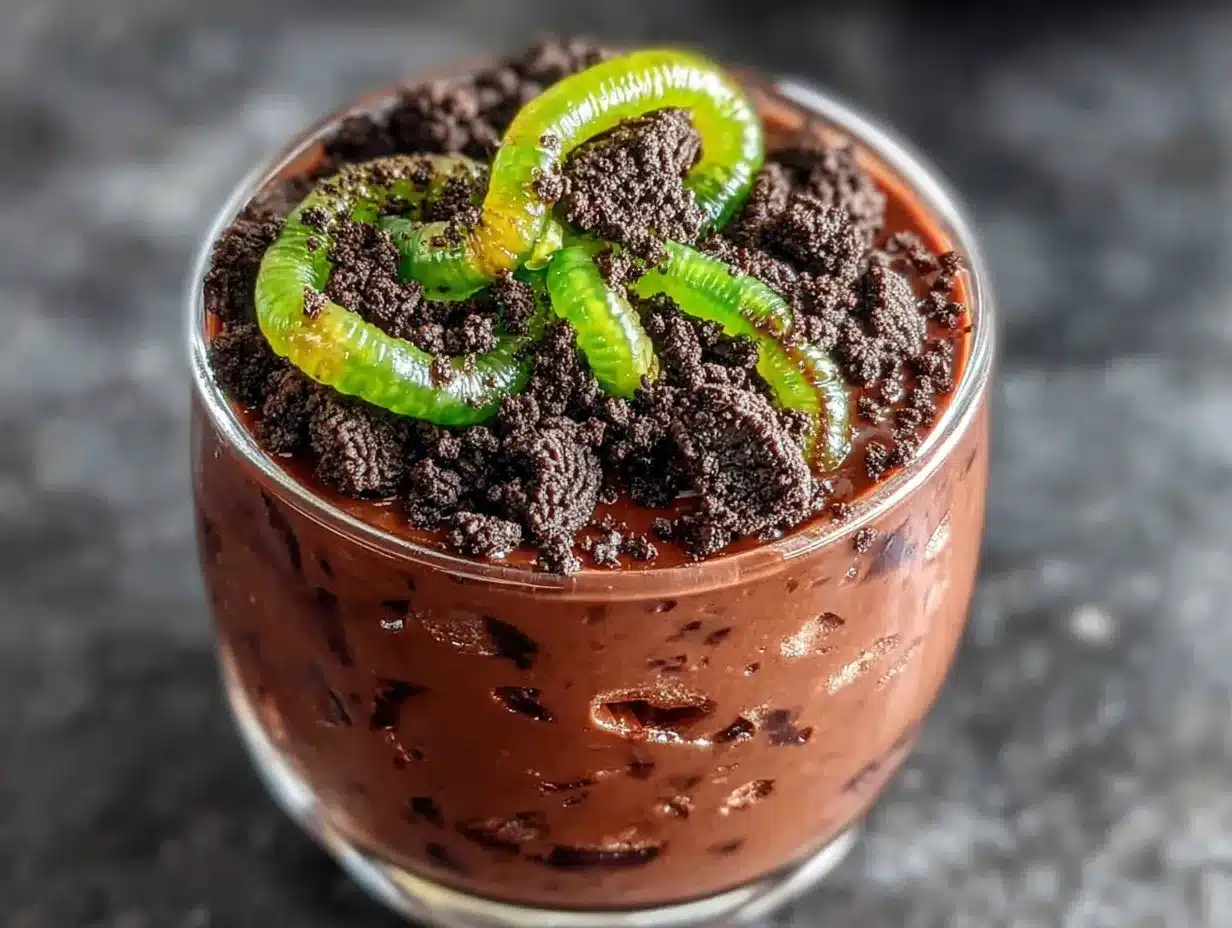
Follow these steps carefully, and you’ll have perfect dirt cups every time. I’ve included all the little details I learned from my seven failed attempts.
- Make the pudding: In a large mixing bowl, whisk together the instant chocolate pudding mix and 2 cups of cold milk. Whisk for about 2 minutes until the mixture thickens. It should look glossy and smooth. Let it sit for 5 minutes to set up completely.
- Fold in the Cool Whip: Gently fold the thawed Cool Whip into the pudding using a spatula. Use a gentle, sweeping motion — don’t stir vigorously or you’ll deflate the mixture. If you’re using gel food coloring, add a drop now and fold until evenly distributed. The mixture should be light, fluffy, and a shade lighter than the original pudding.
- Crush the Oreos: Place the Oreos in a food processor and pulse until you have fine crumbs. If using a zip-top bag, place the cookies in the bag, seal it, and crush them with a rolling pin. You want a mix of fine crumbs and a few slightly larger pieces for that “dirt” texture. Remove about ¼ cup of the crumbs for topping later.
- Layer the cups: Spoon about 2 tablespoons of the Oreo crumbs into the bottom of each clear cup. This creates the first “dirt” layer. Gently tap the cup on the counter to settle the crumbs.
- Add the pudding mixture: Spoon or pipe the pudding mixture over the crumbs, filling each cup about halfway. Use a spoon to spread it evenly. Leave about ½ inch of space at the top.
- Add the gummy worms: Press 1-2 gummy worms into the pudding mixture in each cup, leaving the ends sticking out. This creates the illusion that the worms are crawling out of the dirt.
- Top with remaining pudding: Add another layer of pudding mixture, filling the cups almost to the top. Leave just enough room for the final crumb layer.
- Finish with Oreo crumbs: Sprinkle the reserved Oreo crumbs over the top of each cup. This is your final “dirt” layer. Make sure it covers the pudding completely — you want to hide the worms underneath.
- Add more gummy worms: Place another gummy worm or two on top of each cup, partially buried in the crumbs. This makes it look like the worms are crawling out.
- Chill: Refrigerate the cups for at least 2 hours before serving. This allows the flavors to meld and the texture to firm up. For best results, chill overnight.
Pro tip: If you’re making these ahead of time, wait to add the final gummy worms until just before serving. They tend to soften and lose their shape if left in the fridge too long. The ones buried in the middle are fine, but the top worms look best fresh.
Sensory cue: When you press the gummy worms into the pudding, you should feel a slight resistance. If the pudding is too soft, it needs more time to set. The finished cups should look like tiny gardens of chocolate dirt with worms peeking out — creepy and cute at the same time.
Cooking Tips & Techniques
I’ve made plenty of mistakes with this recipe, so you don’t have to. Here are the most important things I’ve learned:
- Don’t overmix the pudding: Whisk just until the powder dissolves and the mixture thickens. Overmixing can make the pudding grainy. I learned this after one batch turned out lumpy and unappealing.
- Keep the milk cold: Warm milk won’t allow the instant pudding to set properly. Take the milk straight from the fridge — no microwaving.
- Crush the Oreos finely: Large chunks of cookie can make the layers uneven and harder to eat. Aim for crumbs that resemble actual dirt. A food processor gives the best results, but a rolling pin works too.
- Let the cups chill long enough: Two hours is the minimum, but overnight is better. The pudding needs time to firm up, and the flavors develop more depth as they sit.
- Use clear cups: This is non-negotiable for the visual effect. Clear cups let everyone see the layers of dirt and worms, which is half the fun.
- Make extra: These disappear fast. I always double the recipe for parties because people come back for seconds.
Common mistake: Adding too many gummy worms too early. I once added all the worms at the beginning, and by the next day, they had dissolved into the pudding. Now I add the top worms right before serving.
Variations & Adaptations
This recipe is endlessly customizable. Here are some of my favorite variations:
- Dairy-Free Version: Use unsweetened almond or oat milk in place of regular milk. For the pudding, look for a vegan instant pudding mix. Use dairy-free whipped topping like CocoWhip. The texture is slightly lighter, but just as delicious.
- Gluten-Free Option: Use gluten-free chocolate sandwich cookies. Many brands make gluten-free versions that taste just like the original. Everything else in the recipe is naturally gluten-free.
- Spooky Spider Cups: Instead of gummy worms, use gummy spiders or add candy eyeballs to the top. You can also pipe a spider web pattern on top using melted white chocolate.
- Pumpkin Patch Version: Swap the chocolate pudding for vanilla or butterscotch. Use crushed vanilla wafers or graham crackers for the “dirt.” Add candy pumpkins on top for a fall twist.
- Low-Sugar Option: Use sugar-free instant pudding mix and sugar-free Oreos. The taste is still great, and the kids won’t notice the difference.
I once tried a version with crushed pretzels instead of Oreos for a salty-sweet twist. It was interesting, but honestly, the Oreo version is still my favorite. Stick with the original for your first time.
Serving & Storage Suggestions
These dirt cups are best served cold, straight from the fridge. The contrast between the creamy pudding and the crunchy cookie crumbs is at its peak when they’re well-chilled.
For serving: Arrange the cups on a platter with extra gummy worms scattered around for a dramatic effect. You can also add Halloween-themed cupcake toppers or little plastic spiders for extra fun. If you’re serving these at a party, label them “Worm Dirt” with a spooky font for added laughs.
Storage: Keep the cups covered in the refrigerator for up to 3 days. If you’re making them ahead, leave the top gummy worms off until serving time. The pudding will stay creamy, and the cookie crumbs will remain crunchy if you keep the cups sealed.
Freezing: I don’t recommend freezing these. The pudding becomes watery when thawed, and the texture is just not the same. Stick to refrigeration.
Flavor development: These actually taste better the next day. The flavors meld together, and the pudding gets even creamier. Just add fresh gummy worms before serving.
Nutritional Information & Benefits
Here’s the approximate nutritional breakdown for one dirt cup (assuming 8 servings):
| Nutrient | Amount per Serving |
|---|---|
| Calories | 310 |
| Total Fat | 12g |
| Saturated Fat | 6g |
| Cholesterol | 10mg |
| Sodium | 420mg |
| Total Carbohydrates | 48g |
| Dietary Fiber | 2g |
| Sugars | 34g |
| Protein | 5g |
These are estimates and will vary based on the specific brands you use. The good news is that this dessert is relatively low in fat compared to many Halloween treats. The protein from the milk and Cool Whip adds a small nutritional boost, and the Oreos provide a bit of iron and calcium.
Dietary considerations: This recipe contains dairy and gluten. For allergen-friendly versions, see the variations section above. The sugar content is moderate for a dessert, but you can reduce it by using sugar-free pudding mix.
From a wellness perspective, I believe in balance. Halloween is one night a year, and these dirt cups are a fun, memorable treat that brings joy to kids and adults alike. Enjoy them without guilt.
Conclusion
These Halloween dirt cups with gummy worms are more than just a dessert — they’re a tradition waiting to happen. They’re the kind of recipe that your kids will beg you to make every October, and honestly, you’ll be happy to oblige because they’re so simple and fun.
I’ve made these for classroom parties, family gatherings, and quiet nights at home. Every single time, they disappear within minutes. The combination of creamy chocolate pudding, crunchy cookie “dirt,” and chewy gummy worms is just irresistible.
Don’t be afraid to customize these based on what your family loves. Add more worms, use different cookies, or get creative with the decorations. The beauty of this recipe is that it’s forgiving and adaptable. My only rule is to have fun with it.
I’d love to hear how your dirt cups turn out! Leave a comment below and tell me about your Halloween traditions. Did your kids help make these? Did you add your own twist? Share a photo on Pinterest and tag me — I can’t wait to see your creations. Happy Halloween, and happy cooking!
Frequently Asked Questions
Can I make these dirt cups the night before?
Absolutely! In fact, they taste even better the next day. Just wait to add the top gummy worms until right before serving to keep them looking fresh. The pudding will be extra creamy, and the flavors will have melded beautifully.
How long do these keep in the fridge?
These dirt cups will keep for up to 3 days in the refrigerator if stored covered. After that, the cookie crumbs may start to soften, and the gummy worms can lose their shape. For the best texture, enjoy them within 48 hours.
Can I use homemade whipped cream instead of Cool Whip?
Yes, you can! Use 1 cup of heavy cream whipped with 2 tablespoons of powdered sugar until stiff peaks form. Fold it into the pudding just like you would with Cool Whip. The texture will be slightly lighter, and it will taste more natural. Just note that homemade whipped cream may deflate a bit more over time.
What if I don’t have clear cups?
If you don’t have clear cups, you can use any small cups or bowls. The visual effect won’t be as dramatic, but the taste will be exactly the same. You can also use small mason jars or even paper cups for a more rustic look.
Can I use a different type of cookie?
Definitely! Golden Oreos, chocolate wafers, or even crushed graham crackers work well. For a gluten-free option, use gluten-free chocolate sandwich cookies. The key is to use a cookie that crushes into a fine, dirt-like texture. Avoid cookies with large chunks or fillings that won’t break down evenly.
Pin This Recipe!
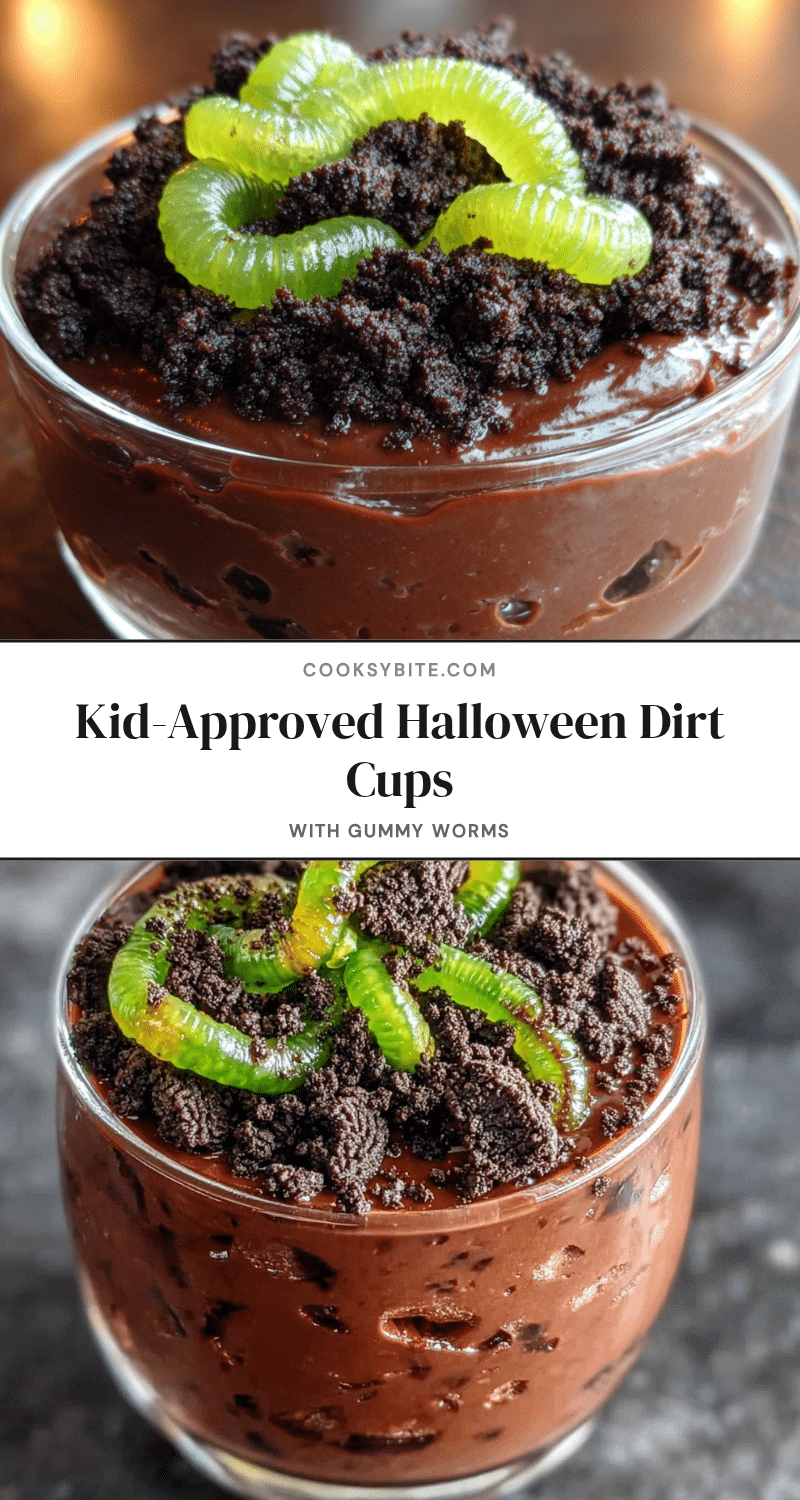
Halloween Dirt Cups with Gummy Worms: Easy Kid-Approved Treat
These Halloween dirt cups with gummy worms are the perfect no-bake dessert for spooky celebrations. Creamy chocolate pudding, crunchy Oreo ‘dirt,’ and chewy gummy worms create a fun, kid-approved treat that’s ready in under 20 minutes.
- Prep Time: 15 minutes
- Cook Time: 0 minutes
- Total Time: 2 hours 15 minutes (includes chilling)
- Yield: 8 servings 1x
- Category: Dessert
- Cuisine: American
Ingredients
- 1 box (3.9 oz) instant chocolate pudding mix (Jell-O recommended)
- 2 cups cold milk (whole or 2%)
- 20 Oreo cookies (regular, not double-stuffed)
- 12–16 gummy worms (sour or classic)
- 1 tub (8 oz) Cool Whip, thawed
- Gel food coloring (optional, orange or green)
- Halloween sprinkles (optional)
- 8 small clear cups (7 oz each)
Instructions
- In a large mixing bowl, whisk together the instant chocolate pudding mix and 2 cups of cold milk for about 2 minutes until thickened. Let sit for 5 minutes to set.
- Gently fold the thawed Cool Whip into the pudding using a spatula. If using gel food coloring, add a drop and fold until evenly distributed.
- Crush the Oreos in a food processor or in a zip-top bag with a rolling pin until fine crumbs form. Reserve about ¼ cup of crumbs for topping.
- Spoon about 2 tablespoons of Oreo crumbs into the bottom of each clear cup. Tap gently to settle.
- Spoon or pipe the pudding mixture over the crumbs, filling each cup about halfway.
- Press 1-2 gummy worms into the pudding mixture in each cup, leaving the ends sticking out.
- Add another layer of pudding mixture, filling cups almost to the top.
- Sprinkle the reserved Oreo crumbs over the top of each cup, covering the pudding completely.
- Place another gummy worm or two on top of each cup, partially buried in the crumbs.
- Refrigerate for at least 2 hours (or overnight) before serving. For best results, add top gummy worms just before serving.
Notes
For best results, use cold milk and instant pudding (not cook-and-serve). Add top gummy worms just before serving to prevent softening. These taste even better the next day. For dairy-free, use unsweetened almond or oat milk and vegan pudding mix. For gluten-free, use gluten-free chocolate sandwich cookies.
Nutrition
- Serving Size: 1 dirt cup
- Calories: 310
- Sugar: 34
- Sodium: 420
- Fat: 12
- Saturated Fat: 6
- Carbohydrates: 48
- Fiber: 2
- Protein: 5
Keywords: Halloween dirt cups, gummy worms, no-bake dessert, chocolate pudding, Oreo dirt, kid-friendly Halloween treat


