The PTA bake sale was in twelve hours and I’d completely forgotten. I mean, completely. I’d signed up to bring a dessert weeks ago, and it just slipped my mind until my phone buzzed with a reminder. Everyone else would be bringing those elaborate, Pinterest-perfect cakes and homemade pies that take all day. I had a bag of marshmallows, a box of cereal, and a bag of candy corn left over from some Halloween project. Honestly, I almost just bought a tray of cookies from the grocery store on the way. But then I remembered this ridiculously simple trick my college roommate used to pull when we were broke and craving something sweet. She’d throw three ingredients together and somehow end up with the most popular thing at any party. So, with the clock ticking and a little bit of desperation, I grabbed my ingredients and got to work. I wasn’t expecting much, just something to bring so I wouldn’t show up empty-handed. What happened next was a total accident of deliciousness. The pan barely made it to the bake sale table before it was half-gone, and I spent the whole night being asked for the recipe. It was a little embarrassing, honestly. I mean, it’s only three ingredients. Maybe you’ve been in that spot, where you need a quick win and the fridge looks hopeless. That’s the story of how these easy 3-ingredient candy corn Rice Krispie treats became my secret weapon for last-minute everything.
Why You’ll Love This Recipe
This isn’t just another rice cereal treat. I’ve made a lot of them over the years, and let me tell you, this version is special. The candy corn melts down into the marshmallow mixture, creating this incredible, gooey, and almost buttery flavor that plain marshmallows just can’t match. It adds a subtle, honey-like sweetness and the most gorgeous sunset color. It’s a total crowd-pleaser that looks like you spent way more time on it than you actually did.
- Quick & Easy: From start to finish, you’re looking at about 15 minutes of active time. Perfect for when you need a dessert, like, yesterday.
- Simple Ingredients: You only need three things: butter, marshmallows, crispy rice cereal, and candy corn. That’s it. No fancy extracts or specialty stores.
- Perfect for Fall & Halloween: The colors are spot-on for autumn parties, but honestly, I make these all year round because they’re just that good.
- Crowd-Pleaser: Kids and adults go nuts for them. The candy corn flavor is familiar but somehow more delicious in this form. It’s the kind of treat that makes you close your eyes after the first bite. It’s comfort food reimagined—faster, easier, but with the same soul-soothing satisfaction.
- Unbelievably Delicious: The texture is perfectly chewy, and the flavor is next-level. It’s not just a dessert; it’s a happy accident that turned into a staple.
What makes this recipe different is the technique of melting the candy corn with the marshmallows. It’s a little trick that creates a richer, more complex flavor profile without any extra work. This is the best version of a classic, and it’s perfect for impressing guests without any of the stress.
What Ingredients You Will Need
This recipe uses the simplest of ingredients to deliver a big, bold flavor and that perfect chewy texture we all crave. You probably have most of these in your pantry right now.
- 3 tablespoons unsalted butter, plus a little extra for greasing the pan. I always use unsalted to control the salt level, but salted butter will work in a pinch—just skip adding any extra salt.
- 1 (10-ounce) bag mini marshmallows. The mini ones melt faster and more evenly than the large ones. I’ve found that Jet-Puffed brand gives the most consistent, fluffy results, but any brand will do.
- 6 cups crispy rice cereal. This is about half a standard box. I recommend Kellogg’s Rice Krispies for that classic snap, crackle, and pop texture, but any store brand works great too. Just make sure it’s fresh and not stale.
- 1 cup candy corn. This is the star of the show! You can use any brand. I personally like the Brach’s candy corn for its classic flavor and texture, but seasonal store brands are perfectly fine. For the best color swirl, use the classic yellow, orange, and white mix.
A quick note on candy corn: fresh candy corn is softer and will melt more easily into the marshmallow mixture. If your bag has been sitting in the pantry for a while and feels a bit hard, you can microwave it for about 10 seconds to soften it up before adding it to the pot. This little trick helps it incorporate more smoothly, preventing any crunchy bits of unmelted candy. For a fun twist, you can try using the autumn-themed candy corn mixes that have brown or green pieces, but the classic trio gives the most iconic look.
Equipment Needed
You don’t need any fancy kitchen gadgets for this one, which is part of its charm. Here’s what you’ll need to have on hand:
- Large pot or Dutch oven: You need a big pot to hold all the cereal. A 5- to 6-quart pot is perfect. I’ve used a non-stick pot before, and it makes cleanup a breeze, but a regular stainless steel one works just fine.
- Rubber spatula or wooden spoon: A sturdy spatula is essential for folding the cereal into the sticky marshmallow mixture without breaking the cereal pieces. I prefer a silicone spatula because it doesn’t scratch the pot and it scrapes the sides clean.
- 9×13-inch baking dish: This is the standard size for a thick batch of treats. If you want them a little thicker, you can use a 9×9-inch pan.
- Parchment paper or wax paper: This is a lifesaver. Lining your pan with parchment paper lets you lift the whole block of treats out for easy cutting. It also makes for a super easy cleanup.
- Sharp knife: A good chef’s knife or a large serrated knife works best for cutting clean squares without smushing them.
If you don’t have a 9×13 pan, you can use a large rimmed baking sheet. The treats will just be a bit thinner, which some people actually prefer. A budget-friendly option for the spatula is a simple wooden spoon—it works like a charm, even if it’s not as non-stick.
Preparation Method
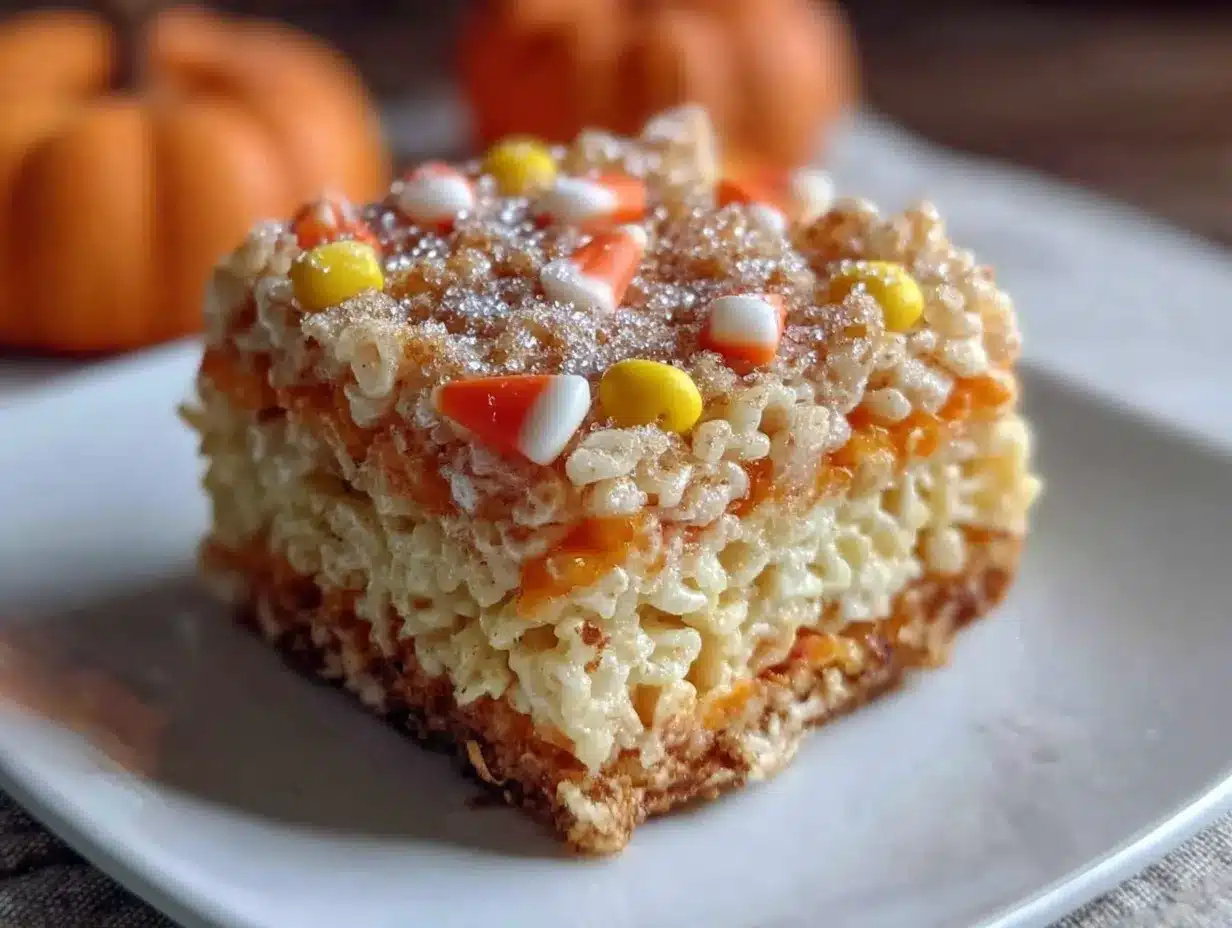
This is where the magic happens. Follow these steps, and you’ll have the best batch of treats you’ve ever made. Trust the process, especially when it comes to the candy corn.
- Prep your pan. Grease a 9×13-inch baking dish with a little butter or line it with parchment paper, leaving some overhang on the sides for easy lifting. If using parchment, give it a light spray of non-stick cooking spray just to be safe.
- Melt the butter. In your large pot, melt the 3 tablespoons of butter over medium-low heat. Don’t rush this step. You want the butter to melt slowly and not brown. Once it’s completely melted, swirl the pot to coat the bottom.
- Add the marshmallows and candy corn. Dump the entire bag of mini marshmallows and the 1 cup of candy corn into the pot with the melted butter. Turn the heat down to low. Stir constantly with your rubber spatula. At first, it will look like a mess—the candy corn will seem stubborn and the marshmallows will start to melt around it. Don’t panic.
- Stir until smooth (the key step!). Keep stirring gently but continuously. The candy corn will start to soften and melt, blending into the marshmallow. This takes a little longer than just melting marshmallows alone—about 5 to 7 minutes. You’re looking for a completely smooth, gooey, and uniform mixture. It should be a beautiful, creamy orange color. If you see any lumps of unmelted candy corn, keep stirring. A little patience here pays off big time.
- Remove from heat and add cereal. Once the mixture is smooth, take the pot off the burner immediately. Pour in the 6 cups of crispy rice cereal. Fold everything together gently but firmly. Use a cutting and folding motion with your spatula to coat every single piece of cereal with that sweet, candy corn-infused marshmallow goo. It might feel a little stiff, but keep working it.
- Press into the pan. Scrape the mixture into your prepared baking dish. Now, here’s a pro tip: don’t press the mixture down too hard. If you compact it, the treats will turn out rock hard and crunchy instead of soft and chewy. Use a piece of wax paper or lightly greased hands to gently and evenly spread the mixture into the corners of the pan. Just pat it down until it’s an even layer.
- Let them set. Let the treats cool completely at room temperature. This takes about 30 minutes to an hour. Don’t rush this by putting them in the fridge, or they can get a bit too firm. Once they’re cool, use the parchment paper to lift the whole block out of the pan and onto a cutting board.
- Cut and serve. Use a sharp knife to cut the block into squares. A serrated knife works great for a clean cut. Wipe the knife clean between cuts for the neatest squares. I like to cut them into 12 big squares or 24 smaller ones.
Cooking Tips & Techniques
I’ve made this recipe more times than I can count, and I’ve definitely learned a few things the hard way. Here are my best tips to make sure your treats turn out perfect every single time.
- Low and slow is the name of the game. When melting the butter, marshmallows, and candy corn, keep the heat on low. High heat will scorch the sugar, giving your treats a bitter, burnt flavor. I once got distracted and cranked the heat up, and let me tell you, the smell was not appetizing. Patience is your friend here.
- Don’t over-melt the marshmallows. You want to melt them just until they’re smooth. If you cook them too long, the sugar will start to harden, and your treats will be tough and crunchy instead of soft and chewy. The moment the mixture is smooth and the candy corn is fully dissolved, pull it off the heat.
- Work quickly once the cereal is added. The marshmallow mixture starts to set as it cools. Once you pour in the cereal, you need to work fast to get it all mixed and into the pan. Have your pan prepped and ready to go.
- Use fresh ingredients. Stale marshmallows and old cereal will give you a subpar result. Fresh marshmallows are soft and pillowy and melt beautifully. Fresh cereal has that satisfying crunch that makes the treats so good.
- Grease your spatula. If the mixture is sticking to your spatula like crazy, give it a light spray of non-stick cooking spray. It makes the whole process so much less frustrating.
Variations & Adaptations
This base recipe is a fantastic starting point for getting creative. Here are a few of my favorite ways to switch it up, depending on the season or my mood.
- Chocolate Drizzle: After the treats have cooled, melt some semi-sweet or white chocolate chips and drizzle it over the top. Let it set before cutting. The combination of the sweet, fruity candy corn flavor with rich chocolate is absolutely divine. I did this for a holiday party once, and they vanished in minutes.
- Festive Mix-Ins: For Halloween, stir in 1/2 cup of mini chocolate chips or chopped peanuts along with the cereal. For a fall-themed version, add a pinch of pumpkin pie spice to the marshmallow mixture as it melts. It gives them a warm, cozy flavor that’s perfect for a crisp autumn day.
- Peanut Butter Twist: Stir 1/4 cup of creamy peanut butter into the marshmallow mixture after it has melted. The peanut butter adds a savory note that balances the sweetness of the candy corn beautifully. This is my go-to variation when I want something a little more substantial.
- Dietary Adaptation: To make these gluten-free, simply use a certified gluten-free crispy rice cereal. Most standard brands are gluten-free, but always double-check the label. This recipe is naturally egg-free and nut-free, making it a great option for school parties or gatherings with dietary restrictions.
Serving & Storage Suggestions
These treats are best enjoyed at room temperature. That’s when they have that perfect, soft, and chewy texture. I love serving them on a simple platter, but they also look fantastic stacked on a cake stand for a party.
They pair wonderfully with a cold glass of milk, a hot cup of coffee, or even a scoop of vanilla ice cream for an extra-decadent dessert. For a Halloween party, serve them alongside a bowl of popcorn and some apple cider for a fun and festive treat table.
For storage, place the treats in an airtight container at room temperature. They will stay fresh and soft for up to 3 days. Do not refrigerate them. The fridge will dry them out and make them hard and crunchy. If you need to store them for longer, you can freeze them. Wrap the block of treats tightly in plastic wrap, then in a layer of aluminum foil, and freeze for up to 3 months. To thaw, just let them sit at room temperature for about an hour. The flavor actually seems to get even better after a day or two, as the candy corn flavor melds with the marshmallow.
Nutritional Information & Benefits
Let’s be real—these are a treat, meant to be enjoyed in moderation. They are a fun, nostalgic dessert that brings a smile to everyone’s face. The nutritional information below is an estimate for one large square (based on 12 servings) and will vary based on the exact brands you use.
- Calories: Approximately 280
- Fat: 4g
- Carbohydrates: 60g
- Sugar: 35g
- Protein: 2g
The main ingredients are simple carbohydrates, which provide a quick source of energy. The butter adds a small amount of fat. While these aren’t a health food, the joy they bring and the ease of making them from scratch with simple ingredients is a win in my book. They are free from eggs, nuts, and are easily made gluten-free, making them an inclusive option for many. It’s all about balance, right?
Conclusion
So, there you have it. The easiest, most delicious, and most forgiving dessert you’ll ever make. These 3-Ingredient Candy Corn Rice Krispie Treats are proof that you don’t need a complicated recipe or a ton of fancy ingredients to create something truly special. They’re perfect for those moments when life gets busy and you still want to show up with something homemade and wonderful. I love this recipe because it reminds me that sometimes the simplest things are the best. It’s a little bit of magic from three humble ingredients. Now, I want to hear from you! Have you ever tried this trick with candy corn? What’s your favorite last-minute dessert hack? Drop a comment below and let me know. And if you make these, please share a photo—I’d love to see your creations. Happy cooking, friend!
Frequently Asked Questions
Can I use large marshmallows instead of mini marshmallows?
Yes, you can! You will need about 40 large marshmallows to equal the 10-ounce bag of minis. Just keep in mind that large marshmallows take a little longer to melt, so be patient and keep the heat low to prevent burning.
My candy corn didn’t melt completely. What did I do wrong?
This usually happens if the candy corn is a bit stale or if the heat was too low. Make sure your candy corn is fresh. You can also try microwaving the candy corn for 10-15 seconds before adding it to the pot to soften it up. Stirring constantly over low heat is key to getting a smooth mixture.
Can I use a different type of cereal?
Absolutely! While crispy rice cereal gives the classic texture, you can experiment with other cereals. Fruity Pebbles would be fun for a more vibrant color, or you could use a corn flake cereal for a different crunch. Just be mindful that the flavor and texture will change.
How do I make my Rice Krispie treats less sticky?
Make sure you are using a well-greased pan and spatula. Also, letting the treats cool completely before cutting is crucial. If they are still warm, they will be very sticky. You can also lightly grease your knife with butter or non-stick spray before cutting.
Can I add food coloring to make them more orange for Halloween?
You can, but you likely won’t need to! The candy corn naturally gives the marshmallow mixture a beautiful, warm orange color. If you want a brighter, more vibrant orange, add a few drops of orange food coloring to the marshmallow mixture once it’s smooth and stir to combine before adding the cereal.
Pin This Recipe!
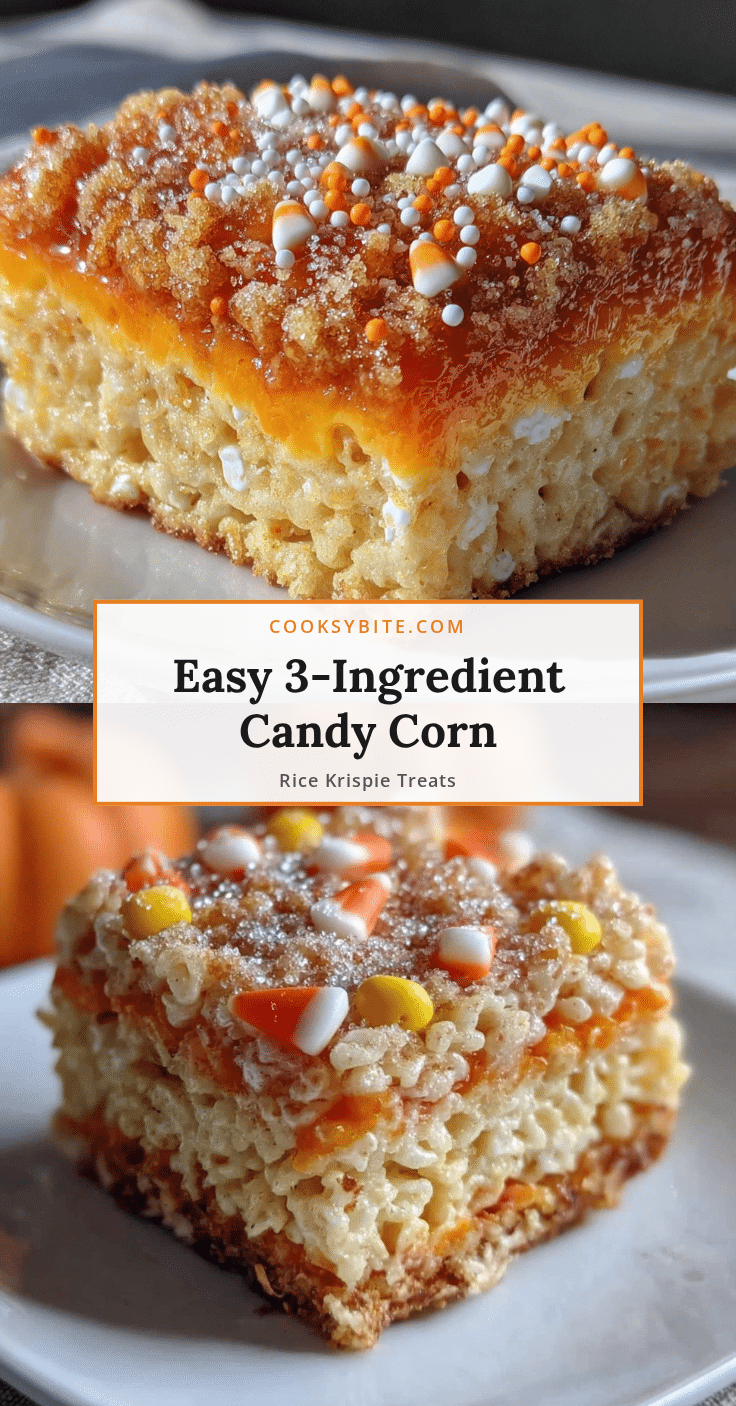
3-Ingredient Candy Corn Rice Krispie Treats: Easy & Best
These 3-ingredient candy corn Rice Krispie treats are the perfect last-minute dessert. The candy corn melts into the marshmallow mixture, creating an incredible, gooey, and almost buttery flavor with a gorgeous sunset color.
- Prep Time: 15 minutes
- Cook Time: 10 minutes
- Total Time: 25 minutes
- Yield: 12 servings 1x
- Category: Dessert
- Cuisine: American
Ingredients
- 3 tablespoons unsalted butter, plus extra for greasing
- 1 (10-ounce) bag mini marshmallows
- 6 cups crispy rice cereal
- 1 cup candy corn
Instructions
- Grease a 9×13-inch baking dish with butter or line with parchment paper, leaving overhang for easy lifting. If using parchment, lightly spray with non-stick cooking spray.
- In a large pot, melt 3 tablespoons of butter over medium-low heat. Do not let it brown.
- Add the entire bag of mini marshmallows and 1 cup of candy corn to the pot. Reduce heat to low and stir constantly with a rubber spatula.
- Continue stirring gently but continuously until the candy corn is fully melted and the mixture is smooth and creamy orange, about 5 to 7 minutes.
- Remove the pot from heat immediately. Pour in 6 cups of crispy rice cereal and fold together gently but firmly until every piece is coated.
- Scrape the mixture into the prepared baking dish. Using a piece of wax paper or lightly greased hands, gently and evenly spread the mixture into the corners. Do not press too hard.
- Let the treats cool completely at room temperature, about 30 minutes to 1 hour. Do not refrigerate.
- Once cool, lift the block out using the parchment paper and place on a cutting board. Cut into squares using a sharp knife, wiping the knife clean between cuts. Makes 12 large or 24 small squares.
Notes
Use fresh candy corn for best melting. If candy corn is hard, microwave for 10 seconds to soften before adding. Do not over-melt the marshmallows; remove from heat as soon as smooth. Work quickly once cereal is added. Grease your spatula to prevent sticking. Store in an airtight container at room temperature for up to 3 days. Do not refrigerate. Can be frozen for up to 3 months.
Nutrition
- Serving Size: 1 large square
- Calories: 280
- Sugar: 35
- Sodium: 180
- Fat: 4
- Saturated Fat: 2
- Carbohydrates: 60
- Protein: 2
Keywords: candy corn, Rice Krispie treats, 3-ingredient, easy dessert, Halloween, fall, no-bake


