I was standing in line at the post office, holding a package that was definitely taped together one too many times, when the woman ahead of me turned around and started talking about frosting. Not just any frosting—orange frosting. She was maybe seventy, with a raincoat that looked like it had seen a few decades, and she was telling the clerk about the Halloween party she was baking for. “The secret,” she said, glancing back at me like I was in on the conversation now, “is that you don’t make cookies. You make bars. Less fuss, more frosting.” I wasn’t expecting baking advice from a stranger in the post office, but there I was, listening to her describe exactly how to make these cozy Halloween sugar cookie bars while my package sat unweighed on the counter. She told me her mother used to make them every October, and the orange frosting wasn’t just for looks—it was the whole point. I mean, I’d never thought about pairing sugar cookies with citrus before. Honestly, it sounded a little weird at first. But by the time I left the post office, I had scribbled her recipe on the back of a receipt, and let me tell you, I’ve been making them every Halloween since. There’s something about that bright orange swirl on top of a soft, buttery bar that just feels like October. Maybe you’ve had that moment where a recipe finds you when you least expect it. This one definitely found me.
Why You’ll Love This Recipe
Let me be real with you—I’ve tested a lot of Halloween treats over the years. Some are too complicated, some taste like cardboard disguised as festive, and some just don’t deliver that cozy feeling you’re after. These cozy Halloween sugar cookie bars with orange frosting hit every single note. Here’s why they’ve become my go-to:
- Quick & Easy: From start to finish, you’re looking at about 35 minutes. No chilling dough, no rolling out individual cookies, no piping intricate designs. Just press, bake, frost, and enjoy.
- Simple Ingredients: You probably have most of these in your pantry right now. Butter, sugar, flour, eggs, vanilla—the usual suspects. The only special addition is fresh orange, and that’s hardly a trip to a specialty store.
- Perfect for Halloween Gatherings: Whether you’re hosting a spooky movie night, sending treats to a classroom, or just want something festive for your family, these bars travel well, slice cleanly, and look impressive without the stress.
- Crowd-Pleaser: I’ve brought these to three different Halloween parties, and every single time, someone asks for the recipe. Kids love the bright orange frosting, adults love that they’re not overwhelmingly sweet.
- Unbelievably Delicious: The combination of soft, buttery sugar cookie base with that tangy, fresh orange frosting is honestly addictive. It’s comfort food with a citrus twist that keeps you coming back for one more square.
What makes these different from every other Halloween cookie bar out there? It’s the frosting. Most recipes use artificial orange flavoring or just slap on some cream cheese frosting with food coloring. But this one uses fresh orange zest and juice, which gives it this bright, natural flavor that cuts through the sweetness perfectly. It’s not just another version—it’s the version that makes you close your eyes after the first bite. Trust me on this one.
What Ingredients You Will Need
This recipe uses simple, wholesome ingredients to deliver that cozy Halloween feeling without any fuss. Most of these are pantry staples, and the fresh orange really does all the heavy lifting in terms of flavor. Here’s what you’ll need:
For the Sugar Cookie Bars
- 1 cup (226g) unsalted butter, softened – I always use unsalted so I can control the salt level. Let it sit out for about 30 minutes before starting.
- 1 ½ cups (300g) granulated sugar – Regular white sugar works best here. Brown sugar would change the texture and flavor.
- 2 large eggs, room temperature – Cold eggs can make the batter seize up. If you forgot to take them out, place them in a bowl of warm water for 5 minutes.
- 2 teaspoons vanilla extract – Pure vanilla extract if you have it, but imitation works fine too. I’ve used both and honestly can’t tell the difference in this recipe.
- 3 cups (375g) all-purpose flour – Spoon and level your flour for the best results. Scooping directly from the bag packs it down and gives you too much.
- 1 teaspoon baking powder – Make sure it’s fresh. If it’s been sitting in your cabinet for two years, it might be time for a new tin.
- ½ teaspoon salt – Fine sea salt or table salt. Don’t skip this—it balances the sweetness.
For the Orange Frosting
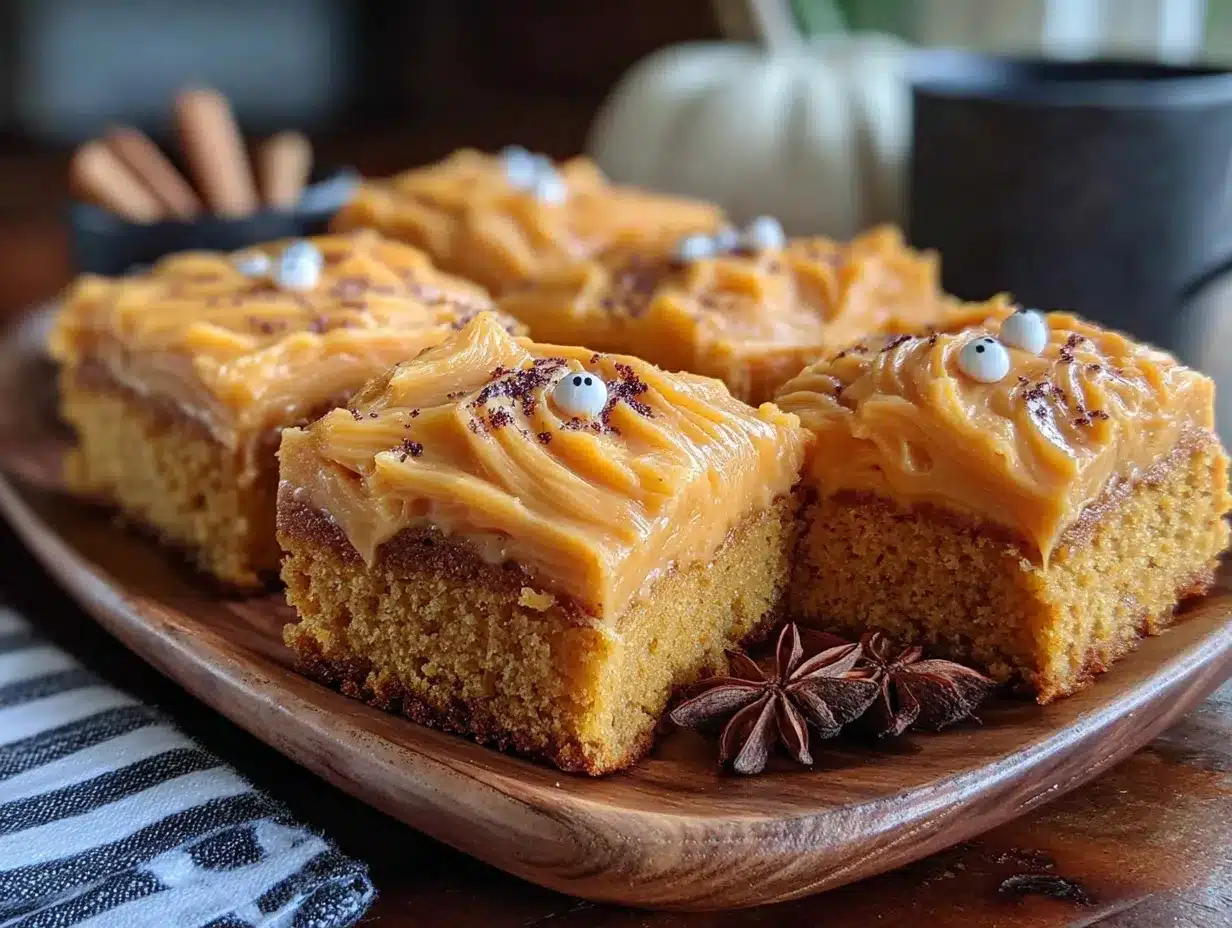
- ½ cup (113g) unsalted butter, softened – Again, room temperature is your friend here.
- 3 cups (360g) powdered sugar – Sift it if you want a super smooth frosting. I usually skip sifting and just mix a little longer.
- 2 tablespoons fresh orange juice – From about half a medium orange. Please don’t use bottled juice—it makes a difference.
- 1 tablespoon fresh orange zest – From that same orange. Zest it before you juice it, trust me.
- 1 teaspoon vanilla extract – A little vanilla helps round out the citrus flavor.
- 2-3 drops orange food coloring (optional) – For that Halloween orange color. I use gel food coloring because it doesn’t thin the frosting.
- Pinch of salt – Just a tiny pinch to keep the frosting from being cloying.
For Decoration (Optional but Fun)
- Halloween sprinkles – Ghosts, pumpkins, bats, whatever you find. I got a mix from the grocery store for like three dollars.
- Black gel icing – For drawing little faces or spiderwebs on top.
Equipment Needed
You don’t need a fancy kitchen for these cozy Halloween sugar cookie bars. Here’s what I use:
- 9×13 inch baking pan – This is non-negotiable. You could use a slightly smaller pan, but your bars will be thicker and need more baking time. I’ve had my current pan for years—it’s scratched up but still works perfectly.
- Parchment paper – Not just for lining the pan. I leave overhang on two sides so I can lift the whole slab out after baking. Game changer.
- Electric mixer – Hand mixer or stand mixer, either works. I use my stand mixer because I’m lazy about holding things, but a hand mixer does the job just fine.
- Mixing bowls – One large, one medium. Nothing fancy.
- Rubber spatula – For scraping down the bowl and spreading the dough in the pan.
- Zester or microplane – If you don’t have one, the smallest side of a box grater works. Just be careful with your knuckles.
- Citrus juicer – Not essential, but it makes juicing less messy. I’ve definitely squeezed oranges by hand in a pinch.
- Offset spatula – For spreading the frosting evenly. A butter knife works too, but the offset spatula makes it look professional.
- Cooling rack – Lets air circulate under the pan so the bars cool evenly. If you don’t have one, just let the pan sit on the counter a little longer.
Preparation Method
Alright, let’s get into the actual making of these cozy Halloween sugar cookie bars with orange frosting. I’ve broken this down step by step so you don’t miss anything. Take your time—it’s worth it.
Step 1: Preheat and Prepare Your Pan
Preheat your oven to 375°F (190°C). While that’s heating up, line your 9×13 inch baking pan with parchment paper. Leave about 2 inches of overhang on the long sides—this will help you lift the bars out later. Lightly spray the parchment with non-stick spray just to be safe. I learned this the hard way after one batch stuck to the paper.
Step 2: Cream the Butter and Sugar
In a large mixing bowl, beat the softened butter and granulated sugar together until light and fluffy. This takes about 3-4 minutes with an electric mixer on medium speed. You’re looking for a pale, creamy texture. Don’t rush this step—proper creaming incorporates air into the dough, which gives you softer bars. Scrape down the sides of the bowl halfway through.
Step 3: Add Eggs and Vanilla
Add the eggs one at a time, beating well after each addition. Then mix in the vanilla extract. The batter should look smooth and glossy at this point. If it looks curdled, your eggs might have been too cold. Don’t panic—it’ll come together when you add the dry ingredients.
Step 4: Combine Dry Ingredients
In a separate medium bowl, whisk together the flour, baking powder, and salt. Whisking aerates the flour and distributes the leavening evenly. I usually give it about 10-15 seconds of whisking.
Step 5: Mix Wet and Dry
Gradually add the dry ingredients to the wet mixture, mixing on low speed until just combined. You don’t want to overmix here, or your bars will be tough. Stop when you can’t see any more streaks of flour. The dough will be thick and slightly sticky—that’s exactly what you want.
Step 6: Press Into Pan
Transfer the dough to your prepared pan. Here’s the trick: use a piece of plastic wrap or wax paper over your hands to press the dough evenly into the pan. It’s way less messy than using your fingers directly, and the dough won’t stick to the plastic. Make sure it’s even—thicker in the middle means uneven baking.
Step 7: Bake
Bake for 18-22 minutes, or until the edges are lightly golden and the center looks set. A toothpick inserted in the center should come out clean or with a few moist crumbs. Don’t overbake! These bars continue to cook slightly in the hot pan after you take them out. I usually pull mine at 20 minutes. Let them cool completely in the pan on a wire rack before frosting. This takes about 45 minutes to an hour. Be patient—warm bars will melt your frosting into a puddle.
Step 8: Make the Orange Frosting
While the bars are cooling, make the frosting. In a medium bowl, beat the softened butter until smooth and creamy. Gradually add the powdered sugar, about a cup at a time, mixing on low speed. Add the fresh orange juice, orange zest, vanilla extract, and a pinch of salt. Beat on medium speed for 2-3 minutes until light and fluffy. If you’re using food coloring, add it now and mix until evenly distributed. The frosting should be spreadable but not runny. If it’s too thick, add a teaspoon more orange juice. Too thin, add a tablespoon more powdered sugar.
Step 9: Frost and Decorate
Once the bars are completely cool, use an offset spatula to spread the orange frosting evenly over the top. Add your Halloween sprinkles while the frosting is still soft so they stick. If you’re using black gel icing for decorations, wait about 10 minutes for the frosting to set slightly, then draw on your designs.
Step 10: Slice and Serve
Use the parchment overhang to lift the entire slab out of the pan. Place it on a cutting board and slice into squares. I usually get 24 bars from one batch—cut 6 rows by 4 rows. For cleaner cuts, wipe your knife clean between slices. Serve immediately or store for later.
Cooking Tips & Techniques
I’ve made these cozy Halloween sugar cookie bars more times than I can count, and I’ve definitely learned a few things along the way. Here are my best tips:
Don’t overmix the dough. I know I said this before, but it’s worth repeating. Overmixing develops gluten, which makes your bars tough and bread-like instead of soft and tender. Mix just until the flour disappears, then stop. Your spatula is your best friend here.
Use room temperature ingredients. Cold butter doesn’t cream properly, and cold eggs can make your batter seize up. I’ve made the mistake of rushing this before, and the texture was never quite right. Give your ingredients at least 30 minutes on the counter before you start.
Zest before you juice. This is one of those small things that makes a big difference. Zesting a juiced orange is nearly impossible. Zest your orange first, then cut it and juice it. You’ll thank me later.
Let the bars cool completely. I cannot stress this enough. The first time I made these, I was impatient and frosted them while they were still warm. The frosting melted into a sad, orange puddle. It still tasted good, but it looked terrible. Give them the full hour to cool.
Test for doneness with your eyes and a toothpick. Ovens vary wildly. My oven runs hot, so I start checking at 18 minutes. Yours might need the full 22. Look for golden edges and a set center. A toothpick should come out with just a few moist crumbs, not wet batter.
Make the frosting while the bars cool. This is a great time management trick. While your bars are sitting on the counter, whip up the frosting. That way, by the time the bars are cool, the frosting is ready to go. No wasted time.
Use a sharp knife for clean slices. A dull knife will drag through the frosting and make a mess. Run your knife under hot water, wipe it dry, then slice. Repeat between cuts for the cleanest edges.
Variations & Adaptations
One of the things I love about this recipe is how flexible it is. Here are some ways to make it your own:
Gluten-Free Version: Substitute the all-purpose flour with a 1:1 gluten-free baking flour blend. I’ve used Bob’s Red Mill and King Arthur brands with good results. The texture is slightly more crumbly, but the flavor is still spot on. Add an extra tablespoon of butter to help with moisture.
Dairy-Free Adaptation: Use vegan butter sticks (not tub margarine) in place of regular butter. I like the Miyoko’s brand for baking. The frosting will be slightly softer, so pop the frosted bars in the fridge for 15 minutes before slicing.
Lemon Orange Twist: Replace half the orange juice with fresh lemon juice and add a teaspoon of lemon zest along with the orange zest. The citrus combination is bright and refreshing—perfect if you want something a little less sweet.
Chocolate Orange Version: Add ½ cup of mini chocolate chips to the dough before pressing it into the pan. Chocolate and orange is a classic combination for a reason. I use semi-sweet chips because they balance the sweetness of the frosting.
Spooky Spiderweb Design: Instead of sprinkles, pipe concentric circles of black gel icing on top of the orange frosting, then drag a toothpick from the center outward to create a spiderweb pattern. It looks complicated but takes about 30 seconds.
Pumpkin Spice Variation: Add 1 teaspoon of pumpkin pie spice to the dry ingredients and replace the orange zest in the frosting with ½ teaspoon of cinnamon. It gives you that fall flavor without changing the texture.
I tried the chocolate orange version last year for a Halloween party, and honestly, it might be my new favorite. The chocolate chips add little pockets of richness that play beautifully with the tangy frosting. Just saying—you might want to try that one first.
Serving & Storage Suggestions
These cozy Halloween sugar cookie bars with orange frosting are best served at room temperature. The texture is soft and tender, and the frosting is perfectly spreadable without being too firm. If you’ve refrigerated them, let them sit out for about 20 minutes before serving.
For presentation, I like to arrange the bars on a white platter or cake stand so the orange frosting really pops. Add some mini pumpkins or fall leaves around the edges for that cozy Halloween vibe. If you’re taking them to a party, stack them in a single layer in a container with parchment paper between layers so the frosting doesn’t smudge.
These bars pair beautifully with a warm drink. A cup of hot apple cider, a pumpkin spice latte, or even just a mug of black coffee—the citrus notes in the frosting complement all of them. For a kid-friendly option, serve with a glass of cold milk. I mean, is there anything better than a cookie bar and milk?
Storage Instructions: Store leftover bars in an airtight container at room temperature for up to 3 days. If your kitchen is warm, you can refrigerate them for up to 5 days. Just let them come to room temperature before serving for the best texture.
Freezing Instructions: These bars freeze beautifully. Freeze the unfrosted bars for up to 3 months. Wrap the entire slab tightly in plastic wrap, then in foil. When you’re ready to serve, thaw overnight in the refrigerator, then bring to room temperature and frost. You can also freeze frosted bars—just place them in a single layer on a baking sheet, freeze until solid, then transfer to a freezer-safe container. Thaw in the refrigerator overnight.
Honestly, the flavors actually get better after a day or two. The orange zest infuses the frosting more deeply, and the sugar cookie base softens even further. I’ve been known to hide a few bars in the back of the fridge for a little mid-week treat.
Nutritional Information & Benefits
Here’s the thing—these are a treat, not a health food. But that doesn’t mean they can’t have some redeeming qualities. Here’s the approximate nutritional breakdown for one bar (based on 24 servings):
| Nutrient | Amount Per Serving |
|---|---|
| Calories | 215 |
| Total Fat | 10g |
| Saturated Fat | 6g |
| Cholesterol | 45mg |
| Sodium | 95mg |
| Total Carbohydrates | 30g |
| Dietary Fiber | 0.5g |
| Sugars | 20g |
| Protein | 2g |
On the bright side, the fresh orange zest and juice provide a small amount of vitamin C, which is always a nice bonus. The butter and eggs give you some vitamin A and protein, and let’s be honest—sometimes you just need a little joy in bar form.
If you’re watching your sugar intake, you can reduce the sugar in the dough to 1 cup without significantly affecting the texture. The frosting needs the full amount for structure, but you can use a sugar substitute in the dough if you prefer. Just know the texture might be slightly different.
These bars are vegetarian-friendly but not vegan (unless you make the dairy-free adaptation). They contain gluten, dairy, and eggs, so keep that in mind if you’re baking for someone with allergies.
Conclusion
Look, I know there are a million Halloween recipes out there. I’ve tried dozens of them myself. But these cozy Halloween sugar cookie bars with orange frosting are something special. They’re the kind of recipe that feels like a warm hug on a chilly October evening—simple, comforting, and full of flavor. The soft, buttery base paired with that bright, citrusy frosting is a combination I never knew I needed until I tried it.
What I love most about this recipe is how approachable it is. You don’t need to be a pastry chef or have a kitchen full of fancy equipment. You just need some basic ingredients, a little bit of time, and the willingness to try something a little different. And honestly, that’s what cooking should be about—trying new things, making them your own, and sharing them with the people you care about.
So give these a try. Make them for your Halloween party, your family movie night, or just because it’s Tuesday and you deserve something sweet. Add your own twist, experiment with the decorations, and don’t forget to save a few for yourself. When you make them, come back and let me know how they turned out. Drop a comment below, share a photo, tell me what variation you tried. I genuinely love hearing from you.
Happy Halloween, friend. May your frosting be orange, your bars be soft, and your kitchen smell like October.
Frequently Asked Questions
Can I use bottled orange juice instead of fresh?
You can, but I really don’t recommend it. Bottled orange juice has a cooked, slightly bitter flavor that doesn’t translate well in frosting. Fresh orange juice gives you that bright, natural citrus taste that makes these bars special. Plus, you need the zest, which you can only get from a fresh orange.
Can I make these ahead of time?
Absolutely. You can bake the bars up to two days ahead and store them unfrosted at room temperature. Frost them the day you plan to serve. Or you can fully assemble them and refrigerate for up to three days. Just let them come to room temperature before serving.
Why did my frosting turn out runny?
This usually happens for one of two reasons: your butter was too soft, or you added too much liquid. If your butter is melting rather than softening, pop the frosting in the fridge for 10 minutes, then beat it again. If it’s too thin, add more powdered sugar a tablespoon at a time until it reaches the right consistency.
Can I use a different citrus fruit?
Yes! Lemon works beautifully—use the same amounts of juice and zest. Lime is also great, especially if you’re going for a more tropical vibe. Grapefruit works too, but it’s more tart, so you might want to add an extra tablespoon of powdered sugar to the frosting.
How do I get clean cuts without the frosting smearing?
Use a sharp, long knife and wipe it clean between each cut. For the cleanest slices, refrigerate the frosted bars for 20-30 minutes before cutting. The frosting firms up just enough to give you those perfect edges. Also, cut in one smooth motion—don’t saw back and forth.
Pin This Recipe!
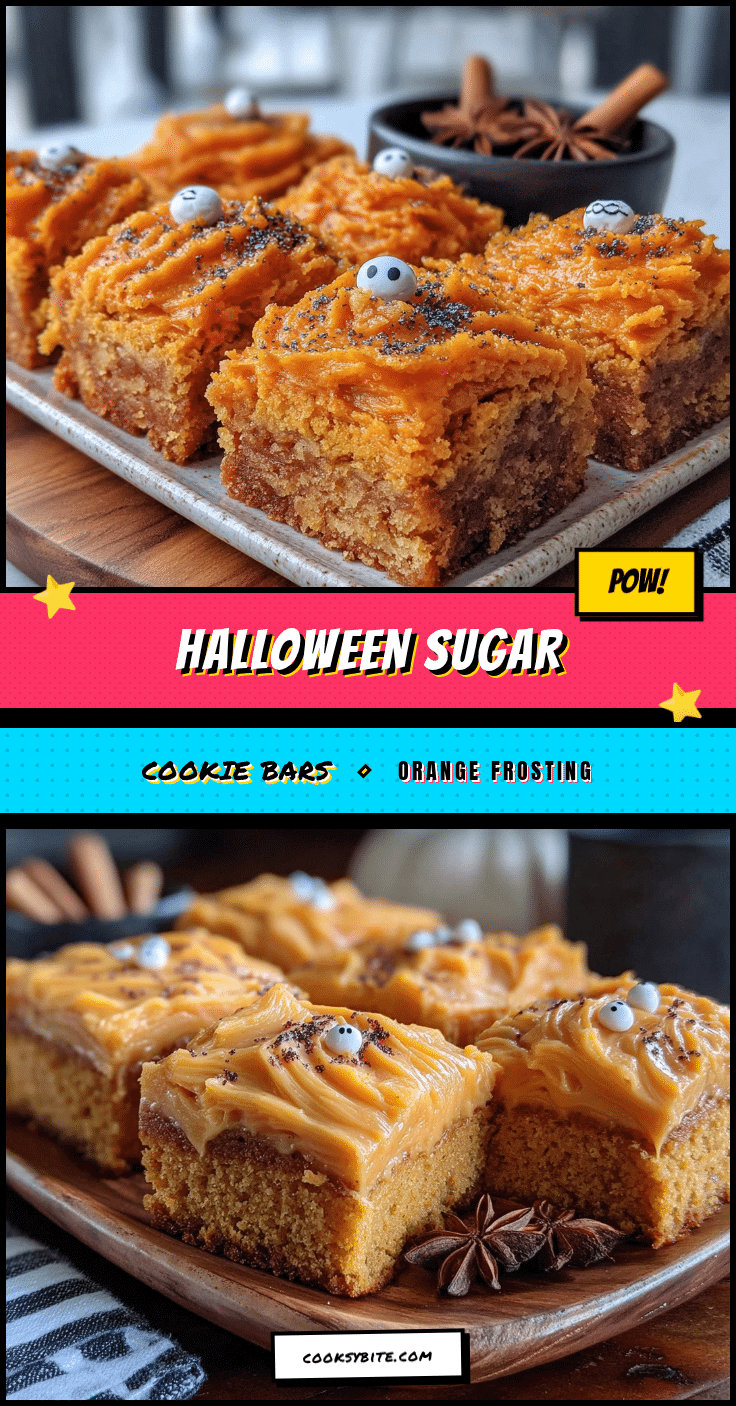
Cozy Halloween Sugar Cookie Bars with Easy Orange Frosting

Soft, buttery sugar cookie bars topped with a bright, fresh orange frosting. This easy Halloween treat comes together in about 35 minutes and is perfect for parties, classrooms, or cozy nights in.
- Prep Time: 15 minutes
- Cook Time: 20 minutes
- Total Time: 35 minutes
- Yield: 24 servings 1x
- Category: Dessert
- Cuisine: American
Ingredients
- 1 cup (226g) unsalted butter, softened
- 1 ½ cups (300g) granulated sugar
- 2 large eggs, room temperature
- 2 teaspoons vanilla extract
- 3 cups (375g) all-purpose flour
- 1 teaspoon baking powder
- ½ teaspoon salt
- ½ cup (113g) unsalted butter, softened
- 3 cups (360g) powdered sugar
- 2 tablespoons fresh orange juice
- 1 tablespoon fresh orange zest
- 1 teaspoon vanilla extract
- 2–3 drops orange food coloring (optional)
- Pinch of salt
- Halloween sprinkles (optional)
- Black gel icing (optional)
Instructions
- Preheat oven to 375°F (190°C). Line a 9×13 inch baking pan with parchment paper, leaving overhang on the long sides. Lightly spray with non-stick spray.
- In a large bowl, beat softened butter and granulated sugar together until light and fluffy, about 3-4 minutes.
- Add eggs one at a time, beating well after each. Mix in vanilla extract.
- In a separate bowl, whisk together flour, baking powder, and salt.
- Gradually add dry ingredients to wet mixture, mixing on low until just combined. Dough will be thick and slightly sticky.
- Transfer dough to prepared pan. Use plastic wrap or wax paper over your hands to press dough evenly into the pan.
- Bake for 18-22 minutes, until edges are lightly golden and center is set. Cool completely in pan on a wire rack (about 45 minutes to 1 hour).
- For frosting: Beat softened butter until smooth. Gradually add powdered sugar, then orange juice, orange zest, vanilla, and salt. Beat 2-3 minutes until fluffy. Add food coloring if desired.
- Spread frosting over cooled bars. Add sprinkles while frosting is soft. If using black gel icing, wait 10 minutes for frosting to set slightly before decorating.
- Use parchment overhang to lift bars out of pan. Slice into 24 squares (6×4). Wipe knife clean between cuts for neat edges.
Notes
Don’t overmix the dough to avoid tough bars. Use room temperature ingredients for best texture. Zest the orange before juicing. Let bars cool completely before frosting to prevent melting. For clean slices, refrigerate frosted bars for 20-30 minutes before cutting.
Nutrition
- Serving Size: 1 bar
- Calories: 215
- Sugar: 20
- Sodium: 95
- Fat: 10
- Saturated Fat: 6
- Carbohydrates: 30
- Fiber: 0.5
- Protein: 2
Keywords: Halloween sugar cookie bars, orange frosting, easy Halloween dessert, sugar cookie bars, fall baking, Halloween treats


