I was standing in the middle of a hardware store last October—looking for a specific size of paintbrush, of all things—when the smell hit me. It wasn’t the store. It was coming from a tiny candle display near the checkout, and suddenly I was seven years old, standing on a step stool in my aunt Margie’s cramped yellow kitchen. She was pulling a tray of muffins from the oven, and the whole room went hazy with cinnamon and nutmeg and something sweet I couldn’t name yet. She’d let me stir the batter, even though I kept leaving streaks of flour, and she’d say, “Good enough, kiddo. Ovens fix everything.” I haven’t seen her kitchen, or her, in almost fifteen years. But that smell—that exact warm, spiced, pumpkin-and-chocolate smell—brought it all back in a second.
I bought the candle, obviously. But it wasn’t the same. It never is, you know? That’s the thing about scent-triggered memories: they’re perfect for a moment, and then they fade, and you’re left holding a wax imitation of something real. So I did what I always do when I can’t let go of a feeling. I went home, opened my pantry, and started making these cozy pumpkin chocolate chip muffins. I wanted to get it right—not just the taste, but the whole experience. The warmth, the soft crumb, the way the chocolate gets all melty against the spiced pumpkin. Honestly, I burned the first batch because I got distracted trying to remember if Aunt Margie used oil or butter. (It was oil. She was a shortcut queen.)
These muffins have become my annual fall ritual. They’re the thing I bake on the first crisp day of October, when the light changes and you can finally breathe again after summer. Maybe you’ve got a memory like that, too—one that hits you sideways in the most ordinary place. If you do, this recipe is for you. It’s my best attempt at bottling that hardware store moment, one muffin at a time.
Why You’ll Love This Recipe
Let me tell you why these muffins have earned a permanent spot in my fall baking rotation—and why I think they’ll earn one in yours, too.
- Quick & Easy: From pantry to plate in about 35 minutes. No stand mixer needed, no complicated techniques. Just a bowl, a whisk, and a spoon. Perfect for those “I need something cozy right now” moments.
- Simple Ingredients: You probably already have most of these in your kitchen. Canned pumpkin, basic spices, chocolate chips—nothing fancy, nothing hard to find. I tested this with both store-brand and name-brand ingredients, and honestly? They both work great.
- Perfect for Fall Baking: These are made for crisp afternoons, apple-picking leftovers, and those first chilly evenings when you want the oven on just to warm the house. They’re the official muffin of sweater weather.
- Crowd-Pleaser: I’ve brought these to potlucks, book club meetings, and neighbor drop-offs. They disappear fast. Kids love the chocolate, adults love the pumpkin-spice balance, and everyone loves that they’re not too sweet.
- Unbelievably Delicious: The texture is what gets me every time. The pumpkin keeps these muffins incredibly moist—almost like a little cake—while the chocolate chips add these pockets of richness that make every bite slightly different. It’s comfort food that actually delivers.
What makes this version different from the dozens of pumpkin muffin recipes out there? Two things. First, I use a combination of brown sugar and a tiny bit of molasses to deepen the flavor without making things complicated. Second, I fold the chocolate chips in at the very end, using a light hand, so they stay suspended in the batter rather than sinking to the bottom. It’s a small trick, but it makes a big difference in how the muffins bake up.
This isn’t just another pumpkin muffin recipe. It’s the kind that makes you close your eyes after the first bite. The kind that makes you text a friend and say, “I just made the best muffins.” It’s comfort food reimagined for real life—faster than you’d expect, but with the same soul-soothing satisfaction.
What Ingredients You Will Need
This recipe uses simple, wholesome ingredients that come together to deliver that unmistakable fall flavor. Most of these are pantry staples, especially if you do any kind of fall baking. Here’s what you’ll need and why each one matters.
For the Muffins
- 1 ¾ cups (210g) all-purpose flour – Spoon and level it for best results. I’ve tested this with King Arthur Flour and Gold Medal, and both work well. If you’re using a different brand, just be careful not to pack the flour into the measuring cup.
- 1 teaspoon baking soda – This helps the muffins rise and gives them that nice domed top. Make sure it’s fresh—if it’s been sitting in your pantry for a year, it might not work as well.
- 1 teaspoon baking powder – Adds extra lift. I like to use aluminum-free baking powder to avoid any metallic aftertaste.
- ½ teaspoon salt – Fine sea salt or table salt both work. Don’t skip it—salt balances the sweetness and brings out the pumpkin flavor.
- 2 teaspoons pumpkin pie spice – Or make your own: 1 teaspoon cinnamon, ½ teaspoon ginger, ¼ teaspoon nutmeg, ¼ teaspoon cloves. I prefer the homemade version because I can control the intensity, but store-bought works perfectly fine.
- 1 teaspoon ground cinnamon – Because you can never have too much cinnamon in a fall muffin. I use Saigon cinnamon when I want a bolder flavor.
- 1 cup (225g) pumpkin puree – Not pumpkin pie filling! Make sure you’re getting 100% pure pumpkin. I’ve used Libby’s and Farmer’s Market brands, and both work well. If you’re using fresh pumpkin puree, drain off any excess liquid before measuring.
- ½ cup (100g) packed brown sugar – Light or dark both work. Dark brown sugar will give a deeper, more molasses-y flavor. Pack it firmly into the measuring cup.
- ¼ cup (50g) granulated sugar – Adds sweetness and helps with browning.
- 1 tablespoon molasses – This is my secret ingredient. It adds a subtle depth that makes the muffins taste more complex than they are. Don’t skip it if you can help it—it really rounds out the flavor.
- 2 large eggs – Room temperature is best, but I’ve used cold eggs in a pinch and the muffins still turned out fine. Just let them sit on the counter for 15 minutes if you can.
- ½ cup (120ml) vegetable oil – Or any neutral oil like canola or avocado. Oil keeps these muffins incredibly moist. I don’t recommend substituting melted butter here—the texture won’t be the same.
- ¼ cup (60ml) milk – Whole milk gives the richest texture, but 2% works too. For a dairy-free version, use oat milk or almond milk. I’ve tested both and they work great.
- 1 teaspoon vanilla extract – Pure vanilla is best, but imitation works in a pinch. It adds warmth and rounds out the spices.
- 1 cup (175g) semi-sweet chocolate chips – I prefer Ghirardelli or Guittard for quality, but any brand works. You can also use dark chocolate chips if you want a less sweet muffin. Reserve a tablespoon to sprinkle on top before baking.
Equipment Needed
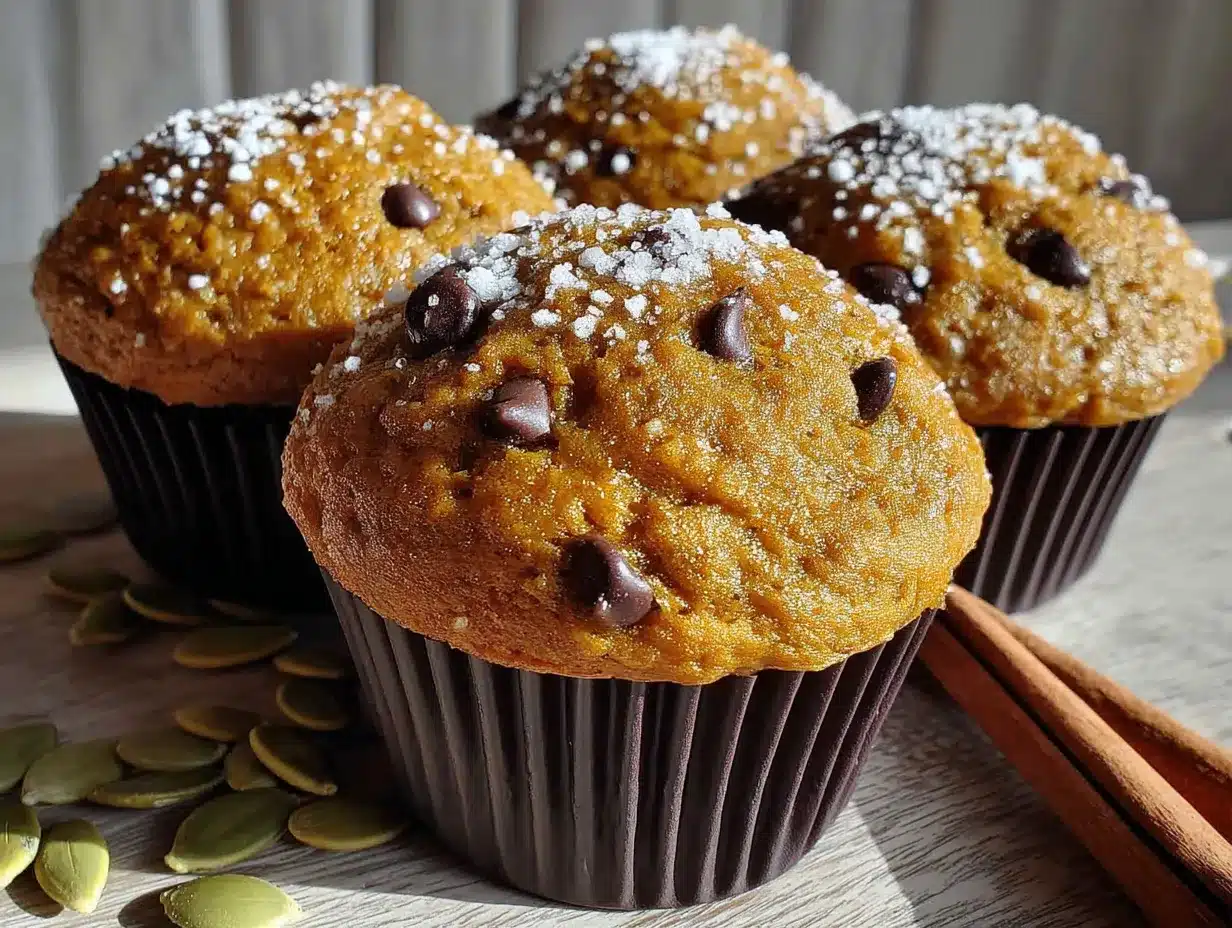
You don’t need a fancy kitchen to make these muffins. Here’s what I use and what you can substitute if needed.
- 12-cup muffin tin – Standard size. If you only have a 6-cup tin, just bake in batches. The batter holds up fine at room temperature.
- Paper liners – I prefer unbleached parchment liners. They don’t stick and they make cleanup a breeze. If you don’t have liners, grease the muffin tin well with butter or non-stick spray.
- Two mixing bowls – One large, one medium. Any bowls you have will work. I use glass or stainless steel because they don’t hold onto odors.
- Whisk – For mixing the dry ingredients. A fork works in a pinch, but a whisk is faster and more thorough.
- Rubber spatula – For folding in the chocolate chips. A wooden spoon also works, but a spatula is gentler on the batter.
- Measuring cups and spoons – For accuracy. I recommend having both dry and liquid measuring cups if possible.
- Cooling rack – Helps the muffins cool evenly and prevents soggy bottoms. If you don’t have one, you can use a cutting board or even a clean dish towel.
I’ve made these muffins in a friend’s kitchen with a warped muffin tin and a whisk that was missing a wire, and they still turned out great. Don’t let missing equipment stop you. The oven does most of the work.
Preparation Method
Alright, let’s get baking. I’ve broken this down into clear steps with all the little details that make a difference. Take your time, and don’t rush the folding.
- Preheat your oven to 350°F (175°C). Position the rack in the center of the oven. Line your muffin tin with paper liners or grease it well. I like to do this first so the oven is fully hot by the time I’m ready to bake.
- Mix the dry ingredients. In a medium bowl, whisk together the flour, baking soda, baking powder, salt, pumpkin pie spice, and cinnamon. Whisk for about 20 seconds to make sure everything is evenly distributed. This step aerates the flour and prevents clumps of baking soda in your muffins. Set aside.
- Mix the wet ingredients. In a large bowl, whisk together the pumpkin puree, brown sugar, granulated sugar, and molasses. Whisk until smooth and well combined. The mixture will look thick and glossy. Add the eggs, one at a time, whisking well after each addition. Then add the oil, milk, and vanilla extract. Whisk until everything is fully incorporated and the mixture is smooth. It should look like a thick, creamy batter.
- Combine wet and dry ingredients. Pour the dry ingredients into the wet ingredients. Use a rubber spatula to fold them together gently. Don’t overmix! Stir just until you can’t see any more streaks of flour. A few small lumps are totally fine—they’ll disappear during baking. Overmixing will make the muffins tough and dense. I learned this the hard way after a batch of hockey pucks in my early baking days.
- Fold in the chocolate chips. Add the chocolate chips (reserving about a tablespoon for topping) and fold them in with just a few strokes. You want them evenly distributed, but you don’t want to deflate the batter. The batter will be thick and slightly sticky—that’s normal.
- Fill the muffin cups. Divide the batter evenly among the 12 muffin cups. I use a large cookie scoop or a ¼ cup measure to get consistent portions. Fill each cup about ¾ full. This gives the muffins room to rise without spilling over. Sprinkle the reserved chocolate chips on top of each muffin. This makes them look pretty and ensures every muffin has visible chocolate on top.
- Bake. Place the muffin tin in the preheated oven and bake for 18-22 minutes. Start checking at 18 minutes. The muffins are done when a toothpick inserted into the center comes out clean or with a few moist crumbs. The tops should be golden brown and spring back when lightly touched. Every oven runs a little differently, so trust your senses more than the timer.
- Cool. Let the muffins cool in the pan for 5 minutes. This allows them to set and makes them easier to remove. Then transfer them to a wire rack to cool completely. If you try to eat them right away, the chocolate will burn your mouth. I speak from experience. Wait at least 10 minutes.
That’s it. Simple, right? The whole process takes about 35 minutes from start to finish, and your kitchen will smell incredible the entire time.
Cooking Tips & Techniques
I’ve made these muffins probably thirty times by now, and I’ve learned a few things along the way. Here are my best tips for getting perfect results every time.
Don’t overmix the batter. This is the number one mistake I see people make with muffins. Mix until the flour just disappears. A few lumps are okay. Overmixing develops gluten, which gives you tough, dense muffins instead of light, tender ones. I ruined my first three batches of muffins this way before I learned to be gentle.
Use room temperature ingredients. Cold eggs and milk can make the batter lumpy and prevent it from mixing evenly. If you forgot to take them out of the fridge, place the eggs in a bowl of warm water for 5 minutes and microwave the milk for 15 seconds. It makes a real difference in how the batter comes together.
Check your pumpkin puree. Sometimes canned pumpkin can be watery, especially if it’s been sitting for a while. If your pumpkin puree looks watery when you open it, spoon it onto a paper towel-lined plate and let it sit for a few minutes to absorb excess moisture. This prevents soggy muffins.
Rotate the pan halfway through. Ovens often have hot spots. Halfway through baking, rotate the muffin tin 180 degrees. This ensures even browning and prevents some muffins from being overdone while others are underdone. I forgot to do this last week and ended up with a tray of half-dark, half-pale muffins. They still tasted good, but they weren’t as pretty.
Let them cool properly. I know it’s tempting to eat them warm, but letting them cool for at least 10 minutes allows the structure to set. If you try to remove them from the pan too early, they might fall apart. Patience pays off here.
Make ahead tip. You can prepare the dry ingredient mix and store it in an airtight container for up to a month. Then when you’re ready to bake, just add the wet ingredients. It makes weekday baking so much easier.
Variations & Adaptations
One of the best things about this recipe is how adaptable it is. Here are some variations I’ve tried and loved.
Gluten-Free Version: Substitute the all-purpose flour with a 1:1 gluten-free baking flour blend. I’ve tested this with King Arthur Measure for Measure and Cup4Cup, and both worked well. The texture will be slightly more delicate, but the flavor is just as good. Add an extra tablespoon of milk to help with moisture.
Dairy-Free Version: Use oat milk or almond milk instead of regular milk. The muffins will be slightly less rich, but still delicious. I’ve made this swap many times and nobody noticed the difference.
Less Sweet Version: Reduce the granulated sugar to 2 tablespoons and use dark chocolate chips (60% cocoa or higher). The pumpkin and spices will still shine through. I make this version when I’m bringing muffins to a brunch where people might prefer less sugar.
Add-In Variations: Swap half the chocolate chips for chopped pecans or walnuts for some crunch. Or add ½ cup of dried cranberries for a tart contrast to the sweet chocolate. I’ve also made a version with white chocolate chips and dried cherries that was absolutely divine.
Spice It Up: Add ¼ teaspoon of cardamom or allspice for a more complex spice profile. A pinch of black pepper (yes, really) enhances the warmth of the cinnamon and nutmeg. It sounds weird, but it works.
Mini Muffins: Use a mini muffin tin and bake for 10-12 minutes. Perfect for snacking or packing in lunchboxes. You’ll get about 36 mini muffins from this recipe.
Serving & Storage Suggestions
These muffins are versatile and easy to serve. Here’s how I like to enjoy them and how to store them for later.
Serving Temperature: These are best at room temperature or slightly warm. If you want to reheat one, pop it in the microwave for 10-15 seconds. The chocolate gets all melty again. For a special treat, split a muffin in half, toast it lightly, and spread with butter or cream cheese. It’s like a whole new dessert.
Pairing Suggestions: Serve with a hot cup of coffee, chai tea, or spiced apple cider. They also go beautifully with a glass of cold milk. For a fall brunch spread, pair them with a pumpkin spice latte or a warm mug of mulled cider. They’re also great alongside a bowl of chili or soup for a cozy dinner.
Storage: Store leftover muffins in an airtight container at room temperature for up to 3 days. To keep them extra moist, place a paper towel at the bottom of the container and another on top. Replace the paper towels if they get soggy. Do not refrigerate—the fridge dries them out.
Freezing: These muffins freeze beautifully. Let them cool completely, then place them in a single layer in a freezer-safe bag or container. They’ll keep for up to 3 months. To thaw, leave them at room temperature for about an hour, or microwave one for 20-30 seconds. I always keep a stash in my freezer for unexpected guests or lazy Sunday mornings.
Flavor Development: Honestly, these muffins taste even better the next day. The flavors meld together overnight, and the texture stays moist. If you can resist eating them all on day one, you’re in for a treat on day two.
Nutritional Information & Benefits
Here’s a rough estimate of the nutritional values per muffin (based on 12 muffins). Keep in mind that these numbers can vary depending on the specific brands and ingredients you use.
- Calories: Approximately 280-300
- Fat: 14-16g
- Carbohydrates: 36-40g
- Fiber: 2-3g
- Sugar: 18-22g
- Protein: 4-5g
Health Benefits: Pumpkin is packed with vitamin A, which supports eye health and immune function. It’s also a good source of fiber and antioxidants. The cinnamon and ginger in the spice blend have anti-inflammatory properties. And dark chocolate (if you use it) contains flavonoids that are good for heart health. So while these are definitely a treat, they’re not empty calories.
Dietary Considerations: This recipe is vegetarian. For a gluten-free or dairy-free version, see the variations section above. It contains eggs, dairy, and gluten in its standard form. The nuts are optional.
I love that I can feel good about eating one of these for breakfast or a snack. They’re satisfying without being heavy, and they give me a little boost of nutrients along with the comfort factor.
Conclusion
These cozy pumpkin chocolate chip muffins have become more than just a recipe in my kitchen. They’re a ritual, a memory, and a way of capturing that fleeting fall feeling in edible form. Every time I bake them, I think about that hardware store moment and Aunt Margie’s yellow kitchen. And every time, they taste a little closer to what I remember.
I hope you’ll give these a try and make them your own. Maybe you’ll add extra chocolate chips or swap in pecans. Maybe you’ll double the cinnamon or use dark chocolate. The beauty of this recipe is that it’s forgiving and adaptable—it wants to be made your way.
So go ahead. Preheat that oven, dig out your muffin tin, and let your kitchen fill with the smell of fall. I promise you won’t regret it. And if you make these, I’d love to hear about it. Drop a comment below and tell me how they turned out, or share a photo with me on social media. Happy baking, friends!
Frequently Asked Questions
Can I use fresh pumpkin instead of canned?
Yes, you can use fresh pumpkin puree. Just make sure to drain off any excess liquid after blending or mashing it. Fresh pumpkin has more water content than canned, so you might need to reduce the milk slightly or add an extra tablespoon of flour. I recommend roasting the pumpkin first for the best flavor.
Why did my muffins sink in the middle?
Muffins usually sink for one of two reasons: the oven temperature was too low, or the batter was overmixed. Make sure your oven is fully preheated to 350°F and that you’re not opening the door too often during baking. Also, be gentle when mixing the batter—overmixing creates too much air that collapses as the muffins cool.
Can I make these into pumpkin chocolate chip bread instead?
Absolutely! Pour the batter into a greased 9×5-inch loaf pan and bake at 350°F for 50-60 minutes, or until a toothpick inserted in the center comes out clean. The baking time will be longer because the loaf is thicker. Let it cool in the pan for 10 minutes before turning out onto a wire rack.
How do I make sure my chocolate chips don’t sink to the bottom?
This is a common problem, and I’ve found two solutions that work. First, toss the chocolate chips in a tablespoon of flour before folding them into the batter. The flour coating helps them stay suspended. Second, reserve a few chocolate chips to sprinkle on top of the batter right before baking. That way, even if some sink, you’ll still have visible chocolate on top.
Can I use pumpkin pie filling instead of pumpkin puree?
I don’t recommend it. Pumpkin pie filling is pre-sweetened and spiced, which will throw off the balance of this recipe. Your muffins will be too sweet and the texture might be different. Stick with 100% pure pumpkin puree for the best results. If you accidentally bought pie filling, you can try reducing the sugar in the recipe, but the results won’t be as reliable.
Pin This Recipe!
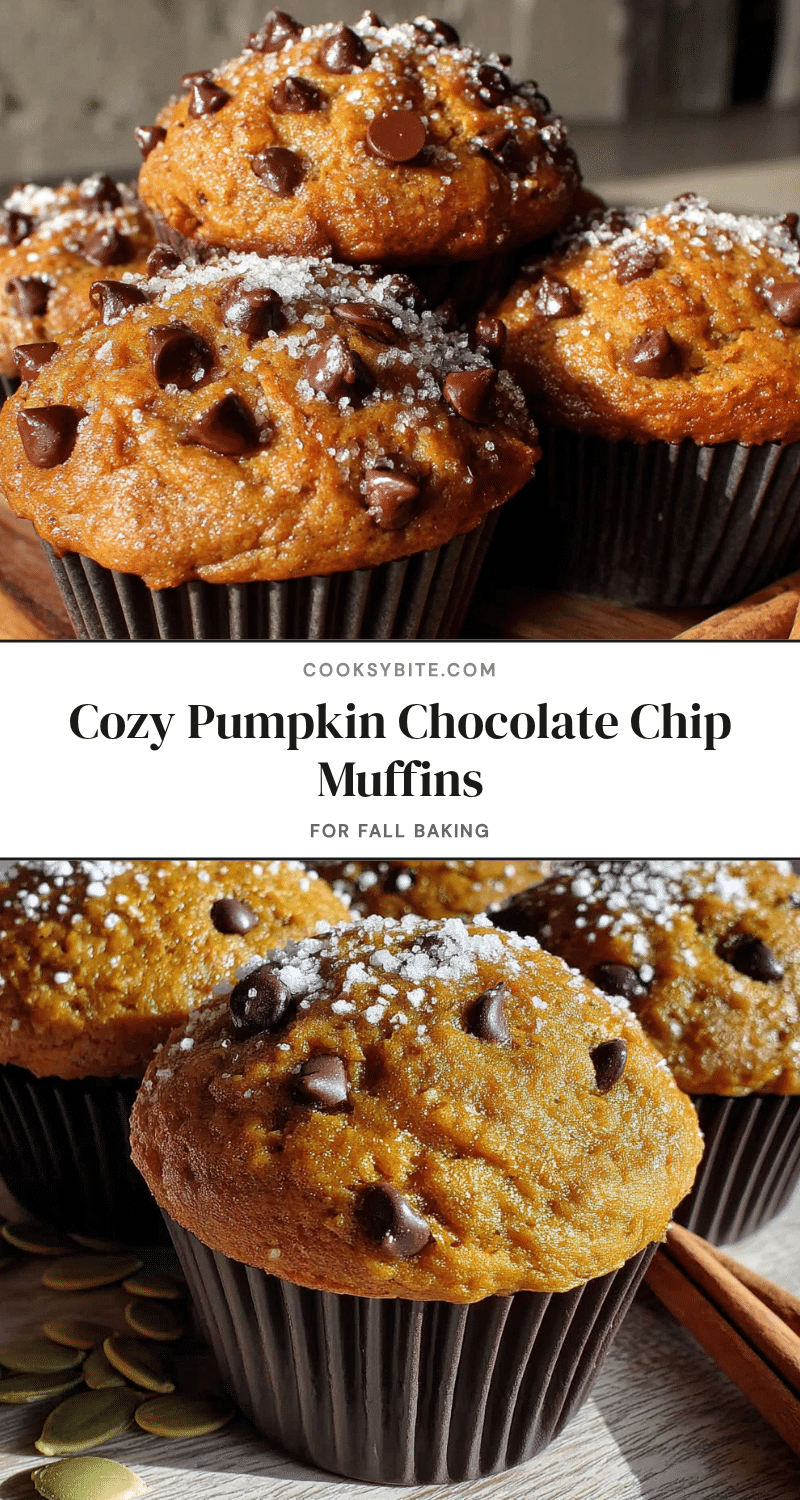
Cozy Pumpkin Chocolate Chip Muffins: Easy Fall Recipe
These moist, spiced pumpkin muffins are loaded with melty chocolate chips and come together in about 35 minutes. They’re the perfect fall treat, inspired by a nostalgic memory and made for cozy sweater-weather mornings.
- Prep Time: 15 minutes
- Cook Time: 20 minutes
- Total Time: 35 minutes
- Yield: 12 muffins 1x
- Category: Dessert
- Cuisine: American
Ingredients
- 1 ¾ cups (210g) all-purpose flour
- 1 teaspoon baking soda
- 1 teaspoon baking powder
- ½ teaspoon salt
- 2 teaspoons pumpkin pie spice
- 1 teaspoon ground cinnamon
- 1 cup (225g) pumpkin puree (not pumpkin pie filling)
- ½ cup (100g) packed brown sugar (light or dark)
- ¼ cup (50g) granulated sugar
- 1 tablespoon molasses
- 2 large eggs (room temperature preferred)
- ½ cup (120ml) vegetable oil (or canola/avocado oil)
- ¼ cup (60ml) milk (whole milk preferred; 2% or dairy-free alternatives work)
- 1 teaspoon vanilla extract
- 1 cup (175g) semi-sweet chocolate chips (plus 1 tablespoon for topping)
Instructions
- Preheat your oven to 350°F (175°C). Position the rack in the center. Line a 12-cup muffin tin with paper liners or grease well.
- In a medium bowl, whisk together the flour, baking soda, baking powder, salt, pumpkin pie spice, and cinnamon for about 20 seconds. Set aside.
- In a large bowl, whisk together the pumpkin puree, brown sugar, granulated sugar, and molasses until smooth and glossy. Add the eggs one at a time, whisking well after each. Then add the oil, milk, and vanilla extract, whisking until fully incorporated and smooth.
- Pour the dry ingredients into the wet ingredients. Use a rubber spatula to fold gently until just combined—do not overmix. A few small lumps are fine.
- Add the chocolate chips (reserving about 1 tablespoon for topping) and fold in with a few strokes until evenly distributed.
- Divide the batter evenly among the 12 muffin cups, filling each about ¾ full. Sprinkle the reserved chocolate chips on top.
- Bake for 18-22 minutes, or until a toothpick inserted into the center comes out clean or with a few moist crumbs. The tops should be golden and spring back when lightly touched.
- Let the muffins cool in the pan for 5 minutes, then transfer to a wire rack to cool completely. Wait at least 10 minutes before eating.
Notes
Don’t overmix the batter to avoid tough muffins. Use room temperature ingredients for best results. If pumpkin puree seems watery, blot with a paper towel. Rotate the pan halfway through baking for even browning. Muffins taste even better the next day. For gluten-free, use a 1:1 gluten-free flour blend and add an extra tablespoon of milk. For dairy-free, use oat or almond milk.
Nutrition
- Serving Size: 1 muffin
- Calories: 290
- Sugar: 20
- Sodium: 220
- Fat: 15
- Saturated Fat: 4
- Carbohydrates: 38
- Fiber: 2.5
- Protein: 4.5
Keywords: pumpkin muffins, chocolate chip muffins, fall baking, easy muffin recipe, pumpkin chocolate chip, cozy fall recipe


