The school bake sale was in twelve hours and I’d completely forgotten. My son had reminded me three times that week—I’d nodded, smiled, and promptly filed it in the mental abyss between “buy milk” and “schedule dentist appointment.” Now it was 9 PM, the kitchen was a disaster zone from dinner, and every Pinterest-perfect recipe I scrolled through required ingredients I didn’t have. Buttermilk? Nope. Greek yogurt? Gone. Three different types of flour? Not in this house.
I stood there, staring into the pantry like it owed me money. A can of pumpkin puree from last Thanksgiving. A bag of oats that were definitely past their prime but not expired. Honey that had crystallized into a stubborn lump. And there it was—the glimmer of an idea. I could hear the neighbor kids already bragging about their mom’s triple-chocolate brownies and elaborate cupcakes with buttercream rosettes. Meanwhile, I was about to show up with what looked like a science experiment gone right.
Honestly, I almost gave up and grabbed a box of store-bought muffins at 10 PM. But my son gave me that look—the one that says “you promised.” So I started mixing, praying the baking soda wasn’t too old and the pumpkin would hide any oat-related crimes. The batter came together in about fifteen minutes, and I slid the tray into the oven with zero expectations. Let me tell you, when those muffins came out smelling like fall in a bakery, I knew something had shifted.
The next morning, my son ate two for breakfast before I could pack them. At the bake sale, they were gone in the first hour. A mom actually asked me for the recipe—the same mom who always brings those perfect lemon bars. I mumbled something about “just throwing things together” and tried not to look too smug. Maybe you’ve been there, standing in your kitchen at 9 PM, wondering how you’d pull off a miracle. These healthy pumpkin oat muffins with honey became our family’s favorite accident, and I’ve been making them ever since.
Why You’ll Love This Recipe
These aren’t just another pumpkin muffin recipe that promises the world and delivers a dry, flavorless brick. I’ve tested this batch more times than I care to admit—burned a few, undercooked a few, and finally nailed the perfect balance of moist, tender, and satisfying.
- Quick & Easy: From pantry to plate in under 30 minutes. No stand mixer required, no complicated techniques. Just a bowl, a spoon, and fifteen minutes of your time.
- Simple Ingredients: You probably have most of these in your kitchen right now. Oats, pumpkin puree, honey, eggs, flour—nothing fancy, nothing expensive. This is real-people cooking.
- Perfect for Busy Mornings: Grab one on your way out the door, and you’ve got breakfast that actually keeps you full until lunch. No more mid-morning hunger crashes.
- Crowd-Pleaser: Kids devour these without knowing they’re eating whole grains and vegetables. Adults ask for seconds. It’s the kind of recipe that makes you look like a hero with zero effort.
- Unbelievably Delicious: The texture is soft and tender, with a subtle sweetness from the honey and warm spices that make your kitchen smell incredible. It’s comfort food that happens to be good for you.
What makes these different from every other pumpkin oat muffin recipe out there? It’s the technique—blending the oats into a flour-like consistency creates a tender crumb without that gummy texture oatmeal can sometimes bring. Plus, the honey adds a floral sweetness that pairs perfectly with the earthy pumpkin. This isn’t just another version; it’s the one you’ll come back to again and again.
These muffins are the kind that make you close your eyes after the first bite. They’re healthy enough for everyday breakfast but special enough for weekend brunch. Perfect for impressing other parents at school events without breaking the bank or your sanity.
What Ingredients You Will Need
This recipe uses simple, wholesome ingredients to deliver big flavor and satisfying texture without the fuss. Most of these are pantry staples, which means you can whip up a batch whenever the craving hits.
- 1 cup old-fashioned rolled oats (not instant—they get mushy. I prefer Quaker or Bob’s Red Mill for consistent results)
- 1 cup all-purpose flour (spooned and leveled, don’t scoop straight from the bag or you’ll pack in too much)
- 1 teaspoon baking soda (check the expiration date—old baking soda won’t give you those beautiful domed tops)
- 1 teaspoon baking powder
- 1 ½ teaspoons pumpkin pie spice (or make your own: 1 teaspoon cinnamon, ¼ teaspoon nutmeg, ¼ teaspoon ginger, pinch of cloves)
- ½ teaspoon salt
- 1 cup pumpkin puree (not pumpkin pie filling—make sure it’s 100% pure pumpkin. Libby’s is my go-to)
- ⅓ cup honey (local honey adds a lovely floral note, but any liquid honey works. If yours has crystallized, warm the jar in a bowl of hot water)
- 2 large eggs (room temperature if you remember, but straight from the fridge works in a pinch)
- ¼ cup melted coconut oil or vegetable oil (coconut oil adds a subtle flavor that pairs beautifully with pumpkin; vegetable oil is neutral and budget-friendly)
- ¼ cup milk (any kind—dairy, almond, oat, whatever you have. I’ve used leftover buttermilk before and it was divine)
- 1 teaspoon vanilla extract (pure if you have it, imitation is fine too—we’re not judging here)
Optional add-ins that make these even better:
- ½ cup chocolate chips (semi-sweet or dark—my kids insist on these)
- ¼ cup chopped walnuts or pecans (for a little crunch)
- ¼ cup raisins or dried cranberries (adds natural sweetness and chewy texture)
Pro tip: If you’re using frozen pumpkin puree (I buy extra in the fall and freeze it), thaw it completely and drain any excess liquid. Too much water will make your muffins dense and sad.
Equipment Needed
You don’t need a fancy kitchen to make these muffins. Here’s what you’ll actually use:
- 12-cup muffin tin (standard size, not the mini ones unless you’re making bite-sized treats)
- Paper liners or cooking spray (I prefer liners for easy cleanup, but spray works fine)
- Two mixing bowls (one medium, one large)
- Whisk (for combining dry ingredients)
- Rubber spatula (for folding the batter without overmixing)
- Measuring cups and spoons
- Ice cream scoop or ¼ cup measure (for evenly portioning the batter)
- Blender or food processor (for grinding the oats—a high-speed blender works best, but a food processor does the job too)
- Cooling rack (prevents soggy bottoms)
Don’t have a blender? You can skip grinding the oats and use them whole. The texture will be heartier and more rustic—still delicious, just different. I’ve done it both ways, and honestly, sometimes I prefer the whole oat version for a more substantial breakfast muffin.
Preparation Method
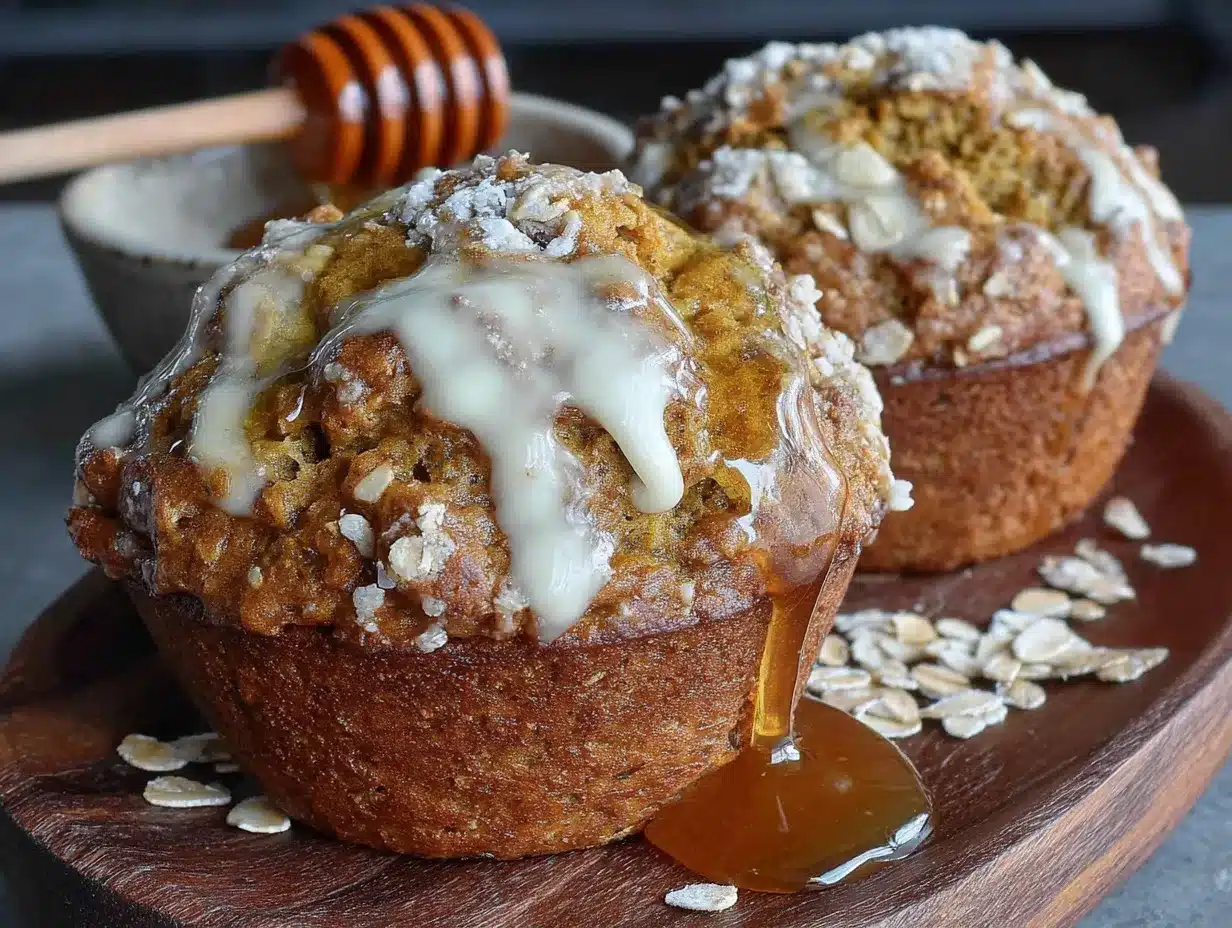
- Preheat your oven to 375°F (190°C). Position the rack in the center of the oven. Line your muffin tin with paper liners or give each cup a generous spray of non-stick cooking spray. Trust me on this—spray even if you’re using liners, because pumpkin muffins have a tendency to stick.
- Grind the oats. Place the rolled oats in your blender or food processor and pulse until they resemble a coarse flour. You want some texture still—not a fine powder, just broken down so they blend seamlessly into the batter. This takes about 15-20 seconds in a good blender. Set aside.
- Mix the dry ingredients. In a medium bowl, whisk together the oat flour (those ground oats), all-purpose flour, baking soda, baking powder, pumpkin pie spice, and salt. Make sure everything is evenly distributed—you don’t want a pocket of baking soda in one muffin.
- Combine the wet ingredients. In a large bowl, whisk together the pumpkin puree, honey, eggs, melted coconut oil (or vegetable oil), milk, and vanilla extract. Whisk until smooth and fully combined. The mixture should be a beautiful golden-orange color and smell amazing already.
- Fold the dry into the wet. Pour the dry ingredients into the wet ingredients. Use a rubber spatula to fold gently—just until no streaks of flour remain. A few lumps are totally fine. Overmixing will make your muffins tough and dense, and nobody wants that. If you’re adding chocolate chips or nuts, fold them in at this stage.
- Fill the muffin cups. Use your ice cream scoop or a ¼ cup measure to divide the batter evenly among the 12 muffin cups. Each cup should be about ¾ full. Don’t be tempted to overfill—these muffins rise nicely, and you want those beautiful domed tops, not a muffin-top that spills over the edge.
- Bake for 15-18 minutes. Start checking at 15 minutes. You’re looking for a golden-brown top and a toothpick inserted in the center that comes out clean or with just a few moist crumbs. The muffins should spring back when you gently press the top. Every oven is different—mine runs hot, so I start checking at 14 minutes.
- Cool properly. Let the muffins rest in the pan for 5 minutes. This allows them to set and makes removal easier. Then transfer them to a wire cooling rack to cool completely. If you skip this step, the bottoms will get soggy from trapped steam.
- Enjoy warm or at room temperature. These are absolutely divine warm, with a little pat of butter melting into the top. But they’re equally delicious at room temperature, which makes them perfect for packing in lunchboxes.
Cooking Tips & Techniques
I learned most of these the hard way—through batches that didn’t quite work out. Let me save you the trouble.
Don’t overmix the batter. This is the number one mistake people make with muffins. Mix until the flour disappears, then stop. I know it’s tempting to keep stirring until it’s perfectly smooth, but that develops the gluten and gives you tough, rubbery muffins. A few lumps are your friend.
Check your baking soda and powder. If your muffins come out flat and dense, it’s probably because your leavening agents are old. I test mine by dropping a little in hot water—if it fizzes vigorously, it’s good. If it barely bubbles, toss it and buy fresh.
Room temperature ingredients matter, but not that much. Ideally, your eggs and milk should be at room temperature so they emulsify properly with the oil. But if you’re in a rush (and let’s be honest, when aren’t we?), cold ingredients work fine. Your muffins might be slightly less fluffy, but they’ll still be delicious.
Use a cookie scoop for even muffins. I use a ¼ cup ice cream scoop to portion the batter, and it’s a game-changer. Every muffin is the same size, so they bake evenly. No more tiny overdone muffins next to giant undercooked ones.
Let them cool completely before storing. I know it’s hard to wait, but if you seal warm muffins in a container, the steam will make them soggy. Patience pays off here.
Variations & Adaptations
This recipe is incredibly forgiving, which is one of the reasons I love it so much. Here are some ways to make it your own:
Gluten-Free Version: Substitute the all-purpose flour with a 1:1 gluten-free baking flour blend. I’ve used Bob’s Red Mill and King Arthur with great results. Make sure your oats are certified gluten-free too, since oats are often processed in facilities that handle wheat.
Dairy-Free Version: Use almond milk, oat milk, or any plant-based milk instead of dairy. Coconut oil works beautifully as the fat. These muffins are naturally dairy-friendly with just a few swaps.
Lower Sugar Option: Reduce the honey to ¼ cup and add an extra ¼ cup of unsweetened applesauce. The muffins will be less sweet but still moist and flavorful. My toddler doesn’t notice the difference.
Vegan Version: Replace the eggs with flax eggs (1 tablespoon ground flaxseed mixed with 3 tablespoons water per egg, let sit for 5 minutes). Use maple syrup instead of honey to keep it truly vegan. The texture will be slightly denser but still delicious.
Pumpkin Chocolate Chip: Fold in ½ cup semi-sweet chocolate chips. This is the version that converted my chocolate-obsessed husband. The warm pumpkin and melted chocolate combination is genuinely dangerous.
Savory Twist: Skip the honey and pumpkin pie spice. Add ½ cup shredded cheddar cheese, ¼ cup chopped fresh rosemary, and a pinch of black pepper. These savory pumpkin muffins are incredible alongside soup or chili.
Serving & Storage Suggestions
These muffins are incredibly versatile when it comes to serving. Here’s how I handle them:
Serving: Warm them slightly in the microwave for 10-15 seconds before serving—it brings back that fresh-from-the-oven magic. Split one open and spread a little butter, cream cheese, or apple butter on top. They’re perfect alongside a cup of coffee for breakfast, packed in lunchboxes for a midday treat, or served as a healthy snack after school.
Storage: Keep muffins in an airtight container at room temperature for up to 3 days. Place a paper towel at the bottom of the container and another on top to absorb excess moisture. Change the paper towels daily if you’re storing longer than a day.
Freezing: These freeze beautifully. Let the muffins cool completely, then wrap each one individually in plastic wrap and place them in a freezer-safe bag. They’ll keep for up to 3 months. To thaw, leave one out on the counter for about an hour, or microwave for 20-30 seconds. I always keep a stash in the freezer for busy mornings.
Flavor Development: Here’s something I discovered by accident—these muffins actually taste better the next day. The flavors meld together overnight, and the texture becomes even more moist. So don’t feel bad if you don’t eat them all on day one.
Nutritional Information & Benefits
Per muffin (based on 12 servings, without add-ins):
- Calories: 175
- Total Fat: 7g
- Saturated Fat: 5g
- Cholesterol: 31mg
- Sodium: 220mg
- Total Carbohydrates: 26g
- Dietary Fiber: 2g
- Sugars: 11g
- Protein: 4g
These muffins pack a surprising nutritional punch. Pumpkin is loaded with vitamin A, which supports eye health and immune function. Oats provide soluble fiber that helps keep you full and supports heart health. Honey offers natural sweetness with antioxidants, and using whole grains means you’re getting sustained energy rather than a sugar crash.
Compared to a typical bakery muffin that can clock in at 400+ calories and 30 grams of sugar, these are practically a health food. They’re kid-approved, budget-friendly, and actually good for you. That’s a win all around.
Conclusion
These healthy pumpkin oat muffins with honey have earned a permanent spot in my weekly rotation. They’re the recipe I turn to when I need something reliable, affordable, and guaranteed to please everyone at the table. From that frantic bake sale night to countless breakfasts and snacks since, they’ve never let me down.
What I love most is how adaptable they are. You can dress them up with chocolate chips for a treat or keep them simple for everyday breakfasts. They work for school lunches, afternoon snacks, and even holiday brunch tables. And they cost pennies to make compared to store-bought options.
I’d love to hear how these turn out for you. Did you add chocolate chips? Try the savory version? Have a bake sale success story of your own? Drop a comment below and share your version. And if you found a new favorite breakfast, share this recipe with a friend who needs it. Happy baking, friends!
Frequently Asked Questions
Can I use quick oats instead of rolled oats?
Yes, you can use quick oats, but skip the blending step. Quick oats are already finely chopped, so grinding them would turn them into a powder. Just mix them in as-is for a slightly softer texture.
Why did my muffins turn out dense?
Overmixing is usually the culprit. Mix just until the flour disappears, and stop. Also check that your baking soda and powder are fresh—old leavening agents won’t give you that light, fluffy texture.
Can I make these into mini muffins?
Absolutely! Fill mini muffin cups and bake for 10-12 minutes instead of 15-18. You’ll get about 24-30 mini muffins from this recipe. Perfect for little hands or party platters.
How do I make these without a blender?
You can skip grinding the oats entirely. Use whole rolled oats for a heartier, more rustic texture. The muffins will be chewier and more substantial, but still delicious. Alternatively, you can buy oat flour at most grocery stores.
Can I substitute the honey with maple syrup?
Yes, maple syrup works beautifully as a 1:1 substitute. The flavor will be slightly different—more woodsy and caramel-like—but it’s a delicious swap. Keep in mind that maple syrup is thinner than honey, so the batter might be slightly runnier.
Pin This Recipe!
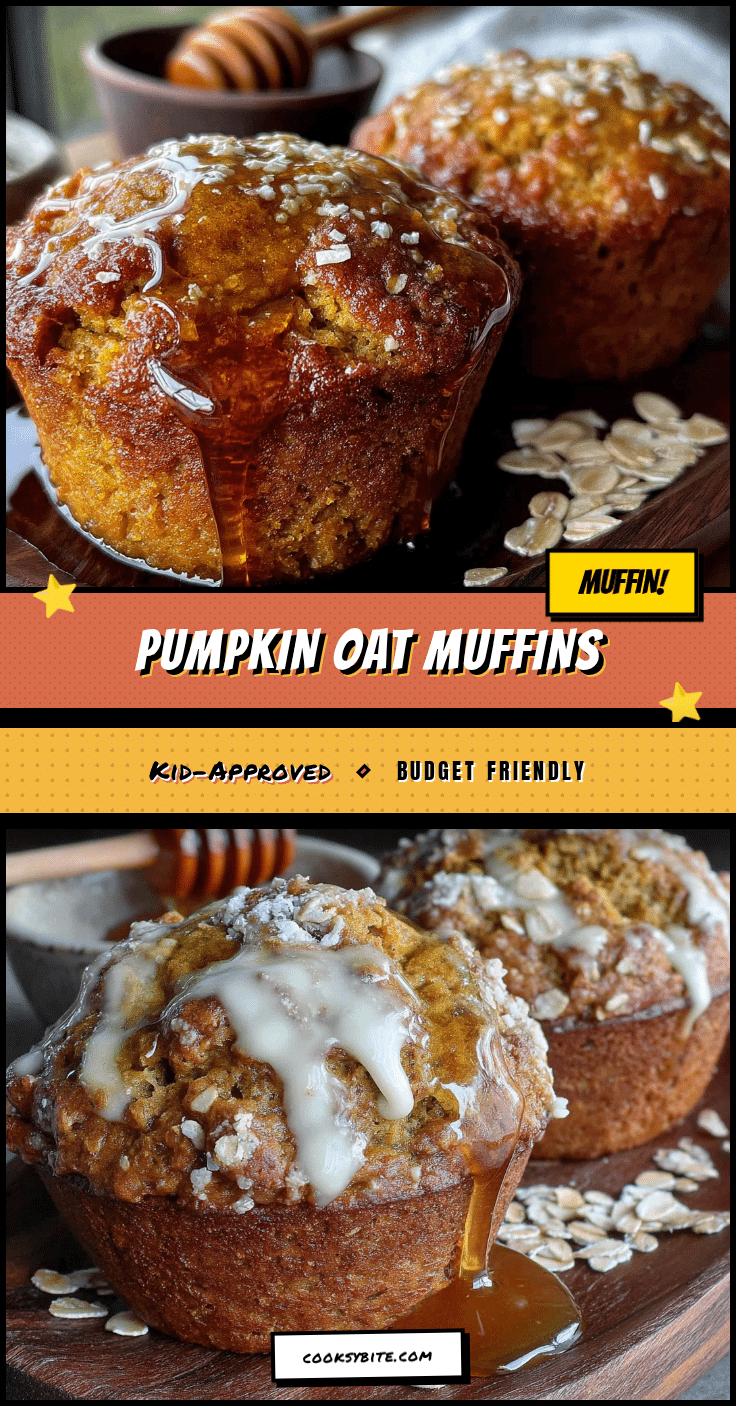
Healthy Pumpkin Oat Muffins: Easy Kid-Approved Budget Recipe
These healthy pumpkin oat muffins with honey are a quick, easy, and budget-friendly recipe perfect for busy mornings, bake sales, or snacks. Made with simple pantry ingredients, they’re moist, tender, and kid-approved.
- Prep Time: 15 minutes
- Cook Time: 18 minutes
- Total Time: 33 minutes
- Yield: 12 servings 1x
- Category: Breakfast
- Cuisine: American
Ingredients
- 1 cup old-fashioned rolled oats
- 1 cup all-purpose flour
- 1 teaspoon baking soda
- 1 teaspoon baking powder
- 1 ½ teaspoons pumpkin pie spice
- ½ teaspoon salt
- 1 cup pumpkin puree
- ⅓ cup honey
- 2 large eggs
- ¼ cup melted coconut oil or vegetable oil
- ¼ cup milk (any kind)
- 1 teaspoon vanilla extract
- ½ cup chocolate chips (optional)
- ¼ cup chopped walnuts or pecans (optional)
- ¼ cup raisins or dried cranberries (optional)
Instructions
- Preheat your oven to 375°F (190°C). Position the rack in the center of the oven. Line your muffin tin with paper liners or give each cup a generous spray of non-stick cooking spray.
- Grind the oats. Place the rolled oats in your blender or food processor and pulse until they resemble a coarse flour. This takes about 15-20 seconds in a good blender. Set aside.
- Mix the dry ingredients. In a medium bowl, whisk together the oat flour, all-purpose flour, baking soda, baking powder, pumpkin pie spice, and salt.
- Combine the wet ingredients. In a large bowl, whisk together the pumpkin puree, honey, eggs, melted coconut oil (or vegetable oil), milk, and vanilla extract until smooth.
- Fold the dry into the wet. Pour the dry ingredients into the wet ingredients. Use a rubber spatula to fold gently—just until no streaks of flour remain. If adding chocolate chips or nuts, fold them in at this stage.
- Fill the muffin cups. Use an ice cream scoop or a ¼ cup measure to divide the batter evenly among the 12 muffin cups. Each cup should be about ¾ full.
- Bake for 15-18 minutes. Start checking at 15 minutes. The muffins are done when the top is golden-brown and a toothpick inserted in the center comes out clean or with a few moist crumbs.
- Cool properly. Let the muffins rest in the pan for 5 minutes, then transfer them to a wire cooling rack to cool completely.
- Enjoy warm or at room temperature.
Notes
Don’t overmix the batter—mix just until the flour disappears. Check that your baking soda and powder are fresh. Room temperature ingredients help but cold ones work in a pinch. Let muffins cool completely before storing to avoid sogginess. These muffins taste even better the next day.
Nutrition
- Serving Size: 1 muffin
- Calories: 175
- Sugar: 11
- Sodium: 220
- Fat: 7
- Saturated Fat: 5
- Carbohydrates: 26
- Fiber: 2
- Protein: 4
Keywords: pumpkin muffins, healthy muffins, oat muffins, kid-friendly, budget recipe, easy breakfast, pumpkin oat muffins


