I was standing in line at the DMV—a place where inspiration goes to die—when the woman ahead of me started talking about oatmeal. Not like, “oh, I had oatmeal for breakfast,” but a full-on, detailed explanation of how she makes these little baked oatmeal cups every Sunday during pumpkin season. She was a retired school lunch lady named Margie, and let me tell you, she knew her way around a cafeteria tray. She told me she’d been making them for years, tweaking the recipe until her grandkids actually asked for seconds of something healthy. I wasn’t expecting cooking advice from a stranger in line at the DMV, but there I was, clutching my number ticket, listening to her describe exactly how to make these cozy pumpkin baked oatmeal cups. I mean, you get recipe advice where you can find it, right?
Margie scribbled the basics on the back of my expired registration form. It was a mess of fractions and crossed-out words, but I could tell she was onto something special. I made my first batch that very weekend, and honestly, I’ve been making them every fall since. There’s something about the combination of warm pumpkin, cozy spices, and that slightly chewy oatmeal texture that just screams sweater weather. The first time I pulled a batch out of the oven, my whole apartment smelled like a pumpkin spice candle had exploded—in the best way possible. I forgot to add the vanilla that first time (classic me), but they were still incredible. Maybe you’ve been there, where a happy accident still turns out delicious.
These pumpkin baked oatmeal cups have become my fall meal prep secret weapon. They’re the kind of recipe that makes you feel like you’ve got your life together, even when you’re running late and eating breakfast in the car. They’re portable, they’re forgiving, and they taste like autumn in a muffin liner. That’s why I keep coming back to them year after year.
Why You’ll Love These Pumpkin Baked Oatmeal Cups
Let me tell you why these little guys have earned a permanent spot in my fall rotation. I’ve tested this recipe more times than I care to admit—some batches were too dry, some were too mushy, and one memorable batch had so much cinnamon it was like eating a Christmas ornament. But this version? This is the one. I’ve got my nutritionist friend Sarah to thank for the protein boost suggestion, and my own trial-and-error to thank for the perfect texture.
- Quick & Easy: These come together in about 30 minutes total, with just 10 minutes of active prep. Perfect for Sunday meal prep when you’d rather be watching football or reading a book.
- Simple Ingredients: You probably already have most of these in your pantry. No fancy superfood powders or hard-to-find extracts here.
- Perfect for Fall Meal Prep: Make a batch on Sunday, grab them all week long. They’re the ultimate grab-and-go breakfast for busy autumn mornings.
- Crowd-Pleaser: My picky-eater nephew actually asked for seconds. Twice. I almost fell off my chair.
- Unbelievably Delicious: The texture is where these shine—soft and tender on the inside with slightly crispy edges. It’s comfort food that happens to be good for you.
What makes these different from every other baked oatmeal recipe out there? It’s the ratio. I spent weeks tweaking the liquid-to-oat ratio until I got that perfect balance where the cups hold their shape without being dry. Plus, I use a trick of mashing some of the pumpkin into the wet ingredients to create a creamier texture throughout. This isn’t just another oatmeal cup recipe—it’s the one you’ll actually look forward to eating.
These cups are the kind of breakfast that makes you close your eyes after the first bite. It’s fall mornings reimagined—healthier, faster, but with the same soul-soothing satisfaction of a big bowl of cinnamon-spiced oatmeal. Perfect for impressing your coworkers at the office breakfast spread, or turning a chaotic weekday morning into something that feels just a little bit special.
What Ingredients You Will Need
This recipe uses simple, wholesome ingredients to deliver that cozy fall flavor without any fuss. Most of these are pantry staples, especially if you’re already in the habit of fall baking.
For the Oatmeal Cups
- Rolled oats, 2 cups (use old-fashioned rolled oats, not quick oats—they hold up better and give you that chewy texture)
- Pumpkin puree, 1 cup (not pumpkin pie filling! Make sure you grab 100% pure pumpkin. I prefer Libby’s for consistent results, but any brand works)
- Milk, 1 cup (any milk works—dairy, almond, oat, or coconut. I’ve used them all and they all turn out great)
- Eggs, 2 large, room temperature (they blend more evenly this way)
- Maple syrup, 1/3 cup (the real stuff, not pancake syrup. It adds a depth of flavor that honey just can’t match)
- Coconut oil, 2 tablespoons, melted (or any neutral oil like avocado or vegetable oil)
- Vanilla extract, 1 teaspoon (don’t skip this—it rounds out the pumpkin spice flavors beautifully)
- Pumpkin pie spice, 2 teaspoons (or make your own with cinnamon, nutmeg, ginger, and cloves)
- Cinnamon, 1 teaspoon (I add extra because I’m a cinnamon fiend)
- Baking powder, 1 teaspoon (for a little lift so they’re not too dense)
- Salt, 1/4 teaspoon (brings out all the other flavors)
Optional Mix-Ins
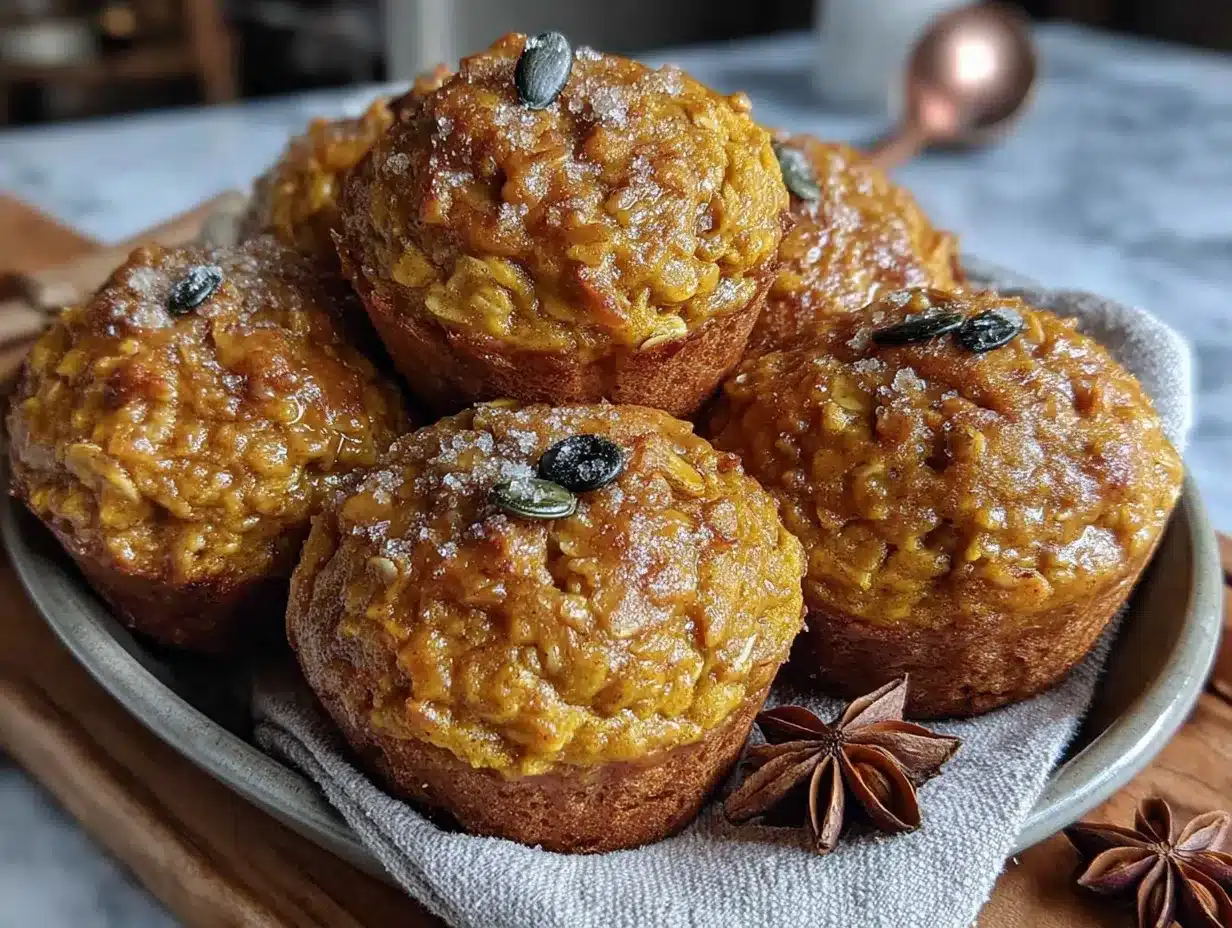
- Chocolate chips, 1/3 cup (dark chocolate or semi-sweet—the pumpkin-chocolate combo is heavenly)
- Chopped pecans or walnuts, 1/3 cup (adds a lovely crunch)
- Dried cranberries, 1/4 cup (for that tart pop of flavor)
- Flax seeds or chia seeds, 2 tablespoons (for extra fiber and omega-3s)
For the pumpkin puree, look for cans that feel heavy for their size—that means they’re packed full. If you’re using homemade pumpkin puree, make sure you’ve drained it well in a cheesecloth or fine-mesh strainer overnight. Homemade puree tends to be more watery than canned, and nobody wants soggy oatmeal cups.
If you’re gluten-sensitive, certified gluten-free rolled oats work perfectly here. I’ve tested them and honestly can’t tell the difference. For a dairy-free version, use your favorite plant-based milk and coconut oil. The texture stays exactly the same.
Equipment Needed
You don’t need a fancy kitchen to make these. Here’s what you’ll need:
- Muffin tin, standard 12-cup size (I use a non-stick one, but any will work with liners)
- Muffin liners (parchment paper liners work best for easy removal, but paper ones are fine too)
- Mixing bowls, one large and one medium
- Whisk (or a fork in a pinch—I’ve done it)
- Measuring cups and spoons
- Rubber spatula (for scraping every last bit of that pumpkin goodness)
- Cooling rack (optional but helpful for even cooling)
If you don’t have a muffin tin, you can bake this in an 8×8 baking dish and cut it into squares. Just increase the baking time by about 10 minutes. I’ve also used silicone muffin cups with great success—they pop right out without any sticking. My favorite budget-friendly tip? Buy the reusable silicone liners. They’re like $8 on Amazon and last forever.
One thing I learned the hard way: don’t skip the liners. I thought I could get away with just greasing the pan, and let’s just say I spent 20 minutes chiseling oatmeal out of a muffin tin. Not my finest moment.
Preparation Method
- Preheat your oven to 350°F (175°C). Line your muffin tin with 12 paper liners or lightly grease each cup. This is non-negotiable—trust me on this one.
- In a large bowl, whisk together the dry ingredients: rolled oats, pumpkin pie spice, cinnamon, baking powder, and salt. Give it a good stir so the spices are evenly distributed. You don’t want one cup to get all the cinnamon while another gets none.
- In a medium bowl, combine the wet ingredients: pumpkin puree, milk, eggs, maple syrup, melted coconut oil, and vanilla extract. Whisk until smooth and fully combined. The mixture should be a beautiful orange color—like a pumpkin spice latte, but better for you.
- Pour the wet ingredients into the dry ingredients. Stir with a rubber spatula until just combined. Don’t overmix! A few streaks of flour are fine. Overmixing will make your oatmeal cups tough, and nobody wants that.
- Fold in your chosen mix-ins if using. I usually add chocolate chips and pecans because I have zero self-control when it comes to that combo. Gently fold them in with a few strokes.
- Let the batter rest for 5 minutes. This is a little trick I learned from Margie herself. Letting the oats absorb some of the liquid before baking gives them a better texture. Use this time to clean up a bit or pour yourself a cup of coffee.
- Spoon the batter evenly into the prepared muffin cups, filling each about 3/4 full. They won’t rise much, so don’t worry about overflow. I use a cookie scoop for even portions—it makes the process so much faster.
- Bake for 20-25 minutes, or until the tops are set and lightly golden. A toothpick inserted in the center should come out clean or with just a few moist crumbs. Your kitchen will smell incredible at this point—like a pumpkin patch had a baby with a bakery.
- Let them cool in the pan for 5 minutes, then transfer to a cooling rack. This resting time helps them set properly. If you try to take them out too soon, they might fall apart.
- Cool completely before storing. I know it’s tempting to eat one right away (and honestly, you should), but let the rest cool fully before putting them in a container. Otherwise, they’ll get steamy and soggy.
A few sensory cues to watch for: the batter should be thick but scoopable—like a thick pancake batter. When they’re done, the edges will be slightly pulled away from the liners, and the tops will spring back when lightly pressed. If they jiggle in the center, give them another 2-3 minutes.
Cooking Tips & Techniques
After about fifteen batches of these (not exaggerating), I’ve picked up a few tricks that make a real difference.
Don’t overmix the batter. I learned this one the hard way when I made a batch that turned out dense and almost rubbery. Stir until the dry ingredients are just moistened, then stop. A few lumps are totally fine—they’ll bake out.
Room temperature ingredients matter. Cold eggs and cold milk can make the coconut oil seize up into little hard bits. Leave your eggs and milk on the counter for 30 minutes before starting. If you forget (which I do, constantly), you can warm the milk slightly in the microwave and run the eggs under warm water for a minute.
Let the batter rest. I mentioned this in the instructions, but it bears repeating. Those 5 minutes allow the oats to start absorbing the liquid, which means your cups will be tender instead of having that raw oat texture. It’s a small step that makes a big difference.
Use a cookie scoop for even portions. This ensures all your cups bake evenly. Nothing worse than having some cups overdone while others are still gooey. I use a #20 scoop (about 3 tablespoons) and it’s perfect.
Rotate your pan halfway through. Most ovens have hot spots. Give the pan a 180-degree turn at the 12-minute mark for even browning. I forgot to do this once and ended up with half a batch of pale, underdone cups and half a batch of dark, overdone ones.
Don’t skip the liners. I know I said this already, but let me tell you about the time I thought I could get away with just greasing the pan. I spent an hour scrubbing baked-on oatmeal. Just use the liners.
Variations & Adaptations
One of the best things about this recipe is how flexible it is. Here are some variations I’ve tried and loved:
Vegan Version: Replace the eggs with flax eggs (2 tablespoons ground flaxseed mixed with 6 tablespoons water, let sit for 5 minutes). Use plant-based milk and maple syrup. They turn out slightly denser but still delicious. My vegan friend Rachel couldn’t tell the difference.
Gluten-Free Version: Use certified gluten-free rolled oats. That’s literally the only change. Everything else stays the same. I’ve made these for my gluten-intolerant cousin and she said they were the best oatmeal cups she’d ever had.
Protein-Packed Version: Add 2 scoops of unflavored or vanilla protein powder and increase the milk by 1/4 cup. I use collagen peptides for this because they dissolve completely and don’t change the texture. Great for post-workout breakfasts.
Apple Pumpkin Version: Swap half the pumpkin puree for unsweetened applesauce and add 1/2 cup finely diced apple. The apple adds little bursts of sweetness and texture. This is my go-to when I have apples that need using up.
Low-Sugar Version: Reduce the maple syrup to 2 tablespoons and add 1/2 cup mashed banana for natural sweetness. The banana flavor pairs beautifully with the pumpkin. My kids actually prefer this version—go figure.
Savory-ish Version: Okay, this one’s weird but good. Reduce the maple syrup to 1 tablespoon, skip the pumpkin pie spice, and add 1/2 teaspoon black pepper, 1/4 teaspoon cayenne, and some chopped sage. It’s like pumpkin soup in oatmeal form. Not for everyone, but I’m obsessed.
Serving & Storage Suggestions
These pumpkin baked oatmeal cups are incredibly versatile when it comes to serving. Here’s how I like to enjoy them:
Warm or room temperature—both work great. If you’re eating them fresh out of the oven, let them cool for at least 5 minutes so they hold their shape. I love serving them with a dollop of Greek yogurt and a drizzle of extra maple syrup. It’s like having dessert for breakfast, but healthy.
For a cozy fall breakfast, pair them with a hot latte or a cup of chai tea. The spices in the oatmeal cups complement those warm, aromatic drinks perfectly. On weekends, I’ll crumble one over a bowl of Greek yogurt with some fresh apple slices. It’s like a deconstructed oatmeal parfait.
Storage: Keep them in an airtight container in the refrigerator for up to 5 days. I stack them with parchment paper between layers so they don’t stick together. They actually get better after a day or two as the flavors meld together.
Freezer instructions: These freeze beautifully! Place the cooled cups on a baking sheet and freeze for 1 hour, then transfer to a freezer-safe bag or container. They’ll keep for up to 3 months. To reheat, microwave one for 30-45 seconds, or pop it in a 350°F oven for 10 minutes. I make a double batch every fall and stash half in the freezer for those mornings when I need breakfast in 30 seconds flat.
Reheating tip: If you’re reheating from frozen, wrap the cup in a slightly damp paper towel before microwaving. This creates steam and keeps them from drying out. Trust me on this one—it’s a game-changer.
Nutritional Information & Benefits
Per serving (1 oatmeal cup, based on 12 servings without mix-ins):
- Calories: 165
- Protein: 5g
- Carbohydrates: 26g
- Fiber: 3g
- Sugar: 9g (from maple syrup and natural sugars)
- Fat: 5g
- Iron: 8% DV
- Vitamin A: 80% DV (thank you, pumpkin!)
These little cups pack a surprising nutritional punch. Pumpkin is loaded with vitamin A, which is great for your immune system and eye health—perfect for cold and flu season. The oats provide steady-release energy that’ll keep you full until lunch. Plus, the fiber content helps with digestion and keeps your blood sugar stable.
If you’re watching your sugar intake, this recipe uses only maple syrup as a sweetener—no refined sugar. The pumpkin itself adds natural sweetness too. For anyone with dietary restrictions, this recipe is easily adaptable for gluten-free, dairy-free, and vegan diets. Just note that the nuts and seeds in the mix-ins could be allergens for some folks.
I love that these feel indulgent but are actually pretty wholesome. It’s the kind of breakfast that makes you feel good about starting your day—nourishing, satisfying, and delicious all at once.
Conclusion
These cozy pumpkin baked oatmeal cups have become my fall meal prep MVP. They’re simple enough for a beginner baker but impressive enough to bring to a brunch or share with coworkers. The best part? They make your kitchen smell like autumn for hours.
I love that this recipe is forgiving and adaptable—you can make it your own. Add your favorite mix-ins, adjust the sweetness, or try one of the variations I mentioned. The basic formula is solid, so feel free to experiment. That’s what cooking is all about, right?
If you make these, I’d love to hear about it! Drop a comment below and let me know what mix-ins you used, or tag me on Pinterest with your creation. Did you add chocolate chips? Go the savory route? Forgot the vanilla like I did that first time? Tell me all about it.
Here’s to cozy fall mornings, meal prep that actually tastes good, and the unexpected recipe advice you find in the most unlikely places. Happy baking, friends!
Frequently Asked Questions
Can I use quick oats instead of rolled oats?
You can, but the texture will be different. Quick oats absorb liquid faster and will give you a softer, more porridge-like texture. Rolled oats give you that chewy, substantial bite that holds up better in cup form. If you only have quick oats, reduce the resting time to 2 minutes and check for doneness a few minutes early.
How do I keep these from sticking to the liners?
Use parchment paper liners if you can find them—they’re non-stick magic. If you’re using paper liners, spray them lightly with cooking spray before adding the batter. This little step makes a huge difference. I learned this after losing half a cup to a paper liner that refused to let go.
Can I make these ahead of time for a party or brunch?
Absolutely! These are perfect for make-ahead entertaining. Bake them up to 3 days in advance and store them in the refrigerator. Reheat them in a 300°F oven for 5-7 minutes before serving, or let them come to room temperature. They’re also great for holiday mornings when you want something special without spending hours in the kitchen.
Why did my oatmeal cups turn out dry?
This usually happens for one of two reasons: you overbaked them, or you used too many dry mix-ins. Check your oven temperature with an oven thermometer—many run hot. Also, if you’re adding lots of nuts, seeds, or dried fruit, reduce the oats by a couple of tablespoons to compensate. Next time, pull them out when a toothpick comes out with a few moist crumbs, not completely clean.
Can I double this recipe?
Yes! This recipe doubles beautifully. Use two muffin tins or bake in batches. If you’re baking two pans at once, rotate them between racks halfway through for even baking. The baking time might increase by a few minutes, so start checking at the 22-minute mark. I always make a double batch and freeze half—it’s the best meal prep hack.
Pin This Recipe!
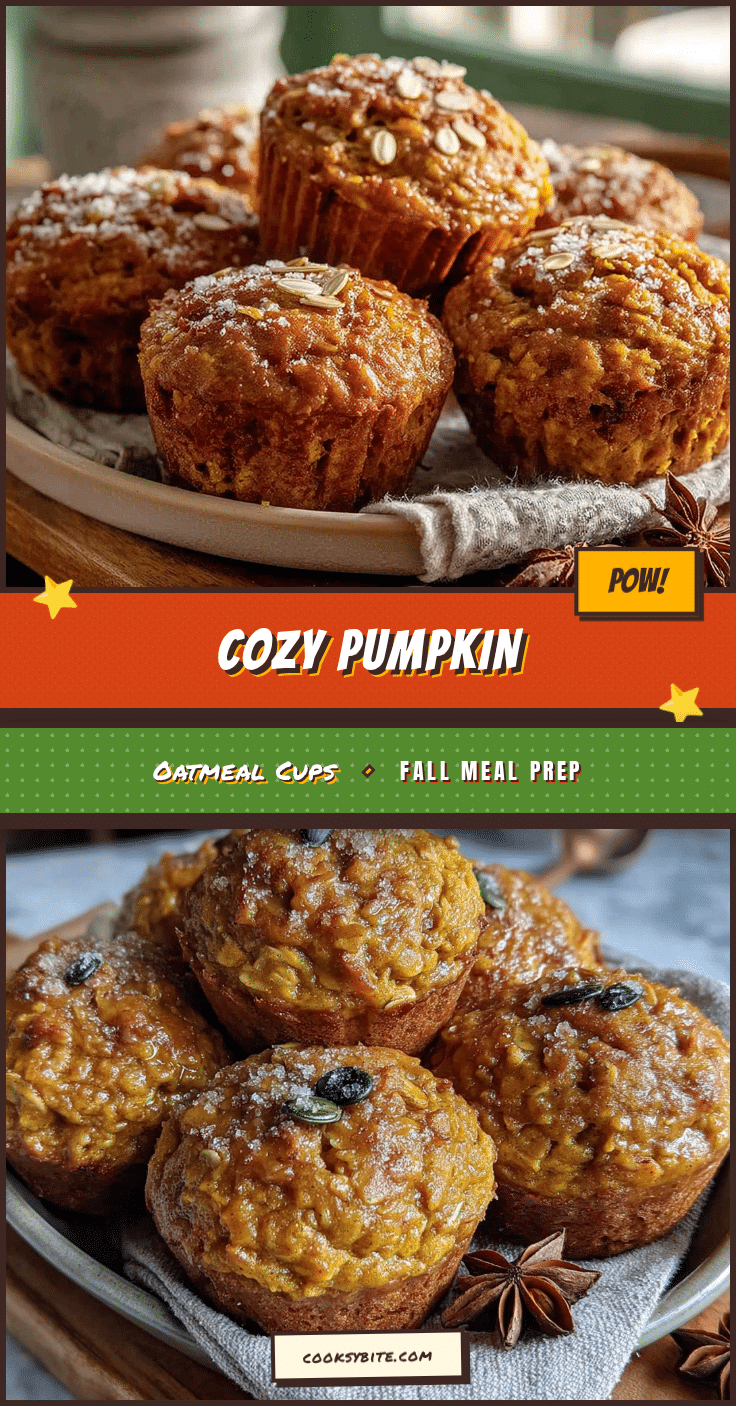
Cozy Pumpkin Baked Oatmeal Cups: Easy Fall Meal Prep

These cozy pumpkin baked oatmeal cups are the perfect fall meal prep breakfast. Made with simple ingredients like rolled oats, pumpkin puree, and warm spices, they’re portable, forgiving, and taste like autumn in a muffin liner.
- Prep Time: 10 minutes
- Cook Time: 25 minutes
- Total Time: 35 minutes
- Yield: 12 servings 1x
- Category: Breakfast
- Cuisine: American
Ingredients
- 2 cups rolled oats (old-fashioned)
- 1 cup pumpkin puree (100% pure, not pumpkin pie filling)
- 1 cup milk (dairy, almond, oat, or coconut)
- 2 large eggs, room temperature
- 1/3 cup maple syrup
- 2 tablespoons coconut oil, melted (or neutral oil)
- 1 teaspoon vanilla extract
- 2 teaspoons pumpkin pie spice
- 1 teaspoon cinnamon
- 1 teaspoon baking powder
- 1/4 teaspoon salt
- 1/3 cup chocolate chips (optional)
- 1/3 cup chopped pecans or walnuts (optional)
- 1/4 cup dried cranberries (optional)
- 2 tablespoons flax seeds or chia seeds (optional)
Instructions
- Preheat your oven to 350°F (175°C). Line a 12-cup muffin tin with paper liners or lightly grease each cup.
- In a large bowl, whisk together the dry ingredients: rolled oats, pumpkin pie spice, cinnamon, baking powder, and salt.
- In a medium bowl, combine the wet ingredients: pumpkin puree, milk, eggs, maple syrup, melted coconut oil, and vanilla extract. Whisk until smooth.
- Pour the wet ingredients into the dry ingredients. Stir with a rubber spatula until just combined. Do not overmix.
- Fold in your chosen mix-ins (if using) gently.
- Let the batter rest for 5 minutes.
- Spoon the batter evenly into the prepared muffin cups, filling each about 3/4 full.
- Bake for 20-25 minutes, or until the tops are set and lightly golden. A toothpick inserted in the center should come out clean or with a few moist crumbs.
- Let them cool in the pan for 5 minutes, then transfer to a cooling rack.
- Cool completely before storing.
Notes
Don’t overmix the batter. Room temperature ingredients help the coconut oil blend smoothly. Letting the batter rest for 5 minutes allows oats to absorb liquid for better texture. Use parchment paper liners to prevent sticking. For even baking, rotate the pan halfway through. Store in an airtight container in the refrigerator for up to 5 days or freeze for up to 3 months.
Nutrition
- Serving Size: 1 oatmeal cup
- Calories: 165
- Sugar: 9
- Sodium: 120
- Fat: 5
- Saturated Fat: 2
- Carbohydrates: 26
- Fiber: 3
- Protein: 5
Keywords: pumpkin baked oatmeal cups, fall meal prep, healthy breakfast, oatmeal cups, pumpkin spice, easy breakfast


