I was standing in the spice aisle at the grocery store last Tuesday, staring at a jar of cinnamon like it held the secrets to the universe. A woman next to me reached for pumpkin pie spice, and the faint, dusty scent that escaped the jar hit me — and suddenly I was eight years old, standing on a step stool in my aunt Clara’s tiny kitchen in Portland. Her hands were dusted in flour, and she was laughing at something I’d said, and the whole apartment smelled like butter and sugar and something warm I couldn’t name. I didn’t even know what snickerdoodles were back then. I just knew that when she pulled that tray from the oven, the whole world stopped for a second. She passed away five years ago, and I still can’t smell cinnamon without thinking of her. Honestly, I’ve been chasing that exact feeling ever since — that perfect, crackly, soft cookie that tastes like a hug. And let me tell you, these pumpkin snickerdoodles are the closest I’ve ever gotten.
This recipe is a small batch, which means you get to enjoy the magic without being buried under dozens of cookies. Because sometimes you just need a little taste of fall, you know? Maybe you’ve been there — craving that cozy, spiced sweetness but not wanting to commit to a full bakery operation. These cookies are soft, chewy, and rolled in a cinnamon-sugar coat that crackles when you bite into them. The pumpkin keeps them tender, and the spices? They hit that nostalgic note every single time.
I’ve made these for potlucks, for quiet Tuesday nights, and for when I just need to feel close to Clara again. They never last long. And honestly, that’s the whole point.
Why You’ll Love This Recipe
These aren’t just any pumpkin cookies. They’re the kind that make people close their eyes after the first bite. I’ve tested this recipe at least seven times — I lost count after the third batch came out too flat — and I can tell you with confidence: this is the one. Here’s why you’re going to love it:
- Small Batch, Big Flavor: This recipe makes about 12 cookies, which is perfect for a cozy night in or a small gathering. No more being stuck with stale cookies a week later.
- Simple Ingredients: You probably have most of these in your pantry right now. No weird extracts or hard-to-find spices. Just good, honest baking staples.
- Perfect for Hosting: If you’re hosting a dinner party or a fall get-together, these cookies are a showstopper. They look impressive on a platter, and the aroma alone will have your guests hovering near the kitchen.
- Crowd-Pleaser: I’ve served these to kids, adults, and even my picky neighbor who “doesn’t like pumpkin.” She asked for the recipe. That’s the kind of power we’re talking about.
- Unbelievably Soft: The pumpkin keeps these cookies incredibly tender. They have that perfect snickerdoodle chew, but with a moistness that makes them practically melt.
What makes this recipe different from all the other pumpkin snickerdoodles out there? It’s the balance. I spent a lot of time figuring out the right ratio of pumpkin to flour so the cookies aren’t cakey or gummy. They’re just right — soft, spiced, and with that signature crackly top. This isn’t just another version. It’s the version you’ll keep coming back to.
What Ingredients You Will Need
This recipe uses simple, wholesome ingredients to deliver bold flavor and satisfying texture without the fuss. Most are pantry staples, which makes this perfect for a spontaneous baking session.
- All-purpose flour, 1 ½ cups (180g) — The backbone of the cookie. I use King Arthur Flour for consistent results, but any brand works fine. Just spoon and level it — don’t scoop directly from the bag or you’ll pack in too much.
- Pumpkin puree, ⅓ cup (80g) — Not pumpkin pie filling! Make sure it’s 100% pure pumpkin. I prefer Libby’s for its smooth texture and consistent moisture content. Pat it with a paper towel if it looks watery — this helps prevent spreading.
- Unsalted butter, ½ cup (113g), softened — Bring it to room temperature. Cold butter won’t cream properly, and melted butter will change the texture. I like using Kerrygold for its rich flavor.
- Granulated sugar, ½ cup (100g) — For sweetness and that tender crumb. You can reduce it slightly if you prefer less sweet cookies, but don’t go below ⅓ cup.
- Brown sugar, ¼ cup (50g), packed — Adds moisture and a hint of molasses flavor. Light or dark both work; dark gives a deeper flavor.
- Egg yolk, 1 large — The yolk adds richness and helps bind the dough. Save the white for an omelet or freeze it for later.
- Vanilla extract, 1 teaspoon — Pure vanilla makes a difference here. I use Nielsen-Massey, but any pure extract will do. Avoid imitation if you can.
- Cream of tartar, 1 teaspoon — The secret to that classic snickerdoodle tang and chew. Don’t skip it — baking soda alone won’t give you the same texture.
- Baking soda, ½ teaspoon — Helps the cookies spread just the right amount and gives them a lift.
- Salt, ¼ teaspoon — Balances the sweetness and enhances all the flavors. I use fine sea salt.
- Pumpkin pie spice, 1 ½ teaspoons — You can use store-bought or make your own. I sometimes mix cinnamon, nutmeg, ginger, and cloves if I’m out of the pre-made blend.
- For the coating: ¼ cup (50g) granulated sugar mixed with 2 teaspoons ground cinnamon — This is what gives snickerdoodles their signature crackly, sparkly look.
Substitution note: If you need a dairy-free option, use vegan butter sticks (I like Miyoko’s). For a gluten-free version, swap the flour with a 1:1 gluten-free baking blend that contains xanthan gum. The texture will be slightly different but still delicious.
Equipment Needed
You don’t need a fancy kitchen to make these cookies. Here’s what I use:
- Mixing bowls — One medium and one large. I prefer glass or stainless steel, but anything works.
- Electric hand mixer or stand mixer — A hand mixer is fine. You can also do it by hand with a wooden spoon, but your arm will get a workout.
- Baking sheet — A standard half-sheet pan works perfectly. I’ve used cheap ones and expensive ones, and honestly, they all work. Just line it with parchment paper.
- Parchment paper — Non-negotiable. It prevents sticking and makes cleanup a breeze. Silpat mats also work great.
- Cookie scoop — A 1.5-tablespoon scoop gives you uniform cookies. If you don’t have one, use two spoons to portion the dough.
- Cooling rack — Helps the cookies cool evenly and prevents soggy bottoms. A wire rack from the dollar store works just fine.
- Measuring cups and spoons — For accuracy. I like metal measuring cups for dry ingredients and glass for liquids.
If you don’t have a mixer, you can cream the butter and sugars by hand. It takes a few extra minutes, but it’s totally doable. I’ve done it plenty of times when my mixer was buried in the back of the cabinet.
Preparation Method
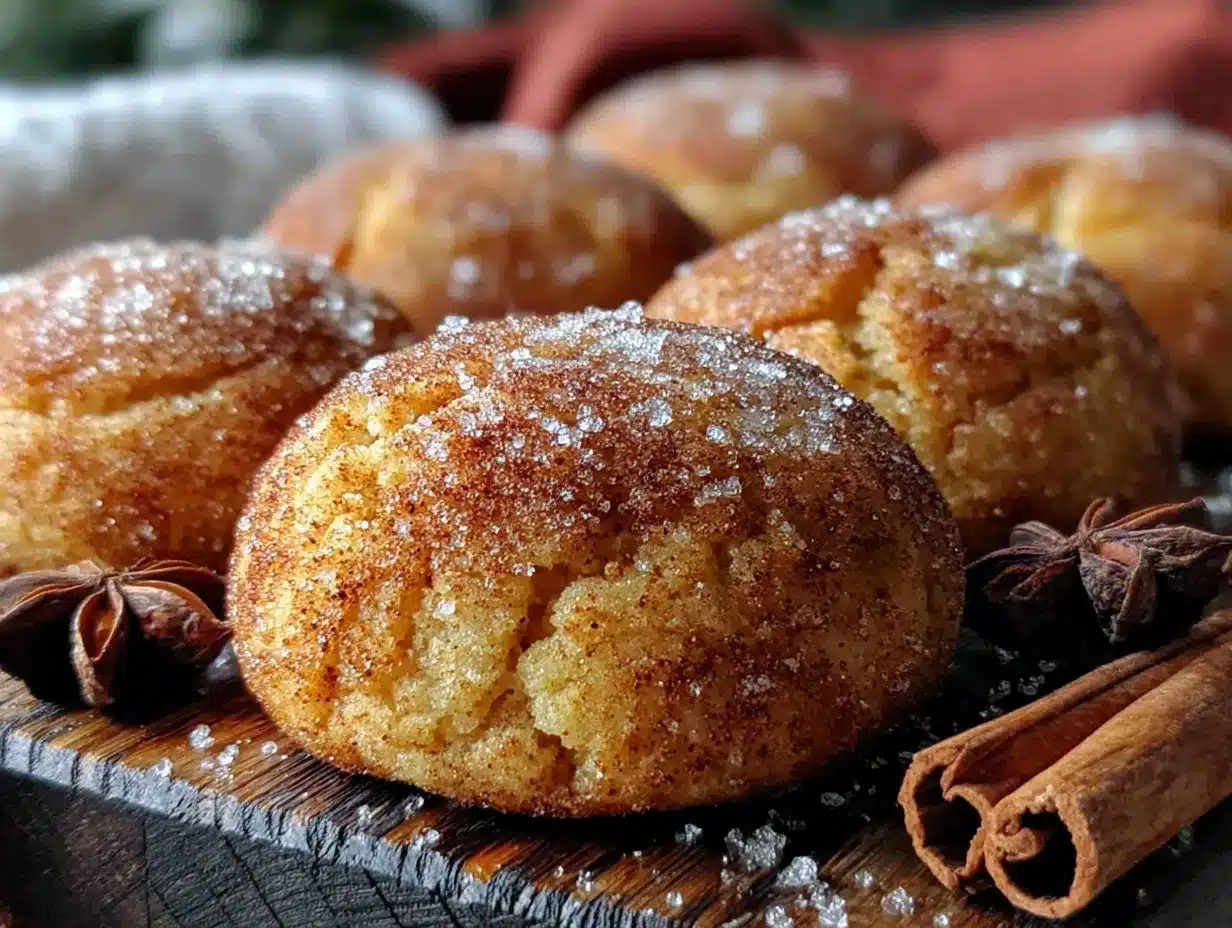
Let’s get baking! This process is straightforward, but I’ll walk you through every step so you get perfect cookies every time.
- Preheat your oven to 350°F (175°C). Line a baking sheet with parchment paper. This gives the cookies a non-stick surface and helps them bake evenly.
- In a medium bowl, whisk together the flour, cream of tartar, baking soda, salt, and pumpkin pie spice. Set this aside. Whisking ensures everything is evenly distributed — nobody wants a pocket of baking soda in their cookie.
- In a large bowl, beat the softened butter with an electric mixer on medium speed until smooth and creamy, about 1 minute. Scrape down the sides of the bowl with a spatula. This step is important because you want the butter to be light and fluffy.
- Add the granulated sugar and brown sugar, and beat on medium-high speed for 2-3 minutes until the mixture is light and fluffy. It should look pale and slightly increased in volume. Don’t rush this — proper creaming is what gives cookies their tender texture.
- Add the egg yolk and vanilla extract, and beat until combined, about 30 seconds. Scrape the bowl again. The mixture might look a little curdled at this point — that’s okay, especially if your pumpkin is cold.
- Add the pumpkin puree and beat on low speed until just combined. Don’t overmix here. The batter will look a bit wet and that’s exactly what we want. If it looks too loose, don’t panic — the flour will fix it.
- Gradually add the dry ingredients to the wet ingredients, mixing on low speed until just combined. Stop as soon as you don’t see any more streaks of flour. Overmixing develops gluten and makes cookies tough. I’ve made that mistake before, and trust me, it’s not worth it.
- Cover the bowl with plastic wrap and chill the dough for at least 30 minutes. This is crucial. Chilling solidifies the butter and prevents the cookies from spreading into flat pancakes. I’ve skipped this step when I was in a hurry, and the cookies spread so much they looked like lace. Not cute. You can chill the dough for up to 3 days if you want to prep ahead.
- While the dough chills, make the cinnamon-sugar coating. In a small bowl, mix the ¼ cup granulated sugar with 2 teaspoons ground cinnamon. Set aside.
- After chilling, scoop the dough into 1.5-tablespoon portions. I use a cookie scoop for uniform size. Roll each portion into a ball between your palms. The dough will be slightly sticky — that’s normal.
- Roll each dough ball in the cinnamon-sugar mixture until fully coated. Don’t be shy with the coating. This is what gives the cookies their beautiful crackly top and that burst of cinnamon flavor.
- Place the coated dough balls on the prepared baking sheet, spacing them about 2 inches apart. You should fit about 6 cookies per sheet. If you’re baking in batches, keep the remaining dough in the fridge.
- Bake for 10-12 minutes, or until the edges are set and the tops are slightly cracked. The centers will look soft and puffy — that’s perfect. They’ll continue to set as they cool. I usually check at the 10-minute mark and go from there.
- Let the cookies cool on the baking sheet for 5 minutes. This allows them to firm up without sticking. Then transfer them to a wire rack to cool completely. If you try to move them too soon, they’ll fall apart. I learned this the hard way with my first batch.
- Repeat with the remaining dough. If you’re baking multiple sheets, make sure the oven is fully preheated again between batches.
Cooking Tips & Techniques
I’ve made these cookies more times than I can count, and I’ve picked up a few tricks along the way. Here’s what I’ve learned:
Don’t skip the chilling step. I know it’s tempting to rush, but chilled dough is the difference between a perfect cookie and a flat mess. The pumpkin adds extra moisture, so the dough needs time to firm up. If you’re in a real hurry, you can pop the dough in the freezer for 15 minutes instead.
Pat the pumpkin puree. Pumpkin has a lot of water, which can make cookies spread. Before adding it to the batter, spread the puree on a paper towel and gently pat it dry. You’ll be surprised how much moisture comes out. This one trick made my cookies much thicker and softer.
Use a cookie scoop for even sizes. Uniform cookies bake evenly. If some are bigger than others, you’ll end up with underdone centers and burnt edges. A 1.5-tablespoon scoop is perfect for this recipe.
Watch the oven like a hawk. Every oven runs differently. My old apartment oven ran hot, and I burned two batches before I figured it out. Start checking at the 9-minute mark if your oven tends to run hot. The cookies are done when the edges are set and the tops look slightly cracked, even if the centers still look soft.
Let them cool on the sheet. I know it’s hard to wait, but those 5 minutes on the hot baking sheet are essential. The cookies continue to bake from the residual heat, and they firm up enough to be moved without breaking.
Variations & Adaptations
One of the best things about this recipe is how easy it is to adapt. Here are some variations I’ve tried and loved:
Spice It Up: Add ¼ teaspoon of ground ginger or cardamom to the dough for an extra layer of warmth. I did this for a holiday party and everyone raved about the “secret ingredient.”
Chocolate Lovers: Fold in ½ cup of white chocolate chips or dark chocolate chunks after mixing the dough. The sweetness of white chocolate pairs beautifully with the pumpkin spice. I made a batch with dark chocolate and it was dangerously good.
Gluten-Free Version: Use a 1:1 gluten-free baking blend that contains xanthan gum. I’ve tested this with Bob’s Red Mill 1:1 Baking Flour, and the texture was surprisingly close to the original. Just note that the dough might be a bit stickier, so chill it for an extra 15 minutes.
Dairy-Free Option: Swap the butter with vegan butter sticks. I’ve used Miyoko’s and it worked perfectly. The cookies spread a tiny bit more, but the flavor was spot on.
Pumpkin Spice Glaze: For an extra touch, drizzle the cooled cookies with a simple glaze made from ½ cup powdered sugar, 1 tablespoon milk, and ¼ teaspoon pumpkin pie spice. It makes them look bakery-worthy.
Serving & Storage Suggestions
These cookies are best served slightly warm, when the centers are still soft and the cinnamon-sugar coating is at its crackliest. If you’re hosting, arrange them on a wooden board or a pretty platter — they look beautiful with their golden-brown tops and sparkly coating. I like to serve them with a hot cup of coffee or a glass of cold milk. They also pair wonderfully with a scoop of vanilla ice cream for a simple dessert.
For storage, keep the cookies in an airtight container at room temperature. They’ll stay fresh for up to 5 days, though honestly, they never last that long in my house. If you want to keep them extra soft, add a slice of bread to the container — the cookies absorb the moisture and stay tender. Just replace the bread slice every day or two.
You can also freeze the baked cookies for up to 3 months. Place them in a single layer in a freezer-safe bag or container. To thaw, let them sit at room temperature for about 30 minutes. The texture will be almost as good as fresh.
For make-ahead hosting, you can prepare the dough up to 3 days in advance and keep it in the fridge. When your guests arrive, just scoop, roll, and bake. The aroma will fill your home and everyone will think you’ve been baking all day.
Nutritional Information & Benefits
Here’s the estimated nutritional breakdown per cookie (based on 12 cookies):
- Calories: 185
- Fat: 8g
- Carbohydrates: 27g
- Fiber: 1g
- Sugar: 16g
- Protein: 2g
Pumpkin is packed with vitamin A and fiber, which supports eye health and digestion. It also adds moisture without extra fat, which is a win in my book. The cinnamon in the coating has anti-inflammatory properties and may help regulate blood sugar. Of course, these are still cookies — they’re a treat, not a health food. But it’s nice to know there’s a little something good in every bite.
This recipe contains gluten, dairy, and eggs. For allergen-friendly options, check the variations section above.
Conclusion
These pumpkin snickerdoodles are more than just a cookie. They’re a little piece of fall that you can hold in your hand. They’re the smell of cinnamon and nutmeg drifting through your kitchen, the crackle of sugar coating on your tongue, and the warmth of sharing something homemade with the people you love.
I make these every time I need to feel close to my aunt Clara, and every time, they bring me right back to that tiny kitchen in Portland. I hope they bring you a little bit of that magic too. Whether you’re baking for a crowd or just for yourself on a quiet Tuesday, these cookies are worth every minute.
So go ahead — preheat that oven, dust your hands with cinnamon sugar, and make some memories. And when you do, I’d love to hear about it. Leave a comment below and tell me how they turned out, or share your own twist on the recipe. Happy baking!
Frequently Asked Questions
Can I use pumpkin pie filling instead of pumpkin puree?
No, please don’t. Pumpkin pie filling is pre-sweetened and spiced, which will throw off the sugar and spice balance in this recipe. Stick with 100% pure pumpkin puree for the best results.
Why did my cookies spread too much?
This usually happens for one of three reasons: the dough wasn’t chilled long enough, the butter was too soft, or the pumpkin puree wasn’t patted dry. Make sure to chill the dough for at least 30 minutes and pat the pumpkin dry before adding it.
Can I double this recipe?
Absolutely! This recipe doubles beautifully. Just make sure you have enough baking sheets to work in batches, and keep the extra dough chilled while the first batch bakes.
How do I know when the cookies are done?
The edges should be set and slightly golden, and the tops should look cracked but still soft in the center. They’ll continue to set as they cool on the baking sheet. If you overbake them, they’ll be dry, so err on the side of underdone.
Can I freeze the dough instead of baking all the cookies?
Yes! Scoop the dough into balls, roll them in the cinnamon-sugar coating, and place them on a baking sheet in the freezer. Once frozen solid, transfer them to a freezer bag. You can bake them straight from frozen — just add 2-3 minutes to the baking time.
Pin This Recipe!
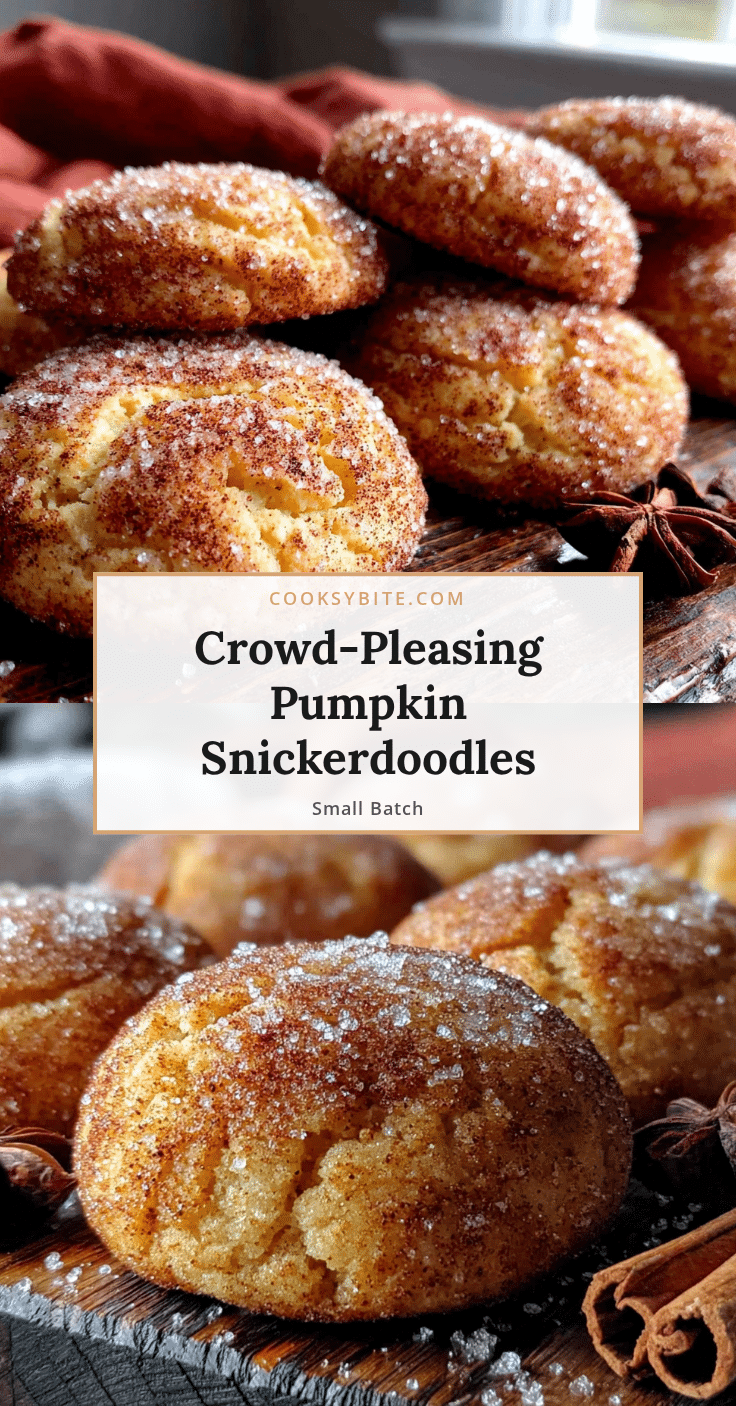
Small Batch Pumpkin Snickerdoodles: Easy Fall Cookie Recipe
These soft, chewy pumpkin snickerdoodles are a small batch recipe perfect for cozy fall nights. Rolled in cinnamon sugar, they deliver nostalgic flavor with a crackly top and tender crumb.
- Prep Time: 15 minutes
- Cook Time: 12 minutes
- Total Time: 57 minutes
- Yield: 12 cookies 1x
- Category: Dessert
- Cuisine: American
Ingredients
- 1 ½ cups (180g) all-purpose flour
- ⅓ cup (80g) pumpkin puree (not pumpkin pie filling)
- ½ cup (113g) unsalted butter, softened
- ½ cup (100g) granulated sugar
- ¼ cup (50g) brown sugar, packed
- 1 large egg yolk
- 1 teaspoon vanilla extract
- 1 teaspoon cream of tartar
- ½ teaspoon baking soda
- ¼ teaspoon salt
- 1 ½ teaspoons pumpkin pie spice
- For the coating: ¼ cup (50g) granulated sugar mixed with 2 teaspoons ground cinnamon
Instructions
- Preheat your oven to 350°F (175°C). Line a baking sheet with parchment paper.
- In a medium bowl, whisk together the flour, cream of tartar, baking soda, salt, and pumpkin pie spice. Set aside.
- In a large bowl, beat the softened butter with an electric mixer on medium speed until smooth and creamy, about 1 minute.
- Add the granulated sugar and brown sugar, and beat on medium-high speed for 2-3 minutes until the mixture is light and fluffy.
- Add the egg yolk and vanilla extract, and beat until combined, about 30 seconds. Scrape the bowl.
- Add the pumpkin puree and beat on low speed until just combined.
- Gradually add the dry ingredients to the wet ingredients, mixing on low speed until just combined.
- Cover the bowl with plastic wrap and chill the dough for at least 30 minutes.
- While the dough chills, make the cinnamon-sugar coating: in a small bowl, mix ¼ cup granulated sugar with 2 teaspoons ground cinnamon.
- After chilling, scoop the dough into 1.5-tablespoon portions. Roll each portion into a ball.
- Roll each dough ball in the cinnamon-sugar mixture until fully coated.
- Place the coated dough balls on the prepared baking sheet, spacing them about 2 inches apart.
- Bake for 10-12 minutes, or until the edges are set and the tops are slightly cracked.
- Let the cookies cool on the baking sheet for 5 minutes, then transfer to a wire rack to cool completely.
- Repeat with the remaining dough.
Notes
Chill the dough for at least 30 minutes to prevent spreading. Pat pumpkin puree dry with a paper towel to remove excess moisture. For best results, use a cookie scoop for uniform size. Cookies can be stored in an airtight container at room temperature for up to 5 days. Freeze baked cookies for up to 3 months.
Nutrition
- Serving Size: 1 cookie
- Calories: 185
- Sugar: 16
- Fat: 8
- Carbohydrates: 27
- Fiber: 1
- Protein: 2
Keywords: pumpkin snickerdoodles, small batch cookies, fall cookies, pumpkin cookies, snickerdoodle recipe, easy cookie recipe


