My husband claimed he hated pumpkin desserts for twelve years. Twelve years of polite smiles at Thanksgiving pie, of pushing pumpkin bread around his plate, of saying “I’m just not a pumpkin guy” with the same finality some people reserve for cilantro or black licorice. Then last October, I made these bars “just for the blog” on a rainy Tuesday when the power flickered twice and the whole house smelled like cinnamon. I turned around from the sink and caught him—hand halfway to the pan, crumbs on his chin, trying to look innocent. “These aren’t pumpkin,” he said, mouth still full. “These are cake.” And honestly? That moment sums up everything I love about this recipe.
These cozy pumpkin bars with cream cheese frosting aren’t trying to be a pumpkin spice latte in bar form. They’re not overly spiced, not heavy, not that dense thing that makes you wonder if you’re eating a vegetable masquerading as dessert. They’re soft, almost pillowy, with a crumb that feels like it was made for autumn afternoons. The cream cheese frosting is tangy enough to cut through the sweetness—I mean, really tangy, the way my grandmother’s frosting was, with that tiny pinch of salt that makes you take another bite just to figure out what’s different.
Maybe you’ve been there—the person in your house who “doesn’t do pumpkin,” or maybe you’re the one who’s been burned by dry, flavorless pumpkin bars one too many times. I get it. I was skeptical of pumpkin baked goods for years too, until I figured out the ratio that actually works. These bars changed my mind, and honestly, they might change yours too. Or at least they’ll catch someone you love sneaking a piece when they think nobody’s watching.
Why You’ll Love This Recipe
Let me tell you why these pumpkin bars have become my most-requested fall recipe, even from people who swear they don’t like pumpkin.
- Quick & Easy: From start to finish, these come together in about 45 minutes. No stand mixer required, no complicated techniques. Just one bowl, a whisk, and a spatula.
- Simple Ingredients: You probably have everything in your pantry right now. Canned pumpkin, basic flour, sugar, eggs, and butter. No weird extracts or hard-to-find spices.
- Perfect for Fall Gatherings: These bars are made for tailgates, Thanksgiving potlucks, cozy book club meetings, or just a Tuesday when the leaves are changing and you need something warm.
- Crowd-Pleaser: I’ve served these to kids, grandparents, and that one friend who’s a professional baker. They disappear every single time.
- Unbelievably Delicious: The texture is what gets people. Not too dense, not too fluffy—that perfect in-between that makes you close your eyes after the first bite.
What makes this recipe different from all the other pumpkin bars out there? Two things. First, I use a bit of brown sugar alongside the granulated, which adds moisture and a subtle molasses depth that plays beautifully with the pumpkin. Second, I whip the cream cheese frosting until it’s light and airy, not that stiff, sugary paste that cracks when you spread it. The result is a bar that tastes like it came from a bakery, but takes about the same effort as boxed brownies.
This isn’t just another pumpkin bar recipe. It’s the one that makes people say “wait, can I have the recipe?” before they’ve even finished their first piece. It’s comfort food that feels like a warm sweater on a cold day—familiar, easy, and exactly what you need.
What Ingredients You Will Need
This recipe uses simple, pantry-friendly ingredients to create something that tastes far more complicated than it is. Here’s what you’ll need, along with a few notes from my years of testing.
For the Pumpkin Bars
- 1 ¾ cups all-purpose flour (spooned and leveled—don’t scoop directly from the bag or you’ll end up with dry bars)
- 1 ½ teaspoons baking powder (make sure it’s fresh; I test mine every few months by dropping a bit in hot water—if it fizzes, it’s good)
- 1 teaspoon baking soda
- 2 teaspoons ground cinnamon (I prefer Saigon cinnamon for its warmth, but any works)
- ½ teaspoon ground nutmeg (freshly grated if you have it, but pre-ground is fine)
- ½ teaspoon ground ginger (adds that little warmth without being spicy)
- ½ teaspoon salt
- 1 cup granulated sugar
- ½ cup packed light brown sugar (dark brown works too, for a deeper molasses flavor)
- ½ cup vegetable oil (or melted coconut oil; I’ve used both and they work equally well)
- 3 large eggs, at room temperature (cold eggs can make the batter seize up)
- 1 can (15 oz) pumpkin puree (not pumpkin pie filling—check the label; you want 100% pumpkin)
- 1 teaspoon vanilla extract
For the Cream Cheese Frosting
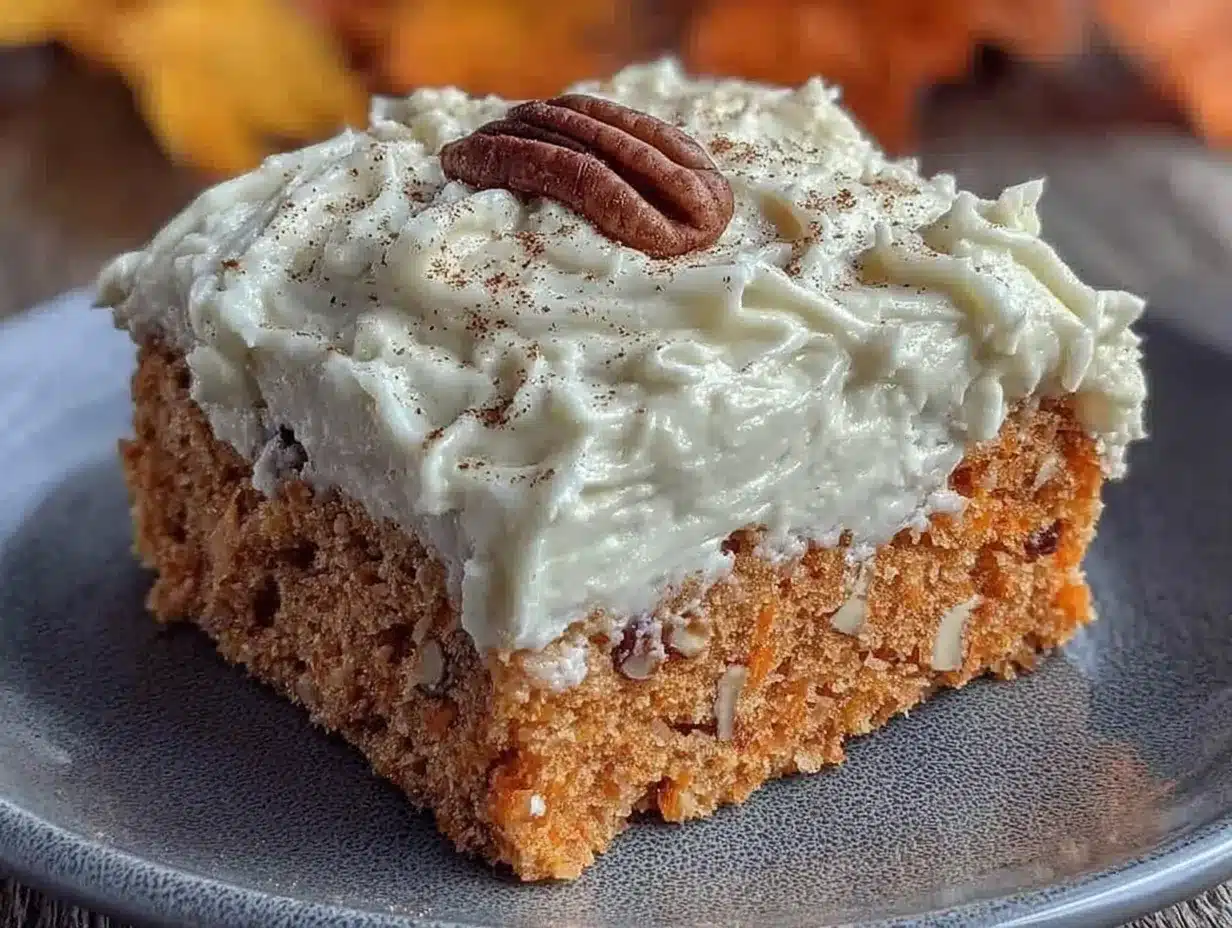
- 8 oz cream cheese, softened (full-fat is best for texture; low-fat can make the frosting runny)
- ½ cup unsalted butter, softened (salted butter works if you reduce the added salt)
- 3 cups powdered sugar, sifted (sifting prevents lumps—I know it’s annoying, but it matters)
- 1 teaspoon vanilla extract
- Pinch of salt (trust me on this—it balances the sweetness)
Ingredient Tips: For the pumpkin, I recommend Libby’s or store-brand 100% pumpkin—just avoid anything labeled “pumpkin pie mix” which has sugar and spices already added. For the cream cheese, Philadelphia is my go-to because it’s consistently creamy, but any block-style cream cheese works. Avoid the spreadable tub kind; it has too much water and your frosting will be thin.
Substitution Guidance: If you’re out of brown sugar, use all granulated and add 1 tablespoon of molasses. For a dairy-free version, use plant-based butter and vegan cream cheese—just note the texture will be slightly softer. Gluten-free? Swap the all-purpose flour with a 1:1 gluten-free baking blend; I’ve had good results with King Arthur’s measure-for-measure blend.
Equipment Needed
You don’t need fancy equipment for these bars, which is part of why I love them. Here’s what you’ll need:
- 9×13-inch baking pan (metal or glass both work; glass may need a few extra minutes of baking time)
- Parchment paper (for easy lifting—I learned this the hard way after a stuck-bar disaster)
- Large mixing bowl (any bowl works, but a wide one makes whisking easier)
- Medium mixing bowl (for the dry ingredients)
- Whisk (for combining dry ingredients and smoothing the batter)
- Rubber spatula (for scraping every bit of batter into the pan)
- Electric hand mixer or stand mixer (for the frosting; you can do it by hand, but your arm will be tired)
- Cooling rack (wire rack is best for even cooling)
- Offset spatula (for spreading the frosting—not required, but makes it look professional)
Budget-Friendly Tip: If you don’t have an electric mixer, you can make the frosting by hand with a wooden spoon and some elbow grease. Just make sure your cream cheese and butter are very soft. I’ve done it during power outages and it works—it just takes a few extra minutes.
Personal Note: I bought my first offset spatula for three dollars at a restaurant supply store, and it’s one of my most-used tools. If you bake often, it’s worth the investment. For this recipe, a butter knife works in a pinch—I’ve done it more times than I’d like to admit.
Preparation Method
Let’s make these pumpkin bars. I’ve broken it down step by step, with all the little details I wish someone had told me when I first started baking.
Step 1: Preheat and Prep
Preheat your oven to 350°F (175°C). Line your 9×13-inch baking pan with parchment paper, leaving a bit of overhang on the long sides—this creates “handles” for lifting the bars out later. Lightly grease the parchment with cooking spray or butter. I forgot to do this once and spent twenty minutes chipping bar bits out of the pan. Learn from my mistake.
Step 2: Mix Dry Ingredients
In a medium bowl, whisk together the flour, baking powder, baking soda, cinnamon, nutmeg, ginger, and salt. Whisk for about 15 seconds to aerate and distribute everything evenly. Set aside.
Step 3: Mix Wet Ingredients
In a large bowl, whisk together the granulated sugar, brown sugar, and vegetable oil until smooth. Add the eggs one at a time, whisking well after each. The mixture should look thick and glossy. Add the pumpkin puree and vanilla extract, and whisk until fully combined. Don’t worry if it looks a bit separated—that’s normal.
Step 4: Combine Wet and Dry
Pour the dry ingredients into the wet mixture. Use a rubber spatula to fold everything together gently. Stop mixing as soon as you no longer see streaks of flour—overmixing will make the bars tough. A few small lumps are fine. The batter will be thick and smell amazing, like autumn in a bowl.
Step 5: Bake
Pour the batter into the prepared pan and spread it evenly with your spatula. Bake for 22-28 minutes, or until a toothpick inserted in the center comes out clean or with just a few moist crumbs. The edges should be pulling away from the pan slightly. My oven runs hot, so I check at 22 minutes. Every oven is different—start checking early.
Step 6: Cool Completely
Let the bars cool in the pan on a wire rack for about 15 minutes. Then use the parchment handles to lift them out and transfer to the rack to cool completely. This is crucial—if you frost them while they’re still warm, the frosting will melt into a sad, runny mess. I learned this the hard way before a party. Patience, my friend.
Step 7: Make the Frosting
While the bars cool, make the frosting. In a large bowl, beat the softened cream cheese and butter together with an electric mixer on medium speed until smooth and creamy, about 2 minutes. Add the vanilla and salt, and beat again. Gradually add the powdered sugar, about ½ cup at a time, beating on low speed until incorporated. Once all the sugar is in, increase speed to medium-high and beat for 2-3 minutes until light and fluffy. Scrape down the sides as needed.
Step 8: Frost and Serve
Once the bars are completely cool, spread the frosting evenly over the top. Use an offset spatula or butter knife to create swoops and swirls if you’re feeling fancy. Cut into squares—I usually get 12-16 bars depending on how hungry I am. Serve immediately or refrigerate until ready.
Cooking Tips & Techniques
After making these pumpkin bars more times than I can count, I’ve collected a few tricks that make a real difference. Here’s what I’ve learned, including the mistakes that taught me.
Don’t Overmix the Batter. This is the number one mistake I see. When you combine wet and dry ingredients, mix just until the flour disappears. Overmixing develops gluten, which makes bars tough and dense instead of tender and soft. I once got distracted by my phone and overmixed a batch—they came out like hockey pucks. Never again.
Room Temperature Ingredients Matter. For the bars, room temperature eggs blend more evenly into the batter. For the frosting, room temperature cream cheese and butter are non-negotiable. Cold cream cheese creates lumpy frosting no matter how long you beat it. Take them out of the fridge about 30 minutes before you start.
Check Your Pumpkin. Canned pumpkin can vary in water content. If your batter looks very thin after adding the pumpkin, add an extra tablespoon of flour. If it looks thick and scoopable, you’re golden. I’ve had one brand that was noticeably wetter than others—always trust your eyes over the recipe.
Use Parchment Paper. I cannot stress this enough. Parchment paper with overhang makes lifting the bars out effortless. No scraping, no broken bars, no tears. It’s worth the thirty seconds it takes to cut and fit the paper.
Let the Bars Cool Fully. I know it’s tempting to rush this step, especially when your kitchen smells incredible. But warm bars + cold frosting = melted disaster. I once frosted bars that were still slightly warm, and the frosting slid right off the edges like a bad toupee. Give them a full hour on the cooling rack.
Timing Strategy: Make the bars in the morning or the day before, let them cool, and frost them just before serving. The bars actually taste better the next day—the flavors meld and deepen overnight. I often bake them on a Friday evening, frost them Saturday morning, and they’re perfect for a weekend gathering.
Variations & Adaptations
One of the best things about this recipe is how adaptable it is. Here are some variations I’ve tried and loved.
Gluten-Free Version: Substitute the all-purpose flour with a 1:1 gluten-free baking blend. I’ve used King Arthur’s measure-for-measure blend with great results. Add an extra tablespoon of milk or water to the batter if it seems too thick—gluten-free flours absorb moisture differently.
Dairy-Free Version: Use plant-based butter and vegan cream cheese for the frosting. Miyoko’s and Violife both make excellent cream cheese alternatives. The texture will be slightly softer, so refrigerate the frosted bars for 20 minutes before serving for cleaner slices.
Spice It Up: Add ¼ teaspoon of cloves or allspice for a warmer, more complex spice profile. I sometimes add a pinch of cardamom, which gives the bars a slightly floral note that pairs beautifully with the pumpkin.
Add Mix-Ins: Fold in ½ cup of chopped pecans, walnuts, or chocolate chips into the batter before baking. White chocolate chips are especially good here—the sweetness plays off the tangy cream cheese frosting perfectly.
Pumpkin Streusel Topping: Instead of cream cheese frosting, make a streusel by mixing ½ cup flour, ¼ cup brown sugar, ¼ cup cold butter, and ½ teaspoon cinnamon. Sprinkle over the batter before baking. It creates a crunchy, buttery top that’s completely different but equally delicious.
Personal Favorite Variation: I once made these with a swirl of salted caramel sauce mixed into the batter before baking. Drizzled extra caramel over the frosting. It was absurdly good—the kind of dessert that makes people close their eyes and make weird noises. Highly recommend if you’re feeling extra.
Serving & Storage Suggestions
These pumpkin bars are versatile enough for any occasion. Here’s how to serve and store them for the best results.
Serving Temperature: I prefer these bars cold from the refrigerator—the frosting firms up and the texture becomes almost fudge-like. But they’re also excellent at room temperature, especially if you’re serving them at a potluck or picnic. If you want warm bars, microwave individual pieces for 10-15 seconds. The frosting will soften but won’t melt completely.
Presentation Ideas: Cut the bars into clean squares using a sharp knife (wipe the blade between cuts for the neatest edges). Dust with a little cinnamon or nutmeg before serving. For a pretty touch, add a few small leaves of fresh mint or a light drizzle of caramel sauce. They look beautiful on a simple white plate or a rustic wooden board.
What to Serve With Them: A cup of hot coffee or spiced chai is the perfect companion. For a dessert spread, pair them with vanilla ice cream or a dollop of whipped cream. They also go surprisingly well with a glass of cold milk—I mean, it’s basically a pumpkin bar and milk, which is peak childhood comfort.
Storage Instructions: Store the frosted bars in an airtight container in the refrigerator for up to 5 days. The bars themselves freeze beautifully—freeze them unfrosted, wrapped tightly in plastic wrap and foil, for up to 3 months. Thaw overnight in the refrigerator, then frost and serve. I often make a double batch and freeze one for later. It’s like finding money in your winter coat.
Reheating Tips: If you’ve stored them in the fridge, let them sit at room temperature for 15-20 minutes before serving for the best texture. For a warm treat, microwave a single bar for 10-12 seconds. Don’t overdo it, or the frosting will get melty.
Flavor Development: These bars actually taste better on day two. The spices meld with the pumpkin, and the texture becomes more tender. So don’t stress if you’re making them ahead—they’re designed to improve with time.
Nutritional Information & Benefits
These pumpkin bars are a treat, but they also have some redeeming qualities. Here’s what you should know.
Estimated Nutrition (per bar, based on 16 servings):
- Calories: 310
- Fat: 16g
- Carbohydrates: 40g
- Fiber: 2g
- Sugar: 28g
- Protein: 4g
- Vitamin A: 80% of daily value
Health Benefits: Pumpkin is packed with vitamin A, which supports eye health and immune function. It’s also a good source of fiber and antioxidants. The cinnamon and ginger in this recipe have anti-inflammatory properties. So while these aren’t health food, they’re not empty calories either—they have some genuine nutritional value.
Dietary Considerations: This recipe can be made gluten-free and dairy-free with simple substitutions (see variations section). It contains eggs, dairy, and gluten in its standard form. The bars are nut-free unless you add nuts as a mix-in.
Personal Wellness Perspective: I believe in balance. These bars are a celebration of fall, of cozy moments, of sharing food with people you love. They’re not meant to be everyday fuel—they’re meant to be enjoyed when the leaves change and the air gets crisp. One bar with a cup of coffee, a good book, and a warm blanket? That’s self-care, my friend.
Conclusion
These cozy pumpkin bars with cream cheese frosting are more than just a recipe—they’re the kind of dessert that creates moments. The kind where someone who swore they hated pumpkin gets caught sneaking a second piece. The kind that makes a rainy Tuesday feel like a celebration. The kind that becomes a tradition, requested year after year.
What I love most about this recipe is how forgiving it is. You don’t need to be a professional baker to nail it. You just need a can of pumpkin, some basic ingredients, and a willingness to let your kitchen smell like autumn. The bars will do the rest—they’ll turn out soft, flavorful, and covered in that tangy, creamy frosting that makes everything better.
So go ahead and make these. Customize them with your favorite mix-ins, serve them however you like, and don’t be surprised if they disappear faster than you expected. And if you try them, I’d love to hear about it. Drop a comment below, share a photo, or tell me how you made them your own. Because that’s the best part of cooking—making something your own and sharing it with the people you care about.
Happy baking, and here’s to finding your new favorite fall tradition.
Frequently Asked Questions
Can I use fresh pumpkin instead of canned?
Yes, but you’ll need to roast and puree it first. Fresh pumpkin has more water than canned, so you’ll need to drain the puree through a cheesecloth or fine-mesh strainer for about 30 minutes before using. Otherwise, your bars might turn out soggy. Canned pumpkin is actually more consistent and reliable for baking, which is why most recipes call for it.
Why did my pumpkin bars turn out dense?
This usually happens from overmixing the batter. Once you add the flour, mix only until it disappears—a few lumps are fine. Overmixing develops gluten, which makes bars tough. Another culprit could be too much pumpkin or not enough leavening agent. Check that your baking powder and baking soda are fresh.
Can I make these pumpkin bars without cream cheese frosting?
Absolutely. The bars are delicious on their own, dusted with powdered sugar, or topped with a simple glaze made from powdered sugar and milk. You could also skip the frosting entirely and serve them with a scoop of vanilla ice cream or a drizzle of caramel sauce. They’re versatile like that.
How do I get clean, neat slices?
Use a sharp knife and wipe it clean between each cut. For the cleanest slices, chill the frosted bars in the refrigerator for at least 30 minutes before cutting. This firms up the frosting and makes the bars easier to slice without smearing. A long, thin-bladed knife works best.
Can I freeze these pumpkin bars?
Yes! Freeze the unfrosted bars wrapped tightly in plastic wrap and then foil for up to 3 months. Thaw overnight in the refrigerator, then frost and serve. You can also freeze the frosted bars, but the texture of the frosting may change slightly after thawing. If you do freeze them frosted, place them in a single layer in an airtight container with parchment between layers.
Pin This Recipe!
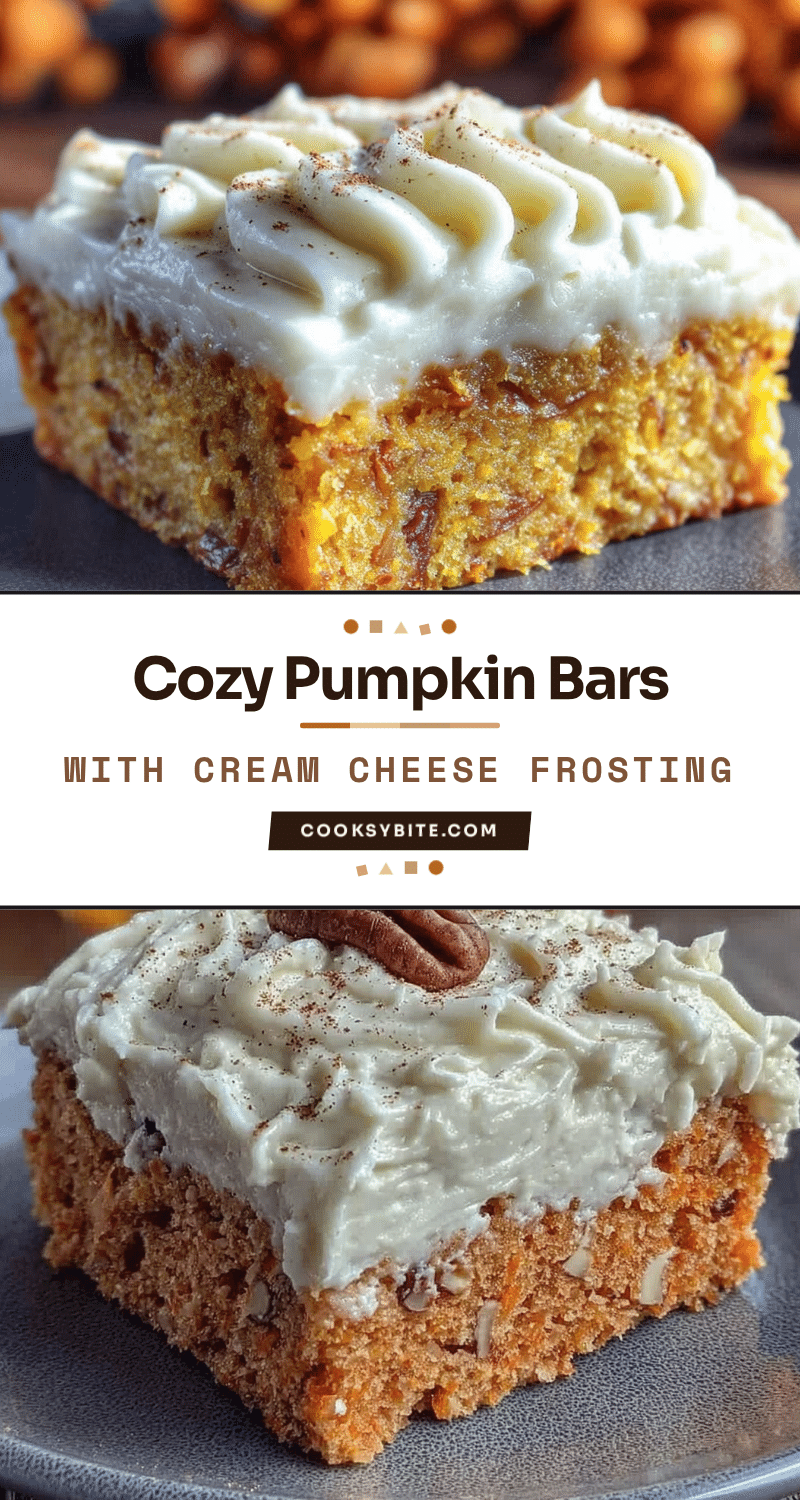
Easy Pumpkin Bars with Cream Cheese Frosting
Soft, pillowy pumpkin bars with tangy cream cheese frosting that even pumpkin skeptics will love. Made with simple pantry ingredients, these bars come together in about 45 minutes and are perfect for fall gatherings.
- Prep Time: 15 minutes
- Cook Time: 25 minutes
- Total Time: 45 minutes
- Yield: 16 servings 1x
- Category: Dessert
- Cuisine: American
Ingredients
- 1 ¾ cups all-purpose flour (spooned and leveled)
- 1 ½ teaspoons baking powder
- 1 teaspoon baking soda
- 2 teaspoons ground cinnamon (preferably Saigon cinnamon)
- ½ teaspoon ground nutmeg
- ½ teaspoon ground ginger
- ½ teaspoon salt
- 1 cup granulated sugar
- ½ cup packed light brown sugar (dark brown works too)
- ½ cup vegetable oil (or melted coconut oil)
- 3 large eggs, at room temperature
- 1 can (15 oz) pumpkin puree (not pumpkin pie filling)
- 1 teaspoon vanilla extract
- 8 oz cream cheese, softened (full-fat recommended)
- ½ cup unsalted butter, softened
- 3 cups powdered sugar, sifted
- 1 teaspoon vanilla extract
- Pinch of salt
Instructions
- Preheat oven to 350°F (175°C). Line a 9×13-inch baking pan with parchment paper, leaving overhang on the long sides. Lightly grease the parchment with cooking spray or butter.
- In a medium bowl, whisk together flour, baking powder, baking soda, cinnamon, nutmeg, ginger, and salt for about 15 seconds. Set aside.
- In a large bowl, whisk together granulated sugar, brown sugar, and vegetable oil until smooth. Add eggs one at a time, whisking well after each. Add pumpkin puree and vanilla extract, whisk until fully combined.
- Pour dry ingredients into wet mixture. Fold gently with a rubber spatula until just combined (a few lumps are fine). Do not overmix.
- Pour batter into prepared pan and spread evenly. Bake for 22-28 minutes, until a toothpick inserted in center comes out clean or with a few moist crumbs. Cool in pan on wire rack for 15 minutes, then lift out using parchment handles and cool completely.
- For frosting: In a large bowl, beat softened cream cheese and butter with electric mixer on medium speed until smooth and creamy, about 2 minutes. Add vanilla and salt, beat again. Gradually add powdered sugar, ½ cup at a time, beating on low. Increase speed to medium-high and beat 2-3 minutes until light and fluffy.
- Once bars are completely cool, spread frosting evenly over top. Cut into squares (12-16 bars). Serve immediately or refrigerate until ready.
Notes
Don’t overmix the batter to avoid dense bars. Use room temperature ingredients for best results. Let bars cool completely before frosting to prevent melting. Bars taste even better the next day as flavors meld. For gluten-free, use a 1:1 gluten-free baking blend. For dairy-free, use plant-based butter and vegan cream cheese.
Nutrition
- Serving Size: 1 bar
- Calories: 310
- Sugar: 28
- Sodium: 220
- Fat: 16
- Saturated Fat: 8
- Carbohydrates: 40
- Fiber: 2
- Protein: 4
Keywords: pumpkin bars, cream cheese frosting, fall dessert, easy pumpkin recipe, pumpkin bars with cream cheese frosting, autumn baking


