I was standing in the middle of the bulk foods aisle at my local grocery store last Tuesday, staring at a bin of raw pumpkin seeds, when the smell hit me. Not from the store, but from my memory — that warm, sweet, slightly toasty scent of cinnamon sugar baking in a small kitchen, the kind that clings to your clothes and follows you around all day. And just like that, I was eight years old again, sitting on the counter at my Aunt Lena’s place, watching her pull a sheet pan of these incredible, crackly pumpkin seeds out of the oven. She’d toss them in a bowl with a wink, and they’d disappear before they even had a chance to cool. I haven’t thought about those afternoons in years. But standing there with a plastic bag in my hand, I felt this sudden, urgent need to bring that feeling back. So I grabbed a bag of seeds and went home to figure it out. Honestly, I burned the first batch. The sugar crystallized into a sticky, blackened mess. The second batch was better, but they were chewy, not crispy. By the third try, I had it. That perfect, light, shatteringly crisp shell with a sweet, buttery cinnamon coating that Aunt Lena used to make. This is that recipe. It’s not just a snack; it’s a little time machine. And if you’ve ever had that feeling — where you’re craving a specific taste from a specific moment — you know exactly what I’m talking about. Let me show you how to make it in just 20 minutes.
Why You’ll Love This Recipe
After testing this recipe about five times in one weekend (my neighbors thought I was running a pumpkin seed factory), I can tell you with total confidence that this is the one. It’s light, it’s crispy, and it has that perfect sweet-salty thing going on that makes it impossible to stop eating.
- Quick & Easy: From start to finish, this takes about 20 minutes. No long roasting times, no complicated steps. Perfect for when that snack craving hits out of nowhere.
- Simple Ingredients: You probably already have everything in your pantry. Pumpkin seeds, butter, cinnamon, sugar, salt. That’s it. No weird specialty items that you’ll use once.
- Perfect for Fall (and All Year): Obviously this is incredible after carving pumpkins, but I make these all year round with raw pepitas from the store. They’re great for lunchboxes, hiking snacks, or movie nights.
- Crowd-Pleaser: I brought a bowl to a potluck last month, and they were gone in ten minutes. People kept asking for the recipe. Even my picky nephew, who “doesn’t like seeds,” ate a handful.
- Unbelievably Delicious: The texture is what gets you. They’re not heavy or greasy. They’re light and airy, with this thin, crunchy shell of cinnamon sugar that shatters when you bite down. It’s next-level snack territory.
What makes this version different from all the others? It’s the technique. Most recipes have you roast the seeds low and slow, which makes them tough and chewy. I use a quick blanch, a hot pan, and a fast toss in butter and sugar. The result is a seed that’s cooked through but still delicate, with a glossy, crackly coating that doesn’t feel heavy. It’s the kind of snack that makes you close your eyes after the first bite. Trust me on this one.
What Ingredients You Will Need
This recipe uses simple, wholesome ingredients that come together to create something genuinely special. The magic is in the technique, not the shopping list. Here’s what you’ll need, along with a few notes from my testing sessions.
- 1 cup raw pumpkin seeds (pepitas): You can use seeds straight from a pumpkin, but make sure you wash them thoroughly to remove all the stringy pulp. I actually prefer store-bought raw pepitas for consistency. They’re already clean and uniform in size. Look for seeds that are a pale green color inside — that means they’re fresh. I usually buy the Go Raw brand, but any raw, unsalted variety works.
- 2 tablespoons unsalted butter, melted: Butter adds richness and helps the cinnamon sugar stick. I use unsalted so I can control the salt level. If you only have salted butter, just reduce the added salt by a pinch. For a dairy-free version, coconut oil works surprisingly well — it adds a subtle tropical note that plays nicely with the cinnamon.
- 2 tablespoons granulated sugar: White sugar gives the best crunch. Brown sugar will work, but it tends to make the seeds a little stickier and less crisp. If you’re using brown sugar, watch the pan closely because it burns faster.
- 1 teaspoon ground cinnamon: This is the star of the show. Use a good quality cinnamon — I prefer Ceylon cinnamon for its milder, sweeter flavor. Cassia cinnamon is more common and works fine, but it has a stronger, spicier kick. Both are delicious, just different.
- ¼ teaspoon fine sea salt: Salt balances the sweetness and makes the cinnamon flavor pop. Don’t skip it. Even if you’re watching your sodium, a little salt is essential here.
- Pinch of nutmeg (optional): I add this about half the time. It’s not traditional, but it adds a warm, cozy depth that reminds me of pumpkin pie. Totally optional, but highly recommended.
Ingredient Selection Tip: If you’re using fresh pumpkin seeds, there’s a trick. After washing them, spread them on a kitchen towel and pat them dry, then let them sit out for an hour. The drier they are before cooking, the crispier they’ll get. Wet seeds steam instead of roast, and nobody wants soggy seeds.
Equipment Needed
You don’t need a fancy kitchen for this recipe. I’ve made these in my tiny apartment kitchen with the bare minimum, and they turned out perfect. Here’s what you’ll need:
- Small saucepan for toasting the seeds. A non-stick pan works best because the sugar can stick to stainless steel. If you only have stainless steel, just keep the seeds moving constantly.
- Baking sheet lined with parchment paper or a silicone baking mat. The parchment is important — the seeds will stick to an unlined pan as they cool.
- Wooden spoon or silicone spatula for stirring. Metal utensils can scratch non-stick pans.
- Measuring cups and spoons for accuracy. Baking is science, even for a simple snack.
- Fine-mesh strainer if you’re using fresh pumpkin seeds (for rinsing and draining).
- Kitchen towel for drying the seeds thoroughly.
Budget-friendly tip: If you don’t have a silicone baking mat, parchment paper is cheap and works perfectly. Also, you can absolutely use a regular frying pan if you don’t have a saucepan. I’ve done it many times. The key is just having a flat surface where the seeds can toast evenly.
Preparation Method
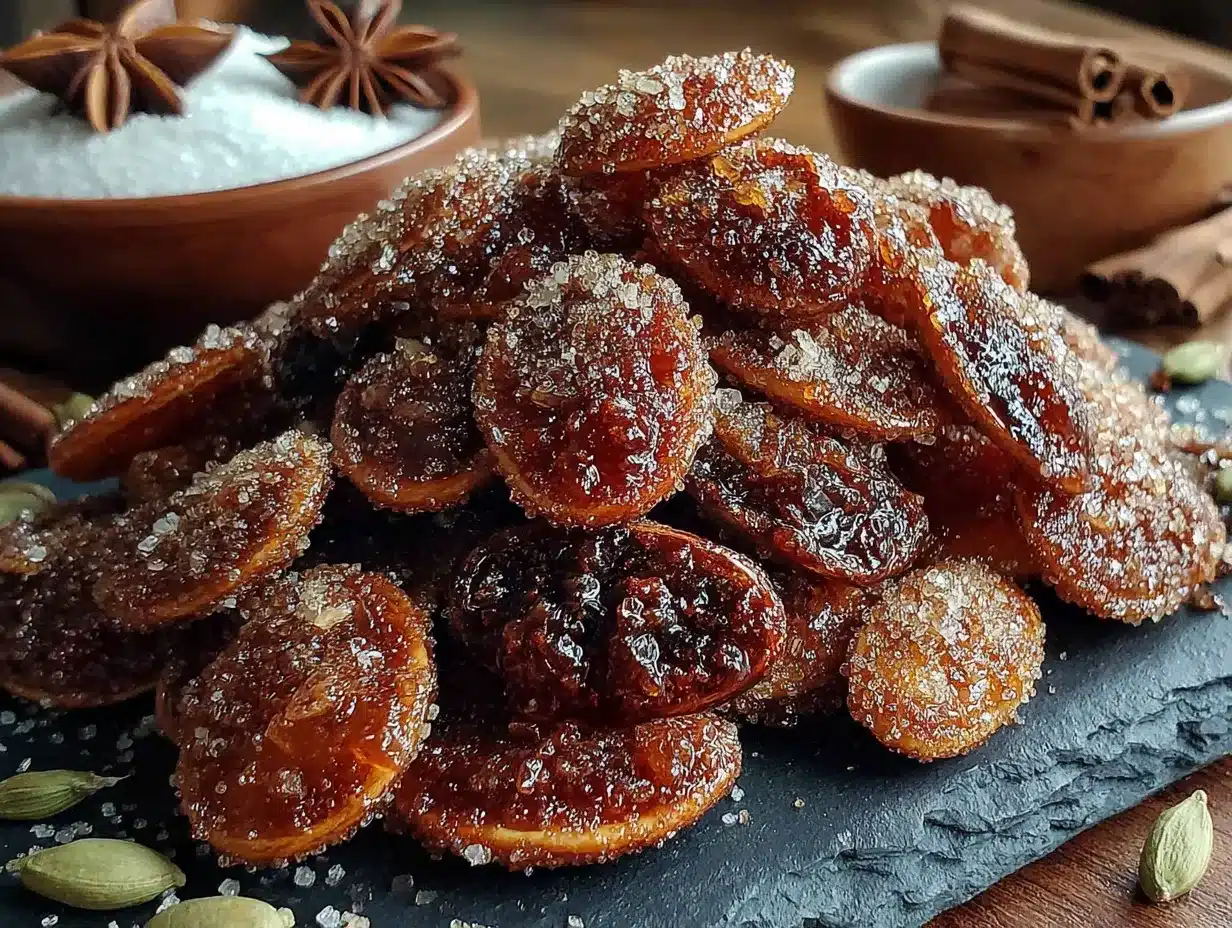
This whole process takes about 20 minutes from start to finish. The active time is even less — maybe 10 minutes. The rest is just watching and stirring. Let’s get into it.
- Prep the seeds (2 minutes): If you’re using fresh pumpkin seeds, rinse them in a fine-mesh strainer under cold water, picking out any remaining bits of pumpkin flesh. Shake off the excess water, then spread them on a clean kitchen towel and pat them very dry. This step is crucial. Any moisture left on the seeds will make them steam instead of toast, and you’ll end up with chewy, sad seeds. If you’re using store-bought pepitas, skip this step — they’re ready to go.
- Toast the seeds (5-7 minutes): Place a small saucepan over medium heat. Add the pumpkin seeds in a single layer. Toast them, stirring frequently, until they start to turn golden brown and you can hear them popping. This usually takes about 5-7 minutes. Don’t walk away from the pan. Seeds can go from perfectly toasted to burnt in about 30 seconds. You’ll know they’re done when they smell nutty and look slightly puffed. A few of them might even jump out of the pan — that’s normal.
- Add the butter (1 minute): Once the seeds are toasted, reduce the heat to low. Pour the melted butter over the seeds and stir quickly to coat every seed. The butter will sizzle and smell amazing. Keep stirring for about 30 seconds, letting the butter toast slightly with the seeds.
- Add the cinnamon sugar (1 minute): In a small bowl, mix together the sugar, cinnamon, salt, and nutmeg (if using). Sprinkle this mixture over the buttered seeds, stirring constantly. The sugar will melt and start to coat the seeds in a glossy, fragrant glaze. Work fast here — you want the sugar to melt evenly without burning. If the pan gets too hot, lift it off the heat for a few seconds while you stir.
- Spread to cool (2 minutes): Immediately pour the seeds onto the prepared baking sheet. Spread them into a single layer with your spatula. Don’t leave them in a pile — they’ll clump together as they cool. Let them sit at room temperature for about 10 minutes. Here’s the hard part: don’t touch them while they’re cooling. The sugar needs time to harden into that crackly shell. If you stir them too early, they’ll stay sticky.
- Break apart and enjoy (1 minute): Once the seeds are completely cool, they should break apart easily. If any are stuck together, just gently break them apart with your fingers. They should feel light and crisp, with a slight snap when you bite into them.
Sensory cue: When the seeds are done toasting, they should smell warm and nutty, like popcorn. When you add the butter, it should smell rich and toasty. And when the cinnamon sugar goes in, your whole kitchen should smell like a bakery. If it smells burnt, you’ve gone too far. Next time, just reduce the heat a little.
Cooking Tips & Techniques
I’ve made this recipe about a dozen times now, and I’ve learned a few things the hard way. Let me save you some trouble.
Don’t skip the toasting step. I know it’s tempting to just toss everything in the pan at once, but toasting the seeds first is what gives them that light, airy texture. It removes excess moisture and opens up the seed’s structure so the butter and sugar can really penetrate. Skipping this step leads to soggy, heavy seeds.
Watch the heat like a hawk. Medium heat is perfect for toasting. If your stove runs hot, use medium-low. The sugar can go from melted to burnt in seconds. I once got distracted by a phone call and ended up with a pan of black, smoking seeds. My smoke alarm didn’t let me forget it for an hour. So set a timer, or better yet, just stay at the stove.
Use a thin layer. Don’t crowd the pan. If you’re making a double batch, toast the seeds in two batches. Overcrowding traps steam, and steam is the enemy of crispiness. You want each seed to have direct contact with the pan.
Let them cool completely. I know it’s hard. They smell incredible. But if you eat them while they’re still warm, the sugar coating will be soft and sticky. Give them the full 10 minutes (or even 15) on the baking sheet. The texture difference is night and day.
Storage hack: If you’re making these ahead of time, store them in an airtight container at room temperature. Don’t put them in the fridge — the humidity will soften the coating. They’ll stay crispy for about a week. If they do get soft, you can re-crisp them in a 300°F oven for 3-4 minutes.
Variations & Adaptations
This base recipe is fantastic on its own, but I love playing around with flavors. Here are a few variations I’ve tried that turned out great.
- Spiced Chai Version: Replace the cinnamon with 1 teaspoon of chai spice blend (or a mix of cinnamon, cardamom, ginger, and cloves). It gives the seeds this warm, exotic flavor that’s perfect for winter. I made these for a holiday party, and they were the first thing to disappear.
- Maple Pecan Twist: Swap the granulated sugar for 1½ tablespoons of maple syrup, and add 2 tablespoons of finely chopped pecans along with the seeds. The maple syrup makes the seeds slightly less crispy but adds a deep, caramel-like sweetness. Just be careful — maple syrup burns faster than sugar, so keep the heat lower.
- Savory-Sweet Hybrid: Add ¼ teaspoon of cayenne pepper along with the cinnamon sugar. The heat sneaks up on you, and the sweet-spicy combo is addictive. I call these “fire and ice” seeds. They’re great for snacking with beer or cocktails.
- Dairy-Free Version: Use coconut oil instead of butter. The coconut flavor is subtle but pairs beautifully with the cinnamon. I actually prefer this version sometimes — it feels a little lighter.
- Extra Crunchy: After toasting the seeds, add 1 tablespoon of egg white (whisked until frothy) along with the butter. The egg white creates an even crispier, more substantial coating. This is my go-to when I want them to stay crunchy for several days.
Serving & Storage Suggestions
These seeds are incredibly versatile. Here’s how I like to serve and store them.
Serving temperature: Room temperature is best. The coating is at its crispiest when completely cool. If you’re serving them at a party, I recommend making them a few hours ahead so they have plenty of time to set.
Presentation ideas: I love serving them in a big wooden bowl or a clear glass jar. They look beautiful with the glossy cinnamon coating. For a party, I’ll sometimes layer them with other snacks — dark chocolate chips, dried cranberries, and salted almonds. It makes a gorgeous snack mix that everyone loves.
Complementary dishes: These seeds pair beautifully with fall flavors. Serve them alongside a warm mug of apple cider or a pumpkin spice latte. They’re also fantastic on top of yogurt or oatmeal for a little crunch. I’ve even crushed them up and used them as a topping for pumpkin pie.
Storage instructions: Store the seeds in an airtight container at room temperature. A mason jar or a resealable bag works perfectly. They’ll stay fresh and crispy for up to one week. Do not refrigerate them — the moisture will soften the coating. If you live in a humid climate, add a silica gel packet (the kind that comes in shoe boxes) to the container to absorb extra moisture.
Reheating tip: If the seeds lose their crunch after a few days, spread them on a baking sheet and pop them in a 300°F oven for 3-4 minutes. Let them cool completely before storing again. This restores the crispiness almost like new.
Flavor development: Honestly, these seeds taste best on the first day. The cinnamon flavor is brightest, and the coating is at its peak crunch. But they’re still really good for the next 3-4 days. After that, the flavor starts to fade a bit. I usually make a half batch if I’m only snacking on them myself.
Nutritional Information & Benefits
I’m not a nutritionist, but I do pay attention to what I’m eating. And I feel pretty good about snacking on these seeds.
Estimated nutrition per serving (¼ cup):
- Calories: 180
- Fat: 14g (mostly healthy unsaturated fats)
- Carbohydrates: 8g
- Fiber: 2g
- Protein: 7g
- Sugar: 5g
Health benefits: Pumpkin seeds are a nutritional powerhouse. They’re packed with magnesium, zinc, and healthy fats. Magnesium is great for sleep and muscle recovery, and zinc supports your immune system. I like to think of these as a treat that’s also doing my body a favor. The cinnamon adds a nice antioxidant boost, too.
Dietary considerations: This recipe is naturally gluten-free and can be made dairy-free with a simple swap. It’s also low-carb friendly if you use a sugar substitute. I’ve tried them with monk fruit sweetener, and while the texture is slightly different, they’re still delicious.
Allergen note: Pumpkin seeds are tree nut-free, but they’re often processed in facilities that handle nuts. If you have severe allergies, check the packaging. Also, the butter obviously contains dairy. Use coconut oil for a dairy-free version.
Personal perspective: Honestly, I don’t stress about the sugar in this recipe. A tablespoon of sugar spread over a whole batch of seeds is not much per serving. And the satisfaction of a homemade snack that actually tastes good? That’s worth every gram. It’s about balance, not deprivation.
Conclusion
This recipe is more than just a snack. It’s a 20-minute escape to a memory, a way to bring a little warmth and sweetness into an ordinary day. The first time I made these successfully, I sat on my couch with the bowl in my lap, and I swear I could hear Aunt Lena’s laugh in the next room. That’s the power of food, isn’t it? It connects us to people and places we love.
I hope you give these a try. Don’t be afraid to mess up the first batch — I certainly did. The beauty of a simple recipe is that it forgives mistakes. Adjust the cinnamon to your taste, add a pinch of nutmeg if you’re feeling fancy, or just follow it exactly. Either way, you’re in for a treat.
I’d love to hear how yours turn out. Did you try a variation? Did you burn them like I did? Drop a comment below and let me know. And if you share a photo on Pinterest, tag me — I want to see your beautiful, crispy, cinnamon-sugar seeds. Happy snacking, friends!
Frequently Asked Questions
Can I use canned pumpkin seeds for this recipe?
No, canned pumpkin seeds are usually cooked and salted, which won’t work here. You need raw seeds so they can toast properly and absorb the cinnamon sugar coating. Stick with raw pepitas or seeds from a fresh pumpkin.
Why are my seeds chewy instead of crispy?
Chewy seeds usually mean they weren’t dried properly before toasting, or they were overcrowded in the pan. Make sure your seeds are completely dry before they hit the heat, and toast them in a single layer. Also, let them cool completely on the baking sheet before eating.
Can I make these in the air fryer?
Yes! Air fry at 300°F for 8-10 minutes, shaking the basket halfway through. Add the butter and cinnamon sugar in the last 2 minutes of cooking. The air fryer gives them an even crispier texture. Just watch closely so the sugar doesn’t burn.
How long do these stay fresh?
Stored in an airtight container at room temperature, they stay crispy for about a week. If they get soft, re-crisp them in a 300°F oven for 3-4 minutes. Don’t refrigerate them — moisture is the enemy of crunch.
Can I use brown sugar instead of white sugar?
You can, but the texture will be slightly different. Brown sugar has more moisture, so the coating will be a bit softer and stickier. It also burns faster, so keep the heat lower and watch the pan closely. The flavor is still delicious — more molasses-y and deep.
Pin This Recipe!
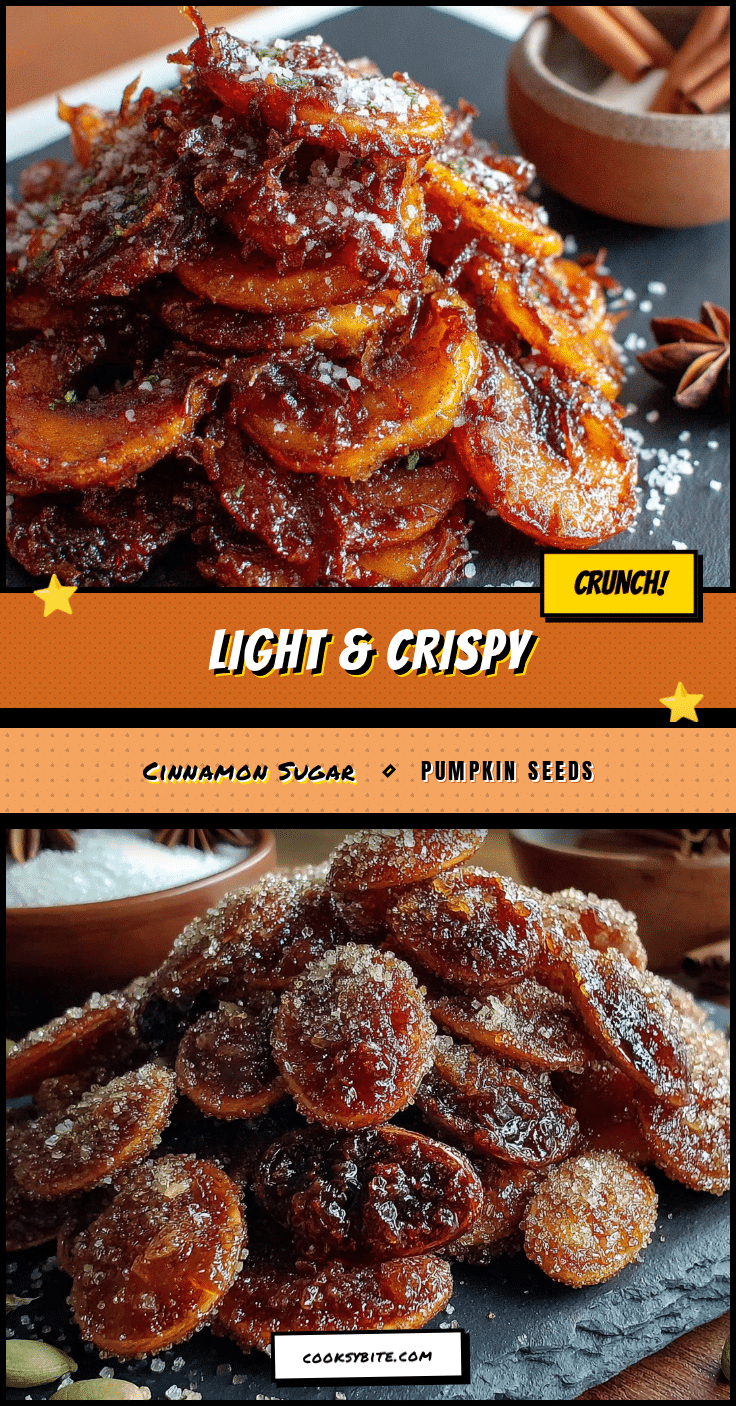
Cinnamon Sugar Pumpkin Seeds (20-Minute Crispy Snack)
A quick and easy recipe for crispy, sweet, and buttery cinnamon sugar pumpkin seeds that come together in just 20 minutes. Perfect for fall snacking, lunchboxes, or a nostalgic treat that tastes like a warm memory.
- Prep Time: 5 minutes
- Cook Time: 10 minutes
- Total Time: 20 minutes
- Yield: 4 servings 1x
- Category: Snack
- Cuisine: American
Ingredients
- 1 cup raw pumpkin seeds (pepitas)
- 2 tablespoons unsalted butter, melted
- 2 tablespoons granulated sugar
- 1 teaspoon ground cinnamon
- ¼ teaspoon fine sea salt
- Pinch of nutmeg (optional)
Instructions
- Prep the seeds (2 minutes): If using fresh pumpkin seeds, rinse them in a fine-mesh strainer under cold water, picking out any remaining bits of pumpkin flesh. Shake off excess water, then spread on a clean kitchen towel and pat very dry. If using store-bought pepitas, skip this step.
- Toast the seeds (5-7 minutes): Place a small saucepan over medium heat. Add the pumpkin seeds in a single layer. Toast, stirring frequently, until they start to turn golden brown and you can hear them popping (about 5-7 minutes). Don’t walk away from the pan.
- Add the butter (1 minute): Reduce heat to low. Pour the melted butter over the seeds and stir quickly to coat every seed. Keep stirring for about 30 seconds, letting the butter toast slightly with the seeds.
- Add the cinnamon sugar (1 minute): In a small bowl, mix together the sugar, cinnamon, salt, and nutmeg (if using). Sprinkle this mixture over the buttered seeds, stirring constantly until the sugar melts and coats the seeds in a glossy glaze. Work fast to avoid burning.
- Spread to cool (2 minutes): Immediately pour the seeds onto a baking sheet lined with parchment paper or a silicone baking mat. Spread into a single layer. Let them sit at room temperature for about 10 minutes without touching them.
- Break apart and enjoy (1 minute): Once completely cool, gently break apart any clumps with your fingers. They should be light, crisp, and have a slight snap when bitten.
Notes
Don’t skip the toasting step—it ensures a light, airy texture. Watch the heat carefully to prevent burning the sugar. Let the seeds cool completely before eating for the crispiest coating. Store in an airtight container at room temperature for up to a week. If they lose crunch, re-crisp in a 300°F oven for 3-4 minutes.
Nutrition
- Serving Size: ¼ cup
- Calories: 180
- Sugar: 5
- Sodium: 150
- Fat: 14
- Saturated Fat: 4
- Carbohydrates: 8
- Fiber: 2
- Protein: 7
Keywords: cinnamon sugar pumpkin seeds, crispy pumpkin seeds, 20-minute snack, fall snack, pepitas, easy snack recipe


