The neighborhood fall potluck was in six hours and I’d completely forgotten. Everyone else would be bringing those elaborate, multi-day preparations—the kind with homemade pie crusts that took three tries and imported spices from some specialty shop. I had a bag of apples that were slightly past their prime, a stick of butter, and about forty-five minutes before I needed to walk out the door. Honestly, I almost just grabbed a bottle of wine and called it a day. But something about the crisp October air and the smell of someone else’s cinnamon drifting through the window made me dig in my heels. I threw the butter in a pan, crossed my fingers, and started browning it—partly because it sounded fancy, partly because I needed that nutty aroma to cover up my panic.
The timer went off, I pulled this brown butter apple crisp out of the oven with oven mitts that had a hole in the thumb, and I practically sprinted next door. I set it down on the dessert table next to a perfectly frosted三层 cake and a tray of French macarons that looked like they belonged in a bakery window. My crisp looked, well, rustic. A little lopsided. The oat crumble had puffed up in one corner more than the other. I mentally prepared myself to eat a sad slice in the corner while everyone raved about the other desserts. But then my neighbor, Carol, took the first bite. She actually closed her eyes. You know that feeling when someone’s reaction to your food is so genuine it catches you off guard? That happened about twelve more times that night. People kept coming back for seconds, asking for the recipe, and I kept having to admit that I threw it together in a panic with brown butter and desperation.
That’s the thing about this best brown butter apple crisp with oat crumble—it doesn’t try to be the fanciest thing on the table. It just happens to be the one everyone remembers. Maybe you’ve been there, showing up to something important with a dish you almost didn’t bring, only to watch it disappear first. I’ve made this recipe more times than I can count since that night, tweaking the oat crumble ratio and perfecting the brown butter timing until it became the version I refuse to change. It’s the dessert I bring when I actually want to impress people, but I still love that it started as an accident.
Why You’ll Love This Recipe
Let me tell you why this brown butter apple crisp has earned a permanent spot in my fall rotation—and why it’ll probably end up in yours too. I’ve tested this recipe more times than I’m willing to admit (my family has been very patient), and every single version taught me something new about balance, texture, and the magic of browned butter.
- Quick & Easy: You can have this in the oven in under 20 minutes. No rolling dough, no chilling time, no complicated steps. It’s the kind of dessert that makes you look like you tried way harder than you actually did.
- Simple Ingredients: Apples, butter, oats, flour, sugar, and a few pantry spices. That’s it. No fancy grocery store trips required—you probably have 90% of this already.
- Perfect for Hosting: This is the dessert you bring to a dinner party when you want to steal the show without stressing yourself out. It scales beautifully for a crowd, and it actually tastes better when you make it ahead of time.
- Crowd-Pleaser: I’ve served this to kids who swear they don’t like cooked fruit, to my uncle who only eats pie, and to a friend who’s gluten-free (just swap the flour). Every single person went back for more.
- Unbelievably Delicious: The brown butter adds this deep, nutty, almost toffee-like flavor that regular butter just can’t touch. Combined with tender, cinnamon-spiced apples and a crunchy oat crumble? It’s next-level comfort food.
What makes this version different from every other apple crisp recipe out there is the brown butter technique. I spent weeks testing different browning levels—too light and you lose the nutty flavor, too dark and it turns bitter. The sweet spot is when the butter turns a deep amber color and smells like toasted hazelnuts. That’s the moment everything changes. Plus, I use a higher oat-to-flour ratio in the crumble for maximum crunch, and I toss the apples in a touch of lemon juice to balance the sweetness. It’s not just another apple crisp—it’s the one you’ll keep coming back to.
This recipe is the kind that makes you close your eyes after the first bite. It’s fall in a baking dish, but faster and more forgiving than a pie. Perfect for impressing guests without breaking a sweat, or turning a regular Tuesday night into something a little more special.
What Ingredients You Will Need
This recipe uses simple, honest ingredients to create something that tastes far more complex than it has any right to. The brown butter does most of the heavy lifting, but each component plays a role in building that perfect balance of sweet, tart, crunchy, and tender.
For the Apple Filling
- 6 cups apples, peeled, cored, and sliced (about 6 medium apples) – I recommend using a mix of tart and sweet varieties. Granny Smith for structure and Honeycrisp or Fuji for natural sweetness. (If you only have one type, go with Granny Smith—the tartness holds up beautifully against the sweet crumble.)
- 1/3 cup granulated sugar – Just enough to coax out the apples’ natural juices without making things syrupy.
- 1/4 cup light brown sugar, packed – Adds a subtle molasses note that pairs perfectly with the brown butter.
- 2 tablespoons all-purpose flour – Helps thicken the filling so it’s not runny. (Use gluten-free all-purpose blend if needed.)
- 1 teaspoon ground cinnamon – The backbone of any good apple dessert. I prefer Saigon cinnamon for its warmer, spicier kick.
- 1/4 teaspoon ground nutmeg – Freshly grated if you have it, but pre-ground works fine too.
- 1 tablespoon lemon juice – Brightens the apples and prevents them from browning while you prep.
- 1 teaspoon vanilla extract – Use pure vanilla extract if you can. The flavor difference is noticeable.
For the Brown Butter Oat Crumble
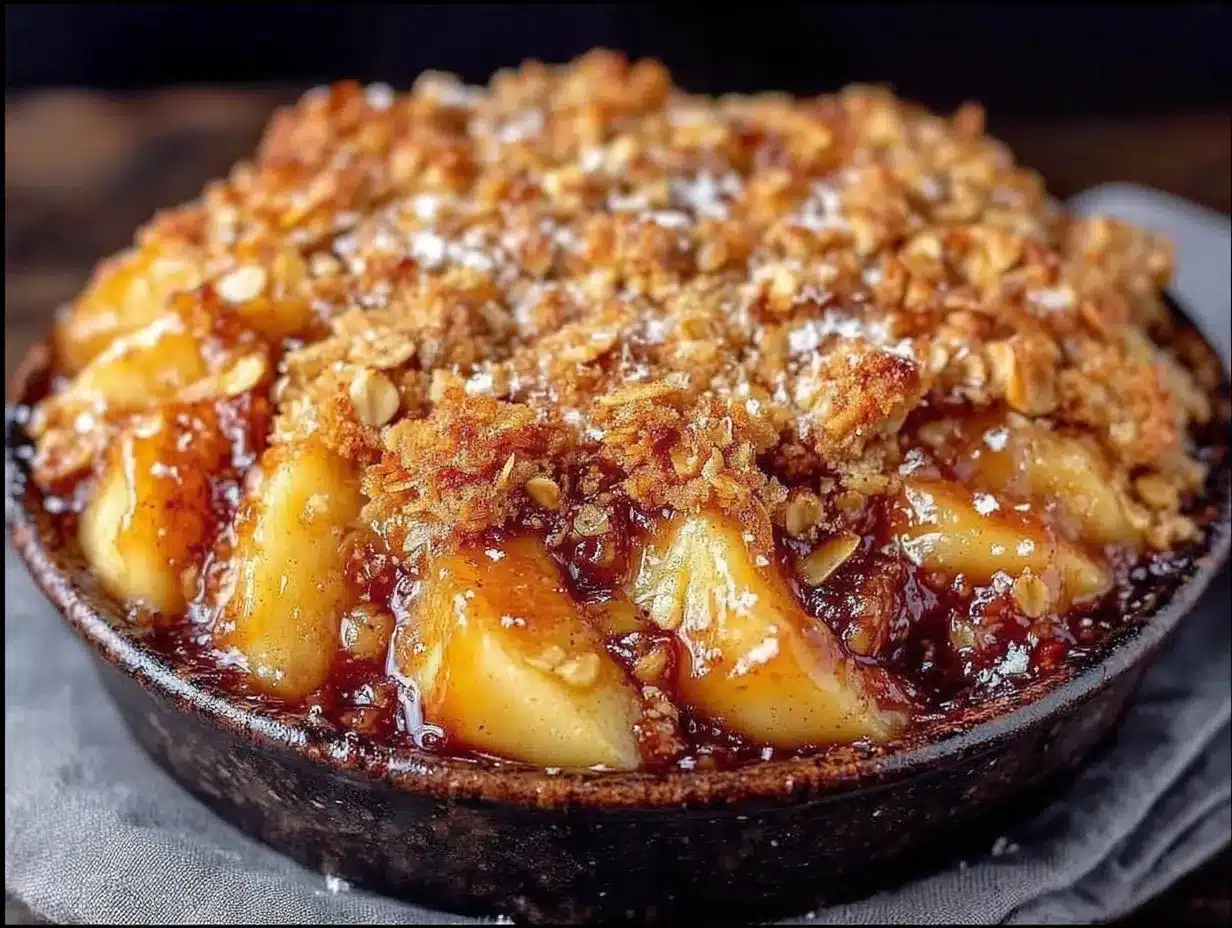
- 1/2 cup unsalted butter – This is where the magic happens. Don’t use salted butter here—you want to control the salt level yourself.
- 3/4 cup old-fashioned rolled oats – Not quick oats! Old-fashioned oats give you that hearty, chewy texture that makes the crumble so satisfying. I prefer Bob’s Red Mill for consistent quality.
- 1/2 cup all-purpose flour – (Or gluten-free all-purpose blend for a GF version.)
- 1/2 cup light brown sugar, packed – Adds sweetness and helps the crumble get those gorgeous golden clumps.
- 1/4 teaspoon salt – Don’t skip this. It balances the sweetness and makes the brown butter flavor pop.
- 1/2 teaspoon cinnamon – A little extra warmth in the crumble layer.
Ingredient Selection Tips: For the apples, look for firm apples without soft spots or bruises. If you’re making this in the summer when apples aren’t in season, try swapping in firm pears or even peaches—just reduce the sugar slightly since they’re sweeter. For the butter, I always use a high-fat European-style butter like Kerrygold for browning. It has a lower water content, which means it browns more evenly and develops a richer flavor. Trust me on this one—it makes a noticeable difference.
Equipment Needed
You don’t need a fancy kitchen to make this brown butter apple crisp. Here’s what you’ll actually use:
- 9×13-inch baking dish – This is the ideal size for a crowd-friendly crisp. An 8×8 dish works too, but you’ll need to increase the baking time slightly and the crumble will be thicker. (I’ve done it—it’s still delicious, just different.)
- Light-colored saucepan or skillet – This is crucial for browning the butter. A dark pan makes it nearly impossible to see when the butter has reached that perfect amber color. I use a stainless steel saucepan and it works perfectly.
- Large mixing bowl – For tossing the apples with the sugar and spices.
- Medium mixing bowl – For mixing the crumble topping.
- Sharp knife and cutting board – For peeling and slicing the apples. A vegetable peeler speeds things up considerably.
- Wooden spoon or silicone spatula – For stirring the brown butter as it cooks.
- Measuring cups and spoons – Standard set will do the job.
Budget-Friendly Options: If you don’t have a 9×13 dish, a cast-iron skillet works beautifully—it retains heat well and gives you a nice crispy edge on the crumble. No light-colored saucepan? Just keep a close eye on the butter and swirl the pan frequently so you can judge the color by the foam. And honestly, you can skip the vegetable peeler and just use a paring knife. It takes a little longer, but it’s totally doable.
Preparation Method
- Preheat your oven to 350°F (175°C). Position a rack in the center of the oven. This ensures even baking without the crumble burning on top before the apples are tender.
- Make the brown butter. Place the 1/2 cup unsalted butter in your light-colored saucepan over medium heat. Stir occasionally as it melts. The butter will start to foam and bubble—this is normal. Keep stirring gently. After about 5-7 minutes, you’ll notice the foam subsiding and little brown specks forming at the bottom of the pan. The butter will smell nutty and toasty. The moment it turns a deep amber color (think the color of a penny), remove it from the heat immediately. Pour it into a heatproof bowl to stop the cooking process. Don’t walk away during this step—brown butter can go from perfect to burnt in seconds. I learned this the hard way when I had to start over because I got distracted by a phone call.
- Prepare the apples. While the brown butter cools slightly, peel, core, and slice your apples into 1/4-inch thick slices. You want them uniform so they cook evenly. Toss the sliced apples in a large bowl with the granulated sugar, brown sugar, flour, cinnamon, nutmeg, lemon juice, and vanilla extract. Stir until every slice is coated. Let them sit for 5 minutes while you make the crumble—this helps the apples release their juices and creates that lovely syrupy filling.
- Make the oat crumble. In a medium bowl, whisk together the oats, flour, brown sugar, salt, and cinnamon. Pour the slightly cooled brown butter over the dry ingredients. Stir with a fork until the mixture looks like wet sand with some larger clumps. Don’t overmix—you want those craggy bits for texture. If the mixture seems too dry, add a tablespoon of melted butter. If it’s too wet, add a tablespoon of oats.
- Assemble the crisp. Spread the apple mixture evenly in your 9×13 baking dish. Sprinkle the oat crumble over the top in an even layer. Don’t press it down—you want it to stay loose and craggy so it gets crispy in the oven. I like to leave a few larger clumps for texture.
- Bake. Place the dish on a baking sheet to catch any bubbling juices (trust me on this—it saves you from a messy oven). Bake for 40-45 minutes, or until the filling is bubbly around the edges and the crumble is deep golden brown. If the crumble is browning too quickly but the apples aren’t tender yet, tent the dish loosely with foil for the last 10 minutes.
- Cool and serve. Let the crisp cool on a wire rack for at least 15 minutes before serving. This allows the filling to set up so it’s not runny. The waiting is the hardest part, I know. But it’s worth it.
Sensory Cues: When the crisp is done, you’ll see the apple filling bubbling up around the edges of the crumble. The kitchen will smell like a fall candle—cinnamon, nutty brown butter, and sweet apples. The crumble should be firm to the touch and a beautiful golden-brown color. If you stick a knife into the center, the apples should be tender but not mushy.
Cooking Tips & Techniques
I’ve made this brown butter apple crisp more times than I can count, and I’ve learned a few things along the way that make a real difference. Here are my best tips:
Master the brown butter. This is the most important step, and it’s also the easiest to mess up. Use a light-colored pan so you can actually see the color change. Swirl the pan constantly once the butter starts foaming. The moment you smell that nutty aroma and see amber specks, pull it off the heat. I once let it go just 10 seconds too long and ended up with a bitter, burnt mess. Start over if that happens—it’s not worth salvaging.
Don’t skip the lemon juice. I know it seems like a small detail, but that splash of acid brightens the entire dish and prevents the apples from turning brown while you prep. It also balances the sweetness so the crisp doesn’t taste cloying. If you’re out of lemons, a splash of apple cider vinegar works in a pinch.
Use a mix of apple varieties. This is my number one tip for better texture and flavor. Tart apples like Granny Smith hold their shape during baking, while sweeter varieties like Honeycrisp break down slightly and create that lovely saucy filling. If you use all one type, you’ll either end up with apples that are too firm or too mushy. The mix gives you the best of both worlds.
Let it rest before serving. I know the smell is intoxicating and you want to dig in immediately. But if you serve it straight out of the oven, the filling will be runny and the crumble will fall apart. Give it at least 15 minutes on the counter. The filling will thicken as it cools, and the crumble will set up perfectly. This is the same patience you need for letting a pie cool—it’s hard, but it’s necessary.
Toast your oats for extra crunch. If you have an extra 5 minutes, spread the oats on a baking sheet and toast them at 350°F for 5-7 minutes before mixing them into the crumble. This adds a deeper, nuttier flavor and ensures the oats stay crunchy even after baking. I do this when I’m making the crisp for a special occasion.
Variations & Adaptations
One of the best things about this brown butter apple crisp is how adaptable it is. Here are some variations I’ve tried and loved:
Gluten-Free Version: Swap the all-purpose flour in both the filling and the crumble with a good gluten-free all-purpose blend. I’ve had great results with Bob’s Red Mill 1-to-1 Baking Flour. Make sure your oats are certified gluten-free if you’re serving someone with celiac disease. The texture is slightly more delicate, but the flavor is just as amazing.
Vegan Adaptation: Use vegan butter for the brown butter step. I’ve tried this with Miyoko’s European Style Cultured Vegan Butter and it browns beautifully. The flavor is slightly different—less dairy richness—but it still delivers that nutty depth. Use a plant-based milk if the crumble seems too dry.
Seasonal Fruit Swaps: In the summer, try this with sliced peaches or nectarines. Reduce the sugar by a tablespoon since stone fruits are sweeter than apples. In the winter, pears and cranberries make a gorgeous combination. Toss in 1/2 cup fresh or frozen cranberries with the pears for a tart pop of color and flavor.
Spice It Up: Add 1/4 teaspoon cardamom or ginger to the apple filling for a warm, aromatic twist. I once added a pinch of black pepper to the crumble on a whim—it sounds weird, but that little bit of heat makes the brown butter flavor sing. Don’t knock it until you try it.
Individual Servings: Make these in ramekins or small baking dishes for a dinner party. Reduce the baking time to 20-25 minutes. Everyone gets their own personal crisp with extra crispy edges—it’s a crowd-pleaser.
Serving & Storage Suggestions
This brown butter apple crisp is best served warm, but not piping hot. Let it cool for at least 15 minutes after baking. The filling will be thick and jammy, and the crumble will stay crunchy. Top it with a scoop of vanilla ice cream for the classic experience—the cold creaminess against the warm, spiced apples is pure magic. A dollop of whipped cream or a drizzle of heavy cream works beautifully too.
For a dinner party, serve this in shallow bowls with a sprig of fresh thyme or a dusting of cinnamon on top. It looks gorgeous and feels special without any extra effort. Pair it with a cup of hot apple cider or a dark roast coffee for the ultimate fall dessert experience.
Storage: Leftover crisp keeps well in the refrigerator for up to 4 days. Cover the dish tightly with foil or plastic wrap. The crumble will soften over time, but it’s still delicious—almost like a warm apple cobbler situation. To reheat, pop individual portions in the microwave for 30 seconds, or reheat the whole dish in a 350°F oven for 10-15 minutes to re-crisp the topping.
Freezing: You can freeze the unbaked crisp for up to 3 months. Assemble the crisp in a freezer-safe dish, cover tightly with foil, and freeze. Bake directly from frozen, adding 15-20 minutes to the baking time. Baked crisp also freezes well—just cool completely, wrap tightly, and freeze. Thaw overnight in the refrigerator and reheat in the oven.
The flavors actually deepen after a day in the fridge. I sometimes make this a day ahead of a gathering on purpose—the spices meld together and the filling gets even more luscious. Just reheat it before serving and add fresh ice cream on top.
Nutritional Information & Benefits
Here’s the approximate nutritional breakdown for one serving of this brown butter apple crisp (based on 8 servings):
| Nutrient | Amount per Serving |
|---|---|
| Calories | 345 |
| Total Fat | 14g |
| Saturated Fat | 8g |
| Cholesterol | 35mg |
| Sodium | 115mg |
| Total Carbohydrates | 54g |
| Dietary Fiber | 4g |
| Sugars | 36g |
| Protein | 3g |
While this is definitely a treat, it does have some redeeming qualities. Apples are packed with fiber and vitamin C, and the oats provide heart-healthy soluble fiber that helps keep you full. The brown butter, despite being butter, adds a richness that means you’re satisfied with a reasonable portion. I love that this dessert feels indulgent without being overly heavy.
For a lighter version, you can reduce the sugar in the filling by a tablespoon or two, or swap half the butter in the crumble with coconut oil. But honestly? I make this when I want something special, and I don’t skimp on the good stuff. Life’s too short for mediocre dessert.
Dietary Considerations: This recipe contains dairy (butter) and gluten (flour and oats). For a dairy-free version, use vegan butter. For a gluten-free version, use certified gluten-free oats and a gluten-free flour blend. Always check labels if you’re cooking for someone with allergies.
Conclusion
This best brown butter apple crisp with oat crumble is the dessert that keeps showing up in my life—at potlucks, family dinners, cozy nights in, and even at my neighbor’s holiday party where I was sure it would be outshined. It’s the recipe I turn to when I want to impress people without spending hours in the kitchen, and it’s the one that always, always gets asked for.
The beauty of this recipe is that it’s forgiving enough for a beginner but impressive enough for a seasoned cook. The brown butter adds that little something extra that makes people lean in and ask, “What’s in this?” And the oat crumble? It’s crunchy, buttery, and absolutely irresistible. Whether you make it for a crowd or just for yourself on a quiet fall evening, I promise it’ll become a staple in your kitchen too.
I’d love to hear how yours turns out! Did you try any variations? Did your guests go back for seconds? Leave a comment below and share your experience—I read every single one. And if you loved this recipe, share it with a friend who needs a show-stopping dessert in their life. Happy baking, friends!
Frequently Asked Questions
Can I use quick oats instead of old-fashioned oats?
You can, but I don’t recommend it. Quick oats are more finely processed and will absorb moisture differently, resulting in a softer, less crunchy crumble. Old-fashioned oats give you that hearty texture that makes the topping so satisfying. If quick oats are all you have, reduce the flour by a tablespoon to compensate.
Do I have to peel the apples?
Technically, no. The peel will soften during baking, but it can become slightly chewy and tough. I always peel them for a smoother, more tender filling. If you’re short on time or don’t mind the texture, leave the peels on—just make sure to wash the apples thoroughly.
Can I make this ahead of time?
Absolutely! You can assemble the crisp (without baking) up to 24 hours in advance. Cover and refrigerate. When you’re ready to bake, add about 10 minutes to the baking time since you’re starting from cold. The flavors actually meld together beautifully when it sits overnight.
Why did my crumble turn out soggy?
Soggy crumble usually means one of two things: either the apples released too much liquid (try using firmer apples next time), or the crumble was pressed down too firmly into the filling. Make sure to sprinkle the crumble loosely on top and don’t pack it down. Also, letting the crisp cool for 15-20 minutes after baking helps the crumble set up properly.
Can I freeze this apple crisp?
Yes! You can freeze it either baked or unbaked. For unbaked, assemble the crisp in a freezer-safe dish, wrap tightly, and freeze for up to 3 months. Bake directly from frozen, adding 15-20 minutes. For baked, cool completely, wrap tightly, and freeze. Thaw overnight in the fridge and reheat in a 350°F oven until warmed through.
Pin This Recipe!
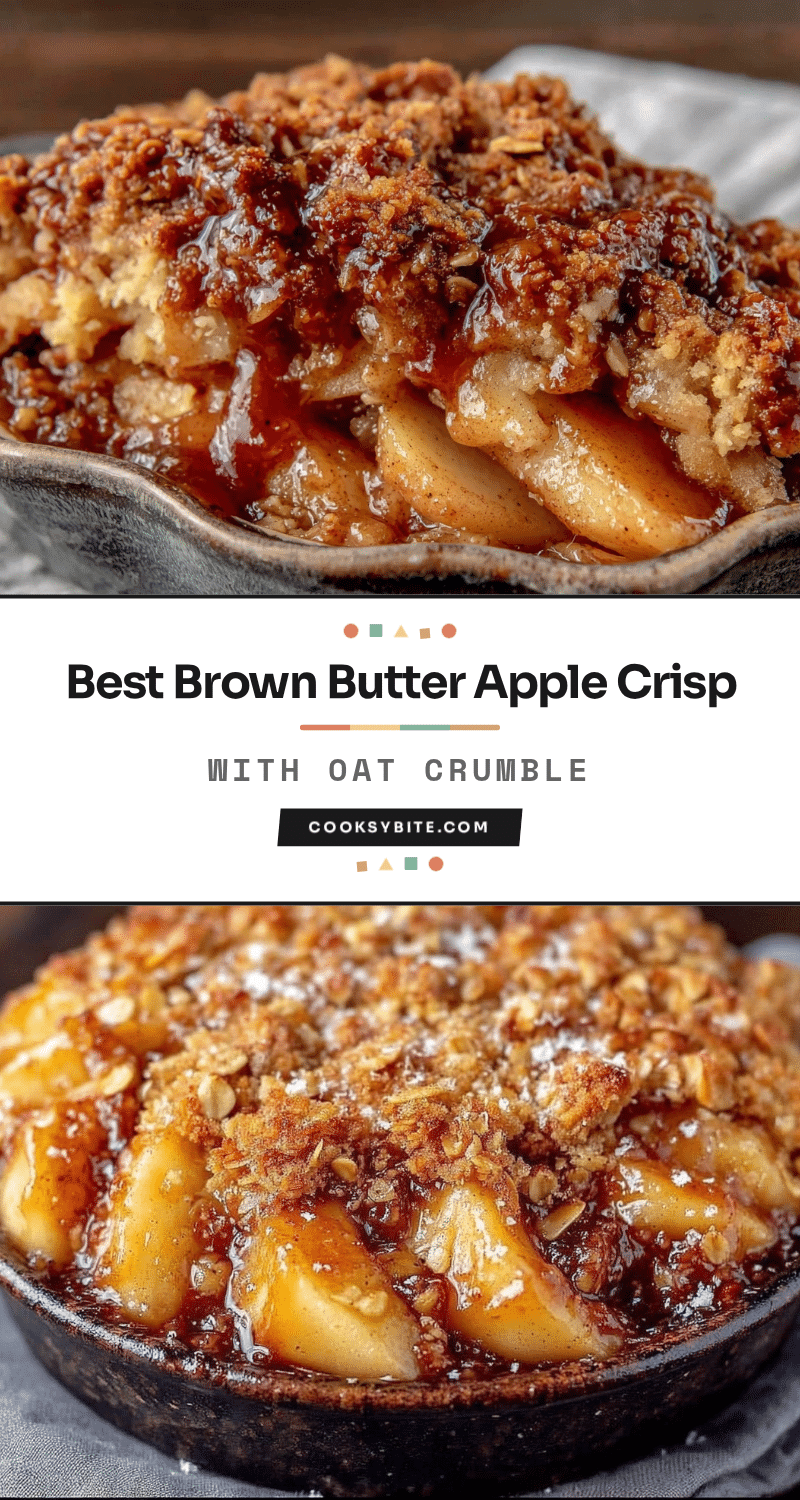
Best Brown Butter Apple Crisp with Oat Crumble (Easy Fall Dessert)

This brown butter apple crisp features tender, cinnamon-spiced apples topped with a crunchy oat crumble. It’s a quick and easy fall dessert that’s perfect for impressing guests without spending hours in the kitchen.
- Prep Time: 20 minutes
- Cook Time: 45 minutes
- Total Time: 1 hour 5 minutes
- Yield: 8 servings 1x
- Category: Dessert
- Cuisine: American
Ingredients
- 6 cups apples, peeled, cored, and sliced (about 6 medium apples)
- 1/3 cup granulated sugar
- 1/4 cup light brown sugar, packed
- 2 tablespoons all-purpose flour
- 1 teaspoon ground cinnamon
- 1/4 teaspoon ground nutmeg
- 1 tablespoon lemon juice
- 1 teaspoon vanilla extract
- 1/2 cup unsalted butter
- 3/4 cup old-fashioned rolled oats
- 1/2 cup all-purpose flour
- 1/2 cup light brown sugar, packed
- 1/4 teaspoon salt
- 1/2 teaspoon cinnamon
Instructions
- Preheat your oven to 350°F (175°C). Position a rack in the center of the oven.
- Make the brown butter: Place the 1/2 cup unsalted butter in a light-colored saucepan over medium heat. Stir occasionally as it melts. The butter will foam and bubble. After about 5-7 minutes, when the foam subsides and brown specks form at the bottom and the butter smells nutty, remove from heat immediately and pour into a heatproof bowl to stop cooking.
- Prepare the apples: Peel, core, and slice apples into 1/4-inch thick slices. Toss in a large bowl with granulated sugar, brown sugar, flour, cinnamon, nutmeg, lemon juice, and vanilla extract until coated. Let sit for 5 minutes.
- Make the oat crumble: In a medium bowl, whisk together oats, flour, brown sugar, salt, and cinnamon. Pour the slightly cooled brown butter over the dry ingredients and stir with a fork until the mixture looks like wet sand with some larger clumps. Do not overmix.
- Assemble the crisp: Spread the apple mixture evenly in a 9×13-inch baking dish. Sprinkle the oat crumble over the top in an even layer. Do not press it down.
- Bake: Place the dish on a baking sheet. Bake for 40-45 minutes, or until the filling is bubbly around the edges and the crumble is deep golden brown. If the crumble browns too quickly, tent loosely with foil for the last 10 minutes.
- Cool and serve: Let the crisp cool on a wire rack for at least 15 minutes before serving to allow the filling to set.
Notes
For best results, use a mix of tart and sweet apples (e.g., Granny Smith and Honeycrisp). Brown the butter in a light-colored pan to monitor color. Let the crisp cool for at least 15 minutes before serving to allow the filling to set. Leftovers keep in the refrigerator for up to 4 days.
Nutrition
- Serving Size: 1 serving
- Calories: 345
- Sugar: 36
- Sodium: 115
- Fat: 14
- Saturated Fat: 8
- Carbohydrates: 54
- Fiber: 4
- Protein: 3
Keywords: brown butter apple crisp, apple crisp, oat crumble, fall dessert, easy apple dessert


