There used to be a tiny Belgian café tucked away on a side street in Portland—the kind of place with mismatched chairs and a chalkboard menu that changed daily. They made this Biscoff cheesecake bar that was absolutely unreal. When they closed their doors two years ago—just a handwritten sign on the window saying “Merci, Portland”—I honestly felt a little pang of loss. I mean, it sounds dramatic for a dessert, but you know that feeling when something just hits right and suddenly it’s gone?
After maybe seven tries—some too soft, one that refused to set, and a couple that just tasted like sadness—I finally cracked the code. Let me tell you, the day I pulled these Best No-Bake Biscoff Cheesecake Bars out of the fridge and took that first bite, I almost teared up. It was that exact combination of buttery cookie crust, silky cream cheese filling, and that signature caramelized Biscoff flavor running through every layer.
The thing is, this isn’t just another no-bake cheesecake recipe. The texture is what makes it—dense but creamy, firm enough to slice cleanly but soft enough to melt on your tongue. And the best part? You don’t even turn on the oven. For a host who wants to impress without spending the whole day in the kitchen, these bars are basically a superpower. The first time I brought them to a dinner party, my friend Mark asked for the recipe before he even finished his slice. That’s when I knew I’d gotten it right.
So here it is—the version that finally brought that café memory back to life. I think you’re going to love it.
Why You’ll Love This Recipe
These Best No-Bake Biscoff Cheesecake Bars aren’t just good—they’re the kind of dessert that makes people close their eyes after the first bite. And honestly, for a host, that’s exactly what you want. Here’s why this recipe works so well:
- No Oven Required: Perfect for summer gatherings or when you just don’t want to heat up the kitchen. The fridge does all the work.
- Simple Ingredients: You probably already have cream cheese, butter, and sugar on hand. The only special item is Biscoff spread, which is widely available now.
- Perfect for Entertaining: These bars slice cleanly, travel well, and look stunning on a platter. Your guests will think you spent hours.
- Crowd-Pleaser: I’ve served these at potlucks, birthday parties, and holiday dinners—they disappear every single time.
- Make-Ahead Friendly: You can prep these a day or two in advance, which is a lifesaver when you’re hosting.
What sets this recipe apart is the technique. Instead of just mixing everything together, we’re layering the Biscoff flavor three ways—in the crust, swirled through the filling, and drizzled on top. That triple hit of caramelized goodness is what makes these bars unforgettable. I’ve tested this with different cream cheese ratios and chilling times, and this version consistently delivers that perfect sliceable texture without any gelatin or baking.
This isn’t just another no-bake cheesecake. It’s the one that’ll get you asked for the recipe every single time.
What Ingredients You Will Need
This recipe uses simple, pantry-friendly ingredients to create something that tastes surprisingly fancy. Most of these are things you probably already have, and the Biscoff spread is worth seeking out—it’s what gives these bars their signature flavor.
For the Crust
- Biscoff cookies, finely crushed – 250g (about 2 cups crushed). You’ll need the classic caramelized biscuits, not the spread. I’ve tried using graham crackers in a pinch, but honestly, the flavor just isn’t the same.
- Unsalted butter, melted – 85g (6 tablespoons). Use real butter here—margarine changes the texture and flavor.
- Granulated sugar – 2 tablespoons (25g). Just a touch to help the crust hold together.
For the Cheesecake Filling
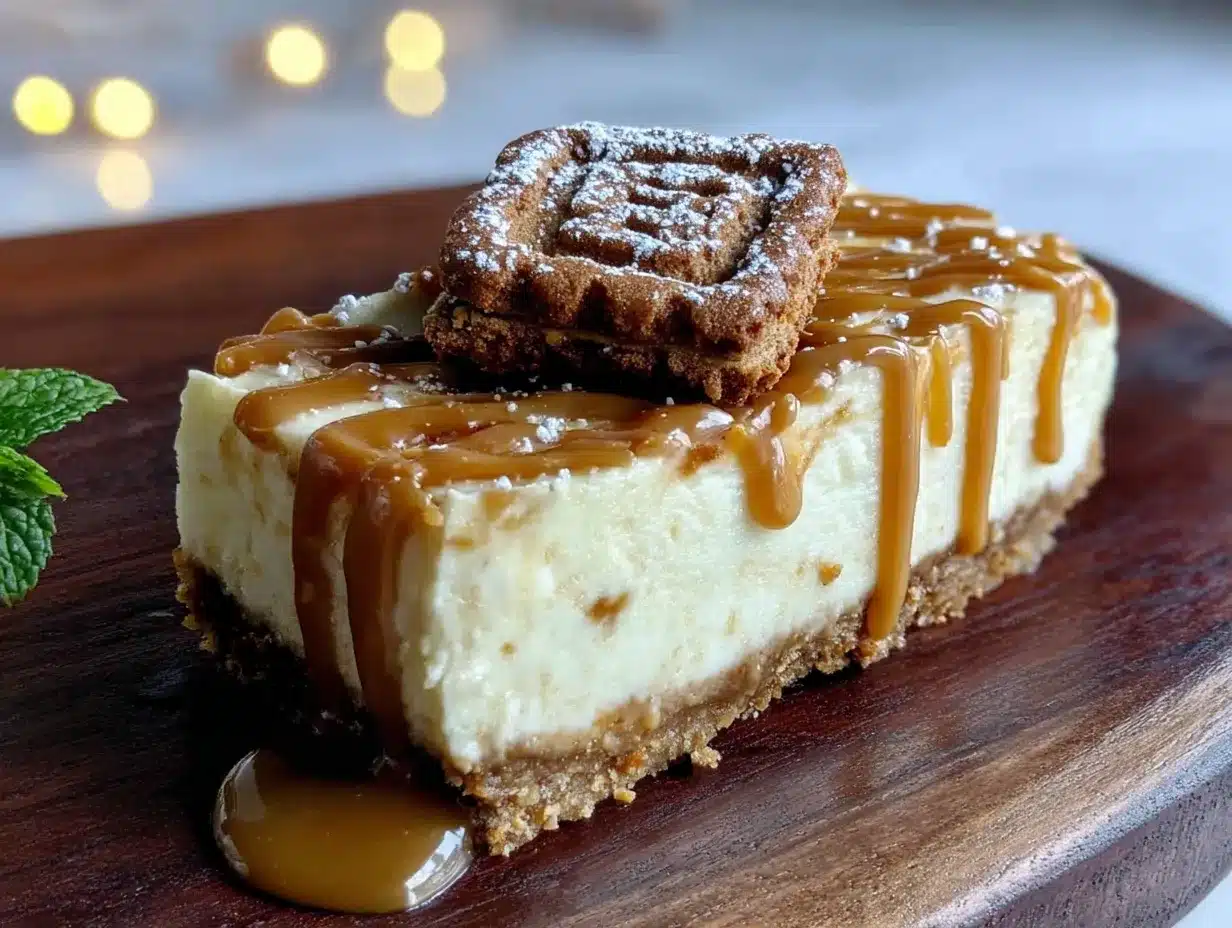
- Full-fat cream cheese, softened – 680g (three 8-ounce blocks). This is non-negotiable. Low-fat cream cheese contains too much water and won’t set properly. I recommend Philadelphia brand for consistent results.
- Powdered sugar – 120g (1 cup). Sifted to avoid lumps.
- Biscoff spread (smooth) – 240g (1 cup). The creamy version works best here. Crunchy would alter the texture.
- Heavy whipping cream – 240ml (1 cup). Make sure it’s cold—this helps the filling whip up light and fluffy.
- Vanilla extract – 1 teaspoon (5ml). Pure vanilla, not imitation, for the best flavor.
- Pinch of salt – Just a tiny one to balance the sweetness.
For the Topping
- Biscoff spread – 60g (¼ cup), warmed slightly for drizzling.
- Optional: Crushed Biscoff cookies – A handful for garnish.
One thing I learned the hard way—always soften your cream cheese properly. If it’s too cold, your filling will be lumpy. Let it sit on the counter for at least an hour before you start. And for the Biscoff spread, look for it in the peanut butter aisle or near the baking supplies. Lotus brand is the original and my personal favorite.
Equipment Needed
You don’t need anything fancy for these bars, which is part of what makes them so great for hosting. Here’s what you’ll need:
- 9×9-inch square baking pan – Glass or metal both work. Line it with parchment paper for easy removal.
- Food processor or rolling pin – For crushing the cookies. I’ve used both, and honestly, the food processor gives a finer, more even crumb. But a rolling pin and a zip-top bag work just fine if that’s what you have.
- Electric hand mixer or stand mixer – You’ll need this to get the filling smooth and fluffy. Whisking by hand would take forever and the texture won’t be as good.
- Mixing bowls – One medium for the crust, one large for the filling.
- Spatula – For spreading and smoothing the layers.
- Measuring cups and spoons – Accuracy matters here, especially with the cream cheese.
If you don’t have a 9×9 pan, an 8×8 will work—your bars will just be a little thicker. You might need to add 15-20 minutes to the chilling time. And if you’re making these for a crowd, you can double the recipe and use a 9×13 pan instead.
Preparation Method
These Best No-Bake Biscoff Cheesecake Bars come together in about 25 minutes of active time, plus at least 6 hours of chilling. The waiting is the hardest part, I promise.
Step 1: Prepare the Pan
Line your 9×9-inch baking pan with parchment paper, leaving some overhang on two opposite sides. This creates handles that make lifting the bars out later so much easier. Lightly grease the parchment with a tiny bit of butter or cooking spray.
Step 2: Make the Crust
Place the Biscoff cookies in your food processor and pulse until they become fine crumbs. You should have about 2 cups. If you don’t have a food processor, put the cookies in a zip-top bag and crush them with a rolling pin—just make sure there aren’t any large chunks left.
Transfer the crumbs to a medium bowl. Add the melted butter and granulated sugar, then stir with a fork until everything is evenly moistened. It should look like wet sand. Pour the mixture into your prepared pan and press it down firmly. I use the bottom of a measuring cup to get it really compact—this is important because a loose crust will fall apart when you cut the bars.
Place the crust in the refrigerator while you make the filling.
Step 3: Whip the Cream
In a clean, cold bowl, pour the heavy whipping cream. Using your electric mixer, beat on medium-high speed until stiff peaks form. This usually takes about 3-4 minutes. Be careful not to over-whip, or you’ll end up with butter. Set the whipped cream aside in the refrigerator for now.
Step 4: Make the Cheesecake Filling
In a large mixing bowl, beat the softened cream cheese with your electric mixer on medium speed until smooth and creamy—about 2 minutes. Scrape down the sides of the bowl with a spatula. Add the sifted powdered sugar and beat again until combined, about 1 minute.
Add the Biscoff spread, vanilla extract, and a pinch of salt. Beat on medium speed until everything is fully incorporated and the mixture is smooth. The color should be an even, pale caramel. Taste it here—I always do, just to make sure it’s right. It should be sweet but with that lovely spiced Biscoff flavor coming through.
Step 5: Fold in the Whipped Cream
Remove the whipped cream from the fridge. Using a spatula, gently fold it into the cream cheese mixture. Start by adding about a third of the whipped cream, folding until just combined, then add the rest. Be gentle—you want to keep the air you whipped into the cream. The finished filling should be light, fluffy, and smooth.
Step 6: Assemble the Bars
Take the crust out of the refrigerator. Spoon the cheesecake filling over the crust and spread it evenly with your spatula. Give the pan a few gentle taps on the counter to release any air bubbles.
Warm the remaining ¼ cup of Biscoff spread in the microwave for about 15 seconds, just until it’s thin enough to drizzle. Spoon it over the top of the filling and use a knife or toothpick to swirl it around. Don’t over-swirl—you want distinct ribbons of Biscoff, not a muddy mess.
Step 7: Chill
Cover the pan with plastic wrap and refrigerate for at least 6 hours, but overnight is better. The filling needs that time to set properly. I know it’s tempting to rush this, but if you cut into them too soon, they’ll be a soft, messy disaster. Trust me—I learned that lesson the hard way.
Step 8: Slice and Serve
When the bars are fully set, lift them out of the pan using the parchment overhang. Place on a cutting board and use a sharp knife to slice into 16 squares. For clean slices, wipe the knife clean between cuts. Sprinkle with crushed Biscoff cookies if you like, and serve cold.
Cooking Tips & Techniques
After making these Best No-Bake Biscoff Cheesecake Bars more times than I can count, I’ve picked up a few tricks that make a real difference.
Room temperature cream cheese is everything. I cannot stress this enough. Cold cream cheese won’t blend smoothly, and you’ll end up with lumps. Take it out of the fridge at least an hour before you start. If you forget, cut it into small cubes and let it sit for 20 minutes—that helps.
Don’t skip the whipped cream. Some no-bake cheesecake recipes use condensed milk or gelatin, but the whipped cream here gives the filling its light, mousse-like texture. It’s what makes these bars feel fancy instead of heavy.
Press the crust firmly. This is the number one mistake I see people make. If the crust is too loose, it’ll crumble when you try to cut the bars. Use the bottom of a glass or measuring cup to really pack it down.
Patience with chilling. I once tried to speed things up by putting the bars in the freezer for 2 hours. Big mistake. The texture was icy and the flavors hadn’t melded. Six hours minimum, people. Overnight is ideal.
Warm your knife for clean slices. Run your knife under hot water, dry it, then slice. The warmth helps cut through the filling without dragging. Wipe the blade clean between each cut for picture-perfect bars.
Variations & Adaptations
One of the great things about this recipe is how easily it adapts. Here are some variations I’ve tried and loved:
Chocolate Biscoff Bars: Add 60g (½ cup) of melted dark chocolate to the cheesecake filling before folding in the whipped cream. Swirl extra chocolate on top alongside the Biscoff spread. The combination is dangerously good.
Gluten-Free Option: Use gluten-free Biscoff-style cookies for the crust. Lotus does make a gluten-free version, but they can be hard to find. Alternatively, use gluten-free graham crackers—the texture will be slightly different but still delicious.
Vegan Adaptation: Use vegan cream cheese (I like Kite Hill or Violife), vegan butter, and coconut cream instead of heavy whipping cream. The texture will be a bit softer, so chill for a full 12 hours. It works, but it’s not quite as firm as the original.
Mini Cheesecake Bites: Press the crust into a mini muffin tin lined with paper liners. Fill with the cheesecake mixture and chill. These are perfect for parties where people want to grab and go.
Peanut Butter Swirl: Replace half the Biscoff spread in the filling with creamy peanut butter. The salty-sweet combo is fantastic, especially if you add a drizzle of melted chocolate on top.
Serving & Storage Suggestions
These bars are best served cold, straight from the refrigerator. The texture is firm but creamy, and the flavors are most pronounced when they’re chilled. I like to take them out about 10 minutes before serving—just enough to take the chill off without losing the structure.
For presentation, arrange the bars on a white platter or cake stand. A dusting of crushed Biscoff cookies on top adds texture and makes them look extra special. If you’re serving at a party, you can garnish each bar with a small dollop of whipped cream and a whole Biscoff cookie.
These pair beautifully with coffee, espresso, or even a glass of cold milk. For a dessert spread, serve them alongside fresh berries or a simple chocolate mousse. The contrast of the rich, spiced bars with tart berries is lovely.
Storage: Keep the bars in an airtight container in the refrigerator for up to 5 days. They actually get better after a day—the flavors meld and the texture firms up perfectly. You can also freeze them for up to 3 months. Wrap individual bars in plastic wrap, then place them in a freezer-safe bag. Thaw in the refrigerator overnight before serving.
One note—if you’re taking these to a potluck or picnic, keep them chilled until you’re ready to serve. They’ll hold up at room temperature for about an hour, but any longer and they’ll start to soften.
Nutritional Information & Benefits
These Best No-Bake Biscoff Cheesecake Bars are a treat, so I won’t pretend they’re health food. But here’s the estimated nutritional breakdown per bar (based on 16 servings):
- Calories: 380
- Fat: 26g
- Saturated Fat: 14g
- Carbohydrates: 32g
- Sugar: 22g
- Protein: 5g
The cream cheese provides a decent amount of protein and calcium, and the Biscoff cookies contain a small amount of fiber. That said, this is definitely an indulgence—and that’s okay. For special occasions, it’s worth every bite.
If you’re watching your sugar intake, you can reduce the powdered sugar slightly, but keep in mind it helps with the texture. You could also use a sugar-free Biscoff spread, though I haven’t tested that myself.
These bars contain dairy, gluten, and are not suitable for vegans unless adapted as noted above. Always check your ingredients if you’re serving someone with allergies.
Conclusion
These Best No-Bake Biscoff Cheesecake Bars are the dessert I turn to when I want to impress without the stress. They’re simple enough for a Tuesday night but fancy enough for a dinner party. The triple layer of Biscoff flavor—crust, filling, and swirl—creates something that tastes like you spent hours, when really it’s about 25 minutes of work.
I love that I can make them a day ahead and just pull them out when guests arrive. No last-minute fussing, no oven timers, no worrying about whether it’ll turn out. They always do. And honestly, that’s the kind of reliability you want in a dessert when you’re hosting.
If you try these bars, I’d love to hear how they turn out. Leave a comment below and let me know—did you add any twists? Serve them at a party? Make them for a quiet night in? I read every comment, and your stories are what keep me testing and tweaking in the kitchen.
Go ahead—give these a try. Your guests (and your taste buds) will thank you. Happy baking, or rather, happy no-baking!
Frequently Asked Questions
Can I use low-fat cream cheese for this recipe?
I don’t recommend it. Low-fat cream cheese has a higher water content, which makes the filling softer and less likely to set properly. Full-fat cream cheese gives you that dense, creamy texture that makes these bars so good.
How long do these bars need to chill?
At least 6 hours, but overnight is best. The filling needs time to firm up so you can slice clean bars. If you’re in a hurry, you can try 4 hours, but they’ll be softer and harder to cut.
Can I freeze these cheesecake bars?
Yes! They freeze beautifully. Wrap individual bars in plastic wrap, then place them in a freezer-safe bag. They’ll keep for up to 3 months. Thaw in the refrigerator overnight before serving.
What can I use instead of Biscoff spread?
You can use cookie butter from other brands, or try speculoos spread, which is very similar. In a pinch, you could use peanut butter, but the flavor will be quite different. For the crust, graham crackers or digestive biscuits work if you can’t find Biscoff cookies.
Why did my filling turn out lumpy?
This usually happens when the cream cheese isn’t softened enough. Make sure it’s at room temperature before you start. If you still get lumps, try beating the mixture for an extra minute or two. You can also press it through a fine-mesh sieve, but that’s a lot of work—better to just soften the cream cheese properly.
Pin This Recipe!
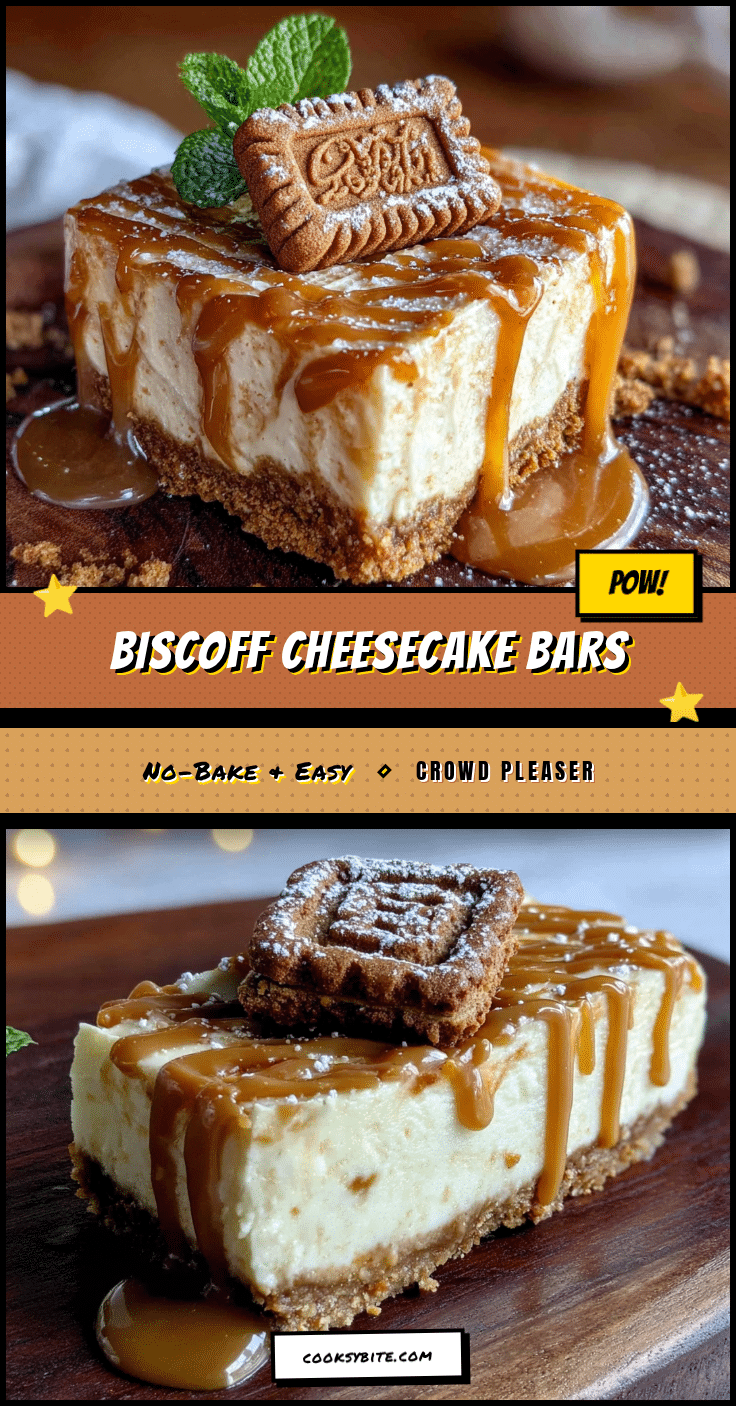
Best No-Bake Biscoff Cheesecake Bars
These no-bake cheesecake bars feature a buttery Biscoff cookie crust, a silky cream cheese filling swirled with Biscoff spread, and a drizzle of warm Biscoff on top. Perfect for entertaining, they require no oven and can be made ahead.
- Prep Time: 25 minutes
- Cook Time: 0 minutes
- Total Time: 6 hours 25 minutes (includes chilling)
- Yield: 16 servings 1x
- Category: Dessert
- Cuisine: Belgian-American
Ingredients
- 250g (about 2 cups) Biscoff cookies, finely crushed
- 85g (6 tablespoons) unsalted butter, melted
- 2 tablespoons (25g) granulated sugar
- 680g (three 8-ounce blocks) full-fat cream cheese, softened
- 120g (1 cup) powdered sugar, sifted
- 240g (1 cup) smooth Biscoff spread
- 240ml (1 cup) heavy whipping cream, cold
- 1 teaspoon (5ml) pure vanilla extract
- Pinch of salt
- 60g (¼ cup) Biscoff spread, warmed for drizzling
- Optional: crushed Biscoff cookies for garnish
Instructions
- Line a 9×9-inch baking pan with parchment paper, leaving overhang on two opposite sides. Lightly grease the parchment.
- Pulse Biscoff cookies in a food processor until fine crumbs form (about 2 cups). Alternatively, crush in a zip-top bag with a rolling pin.
- Transfer crumbs to a medium bowl. Add melted butter and granulated sugar; stir with a fork until evenly moistened (like wet sand). Press firmly into the prepared pan using the bottom of a measuring cup. Refrigerate while making the filling.
- In a clean, cold bowl, beat heavy whipping cream with an electric mixer on medium-high speed until stiff peaks form (3-4 minutes). Refrigerate.
- In a large bowl, beat softened cream cheese on medium speed until smooth and creamy (about 2 minutes). Scrape down sides. Add sifted powdered sugar and beat until combined (1 minute).
- Add 240g Biscoff spread, vanilla extract, and a pinch of salt. Beat on medium speed until fully incorporated and smooth.
- Gently fold the whipped cream into the cream cheese mixture in thirds until just combined. The filling should be light, fluffy, and smooth.
- Remove crust from refrigerator. Spoon filling over crust and spread evenly. Tap pan gently on counter to release air bubbles.
- Warm 60g Biscoff spread in microwave for about 15 seconds until thin enough to drizzle. Spoon over filling and swirl with a knife or toothpick. Do not over-swirl.
- Cover pan with plastic wrap and refrigerate for at least 6 hours, preferably overnight.
- When set, lift bars out using parchment overhang. Place on cutting board and slice into 16 squares with a sharp knife, wiping blade clean between cuts. Garnish with crushed Biscoff cookies if desired. Serve cold.
Notes
Room temperature cream cheese is essential for a smooth filling. Press the crust firmly to prevent crumbling. Chill at least 6 hours, preferably overnight, for clean slices. For clean cuts, warm the knife under hot water and wipe between slices. Bars can be frozen for up to 3 months.
Nutrition
- Serving Size: 1 bar
- Calories: 380
- Sugar: 22
- Fat: 26
- Saturated Fat: 14
- Carbohydrates: 32
- Protein: 5
Keywords: no-bake cheesecake, Biscoff, cookie butter, cheesecake bars, easy dessert, no-bake dessert, make-ahead dessert


