It was 10:47 PM on a rainy Tuesday in early October, and I had an unreasonable craving for something both chocolatey and creepy. I didn’t have any Halloween-themed sprinkles or those fancy candy eyeballs everyone uses, but I had a batch of my go-to chocolate cupcake batter chilling in the fridge and a jar of marshmallow fluff that was honestly just taking up space. The idea that arrived was weirdly specific: what if I could pipe a spider web onto each cupcake, not with fondant or melted chocolate, but with a simple marshmallow buttercream and a toothpick? I mean, maybe I was just tired, but it felt like a revelation.
I started pulling things out of the pantry—cocoa powder, flour, sugar—and the kitchen smelled like a bakery that had been taken over by friendly ghosts. I accidentally dropped a whole egg on the floor, which my cat immediately investigated with great suspicion, and I realized I was out of vanilla extract. So I used a splash of almond extract instead, which honestly made the chocolate taste even richer. Let me tell you, something about the quiet of late night, the rain tapping against the window, and the complete lack of anyone watching made me take risks I’d never try during daylight hours. I piped that buttercream into messy, beautiful webs, and when I dragged the toothpick through the white frosting to create those thin, dark chocolate lines, I actually gasped. It worked. It actually worked.
Maybe you’ve been there—standing in your kitchen at an absurd hour, covered in flour, convinced you’re either a genius or completely losing it. These spooky chocolate spider web cupcakes were born from that exact energy, and they’ve become my favorite Halloween tradition. They look like you spent hours on them, but honestly? The hardest part was waiting for them to cool.
Why You’ll Love This Recipe
These aren’t just any Halloween cupcakes. They are the kind that makes people stop and say, “Wait, you made these?” I’ve tested this recipe six times now—yes, six—to get the crumb just right and the web pattern foolproof. Here is why they deserve a spot in your Halloween baking rotation:
- Quick & Easy: From start to finish, you’re looking at about 45 minutes. The frosting comes together in one bowl, and the spider web design takes maybe 30 seconds per cupcake.
- Simple Ingredients: No specialty baking supplies needed. You probably have everything in your pantry right now, minus maybe the marshmallow fluff (which is totally worth buying).
- Perfect for Halloween: These are the star of any Halloween party, classroom treat, or spooky movie night. They look impressive but are secretly low-stress.
- Crowd-Pleaser: The combination of ultra-moist chocolate cake and creamy marshmallow buttercream is a guaranteed hit. Kids love the design, adults love the flavor.
- Unbelievably Delicious: The almond extract in the cake adds a subtle warmth that makes the chocolate taste deeper and more complex. It’s not your average box-mix cupcake.
What makes these different from every other spider web cupcake out there is the technique. Instead of struggling with melted chocolate that hardens too fast, you use a simple buttercream base and a toothpick drag method that is nearly impossible to mess up. It is comfort food reimagined—spooky enough for Halloween, but so good you’ll want to make them all year round.
What Ingredients You Will Need
This recipe relies on pantry staples to deliver rich chocolate flavor and a light, tender crumb. The marshmallow buttercream is the real star here—it’s silky, sweet, and creates the perfect canvas for your spider web design.
For the Chocolate Cupcakes
- 1 1/2 cups all-purpose flour (spooned and leveled)
- 1 cup granulated sugar
- 1/2 cup unsweetened cocoa powder (I prefer Ghirardelli for its deep flavor)
- 1 teaspoon baking soda
- 1/2 teaspoon baking powder
- 1/2 teaspoon salt
- 1 cup buttermilk, room temperature (or 1 cup milk + 1 tablespoon lemon juice, let sit 5 minutes)
- 1/2 cup vegetable oil
- 2 large eggs, room temperature
- 1 teaspoon almond extract (or vanilla if you don’t have almond)
- 1/2 cup hot coffee (this deepens the chocolate flavor—trust me)
For the Marshmallow Buttercream Frosting
- 1 cup unsalted butter, softened (2 sticks)
- 1 (7 oz) jar marshmallow fluff (about 2 cups)
- 2 cups powdered sugar, sifted
- 1 teaspoon vanilla extract
- 2-3 tablespoons heavy cream or milk (as needed for consistency)
For the Spider Web Design
- 1/4 cup semi-sweet chocolate chips, melted
- 1 tablespoon coconut oil or vegetable shortening (to thin the chocolate)
- A toothpick or wooden skewer
- Optional: small candy spiders or chocolate chips for decoration
Equipment Needed
You don’t need a fancy bakery setup for these. Here’s what you’ll actually use:
- 12-cup muffin tin – Standard size works best. I recommend a non-stick pan for easy release.
- Paper cupcake liners – Go for black or orange ones for extra Halloween flair, but any color works.
- Mixing bowls – One large bowl for dry ingredients, one for wet. Nothing fancy.
- Electric hand mixer or stand mixer – For the frosting. You can whisk by hand, but your arm will hate you.
- Piping bag or zip-top bag – For the frosting. A zip-top bag with the corner snipped off works perfectly.
- Small microwave-safe bowl – For melting the chocolate.
- Toothpick or wooden skewer – The secret weapon for your spider web design.
- Cooling rack – Essential for even cooling. Don’t skip this or your frosting will melt.
I’ve used a basic Wilton piping tip for the frosting, but honestly, just snipping the corner of a zip-top bag gives you more control. And if you don’t have a muffin tin? You could bake these as a sheet cake and just cut it into squares—still spooky, still delicious.
Preparation Method
Let’s get baking. I’ve broken this down so even a beginner can nail it.
Step 1: Preheat and Prep
Preheat your oven to 350°F (175°C). Line your muffin tin with 12 paper liners. If you’re feeling extra Halloween-y, use black or orange liners. Set aside.
Step 2: Mix the Dry Ingredients
In a large bowl, whisk together the flour, sugar, cocoa powder, baking soda, baking powder, and salt. Make sure there are no lumps—cocoa powder can be stubborn. Sift it if you need to, but honestly, a good whisk works fine.
Step 3: Combine the Wet Ingredients
In a separate bowl, whisk together the buttermilk, vegetable oil, eggs, and almond extract until smooth. The mixture should look a little pale and glossy. This is where the almond extract does its magic—it smells amazing.
Step 4: Bring It All Together
Pour the wet ingredients into the dry ingredients and stir gently with a spatula until just combined. Do not overmix—lumps are okay. Now, slowly pour in the hot coffee while stirring. The batter will be very thin, almost like a milkshake. That’s normal. Don’t panic.
Step 5: Fill and Bake
Divide the batter evenly among the 12 liners, filling each about 2/3 full. I use an ice cream scoop for this—it’s less messy. Bake for 18-22 minutes, or until a toothpick inserted into the center comes out with a few moist crumbs. The tops should spring back when lightly touched. Let them cool in the pan for 5 minutes, then transfer to a wire rack to cool completely. Patience is key here—warm cupcakes will melt your frosting into a sad puddle.
Step 6: Make the Marshmallow Buttercream
While the cupcakes cool, make the frosting. In a large bowl, beat the softened butter with an electric mixer until creamy and pale, about 2 minutes. Add the marshmallow fluff and beat until combined. It will look a little curdled at first—keep going. Gradually add the sifted powdered sugar, one cup at a time, beating on low speed. Add the vanilla extract and 2 tablespoons of heavy cream. Beat on medium-high for 2-3 minutes until light and fluffy. If it’s too thick, add another tablespoon of cream. If it’s too thin, add a little more powdered sugar.
Step 7: Frost the Cupcakes
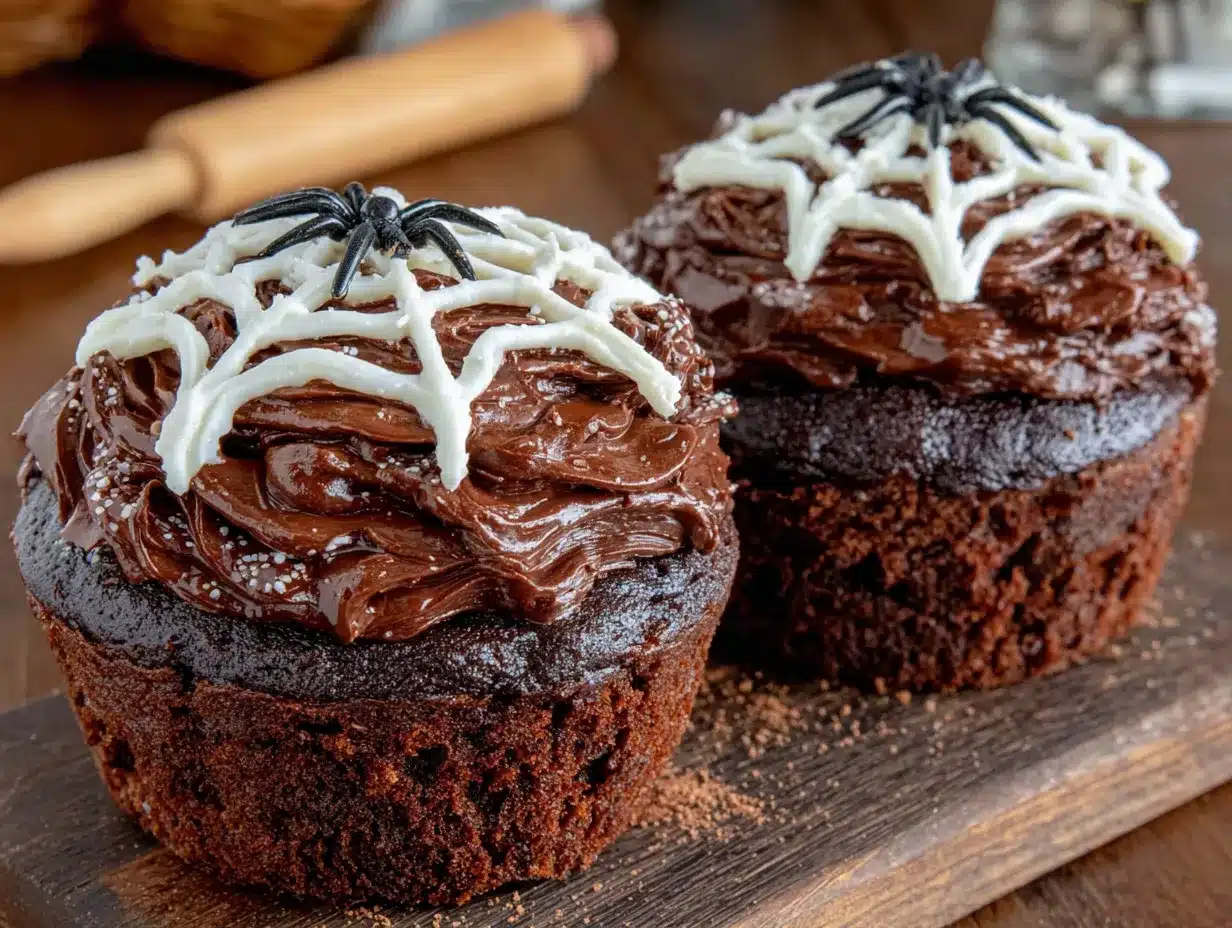
Transfer the frosting to a piping bag (or zip-top bag with the corner snipped). Pipe a generous swirl onto each cooled cupcake. Start from the outside and work your way in, creating a smooth, rounded top. You want a nice flat surface for your spider web.
Step 8: Create the Spider Web Design
Melt the chocolate chips and coconut oil together in a small microwave-safe bowl in 20-second bursts, stirring between each, until smooth. Let it cool slightly—it should be warm but not hot. Dip the tip of a toothpick into the melted chocolate. Starting from the center of a frosted cupcake, drag the toothpick outward in a straight line to the edge. Repeat this 5-6 times around the cupcake, like spokes on a wheel. Then, working from the center outward, drag the toothpick in curved lines between the spokes to create the web. Wipe the toothpick clean between each drag for clean lines. It sounds complicated, but after the first cupcake, you’ll be a pro.
Step 9: Add the Spider (Optional)
Place a small candy spider on top of each cupcake, or use a chocolate chip with pretzel stick legs. I’ve also used black licorice strings cut into tiny pieces. Get creative!
Cooking Tips & Techniques
I’ve made these cupcakes more times than I care to admit, and I’ve learned a few things the hard way. Here’s what I wish someone had told me:
Don’t overmix the batter. I know I said it before, but it’s worth repeating. Overmixing develops gluten, which makes cupcakes tough and dense. You want them light and fluffy. Mix until the flour just disappears, then stop.
Room temperature ingredients matter. Cold eggs and cold buttermilk won’t emulsify properly, leading to a denser crumb. Take them out of the fridge 30 minutes before you start. Set a timer—I’ve forgotten and had to microwave my eggs (don’t do that).
The coffee is not optional. I know it sounds weird, but hot coffee enhances the chocolate flavor without making the cupcakes taste like coffee. It’s a baker’s trick. Use decaf if you’re worried about caffeine.
Let the cupcakes cool completely. I once frosted a slightly warm cupcake and watched the buttercream slide off like a mudslide. It was tragic. Wait the full 30 minutes. Read a book. Pet your cat. Just wait.
Chocolate consistency is everything. If your melted chocolate is too thick, the web lines will be clumpy. If it’s too thin, they’ll be watery. The coconut oil helps keep it fluid but not runny. Test on a piece of wax paper first.
Wipe your toothpick often. This is the secret to clean web lines. After every drag, wipe the toothpick on a paper towel. It takes two seconds and makes a huge difference.
Variations & Adaptations
One of the best things about this recipe is how flexible it is. Here are some ways to make it your own:
Gluten-Free Version: Substitute the all-purpose flour with a 1:1 gluten-free baking flour blend. I’ve used Bob’s Red Mill with great results. Add 1/4 teaspoon xanthan gum if your blend doesn’t include it.
Dairy-Free Version: Use a dairy-free butter substitute (like Miyoko’s) and replace the buttermilk with almond milk mixed with 1 tablespoon apple cider vinegar. The texture will be slightly less tender, but still delicious.
Peanut Butter Spider Webs: Swap the marshmallow fluff for creamy peanut butter in the frosting. Pipe the same way, but use melted dark chocolate for the web. The salty-sweet combo is incredible.
White Chocolate Webs: For a reverse look, use white chocolate for the web design on dark chocolate frosting. It gives a ghostly, ethereal vibe that’s perfect for a haunted house party.
Cupcake Flavor Variations: Try a red velvet base for a blood-red crumb, or a vanilla bean base for a “mummy” look. The spider web technique works on any flavor.
Mini Cupcakes: Use a mini muffin tin and reduce the baking time to 10-12 minutes. Perfect for Halloween parties where people want to sample multiple treats.
Serving & Storage Suggestions
These cupcakes are best served at room temperature, which lets the frosting soften to that perfect creamy texture. Arrange them on a black platter or a cake stand for maximum spooky effect. I like to add a few fake cobwebs around the base for decoration—just make sure they’re not near the food.
For a Halloween party, pair these with a glass of cold milk, a warm apple cider, or even a pumpkin spice latte. They also go surprisingly well with a scoop of vanilla ice cream—the cold creaminess balances the rich chocolate.
Storing: Keep unfrosted cupcakes in an airtight container at room temperature for up to 3 days. Frosted cupcakes should be stored in the refrigerator, but bring them to room temperature for 30 minutes before serving for the best texture.
Freezing: You can freeze the unfrosted cupcakes for up to 3 months. Wrap each one tightly in plastic wrap, then place in a freezer bag. Thaw at room temperature before frosting. The frosting itself doesn’t freeze well, so make it fresh.
The flavors actually deepen overnight—the almond extract melds with the chocolate, and the marshmallow buttercream gets even fluffier. Honestly, I think they taste even better the next day.
Nutritional Information & Benefits
Let’s be real—these are a treat, not a health food. But here’s the breakdown for one cupcake with frosting (without the candy spider):
- Calories: Approximately 420
- Fat: 22g
- Carbohydrates: 55g
- Protein: 4g
- Sugar: 38g
- Fiber: 2g
On the bright side, dark chocolate contains antioxidants and magnesium, and the eggs provide a small amount of protein. The almond extract adds a touch of vitamin E. But honestly? These are about joy, not nutrition. Halloween comes once a year, and these cupcakes are worth every single calorie. If you’re watching your sugar intake, you can reduce the sugar in the frosting by using a sugar-free marshmallow fluff, but I haven’t tested that version myself.
Conclusion
These spooky chocolate spider web cupcakes are everything I want in a Halloween recipe: impressive enough to steal the show, simple enough to make on a Tuesday night, and delicious enough to eat three in a row without guilt. They started as a late-night experiment born from a craving and a jar of marshmallow fluff, and now they’re my most-requested fall treat.
I love that each spider web is slightly different—some messy, some perfect, all beautiful in their own way. That’s the thing about baking, isn’t it? The imperfections are what make it yours. So go ahead, make these for your Halloween party, your kids’ classroom, or just for yourself on a rainy October night. You deserve something spooky and sweet.
If you try this recipe, I’d love to hear about it! Drop a comment below and let me know how your spider webs turned out. Tag me in your photos—I live for seeing your creations. And if you have a favorite Halloween memory or a secret ingredient you swear by, share that too. Happy Halloween, and happy baking!
Frequently Asked Questions
Can I use a boxed cake mix for these cupcakes?
Absolutely. If you’re short on time, a devil’s food cake mix works perfectly. Just follow the box instructions, add a teaspoon of almond extract, and replace the water with strong brewed coffee. The frosting and spider web technique stay the same.
Why did my frosting turn out too runny?
This usually happens if the butter is too soft or if you added too much liquid. Pop the frosting in the fridge for 10-15 minutes to firm up, then re-whip it. If it’s still runny, beat in a little more powdered sugar, one tablespoon at a time.
Can I make these cupcakes ahead of time?
Yes! Bake the cupcakes up to 2 days in advance and store them unfrosted in an airtight container. Make the frosting and decorate on the day you plan to serve them. The spider web design is best done fresh, as the chocolate can bleed into the frosting over time.
How do I get clean spider web lines?
Wipe your toothpick clean after every single drag. It’s tedious, but it makes a huge difference. Also, make sure your melted chocolate is the right consistency—thin enough to flow but not watery. Test on a piece of wax paper first.
Can I use a different frosting for the spider web design?
Yes! Cream cheese frosting works beautifully, as does a simple buttercream. Just make sure it’s thick enough to hold the chocolate lines. Avoid very soft frostings like whipped cream, as the chocolate will sink in.
Pin This Recipe!
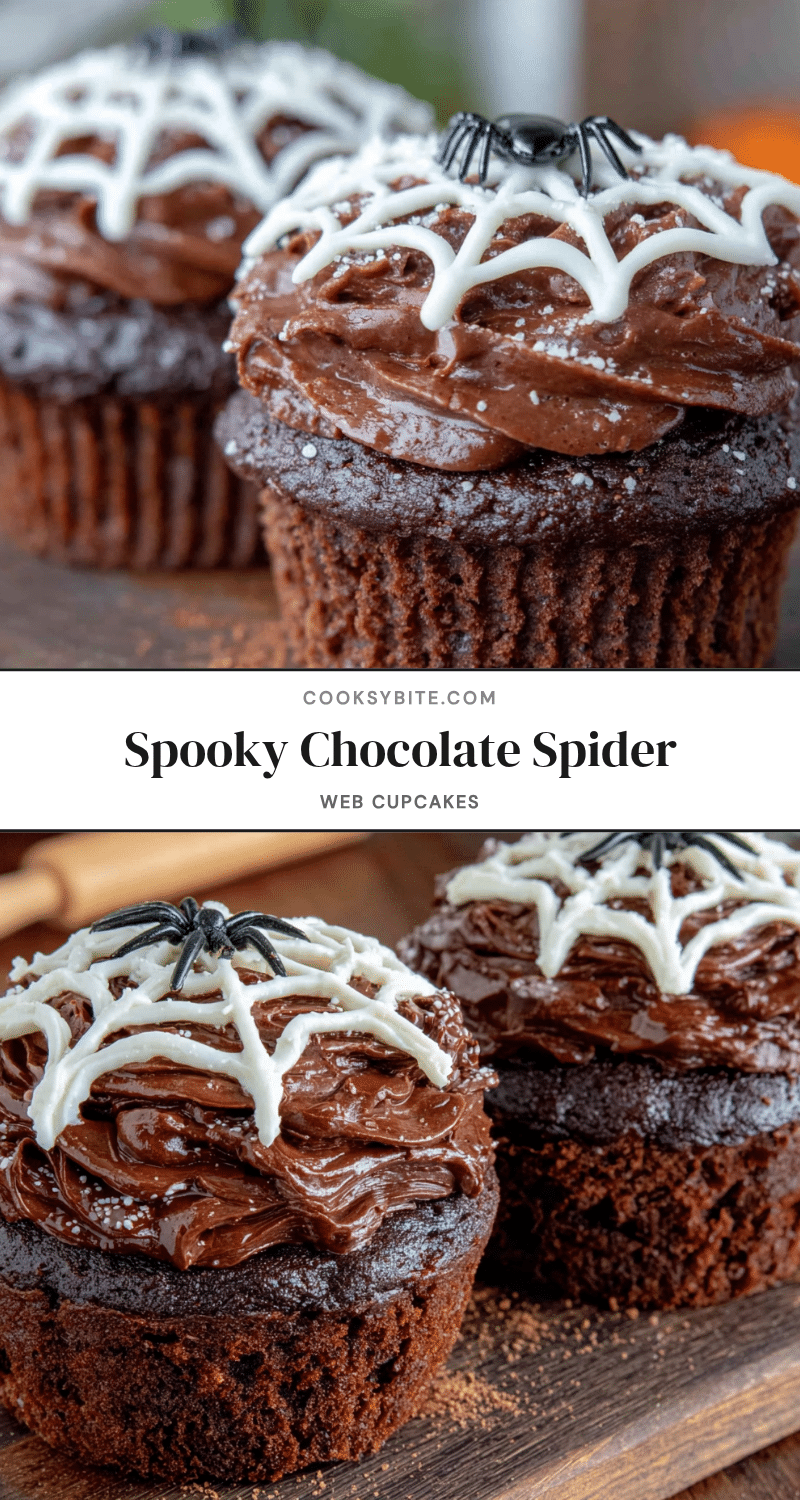
Spooky Chocolate Spider Web Cupcakes: Easy Halloween Recipe
These spooky chocolate spider web cupcakes are moist, rich, and topped with a silky marshmallow buttercream. The easy toothpick drag technique creates impressive webs in seconds, making them perfect for Halloween parties or a fun baking project.
- Prep Time: 15 minutes
- Cook Time: 20 minutes
- Total Time: 45 minutes
- Yield: 12 cupcakes 1x
- Category: Dessert
- Cuisine: American
Ingredients
- 1 1/2 cups all-purpose flour (spooned and leveled)
- 1 cup granulated sugar
- 1/2 cup unsweetened cocoa powder (preferably Ghirardelli)
- 1 teaspoon baking soda
- 1/2 teaspoon baking powder
- 1/2 teaspoon salt
- 1 cup buttermilk, room temperature (or 1 cup milk + 1 tablespoon lemon juice, let sit 5 minutes)
- 1/2 cup vegetable oil
- 2 large eggs, room temperature
- 1 teaspoon almond extract (or vanilla extract)
- 1/2 cup hot coffee
- 1 cup unsalted butter, softened (2 sticks)
- 1 (7 oz) jar marshmallow fluff (about 2 cups)
- 2 cups powdered sugar, sifted
- 1 teaspoon vanilla extract
- 2–3 tablespoons heavy cream or milk (as needed for consistency)
- 1/4 cup semi-sweet chocolate chips
- 1 tablespoon coconut oil or vegetable shortening
- A toothpick or wooden skewer
- Optional: small candy spiders or chocolate chips for decoration
Instructions
- Preheat oven to 350°F (175°C). Line a 12-cup muffin tin with paper liners.
- In a large bowl, whisk together flour, sugar, cocoa powder, baking soda, baking powder, and salt.
- In a separate bowl, whisk together buttermilk, vegetable oil, eggs, and almond extract until smooth.
- Pour wet ingredients into dry ingredients and stir gently with a spatula until just combined. Do not overmix. Slowly stir in hot coffee until batter is thin and smooth.
- Divide batter evenly among the 12 liners, filling each about 2/3 full. Bake for 18-22 minutes, or until a toothpick inserted into the center comes out with a few moist crumbs. Cool in pan for 5 minutes, then transfer to a wire rack to cool completely.
- For the frosting: In a large bowl, beat softened butter with an electric mixer until creamy and pale, about 2 minutes. Add marshmallow fluff and beat until combined. Gradually add sifted powdered sugar, one cup at a time, beating on low speed. Add vanilla extract and 2 tablespoons heavy cream. Beat on medium-high for 2-3 minutes until light and fluffy. Add more cream if needed.
- Transfer frosting to a piping bag or zip-top bag with the corner snipped. Pipe a generous swirl onto each cooled cupcake, starting from the outside and working inward to create a smooth, rounded top.
- Melt chocolate chips and coconut oil together in a small microwave-safe bowl in 20-second bursts, stirring between each, until smooth. Let cool slightly.
- Dip the tip of a toothpick into the melted chocolate. Starting from the center of a frosted cupcake, drag the toothpick outward in a straight line to the edge. Repeat 5-6 times around the cupcake like spokes on a wheel. Then, working from the center outward, drag the toothpick in curved lines between the spokes to create the web. Wipe the toothpick clean between each drag.
- Optional: Place a small candy spider or chocolate chip on top of each cupcake for decoration.
Notes
Don’t overmix the batter. Room temperature ingredients matter. The coffee is not optional—it enhances the chocolate flavor. Let cupcakes cool completely before frosting. Wipe toothpick clean between each drag for clean web lines. Frosted cupcakes can be stored in the refrigerator but bring to room temperature before serving. Unfrosted cupcakes can be frozen for up to 3 months.
Nutrition
- Serving Size: 1 cupcake
- Calories: 420
- Sugar: 38
- Sodium: 280
- Fat: 22
- Saturated Fat: 12
- Carbohydrates: 55
- Fiber: 2
- Protein: 4
Keywords: Halloween cupcakes, spider web cupcakes, chocolate cupcakes, marshmallow buttercream, easy Halloween recipe, spooky dessert


