My neighbor, Mark, asked why I couldn’t just crush the Oreos in the bag with a rolling pin instead of dirtying my food processor. I started to explain why that wouldn’t work—something about even crumbs and proper texture. Then I stopped. Honestly? I had no good reason. I just always did it my way because that’s how I’d always done it. So I handed him the bag and the rolling pin, fully expecting to pick Oreo dust out of every corner of my kitchen. Three minutes later, we had perfectly crushed cookies, zero mess, and I felt like a bit of a fool. It was a Tuesday afternoon, and I was supposed to be the one teaching him how to make these Oreo dirt cups for his daughter’s birthday party. Instead, he taught me that sometimes the simplest method is the best one. That cracked my whole “I’m the expert here” thing wide open.
That moment stuck with me. Not because Mark was particularly smug about it—he wasn’t—but because it reminded me that cooking (and baking, and assembling no-bake desserts) isn’t about having the fanciest technique. It’s about what works. And these Oreo dirt cups? They work. They’re the kind of dessert that makes people stop mid-conversation and say, “Wait, you made these?” with genuine surprise. I’ve brought them to potlucks, backyard barbecues, and a particularly memorable game night where they disappeared before the chips and dip. Maybe you’ve been there—standing in the grocery store aisle, trying to decide what to bring that won’t be a total flop. Let me tell you, these dirt cups are your answer. They stayed with me because they’re the dessert that makes everyone feel like a kid again, and honestly, that’s a pretty good reason to keep making them.
Why You’ll Love This Recipe
Let’s be real for a second. There are a million dessert recipes out there claiming to be “the best.” But these Oreo dirt cups have something most of them don’t: they actually deliver on the hype. I’ve tested this recipe at least a dozen times—for picky eaters, for fancy dinner parties, for that one friend who claims they don’t like sweets. Every single time, the cups come back empty. Here’s why this version stands out from the rest:
- No-Bake & Stress-Free: You don’t need an oven, a mixer, or any special skills. If you can crush cookies and stir pudding, you can make these. Perfect for when you’re already juggling a dozen other things before guests arrive.
- Simple Ingredients: Everything on the list is available at any grocery store. No hunting down specialty items or spending a fortune. You probably have half of it in your pantry right now.
- Perfect for Hosting: These are made for gatherings. They’re individual portions, so no slicing or serving required. Guests grab one and go, which means less work for you and more time actually enjoying the party.
- Crowd-Pleaser: Kids love the gummy worms and the “dirt” factor. Adults love the creamy, chocolatey, nostalgic flavor. It’s rare to find a dessert that genuinely appeals to every age group, but this one does.
- Unbelievably Delicious: The texture is what gets everyone. The creamy pudding layer, the crunch of the crushed Oreos, the slight chewiness of the gummy worms—it all comes together in a way that’s way more than the sum of its parts.
What makes my version different? It’s the ratio. I spent way too long figuring out the perfect balance of pudding to Oreo crumbs so that every single bite has enough crunch and enough creaminess. No dry bites, no soggy layers. Plus, I use a little trick with the cream cheese that gives the pudding layer a richness that boxed pudding alone just can’t achieve. This isn’t just another dirt cup recipe—it’s the one you’ll come back to every time.
Ingredients You Will Need
This recipe uses simple, everyday ingredients to create something that feels surprisingly special. Most of these are pantry staples or easy to find at any grocery store. Let me walk you through what each ingredient does and why I chose these specific ones.
For the Pudding Layer
- 1 package (3.9 oz) instant chocolate pudding mix – I prefer Jell-O brand for the smoothest texture, but any brand works. Don’t use cook-and-serve pudding; it won’t set properly in the fridge.
- 2 cups cold whole milk – Whole milk gives the richest, creamiest texture. You can use 2% in a pinch, but avoid skim milk—the pudding won’t be as luscious.
- 4 oz cream cheese, softened to room temperature – This is my secret ingredient. It adds a slight tang and a velvety richness that makes the pudding layer taste almost like a mousse. Make sure it’s really softened, or you’ll end up with lumps.
- 1/4 cup powdered sugar – Just enough to sweeten the cream cheese without making the whole thing cloying. Regular granulated sugar won’t dissolve as smoothly here.
- 1 teaspoon vanilla extract – Pure vanilla extract is worth it here. The imitation stuff has a chemical aftertaste that you’ll notice in a simple recipe like this.
- 1 cup frozen whipped topping, thawed (like Cool Whip) – This lightens the pudding layer and makes it fluffy. You could whip your own heavy cream if you prefer, but Cool Whip is more stable for make-ahead desserts.
For the “Dirt” Layer
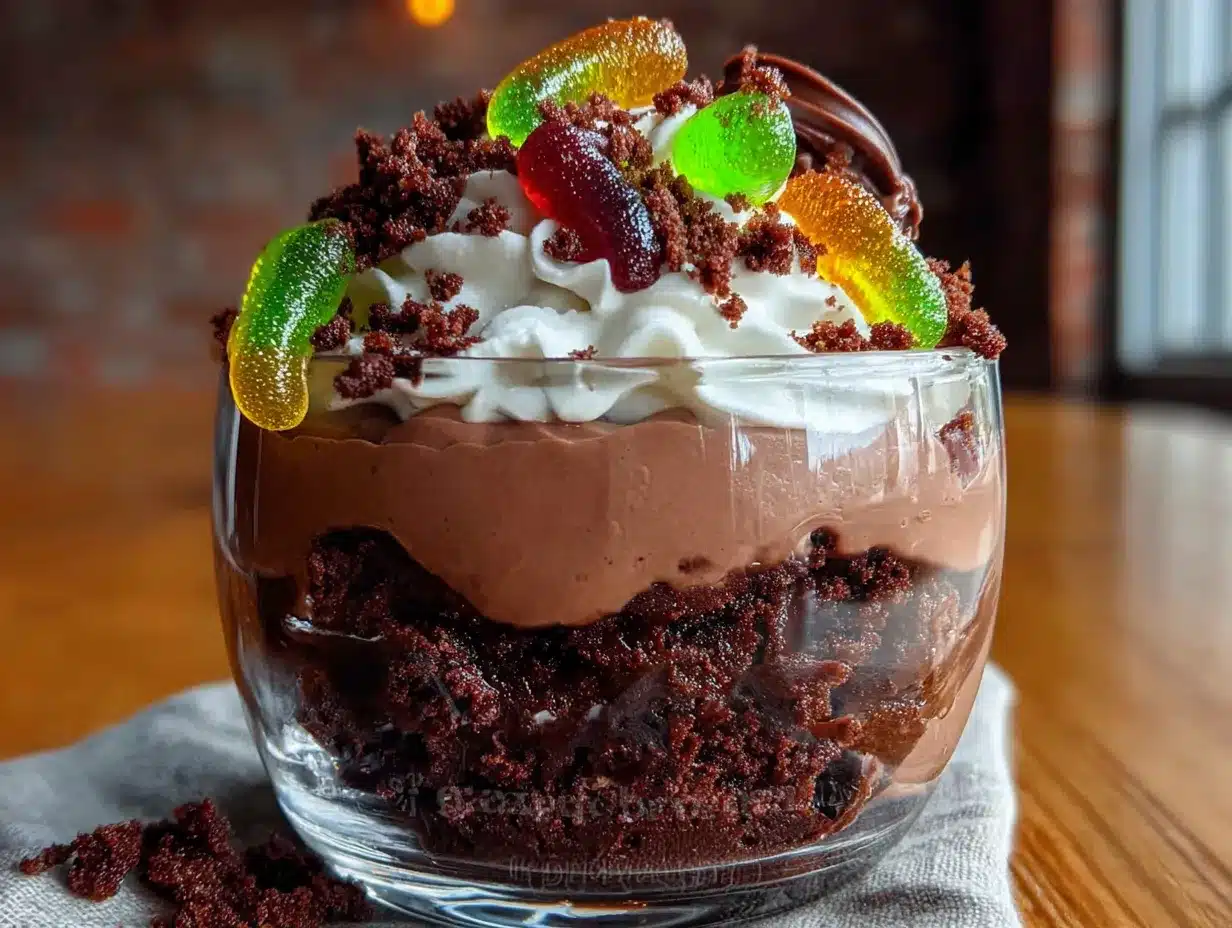
- 1 package (14.3 oz) Oreo cookies – Regular Oreos work best. Double Stuf is fine too, but you’ll have slightly less cookie-to-creme ratio, which changes the texture a bit. I’ve tested both, and regular Oreos give a more authentic “dirt” look.
- 4 tablespoons unsalted butter, melted – This helps the Oreo crumbs hold together slightly and adds a richness that makes the “dirt” taste more like a crust. Salted butter works too—just reduce any additional salt in the recipe.
For the Garnish
- 1 cup gummy worms – Use the sour or regular kind, whichever you prefer. I like the sour ones because they cut through the sweetness a bit. Cut some in half so they look like they’re crawling out of the dirt.
- Optional: 8-10 small gummy leaves or flower-shaped gummies – This is purely decorative but adds a fun garden vibe if you’re serving these at a themed party.
Equipment Needed
You don’t need a fully stocked kitchen for this recipe, which is part of the beauty of it. Here’s what you’ll need:
- 8 small clear cups or glasses – Clear is key here; the whole point is seeing the layers. I use 8-ounce plastic cups for parties (no glass to wash!), but small mason jars or wine glasses work beautifully for a fancier presentation.
- A large zip-top bag and a rolling pin – Thanks to Mark’s suggestion, this is now my preferred method for crushing Oreos. It’s fast, contained, and oddly satisfying. A food processor works too if you prefer.
- A medium mixing bowl and a hand mixer – You need the hand mixer to get the cream cheese smooth. A whisk will work if you’re patient and the cream cheese is very soft, but honestly, a hand mixer saves you ten minutes of arm workout.
- A spatula – For scraping every last bit of pudding into the cups. Waste not, want not.
- A small cookie scoop or spoon – For layering the pudding and crumbs evenly. A cookie scoop makes this go much faster and keeps portions consistent.
If you don’t have a hand mixer, you can beat the cream cheese and sugar together with a wooden spoon—just make sure the cream cheese is really, really soft. I’ve done it before when my mixer was in storage, and it worked fine. It just took a little elbow grease.
Preparation Method
This recipe comes together in about 20 minutes of active time, plus 2 hours of chilling. I always make these the morning of a party so they have plenty of time to set. Here’s how to do it:
- Crush the Oreos. Place the entire package of Oreos (creme filling and all) into a large zip-top bag. Seal it tightly, pressing out as much air as possible. Use a rolling pin to crush the cookies into fine crumbs. You want a mix of fine crumbs and a few slightly larger pieces—the texture should resemble actual garden dirt. Set aside 1/4 cup of the crumbs for topping later.
- Mix the melted butter into the remaining crumbs. Pour the melted butter into the bag with the Oreo crumbs. Seal and squish it around with your hands until the butter is evenly distributed. This step makes the “dirt” taste richer and helps it hold together slightly when layered. Set aside.
- Make the cream cheese base. In a medium mixing bowl, beat the softened cream cheese with the powdered sugar and vanilla extract using a hand mixer on medium speed until smooth and fluffy—about 2 minutes. Scrape down the sides of the bowl with a spatula halfway through. There should be no lumps. This is important; lumps of cream cheese in the pudding are not a good texture.
- Prepare the pudding. In a separate bowl, whisk the instant chocolate pudding mix with the cold milk for about 2 minutes until it starts to thicken. It will be quite thin at first, then suddenly it will thicken up. Don’t overmix; you just want it to come together.
- Combine the pudding with the cream cheese. Add the pudding mixture to the cream cheese mixture and beat on low speed until just combined. Use your spatula to fold it together gently if needed. You want a uniform, creamy mixture with no streaks.
- Fold in the whipped topping. Gently fold the thawed whipped topping into the pudding-cream cheese mixture using a spatula. Fold until no white streaks remain. This lightens the whole mixture and gives it that mousse-like texture. Be gentle—you don’t want to deflate all that air.
- Layer the cups. Start with a layer of the buttered Oreo crumbs at the bottom of each cup—about 2 tablespoons per cup. Press down lightly with the back of a spoon. Next, add a layer of the pudding mixture—about 3 tablespoons per cup. Then add another layer of Oreo crumbs (about 1 tablespoon). Finally, top with another layer of pudding mixture. The exact amounts will depend on your cup size; just aim for an even distribution among all 8 cups.
- Top with reserved crumbs. Sprinkle the reserved 1/4 cup of plain Oreo crumbs over the top of each cup. This gives that final “dirt” look that makes the gummy worms pop.
- Add the gummy worms. Gently press 2-3 gummy worms into the top of each cup so they look like they’re crawling out of the dirt. I like to position one worm hanging over the edge of the cup for maximum effect.
- Chill. Refrigerate the cups for at least 2 hours, or up to 24 hours. The longer they sit, the more the flavors meld together. Don’t skip this step—the pudding needs time to set properly, and the Oreo crumbs need to soften just slightly against the pudding.
A quick note: if you’re making these for a party, assemble them in the cups but wait to add the gummy worms until just before serving. If the worms sit in the fridge too long, they can get a bit hard and lose their chewiness. I learned this the hard way when I made them the night before and the worms were oddly tough the next day.
Cooking Tips & Techniques
After making these Oreo dirt cups more times than I can count, I’ve picked up a few tricks that make the process smoother and the results better. Here are the ones I swear by:
Don’t overmix the pudding. Instant pudding sets quickly, and if you keep beating it, it can become grainy or separate. Mix just until it comes together, then stop. This is one of those lessons I learned from a failed batch that ended up with a weird, watery layer on top.
Use room temperature cream cheese. Cold cream cheese will leave lumps in your pudding layer no matter how long you beat it. Take it out of the fridge 30 minutes before you start. If you forget (I do this all the time), microwave it for 10-15 seconds on low power—just until it’s soft but not melted.
Crush the Oreos in batches. If you’re making a double batch for a larger party, crush the cookies in separate bags rather than trying to cram them all into one. The more room the cookies have, the more evenly they crush. Overcrowding leads to uneven crumbs and a lot of frustration.
Let the cups sit for at least 2 hours. I know it’s tempting to serve them right away, but the texture is completely different after they’ve chilled. The Oreo crumbs soften just enough to meld with the pudding, and the flavors deepen. Trust me on this one.
Use a piping bag for the pudding layer. If you want perfectly clean layers without smearing pudding on the sides of the cup, transfer the pudding mixture to a piping bag and pipe it in. I use a zip-top bag with the corner snipped off. It takes an extra minute but makes the presentation look professional.
One mistake I made early on was using too many gummy worms in each cup. It sounds like a good idea, but it throws off the ratio. You want just enough worms to look fun without overwhelming the creamy, crunchy layers. Three per cup is the sweet spot.
Variations & Adaptations
This recipe is incredibly flexible, which is one of the reasons I love it. Here are some variations I’ve tried and loved:
Gluten-Free Version: Use gluten-free chocolate sandwich cookies (like Glutino or Kinnikinnick brands) in place of Oreos. The texture is slightly different, but the flavor is still excellent. I made these for a friend with celiac disease, and she couldn’t tell the difference.
Peanut Butter Twist: Add 1/4 cup of creamy peanut butter to the cream cheese mixture before adding the pudding. Beat it in until smooth. The peanut butter pairs beautifully with the chocolate. Just be aware of nut allergies if you’re serving these at a party.
Mint Chocolate Version: Use mint-flavored Oreos (the ones with green creme) and add 1/2 teaspoon of peppermint extract to the pudding mixture. Top with a few chocolate shavings for an extra touch. This is my go-to for holiday parties.
Individual Trifle Cups: Instead of just Oreo crumbs and pudding, layer in some fresh raspberries or sliced strawberries between the layers. The tart fruit cuts through the sweetness and adds a pop of color. I did this for a summer barbecue, and they were a hit.
Dairy-Free Option: Use a dairy-free cream cheese alternative (like Kite Hill or Tofutti), coconut milk or oat milk for the pudding, and a dairy-free whipped topping. The texture will be slightly different, but the flavor is still delicious. I haven’t tested this with every brand, so results may vary.
If you’re making these for a kids’ party, consider using smaller cups (like 4-ounce shot glasses) for mini versions. They’re less overwhelming for little hands and look adorable on a dessert table.
Serving & Storage Suggestions
These Oreo dirt cups are best served cold, straight from the fridge. The contrast between the chilled, creamy pudding and the crunchy Oreo crumbs is part of what makes them so satisfying. Here are my tips for serving and storing them:
Serving Temperature: Take them out of the fridge about 5-10 minutes before serving. This takes the chill off just enough so the flavors really shine. Any longer, and the pudding can start to soften too much.
Presentation Ideas: For a garden-themed party, place each cup on a small plate and sprinkle a few extra Oreo crumbs around the base. Add a small plastic flower or a little garden flag for decoration. For Halloween, use orange and black gummy worms and add a small plastic spider on top.
What to Serve Alongside: These are rich enough to stand alone, but they pair beautifully with a cup of coffee or a glass of cold milk. If you’re serving them as part of a dessert table, balance them with something lighter, like fresh fruit skewers or a simple angel food cake.
Storage: Cover each cup with plastic wrap or a lid and store in the refrigerator for up to 3 days. The texture is best within the first 24 hours, but they’re still delicious after that. Do not freeze them—the pudding will become watery and grainy when thawed.
Reheating: These are meant to be served cold, so no reheating needed. If the gummy worms have hardened in the fridge, let the cups sit at room temperature for 10 minutes before serving to soften them up.
One thing I’ve noticed is that the flavors actually develop and deepen overnight. The Oreo crumbs soften ever so slightly, and the cream cheese flavor melds with the chocolate. If you can make these a day ahead, do it. They’re even better the next day.
Nutritional Information & Benefits
Let’s be honest—these are a treat, not a health food. But knowing what’s in them helps you enjoy them mindfully. Here’s the approximate nutritional breakdown for one serving (based on 8 servings):
- Calories: 380-420 per cup
- Fat: 18-22g (mostly from cream cheese and butter)
- Carbohydrates: 48-52g
- Protein: 6-8g
- Fiber: 1-2g
- Sugar: 32-36g
Health Highlights: The cream cheese provides a small amount of calcium and protein. The Oreos contain a bit of iron (from enriched flour). The milk in the pudding adds calcium and vitamin D. That said, this is a dessert meant to be enjoyed in moderation—not a daily staple.
Dietary Considerations: This recipe contains dairy (milk, cream cheese, whipped topping), gluten (Oreos), and soy (in some brands of Oreos and whipped topping). It’s not suitable for vegans or those with dairy or gluten allergies without substitutions. See the variations section for dairy-free and gluten-free options.
I personally see these as a “sometimes food”—perfect for birthdays, holidays, and gatherings where you want something special. They’re indulgent, but they’re also made with real ingredients (no artificial flavors if you use real vanilla and quality pudding). And honestly, sometimes you just need a dessert that makes you smile. These do exactly that.
Conclusion
These Oreo dirt cups are more than just a fun dessert—they’re the kind of recipe that makes hosting easier and more enjoyable. They come together in minutes, look impressive on a dessert table, and appeal to everyone from picky toddlers to discerning adults. I’ve brought them to countless gatherings, and they’ve never let me down.
What I love most about this recipe is how customizable it is. Swap in different cookies, change up the pudding flavor, add fruit, or go all-out with the gummy worm decorations. Make it your own. That’s the beauty of a simple recipe like this—it’s a foundation you can build on.
I’d love to hear how yours turn out! Did you try a variation? Did your guests love them? Drop a comment below and let me know. And if you share them on social media, tag me so I can see your creations. Happy hosting, and enjoy every creamy, crunchy, slightly silly bite.
Frequently Asked Questions
Can I make these Oreo dirt cups ahead of time?
Absolutely! In fact, I recommend making them at least 2 hours ahead so the pudding sets properly. They’ll keep in the fridge for up to 3 days. Just wait to add the gummy worms until right before serving so they stay soft and chewy.
Can I use homemade whipped cream instead of Cool Whip?
Yes, you can. Whip 1 cup of heavy cream with 2 tablespoons of powdered sugar until stiff peaks form, then fold it into the pudding mixture. The texture will be slightly lighter and less stable than with Cool Whip, so the cups won’t hold their shape as long. Use them within 24 hours if you go this route.
What if I don’t have clear cups?
You can use any small cups or bowls, but clear cups really make the layers visible, which is part of the fun. If you don’t have clear cups, try small mason jars, wine glasses, or even shot glasses for mini versions. The presentation won’t be quite as dramatic, but the taste will be the same.
Can I use sugar-free pudding and cookies?
Yes, you can use sugar-free instant chocolate pudding and sugar-free Oreos (if you can find them). The texture will be similar, though the flavor might be slightly different. Keep in mind that the cream cheese and whipped topping still contain sugar unless you use their sugar-free versions too.
How many cups does this recipe make?
This recipe makes 8 standard-sized cups (about 8 ounces each). If you’re using smaller cups, you’ll get more servings—around 12-14 mini cups. If you’re serving a crowd, double the recipe easily. Just make sure you have enough fridge space for all the cups to chill.
Pin This Recipe!
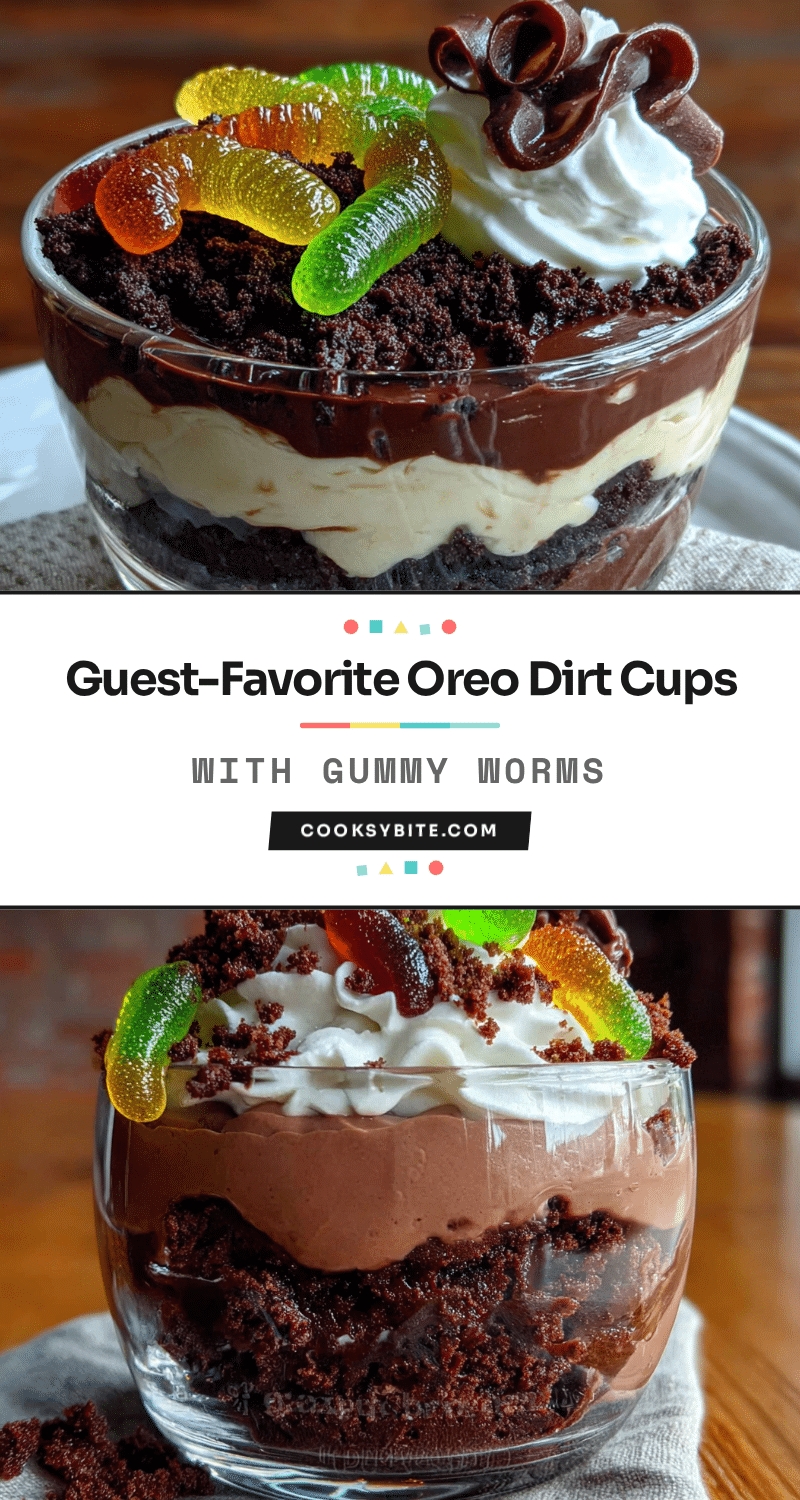
Easy Oreo Dirt Cups with Gummy Worms: Best Recipe
These no-bake Oreo dirt cups are the ultimate crowd-pleaser, featuring creamy chocolate pudding, crunchy Oreo crumbs, and fun gummy worms. Perfect for parties, they come together in minutes and always disappear fast.
- Prep Time: 20 minutes
- Cook Time: 0 minutes
- Total Time: 2 hours 20 minutes
- Yield: 8 servings 1x
- Category: Dessert
- Cuisine: American
Ingredients
- 1 package (3.9 oz) instant chocolate pudding mix
- 2 cups cold whole milk
- 4 oz cream cheese, softened to room temperature
- 1/4 cup powdered sugar
- 1 teaspoon vanilla extract
- 1 cup frozen whipped topping, thawed (like Cool Whip)
- 1 package (14.3 oz) Oreo cookies
- 4 tablespoons unsalted butter, melted
- 1 cup gummy worms
- Optional: 8-10 small gummy leaves or flower-shaped gummies
Instructions
- Crush the Oreos. Place the entire package of Oreos (creme filling and all) into a large zip-top bag. Seal it tightly, pressing out as much air as possible. Use a rolling pin to crush the cookies into fine crumbs. You want a mix of fine crumbs and a few slightly larger pieces—the texture should resemble actual garden dirt. Set aside 1/4 cup of the crumbs for topping later.
- Mix the melted butter into the remaining crumbs. Pour the melted butter into the bag with the Oreo crumbs. Seal and squish it around with your hands until the butter is evenly distributed. Set aside.
- Make the cream cheese base. In a medium mixing bowl, beat the softened cream cheese with the powdered sugar and vanilla extract using a hand mixer on medium speed until smooth and fluffy—about 2 minutes. Scrape down the sides of the bowl with a spatula halfway through. There should be no lumps.
- Prepare the pudding. In a separate bowl, whisk the instant chocolate pudding mix with the cold milk for about 2 minutes until it starts to thicken. Don’t overmix.
- Combine the pudding with the cream cheese. Add the pudding mixture to the cream cheese mixture and beat on low speed until just combined. Use your spatula to fold it together gently if needed.
- Fold in the whipped topping. Gently fold the thawed whipped topping into the pudding-cream cheese mixture using a spatula. Fold until no white streaks remain.
- Layer the cups. Start with a layer of the buttered Oreo crumbs at the bottom of each cup—about 2 tablespoons per cup. Press down lightly with the back of a spoon. Next, add a layer of the pudding mixture—about 3 tablespoons per cup. Then add another layer of Oreo crumbs (about 1 tablespoon). Finally, top with another layer of pudding mixture.
- Top with reserved crumbs. Sprinkle the reserved 1/4 cup of plain Oreo crumbs over the top of each cup.
- Add the gummy worms. Gently press 2-3 gummy worms into the top of each cup so they look like they’re crawling out of the dirt.
- Chill. Refrigerate the cups for at least 2 hours, or up to 24 hours.
Notes
For best results, wait to add gummy worms until just before serving to keep them soft. The cups can be made up to 3 days in advance. For a gluten-free version, use gluten-free chocolate sandwich cookies. For a dairy-free option, use dairy-free cream cheese, milk, and whipped topping.
Nutrition
- Serving Size: 1 cup
- Calories: 400
- Sugar: 34
- Sodium: 380
- Fat: 20
- Saturated Fat: 12
- Carbohydrates: 50
- Fiber: 1.5
- Protein: 7
Keywords: Oreo dirt cups, gummy worms, no-bake dessert, chocolate pudding, kids dessert, party dessert


