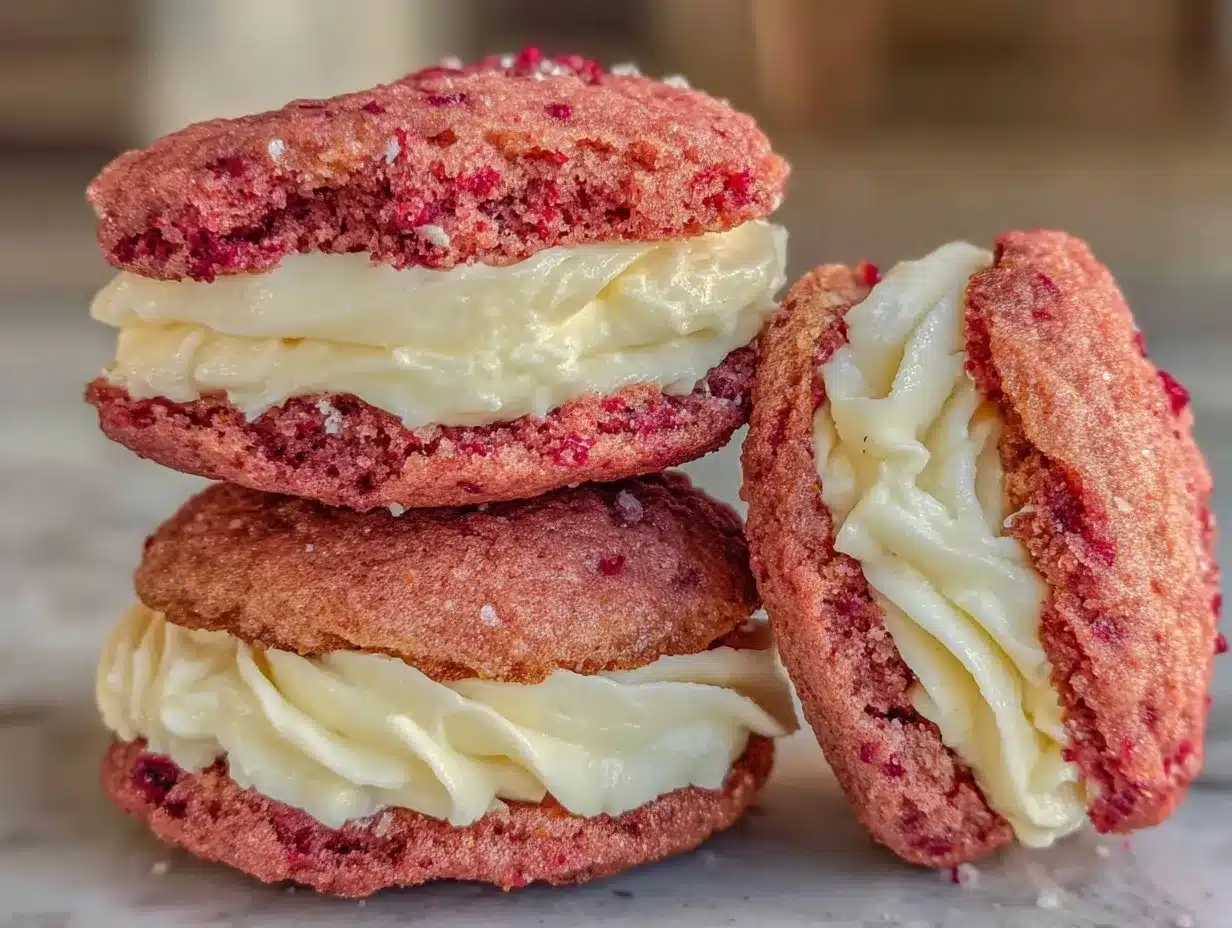
Let me tell you, the scent of rich cocoa mingling with sweet vanilla and a hint of tangy buttermilk, wafting from my oven, is enough to make anyone’s mouth water. The first time I baked these fluffy pink velvet whoopie pies with creamy filling, I was instantly hooked—the kind of moment where you pause, take a deep breath, and just smile because you know you’re onto something truly special. Back when I was knee-high to a grasshopper, my grandma used to make something similar, but these whoopie pies take that nostalgic comfort and add a bright, fun twist that feels just right for today.
You know what’s funny? My family couldn’t stop sneaking them off the cooling rack (and I can’t really blame them). Honestly, they’re dangerously easy to whip up and perfect for potlucks, sweet treats for your kids, or even brightening up your Pinterest cookie board. This recipe has become a staple for family gatherings and gifting—tested multiple times in the name of research, of course—and it feels like a warm hug wrapped in pink velvet fluff. You’re going to want to bookmark this one, trust me!
Why You’ll Love This Recipe
Years of baking and tweaking this pink velvet whoopie pies recipe have taught me a thing or two. Honestly, it’s one of those recipes that feels fancy but comes together without stress or fuss. Here’s why you’ll be reaching for it again and again:
- Quick & Easy: You can have these whoopie pies ready in under 45 minutes—perfect for busy weeknights or last-minute sweet cravings.
- Simple Ingredients: No fancy grocery trips. Most of the ingredients are pantry staples or easy to find.
- Perfect for Celebrations: Great for birthday parties, baby showers, or just because you deserve a treat.
- Crowd-Pleaser: Kids and adults alike rave about the soft cake and creamy filling combo.
- Unbelievably Delicious: The texture is fluffy yet tender, and the creamy filling adds a luscious finish.
What sets this recipe apart? Well, the secret is in balancing the classic red velvet flavors with a gentle pink hue—no artificial overload here. Plus, the creamy filling is whipped to perfection for that melt-in-your-mouth sensation. This isn’t just another whoopie pie recipe; it’s the best version I’ve found after many trials. Honestly, after your first bite, you might just close your eyes and savor the moment.
What Ingredients You Will Need
This recipe uses simple, wholesome ingredients to deliver bold flavor and satisfying texture without the fuss. You probably already have most of these in your kitchen!
- For the Pink Velvet Batter:
- All-purpose flour – 2 ½ cups (315g)
- Unsweetened cocoa powder – 2 tablespoons (use a good quality brand like Ghirardelli for best flavor)
- Baking soda – 1 teaspoon
- Salt – ½ teaspoon
- Unsalted butter – ¾ cup (170g), softened (adds richness and tenderness)
- Granulated sugar – 1 ¼ cups (250g)
- Large eggs – 2, room temperature
- Buttermilk – 1 cup (240ml), room temperature (for tang and moisture)
- Vanilla extract – 1 teaspoon
- Red food coloring – 1 tablespoon (use gel for vibrant color without extra liquid)
- For the Creamy Filling:
- Marshmallow fluff – ½ cup (approx. 125g)
- Unsalted butter – ½ cup (113g), softened
- Powdered sugar – 2 cups (240g), sifted (for smoothness)
- Vanilla extract – 1 teaspoon
- Heavy cream – 1 tablespoon (optional, to thin if needed)
If you want to keep it dairy-free, swap the butter with a plant-based alternative and use coconut milk instead of buttermilk (add a splash of lemon juice to mimic tang). For gluten-free, almond flour can work but expect a denser cake. I prefer using small-curd buttermilk for that perfect tang and moist crumb. In summer, fresh strawberry puree instead of food coloring adds a natural pink with a fruity twist.
Equipment Needed
- Mixing bowls – several sizes for batter and filling
- Electric mixer – hand or stand mixer makes creaming butter and whipping filling a breeze
- Measuring cups and spoons – for accuracy
- Rubber spatula – to fold batter gently
- Baking sheets – two or more, lined with parchment paper or silicone mats
- Cooling racks – to let the whoopie pies cool evenly
- Spoon or cookie scoop – to portion batter evenly (I like a 2-tablespoon scoop)
No fancy gadgets required, though a stand mixer definitely saves your arm during filling prep. If you don’t have one, a sturdy whisk and some elbow grease works fine. I keep a silicone spatula handy because it’s flexible and perfect for scraping bowls. For budget-friendly baking sheets, those non-stick aluminum ones do the trick just fine.
Preparation Method
- Preheat your oven to 350°F (175°C). Line two baking sheets with parchment paper or silicone mats to prevent sticking.
- Sift the dry ingredients: In a medium bowl, sift together 2 ½ cups all-purpose flour, 2 tablespoons cocoa powder, 1 teaspoon baking soda, and ½ teaspoon salt. Set aside.
- Cream the butter and sugar: In a large bowl, use an electric mixer to beat ¾ cup softened unsalted butter and 1 ¼ cups granulated sugar until light and fluffy, about 3-4 minutes. This step is key for that tender crumb.
- Add eggs and vanilla: Beat in 2 large eggs, one at a time, ensuring each is fully incorporated. Stir in 1 teaspoon vanilla extract and 1 tablespoon red gel food coloring until the batter is uniformly pink.
- Alternate adding dry ingredients and buttermilk: With mixer on low speed, add the flour mixture in three parts, alternating with 1 cup buttermilk, beginning and ending with the flour. Mix gently after each addition until just combined. Be careful not to overmix; the batter should be smooth but not dense.
- Portion the batter: Using a spoon or 2-tablespoon cookie scoop, drop rounded dollops of batter onto the prepared baking sheets, spacing them about 2 inches apart. Each dollop will spread into a perfect round.
- Bake: Place the sheets in the oven and bake for 12-14 minutes, or until the tops spring back lightly when touched. The edges should be set, but the centers remain soft. Don’t overbake or they’ll dry out.
- Cool completely: Transfer the baked rounds to cooling racks. Let them cool fully before assembling, or the filling might melt.
- Prepare the creamy filling: While the cakes cool, beat ½ cup softened unsalted butter until smooth. Gradually add 2 cups sifted powdered sugar and continue beating until fluffy. Mix in ½ cup marshmallow fluff and 1 teaspoon vanilla extract. If the filling is too stiff, add 1 tablespoon heavy cream to loosen it slightly.
- Assemble the whoopie pies: Pair up the cooled cake rounds by size. Spread or pipe a generous dollop of filling onto one half, then sandwich with the other half, pressing gently to spread the filling evenly.
- Serve or chill: These whoopie pies are best enjoyed the same day, but chilling for 30 minutes helps the filling set perfectly.
Pro tip: If your batter looks too thin, add a little more flour, a tablespoon at a time. If it’s too thick, a splash of buttermilk helps. When baking, rotate pans halfway through for even browning. The smell at step 7 is honestly irresistible—your kitchen will smell like a cozy bakery!
Cooking Tips & Techniques
Whipping up perfect pink velvet whoopie pies is all about balance and timing. Here’s what I’ve learned from many batches (and a few flops):
- Don’t skip sifting: Sifting dry ingredients prevents lumps and ensures even mixing—your cakes will be smoother and fluffier.
- Use room temperature ingredients: Cold eggs or butter can cause batter to curdle or not mix well, affecting texture.
- Be gentle folding: Overmixing develops gluten and leads to dense cakes. Fold in dry ingredients until just combined.
- Watch your baking time: These cakes bake quickly; even a minute over can dry them out. Start checking at 12 minutes.
- Mix filling thoroughly: Beat the butter and sugar long enough to get a fluffy texture, but don’t overbeat or filling can become greasy.
- Chill if needed: If your filling feels too soft, pop it in the fridge for 10 minutes before assembling.
- Multitask smartly: While cakes bake, prep the filling to save time. Baking and cooling overlap perfectly.
Here’s a little secret—if your filling gets too stiff, a tiny bit of heavy cream or milk makes it spreadable again without losing fluff. Learned that one the hard way after a filling disaster!
Variations & Adaptations
Want to switch things up? Here are some fun and tasty variations to try with this pink velvet whoopie pies recipe:
- Chocolate Lover’s Version: Add mini chocolate chips to the batter for a melty surprise inside each cake.
- Berry-Infused Filling: Fold in some raspberry or strawberry preserves into the creamy filling for a fruity twist.
- Vegan Adaptation: Use flax eggs (1 tablespoon ground flax + 3 tablespoons water per egg), dairy-free butter, and coconut milk mixed with vinegar instead of buttermilk. Swap marshmallow fluff for a vegan-friendly alternative or make a simple coconut cream frosting.
- Seasonal Spin: For fall, add a pinch of cinnamon and nutmeg to the batter and swap the filling for a cream cheese frosting with a hint of pumpkin puree.
- Healthier Swap: Use whole wheat pastry flour for a nuttier flavor and reduce sugar slightly; swap butter for avocado oil for moisture.
I once tried adding a teaspoon of espresso powder to the batter—wow, that gave a subtle mocha note that my husband was crazy about. Feel free to experiment and make them your own!
Serving & Storage Suggestions
These whoopie pies are best served at room temperature. The soft, fluffy cakes paired with the creamy filling just melts in your mouth when not too cold. For a special touch, dust with a little powdered sugar or garnish with fresh berries.
They make fantastic companions to a cup of tea, coffee, or even a cold glass of milk for the kids. Hosting a party? Arrange them on a pretty platter to impress guests without much effort.
To store, keep them in an airtight container at room temperature for up to 2 days. For longer storage, refrigerate up to 5 days or freeze assembled pies for up to 1 month. When freezing, wrap each pie individually in plastic wrap, then place in a freezer bag.
Reheat frozen or refrigerated whoopie pies by letting them sit at room temperature for 30 minutes or warming gently in a microwave for 10-15 seconds—just enough to soften the filling without melting it completely.
Flavors actually deepen and meld wonderfully after a day or two, so don’t be afraid to make them ahead of time. They’re a treat that keeps on giving!
Nutritional Information & Benefits
Each fluffy pink velvet whoopie pie with creamy filling contains approximately 280 calories, 14 grams of fat, 35 grams of carbs, and 3 grams of protein. While these are sweet treats, the recipe incorporates some wholesome elements like buttermilk, which adds calcium and a nice tang without extra sugar.
The cocoa powder contributes antioxidants, and using real butter and eggs provides essential fats and proteins. For those watching allergens, this recipe contains gluten, dairy, and eggs but can be adapted for vegan and gluten-free diets with the substitutions mentioned earlier.
Honestly, these whoopie pies are a fun indulgence with a nostalgic vibe, perfect for brightening your day without going overboard. Balance them with your usual healthy meals, and they fit right into a joyful lifestyle.
Conclusion
There you have it—fluffy pink velvet whoopie pies with creamy filling that are as delightful to make as they are to eat. This recipe is worth trying because it brings together simple ingredients and straightforward steps to create a memorable treat that’s perfect for all kinds of occasions. Customize the filling, add your favorite flavors, or keep it classic; either way, you’ll end up with something that feels both nostalgic and fresh.
I love this recipe because it reminds me of family times while still being fun and approachable. I hope it brings a smile to your kitchen and your loved ones. If you try it, drop a comment or share your twists—I’d love to hear how you made it yours. Now go on, treat yourself to some pink velvet magic—you deserve it!
FAQs
What makes whoopie pies different from regular cookies?
Whoopie pies are softer and cakier than typical cookies, almost like two small cupcakes sandwiched with creamy filling. They’re tender, fluffy, and melt in your mouth.
Can I make the batter ahead of time?
You can prepare the batter and refrigerate it for up to 24 hours before baking. Just give it a gentle stir before scooping onto the pans.
How do I store leftover whoopie pies?
Store them in an airtight container at room temperature for up to 2 days, or refrigerate up to 5 days. They also freeze well when wrapped tightly.
Can I use a different food coloring?
Absolutely! Gel food coloring gives the best vibrant color without altering batter consistency. You can also use natural colorings like beet juice or strawberry puree.
Is there a gluten-free option for this recipe?
Yes, you can substitute the all-purpose flour with a gluten-free baking blend. Just make sure it includes xanthan gum for structure, or add ½ teaspoon yourself.
Pin This Recipe!
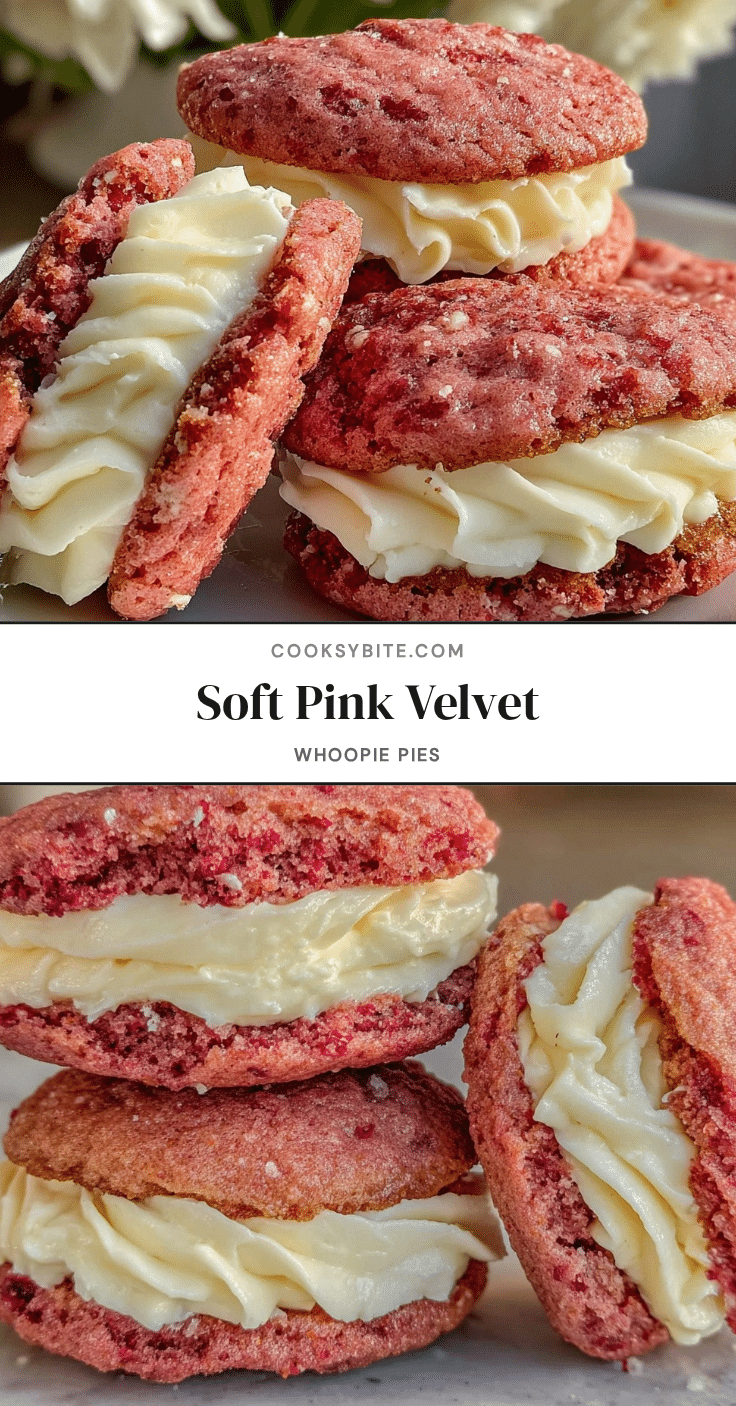
Fluffy Pink Velvet Whoopie Pies Recipe Easy Homemade Creamy Filling

Delight in these fluffy pink velvet whoopie pies with a creamy homemade filling, perfect for celebrations and sweet treats. This easy recipe combines classic red velvet flavors with a gentle pink hue and a luscious filling for a melt-in-your-mouth experience.
- Prep Time: 15 minutes
- Cook Time: 14 minutes
- Total Time: 40 minutes
- Yield: 12 servings 1x
- Category: Dessert
- Cuisine: American
Ingredients
- 2 ½ cups all-purpose flour (315g)
- 2 tablespoons unsweetened cocoa powder
- 1 teaspoon baking soda
- ½ teaspoon salt
- ¾ cup unsalted butter (170g), softened
- 1 ¼ cups granulated sugar (250g)
- 2 large eggs, room temperature
- 1 cup buttermilk (240ml), room temperature
- 1 teaspoon vanilla extract
- 1 tablespoon red gel food coloring
- ½ cup marshmallow fluff (approx. 125g)
- ½ cup unsalted butter (113g), softened
- 2 cups powdered sugar (240g), sifted
- 1 teaspoon vanilla extract
- 1 tablespoon heavy cream (optional)
Instructions
- Preheat your oven to 350°F (175°C). Line two baking sheets with parchment paper or silicone mats.
- Sift together 2 ½ cups all-purpose flour, 2 tablespoons cocoa powder, 1 teaspoon baking soda, and ½ teaspoon salt in a medium bowl. Set aside.
- In a large bowl, beat ¾ cup softened unsalted butter and 1 ¼ cups granulated sugar with an electric mixer until light and fluffy, about 3-4 minutes.
- Beat in 2 large eggs one at a time, then stir in 1 teaspoon vanilla extract and 1 tablespoon red gel food coloring until batter is uniformly pink.
- With mixer on low speed, add the flour mixture in three parts, alternating with 1 cup buttermilk, beginning and ending with the flour. Mix gently until just combined.
- Drop rounded 2-tablespoon dollops of batter onto prepared baking sheets, spacing about 2 inches apart.
- Bake for 12-14 minutes until tops spring back lightly when touched and edges are set but centers remain soft.
- Transfer baked rounds to cooling racks and cool completely before assembling.
- For the filling, beat ½ cup softened unsalted butter until smooth. Gradually add 2 cups sifted powdered sugar and beat until fluffy.
- Mix in ½ cup marshmallow fluff and 1 teaspoon vanilla extract. Add 1 tablespoon heavy cream if filling is too stiff.
- Pair cooled cake rounds by size. Spread or pipe filling onto one half and sandwich with the other half, pressing gently.
- Serve immediately or chill for 30 minutes to set the filling.
Notes
Use room temperature ingredients for best texture. Do not overmix batter to avoid dense cakes. Rotate pans halfway through baking for even browning. Chill filling if too soft before assembling. For dairy-free or gluten-free adaptations, see recipe notes.
Nutrition
- Serving Size: 1 whoopie pie
- Calories: 280
- Fat: 14
- Carbohydrates: 35
- Protein: 3
Keywords: whoopie pies, pink velvet, creamy filling, easy dessert, homemade, party treats, kid-friendly, baking