Let me tell you, the scent of cocoa and cream cheese mingling together while baking red velvet cake is enough to make anyone’s mouth water. The first time I made these creamy red velvet cake pops with white chocolate coating, I was instantly hooked. It was one of those rare kitchen moments where you pause, take a deep breath, and just smile because you know you’re onto something truly special. Years ago, when I was knee-high to a grasshopper, my grandma used to bake all sorts of delightful treats, but I never imagined cake pops could pack so much nostalgia and joy in such a tiny bite.
I stumbled upon this recipe on a rainy weekend when I was craving something sweet but also a little fancy-looking for a family get-together. The results? Pure, nostalgic comfort wrapped in a smooth, white chocolate shell. Honestly, my family couldn’t stop sneaking them off the cooling rack (and I can’t really blame them). These cake pops are dangerously easy to make and perfect for potlucks, birthday parties, or just a sweet treat for your kids after school. You know what’s great? They brighten up your Pinterest cookie board with their vibrant red color contrasted by creamy white chocolate coating.
After testing this recipe multiple times in the name of research, of course, it’s now a staple for family gatherings and gifting around the holidays. If you want something that feels like a warm hug in dessert form, you’re definitely going to want to bookmark this one. Creamy red velvet cake pops with white chocolate coating are the kind of treat that makes you smile long after the last bite.
Why You’ll Love This Recipe
Having whipped up countless cake pop recipes over the years, I can say with confidence this one stands out. It’s not just another red velvet cake pop; it’s creamy, luscious, and coated in silky white chocolate that sets it apart beautifully. Here’s why this creamy red velvet cake pops recipe is a must-try:
- Quick & Easy: You can whip these up in under an hour, making them perfect for last-minute celebrations or sweet cravings.
- Simple Ingredients: No fancy trips to specialty stores—everything comes from your pantry or local grocery.
- Perfect for Any Occasion: Whether it’s a birthday, bridal shower, or casual tea party, these cake pops impress effortlessly.
- Crowd-Pleaser: Kids love the creamy texture, and adults keep coming back for more.
- Unbelievably Delicious: The balance of rich red velvet with the smooth white chocolate coating is downright addictive.
What makes this recipe different? The secret lies in blending cream cheese into the cake crumbs before forming the pops—this makes them extra moist and creamy inside. Plus, the white chocolate coating isn’t just for looks; it adds a luxurious melt-on-your-tongue finish. This recipe isn’t just good; it’s the kind that makes you close your eyes after the first bite. It feels like comfort food with a fancy twist, great for impressing guests without breaking a sweat.
What Ingredients You Will Need
This recipe uses simple, wholesome ingredients that deliver bold flavor and that smooth, creamy texture without any fuss. Most are pantry staples, and if you want, there are easy swaps to make it your own.
- For the Red Velvet Cake:
- All-purpose flour – 1 ½ cups (190g)
- Cocoa powder, unsweetened – 2 tbsp (use good quality like Hershey’s for best flavor)
- Baking soda – ½ tsp
- Salt – ¼ tsp
- Granulated sugar – 1 cup (200g)
- Vegetable oil – ½ cup (120ml)
- Buttermilk – 1 cup (240ml) (or DIY with milk + vinegar)
- Large egg – 1, room temperature
- Vanilla extract – 1 tsp
- Red food coloring – 2 tbsp (gel-based for vibrant color)
- White vinegar – 1 tsp
- For the Cream Cheese Mixture:
- Cream cheese, softened – 6 oz (170g) (I recommend full-fat Philadelphia for creaminess)
- Powdered sugar – ½ cup (60g), sifted
- For the White Chocolate Coating:
- White chocolate chips or melting wafers – 12 oz (340g) (Ghirardelli or Wilton wafers work wonders)
- Shortening – 1 tbsp (optional, for smoother melting)
- Extras:
- Cake pop sticks
- Sprinkles or crushed nuts for decoration (optional)
Substitution tips: Use almond flour instead of all-purpose for gluten-free. Swap cream cheese with dairy-free coconut cream cheese if needed. During summer, fresh strawberries crushed into the cake batter add a lovely fruity twist.
Equipment Needed
- Mixing bowls (medium and large)
- Electric mixer or stand mixer (essential for smooth cream cheese blending)
- Measuring cups and spoons (precision matters for baking)
- 9×9-inch baking pan (or similar square pan)
- Cooling rack (to let cake cool evenly)
- Baking sheet or tray lined with parchment paper (for shaping cake pops)
- Cake pop sticks (available at craft or baking stores)
- Microwave-safe bowl or double boiler (for melting white chocolate)
- Styrofoam block or cake pop stand (to hold pops upright while drying)
If you don’t have a stand, a simple glass filled with rice can hold the sticks steady. For melting chocolate, I find a double boiler gives better control than microwave, but the microwave works fine if you pause often to stir. Budget-friendly tip: you can reuse cake pop sticks from previous batches if cleaned well.
Preparation Method
- Preheat your oven to 350°F (175°C). Grease and flour your 9×9-inch baking pan to prevent sticking.
- Mix dry ingredients: In a medium bowl, sift together 1 ½ cups flour, 2 tbsp cocoa powder, ½ tsp baking soda, and ¼ tsp salt. Set aside.
- Combine wet ingredients: In a large bowl, whisk 1 cup sugar and ½ cup vegetable oil until well blended. Add 1 large egg and 1 tsp vanilla extract; mix until smooth.
- Add color and acidity: Stir in 2 tbsp red food coloring and 1 tsp white vinegar. These give that iconic red velvet flavor and vibrant color.
- Alternate adding dry and buttermilk: Add the dry ingredients in thirds, alternating with 1 cup buttermilk, beginning and ending with dry. Mix gently until just combined; overmixing can make the cake dense.
- Bake: Pour batter into the prepared pan. Bake for 30-35 minutes or until a toothpick inserted comes out clean. Let cool completely on a wire rack. This step is key—warm cake won’t form good pops.
- Crumble the cake: Once cooled, crumble the cake into a large bowl using your hands or a fork until fine crumbs form.
- Prepare cream cheese mixture: Beat 6 oz softened cream cheese with ½ cup powdered sugar until smooth and creamy. This adds the luscious creaminess to your cake pops.
- Combine cake and cream cheese: Add cream cheese mixture to cake crumbs. Use a spatula or hands to mix until the mixture sticks together well. If too dry, add a bit more cream cheese, but be careful not to overdo it.
- Form cake pops: Scoop about 1 ½ tbsp (25g) of mixture and roll into balls. Place on a baking sheet lined with parchment paper. Chill in the fridge for at least 1 hour to firm up.
- Melt white chocolate coating: In a microwave-safe bowl, melt 12 oz white chocolate chips with 1 tbsp shortening in 30-second intervals, stirring in between until smooth. This makes coating silky and easier to work with.
- Assemble cake pops: Dip the tip of each cake pop stick into melted chocolate, then insert halfway into each cake ball (this helps the stick stay in place). Return to fridge for 15 minutes.
- Coat the pops: Dip each cake pop into the melted white chocolate, letting excess drip off. Place upright in a Styrofoam block or stand to set.
- Decorate: While coating is still wet, sprinkle with your choice of sprinkles or crushed nuts.
- Set and serve: Let the pops set completely at room temperature or chill for 30 minutes. Serve and enjoy!
Pro tip: When dipping, hold the cake pop still and twirl the bowl rather than moving the pop around to avoid cracks. If coating thickens, gently reheat in short bursts.
Cooking Tips & Techniques
Making creamy red velvet cake pops is pretty straightforward, but a few tips can save you from common pitfalls. First, make sure your cake is completely cool before crumbling; warm cake will make the mixture too sticky and hard to shape.
When mixing in the cream cheese, don’t rush. You want a balance so the pops hold together but aren’t overly dense. If the mixture feels crumbly, a teaspoon or two more cream cheese will help without making it greasy.
Melting white chocolate can be tricky—too hot and it seizes up, too cool and it won’t coat well. Use short microwave bursts and stir often, or melt over a double boiler for better control. Adding a bit of shortening thins the chocolate and gives a lovely sheen.
Don’t skip chilling the cake balls before dipping. It’s tempting, but firm cake balls reduce breakage and make dipping smoother. When inserting the sticks, dipping them first in chocolate “glue” helps the pops stay put.
Lastly, work quickly but gently when decorating. Sprinkles stick best on wet coating, so have your decorations ready. If you want consistent shapes, use a cookie scoop to portion cake balls evenly.
Variations & Adaptations
This creamy red velvet cake pops recipe is a great base for creative twists. Here are a few I’ve tried (and loved):
- Chocolate Coating Swap: Use dark or milk chocolate instead of white for a richer, less sweet finish.
- Vegan Version: Use dairy-free cream cheese and vegan white chocolate coating. Substitute egg with flax egg in the cake batter.
- Flavor Boost: Add a teaspoon of espresso powder to the batter for a subtle mocha undertone that pairs beautifully with red velvet.
- Seasonal Twist: Fold in crushed peppermint candies into the coating during winter holidays for a festive crunch.
- Nutty Crunch: Roll the finished pops in crushed pistachios or toasted coconut flakes instead of sprinkles.
One personal favorite is swirling a bit of cream cheese frosting into the batter before baking for extra creamy pockets inside the cake pops. Just a word of caution—it makes the batter a little wetter, so watch your baking time closely.
Serving & Storage Suggestions
These creamy red velvet cake pops are best served chilled or at room temperature. Present them upright in a decorative vase or cake pop stand to show off their glossy white chocolate coating. They pair wonderfully with a hot cup of coffee, tea, or even a festive glass of sparkling wine for grown-up gatherings.
To store, keep the cake pops in an airtight container in the refrigerator for up to 5 days. For longer storage, freeze them in a single layer on a baking sheet, then transfer to a freezer-safe container for up to 2 months. When ready to enjoy, thaw in the fridge for a few hours. Reheat gently at room temperature to avoid condensation on the coating, which can dull their shine.
Pro tip: Flavors tend to deepen after a day in the fridge, so if you have the patience, make your cake pops a day ahead for best taste and texture.
Nutritional Information & Benefits
Each creamy red velvet cake pop has approximately 150-180 calories, depending on size and toppings. The use of cream cheese adds a bit of protein and calcium, while the white chocolate coating provides a sweet finish. This recipe can fit nicely into a balanced diet when enjoyed in moderation.
Using buttermilk helps tenderize the cake, and opting for a quality cocoa powder adds antioxidants. If you swap all-purpose flour for almond flour, the cake pops become gluten-free and slightly lower in carbs. Just be mindful of allergens—this recipe contains dairy, eggs, and gluten unless adapted.
Honestly, this treat feels like a little indulgence that brings joy and a touch of homemade comfort. It’s a fun way to sneak in some wholesome ingredients without sacrificing flavor or texture.
Conclusion
So there you have it—creamy red velvet cake pops with white chocolate coating that are as fun to make as they are to eat. This recipe is a keeper, perfect for sweetening up any occasion with minimal fuss and maximum smiles. Feel free to customize with your favorite flavors or decorations; it’s your canvas, after all.
I love this recipe because it reminds me of cozy family moments and sweet celebrations. The creamy texture combined with that gorgeous white chocolate shell feels like a warm hug in every bite. Give it a go, and let me know how you like to jazz yours up!
If you try this recipe, please leave a comment below sharing your experience or any delicious tweaks you’ve made. And hey, don’t forget to share it with friends who need some sweet inspiration!
FAQs
Can I make these cake pops ahead of time?
Absolutely! You can make and store them in the fridge for up to 5 days or freeze for longer storage. Just thaw before serving.
What can I use if I don’t have cake pop sticks?
Wooden skewers or sturdy lollipop sticks work fine as alternatives. Just be gentle when inserting into the cake balls.
How do I prevent cracks in the white chocolate coating?
Make sure your cake pops are chilled well before dipping and avoid overheating the chocolate. Stir frequently while melting and dip gently.
Can I use store-bought red velvet cake instead of baking from scratch?
Yes, you can crumble store-bought red velvet cake, but homemade gives the best flavor and texture when mixed with cream cheese.
Is there a dairy-free option for these cake pops?
Yes! Use dairy-free cream cheese and plant-based white chocolate melts, and substitute regular milk with almond or oat milk in the cake batter.
Pin This Recipe!

Creamy Red Velvet Cake Pops Recipe Easy Homemade White Chocolate Coating

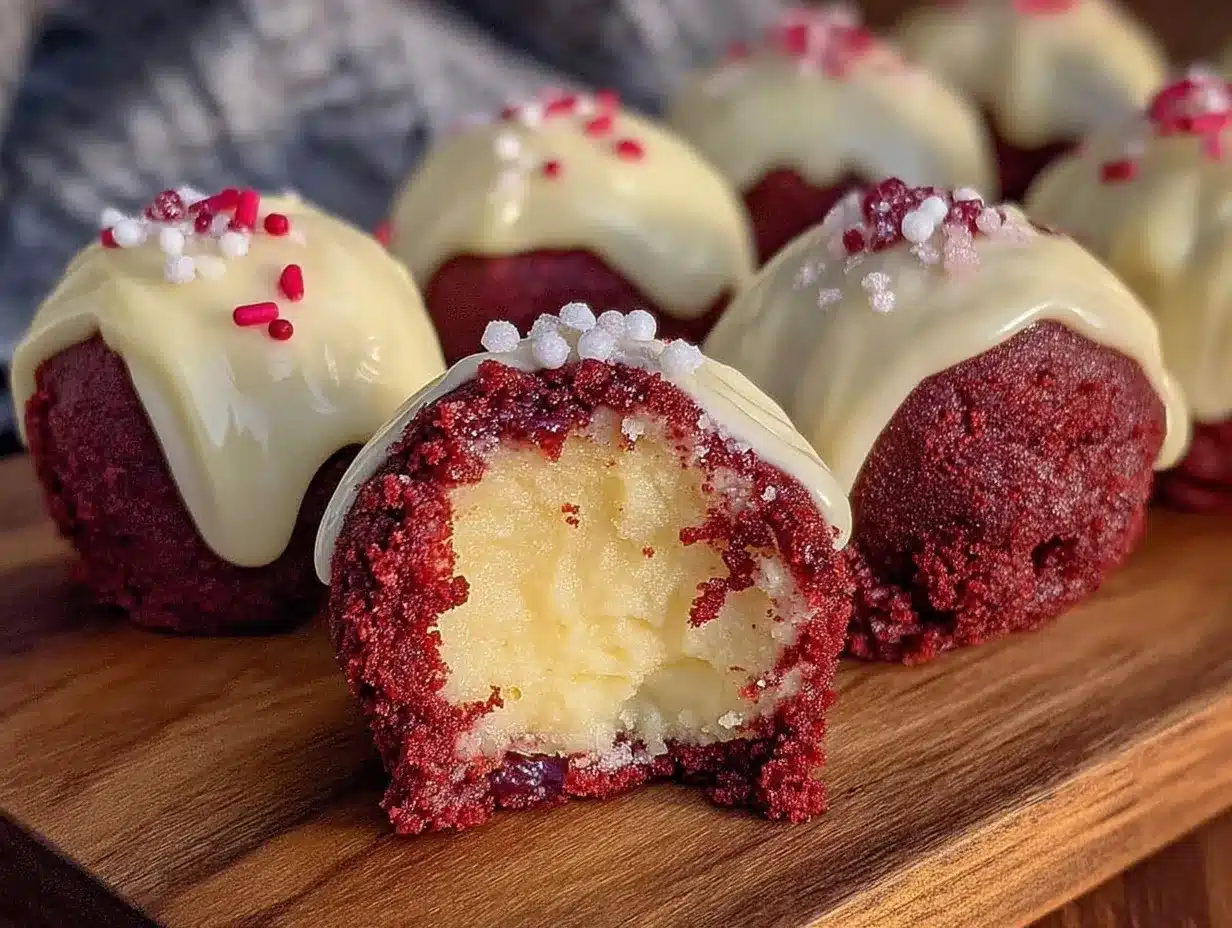
These creamy red velvet cake pops feature a moist, luscious cake blended with cream cheese and coated in silky white chocolate, perfect for any occasion and easy to make.
- Prep Time: 20 minutes
- Cook Time: 35 minutes
- Total Time: 1 hour 45 minutes
- Yield: 24 cake pops 1x
- Category: Dessert
- Cuisine: American
Ingredients
- 1 ½ cups all-purpose flour (190g)
- 2 tbsp unsweetened cocoa powder
- ½ tsp baking soda
- ¼ tsp salt
- 1 cup granulated sugar (200g)
- ½ cup vegetable oil (120ml)
- 1 cup buttermilk (240ml) or milk + vinegar
- 1 large egg, room temperature
- 1 tsp vanilla extract
- 2 tbsp red food coloring (gel-based)
- 1 tsp white vinegar
- 6 oz cream cheese, softened (170g)
- ½ cup powdered sugar (60g), sifted
- 12 oz white chocolate chips or melting wafers (340g)
- 1 tbsp shortening (optional)
- Cake pop sticks
- Sprinkles or crushed nuts for decoration (optional)
Instructions
- Preheat oven to 350°F (175°C). Grease and flour a 9×9-inch baking pan.
- In a medium bowl, sift together flour, cocoa powder, baking soda, and salt. Set aside.
- In a large bowl, whisk sugar and vegetable oil until blended. Add egg and vanilla extract; mix until smooth.
- Stir in red food coloring and white vinegar.
- Add dry ingredients in thirds alternating with buttermilk, beginning and ending with dry. Mix gently until just combined.
- Pour batter into prepared pan and bake for 30-35 minutes or until a toothpick comes out clean. Cool completely on a wire rack.
- Crumble cooled cake into fine crumbs.
- Beat cream cheese with powdered sugar until smooth and creamy.
- Combine cream cheese mixture with cake crumbs until mixture sticks together well. Add more cream cheese if too dry.
- Scoop about 1 ½ tbsp (25g) of mixture and roll into balls. Place on parchment-lined baking sheet and chill for at least 1 hour.
- Melt white chocolate chips with shortening in 30-second intervals, stirring until smooth.
- Dip tip of each cake pop stick into melted chocolate, then insert halfway into each cake ball. Chill for 15 minutes.
- Dip each cake pop into melted white chocolate, letting excess drip off. Place upright in a Styrofoam block or stand to set.
- Decorate with sprinkles or crushed nuts while coating is wet.
- Let cake pops set completely at room temperature or chill for 30 minutes before serving.
Notes
Ensure cake is completely cool before crumbling to avoid sticky mixture. Use short microwave bursts when melting chocolate to prevent seizing. Chill cake balls before dipping to reduce breakage. Dip sticks first in chocolate to help them stay in place. Use a cookie scoop for consistent cake ball sizes. Store in airtight container in fridge up to 5 days or freeze up to 2 months.
Nutrition
- Serving Size: 1 cake pop
- Calories: 165
- Sugar: 15
- Sodium: 110
- Fat: 9
- Saturated Fat: 5
- Carbohydrates: 20
- Fiber: 1
- Protein: 2
Keywords: red velvet cake pops, creamy cake pops, white chocolate coating, easy cake pops, homemade cake pops, party dessert, kid-friendly dessert