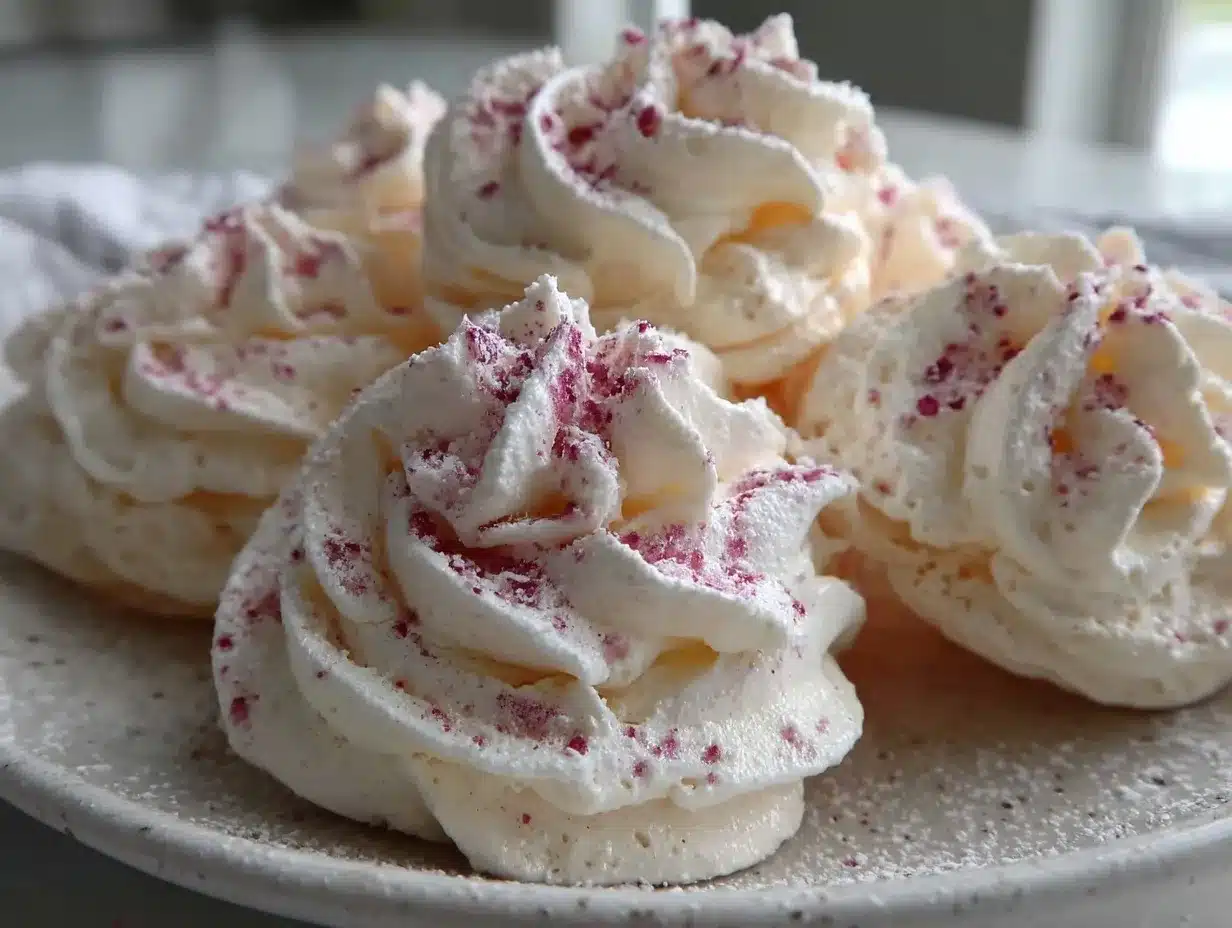
Let me tell you, the scent of sugar and vanilla swirling in the kitchen, paired with those delicate, pastel pink meringue kisses cooling on the rack, is enough to make anyone’s mouth water. The first time I baked these light and airy pink meringue kisses, I was instantly hooked—the kind of moment where you pause, take a deep breath, and just smile because you know you’re onto something truly special. I remember when I was knee-high to a grasshopper, my grandma would whip up these sweet little clouds for holiday gatherings, and years ago, I stumbled upon a vintage recipe that inspired this modern twist.
Honestly, my family couldn’t stop sneaking them off the cooling rack (and I can’t really blame them). These charming pink meringue kisses bring pure, nostalgic comfort with a hint of whimsy—perfect for brightening up your Pinterest cookie board or adding a sweet touch to potlucks and afternoon teas. Dangerously easy to make, they’ve become a staple for my family gatherings and gifting, tested multiple times in the name of research, of course. If you’re looking for a light dessert that feels like a warm hug, you’re going to want to bookmark this one.
Why You’ll Love This Light and Airy Pink Meringue Kisses Recipe
After countless trials (and a few kitchen mishaps), this pink meringue kisses recipe has earned its spot as a crowd-pleaser and a go-to treat for special occasions. Here’s the scoop on what makes it stand out:
- Quick & Easy: Whips up in under 30 minutes, making it perfect for last-minute cravings or an impromptu dessert.
- Simple Ingredients: No fancy grocery runs needed; you likely have everything in your pantry already.
- Perfect for Celebrations: Great for bridal showers, baby showers, or simply adding a pop of color to your cookie platter.
- Crowd-Pleaser: Kids and adults alike rave about these melt-in-your-mouth bites.
- Unbelievably Delicious: The light, crisp texture paired with a subtle sweetness is next-level comfort food.
This isn’t just any meringue recipe. The secret lies in gently folding the sugar for that perfectly smooth, glossy finish and adding just the right amount of pink coloring to create an inviting, delicate hue without overpowering the flavor. The balance of vanilla and the crisp exterior with a slight chew inside makes these meringue kisses truly one of a kind. It’s comfort food reimagined—lighter, brighter, but with all the soul-soothing satisfaction you want from a homemade treat.
Whether you’re impressing guests with a beautiful dessert or need a sweet pick-me-up, these pink meringue kisses are your new best friend in the kitchen.
What Ingredients You Will Need
This recipe uses simple, wholesome ingredients to deliver bold flavor and satisfying texture without the fuss. Most are pantry staples, and substitutions are easy if you need them!
- Egg Whites – 4 large, at room temperature (room temp helps with volume and stability)
- Granulated Sugar – 1 cup (200g, I prefer using caster sugar for a smoother texture but regular granulated works fine)
- Cornstarch – 1 teaspoon (adds a slight chew and helps stabilize the meringue)
- Vanilla Extract – 1 teaspoon (pure vanilla extract for best flavor)
- Cream of Tartar – 1/4 teaspoon (optional but recommended for stability)
- Pink Gel Food Coloring – A few drops (gel coloring is better than liquid for vibrant color without affecting texture)
Substitution tips: Use aquafaba (chickpea water) for a vegan option, though results may vary slightly. Swap cornstarch with arrowroot powder if needed. For a natural pink hue, a tiny pinch of beetroot powder mixed with water can work, but test for taste.
Equipment Needed
- Electric Mixer or Stand Mixer: A mixer with a whisk attachment is key for whipping the egg whites to stiff peaks. I’ve used both hand mixers and stand mixers; the stand mixer makes it faster and easier, but a good hand mixer does the job well too.
- Baking Sheet: A rimmed baking sheet lined with parchment paper or a silicone baking mat for easy cleanup and to prevent sticking.
- Piping Bag and Tips: For shaping the meringue kisses. If you don’t have a piping bag, a resealable plastic bag with a corner snipped off works just fine.
- Spatula: Flexible rubber spatula for folding in ingredients gently without deflating the meringue.
- Oven Thermometer: (Optional) To ensure your oven is at the correct low temperature, since meringues bake best slow and low.
If you’re on a budget, you can find affordable silicone mats and reusable piping bags online or at kitchen outlets. Keep your whisk attachment well maintained by washing and drying promptly after use to avoid rust.
Preparation Method
- Preheat your oven to 200°F (95°C). Line a baking sheet with parchment paper or a silicone mat. This low temp helps dry out the meringues rather than brown them.
- Separate the eggs: Carefully separate 4 large egg whites into a clean, dry mixing bowl—any yolk can prevent whipping. Let the whites sit at room temperature for 20-30 minutes to whip better.
- Start whipping: Using an electric mixer, beat the egg whites on medium speed until they become frothy and start forming soft peaks (about 2-3 minutes).
- Add cream of tartar: Add 1/4 teaspoon cream of tartar to stabilize the meringue and continue beating.
- Gradually add sugar: Slowly add 1 cup (200g) granulated sugar, a tablespoon at a time, while beating on high speed. This slow addition helps the sugar dissolve fully, giving a glossy, smooth meringue. This step takes about 5-7 minutes.
- Test the meringue: Rub a bit of meringue between your fingers—if it feels gritty, keep beating. When it forms stiff peaks that hold shape without drooping, you’re golden.
- Fold in cornstarch and vanilla: Sift 1 teaspoon cornstarch over the meringue and add 1 teaspoon vanilla extract. Gently fold with a spatula to combine without deflating.
- Add color: Drop a few drops of pink gel food coloring onto the meringue and gently fold until the color is evenly distributed. Be careful not to overmix!
- Pipe the meringue kisses: Transfer the mixture to a piping bag fitted with a star tip. Pipe small kisses (about 1 inch/2.5 cm in diameter) onto the prepared baking sheet, spacing them about 1 inch (2.5 cm) apart.
- Bake low and slow: Place the tray in the oven and bake for 90-120 minutes. The goal is to dry the meringues out, not brown them. They should easily lift off the parchment and feel crisp on the outside.
- Cool completely: Turn off the oven and let the meringues cool inside with the door slightly ajar for an hour. This prevents cracking from sudden temperature changes.
If your meringues become sticky, they may need a little longer in the oven. Watch for a crisp shell and a light interior texture that melts in your mouth.
Cooking Tips & Techniques
Making perfect meringue kisses can be a little tricky at first, but these tips will save you from common pitfalls:
- Egg whites at room temperature whip better and produce more volume. I learned this the hard way after trying cold egg whites and getting flat meringue.
- Make sure your bowl and whisk are spotless—any grease or egg yolk will ruin the whipping process.
- Add sugar slowly: Dumping it all at once can lead to grainy texture or weepiness. Patience here pays off, trust me.
- Low oven temperature is key. I once cranked up the heat to speed things up and ended with browned, cracked meringues—definitely not the look we want.
- Don’t rush cooling: Letting the meringues cool inside the oven helps prevent cracks and keeps them crispy.
- Multitasking tip: While your meringues bake, you can prep tea, tidy the kitchen, or plan your next dessert!
Variations & Adaptations
Here are some fun ways to switch up this recipe to suit your taste or dietary needs:
- Flavor twists: Swap vanilla for almond extract or add a teaspoon of lemon zest to brighten the flavor.
- Colorful meringues: Use different gel food coloring to match holidays or party themes—think pastel blues, mint greens, or sunny yellows.
- Chocolate dipped: Once cooled, dip the kisses in melted dark or white chocolate for an extra indulgence.
- Vegan option: Use aquafaba (chickpea water) instead of egg whites. Whip it just like egg whites, but expect a slightly different texture and longer baking time.
- Seasonal flavors: In fall, add a pinch of cinnamon or pumpkin spice to the meringue mix.
Personally, I once tried swirling in a bit of raspberry puree for a natural pink color and a fruity note—it was a hit at a summer picnic!
Serving & Storage Suggestions
Serve these pink meringue kisses at room temperature for the best crunch and melt-in-your-mouth texture. They make a charming garnish for cakes, cupcakes, or a fancy hot cocoa bar. Pair them with a cup of Earl Grey tea or a chilled glass of rosé for an elegant touch.
Store your meringue kisses in an airtight container at room temperature. They’ll keep fresh and crisp for up to two weeks if kept dry. Avoid refrigeration as humidity will soften them. If you want to freeze them, place in a sealed container with parchment layers, and thaw at room temperature before serving.
Reheating isn’t necessary, but if they soften, you can pop them in a low oven (200°F/95°C) for 5-10 minutes to crisp back up. Flavors deepen slightly after a day or two, making them taste even better with time.
Nutritional Information & Benefits
These light and airy pink meringue kisses are a guilt-free treat, primarily made of egg whites and sugar. Here’s an estimated breakdown per serving (about 5 kisses):
| Calories | 70 |
|---|---|
| Fat | 0g |
| Carbohydrates | 17g |
| Protein | 1g |
| Sugar | 16g |
Egg whites provide a good source of protein without fat or cholesterol, and this recipe is naturally gluten-free. Just watch the sugar if you’re watching carbs. For those with egg allergies, aquafaba can be a handy substitute but test for tolerance.
From a wellness perspective, these meringue kisses are a delightful way to enjoy a sweet treat without heavy fats or additives—honestly, a little indulgence that feels light as air.
Conclusion
This light and airy pink meringue kisses recipe is worth trying if you want a sweet, simple homemade dessert that looks as good as it tastes. Customize the color, flavor, or presentation to suit your style and occasions. I love this recipe because it brings back cozy memories and adds a sprinkle of joy to any gathering.
Give it a go, share your variations, and let me know how your kisses turned out! Don’t be shy to leave a comment or share this recipe with friends who adore easy, elegant desserts. Happy baking, and remember—sometimes the simplest sweets are the most magical!
Frequently Asked Questions
Can I make meringue kisses ahead of time?
Absolutely! They store well in an airtight container for up to two weeks. Just keep them dry and at room temperature.
Why did my meringue turn out sticky?
Sticky meringue usually means it wasn’t baked long enough or the humidity is too high. Try baking a bit longer and store them properly.
Can I use powdered sugar instead of granulated sugar?
It’s best to use granulated or caster sugar. Powdered sugar contains cornstarch which can affect the texture.
What’s the best way to separate eggs?
Use cold eggs and separate whites from yolks carefully, ensuring no yolk gets into the whites. Some people crack eggs into separate bowls before adding to the mixer to avoid contamination.
Can I pipe shapes other than kisses?
Yes! Get creative with star tips, rosettes, or even little nests for chocolate chips or berries. Just adjust the size for even baking.
Pin This Recipe!
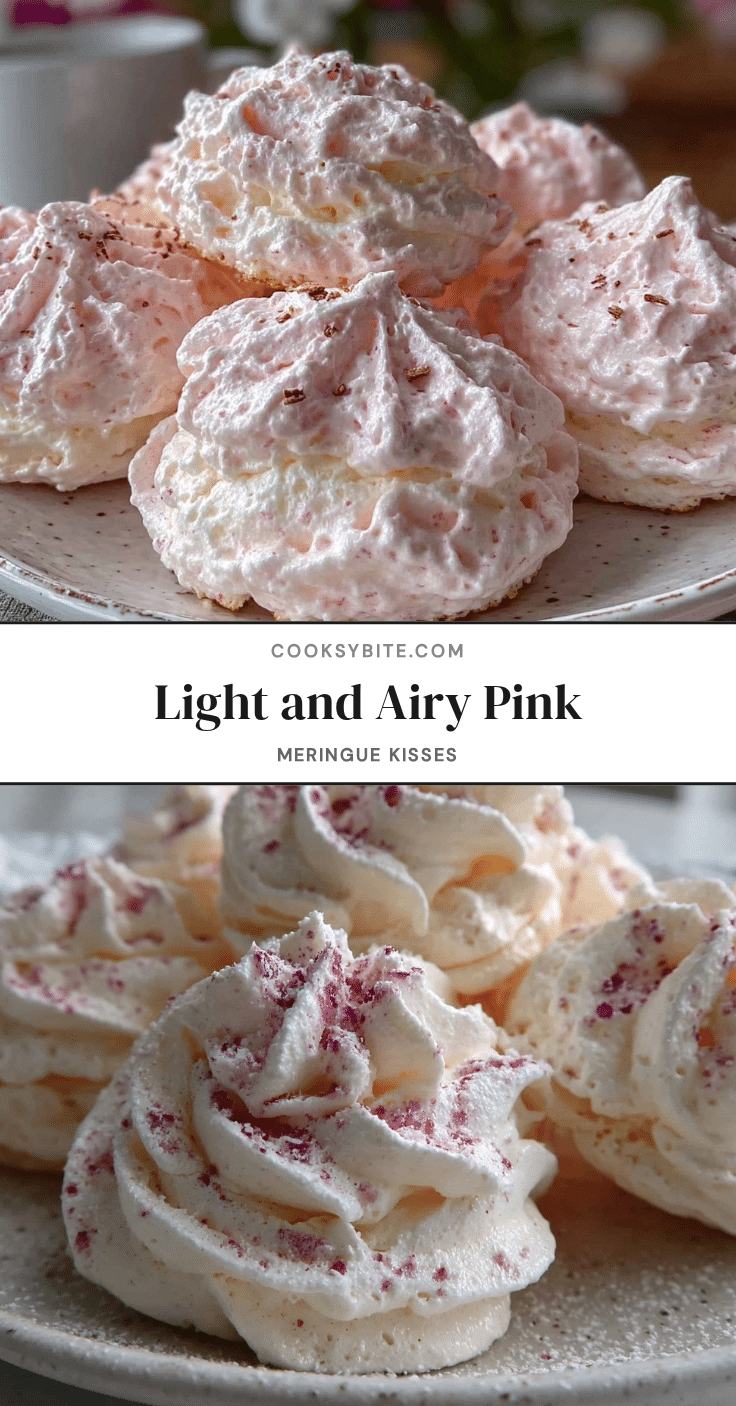
Light and Airy Pink Meringue Kisses
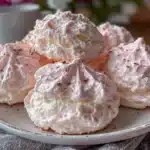
Delicate, pastel pink meringue kisses that are light, airy, and melt-in-your-mouth sweet. Perfect for celebrations, gifting, or a charming homemade dessert.
- Prep Time: 15 minutes
- Cook Time: 1 hour 30 minutes to 2 hours
- Total Time: 1 hour 45 minutes to 2 hours 15 minutes
- Yield: About 25-30 meringue kisses (5 kisses per serving, 5-6 servings) 1x
- Category: Dessert
- Cuisine: American
Ingredients
- 4 large egg whites, at room temperature
- 1 cup (200g) granulated sugar (caster sugar preferred)
- 1 teaspoon cornstarch
- 1 teaspoon pure vanilla extract
- 1/4 teaspoon cream of tartar (optional but recommended)
- A few drops pink gel food coloring
Instructions
- Preheat your oven to 200°F (95°C). Line a baking sheet with parchment paper or a silicone mat.
- Separate 4 large egg whites into a clean, dry mixing bowl. Let sit at room temperature for 20-30 minutes.
- Using an electric mixer, beat the egg whites on medium speed until frothy and soft peaks form (2-3 minutes).
- Add 1/4 teaspoon cream of tartar and continue beating.
- Gradually add 1 cup granulated sugar, a tablespoon at a time, while beating on high speed for 5-7 minutes until glossy and stiff peaks form.
- Rub a bit of meringue between fingers to check for grittiness; continue beating if needed.
- Sift 1 teaspoon cornstarch over the meringue and add 1 teaspoon vanilla extract. Gently fold to combine.
- Add a few drops of pink gel food coloring and gently fold until evenly colored.
- Transfer mixture to a piping bag fitted with a star tip and pipe 1 inch (2.5 cm) kisses onto the prepared baking sheet, spacing 1 inch apart.
- Bake for 90-120 minutes at 200°F (95°C) to dry out the meringues without browning.
- Turn off oven and let meringues cool inside with door slightly ajar for 1 hour.
Notes
Use room temperature egg whites for better volume. Add sugar slowly to avoid grainy texture. Bake low and slow to dry without browning. Cool meringues inside oven with door ajar to prevent cracking. Store in airtight container at room temperature for up to two weeks. Avoid refrigeration to keep crispness. For vegan option, substitute egg whites with aquafaba but expect longer baking time and slightly different texture.
Nutrition
- Serving Size: About 5 meringue kis
- Calories: 70
- Sugar: 16
- Carbohydrates: 17
- Protein: 1
Keywords: meringue kisses, pink meringue, light dessert, airy meringue, homemade dessert, easy meringue recipe, pastel cookies, party treats