Let me tell you, the scent of cocoa and vanilla swirling through my kitchen while these Moist Red Velvet Whoopie Pies bake is nothing short of magical. The first time I baked these little delights, I was instantly hooked—the kind of moment where you pause, take a deep breath, and just smile because you know you’re onto something truly special. When I was knee-high to a grasshopper, my grandma used to make simple cakes that felt like warm hugs, but these whoopie pies bring that feeling into the modern day with a luscious, creamy filling that’s downright irresistible.
I stumbled upon this recipe on a rainy weekend, trying to recreate a nostalgic treat from a local bakery that no longer exists. Honestly, I wish I had discovered this Moist Red Velvet Whoopie Pies recipe years ago because my family couldn’t stop sneaking them off the cooling rack (and I can’t really blame them). These sweet, tender cakes sandwiching a dreamy filling are dangerously easy to make and perfect for potlucks, a sweet treat for your kids, or just brightening up your Pinterest cookie board with a splash of color and comfort.
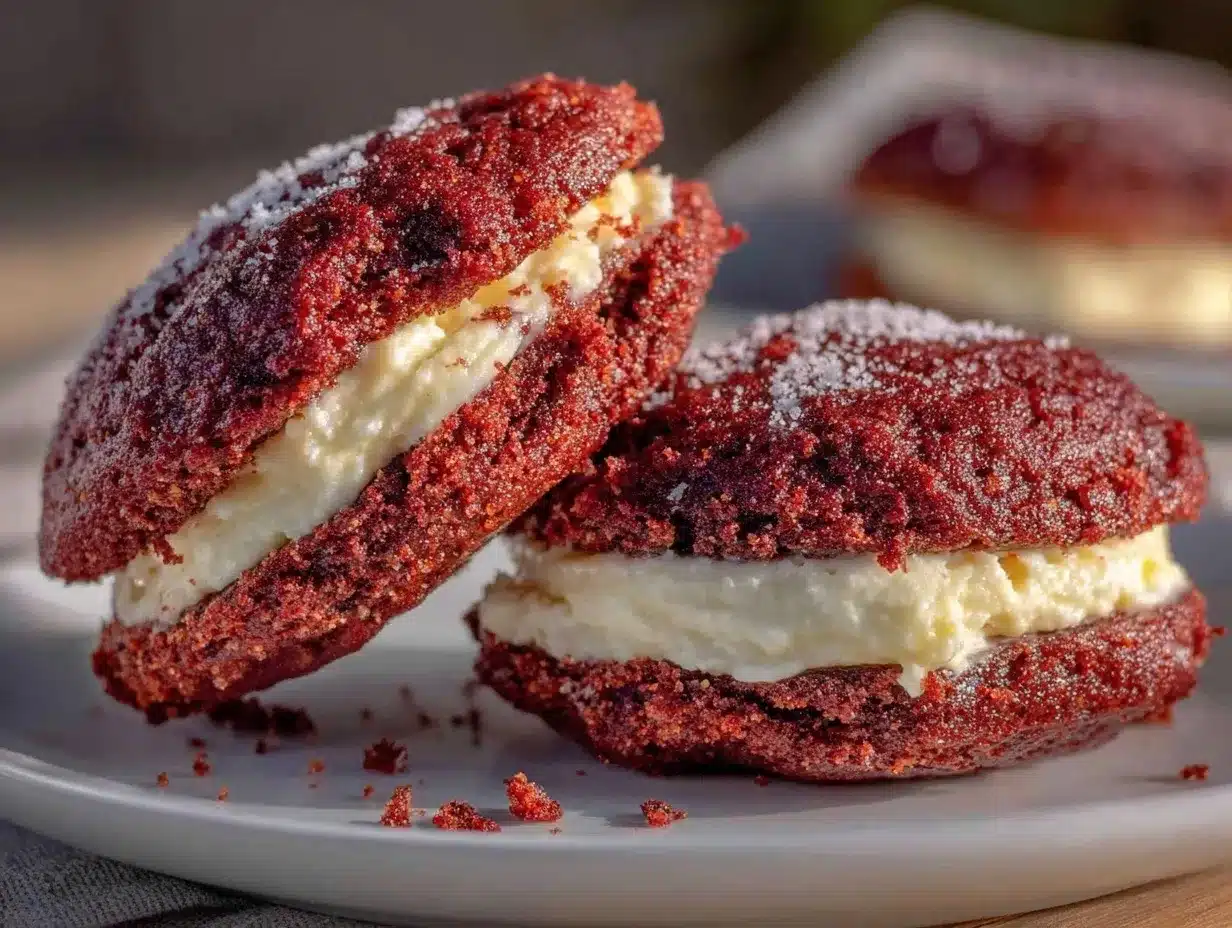
After testing this recipe multiple times—in the name of research, of course—it’s become a staple for family gatherings and gifting. The creamy filling combined with the moist, tender red velvet cake feels like a warm hug wrapped in a dessert, and trust me, you’re going to want to bookmark this one.
Why You’ll Love This Recipe
This Moist Red Velvet Whoopie Pies recipe is the kind of baking triumph that makes you look like a pro without breaking a sweat. After plenty of trials (and a few tasty failures), here’s why this recipe stands out:
- Quick & Easy: Comes together in under 45 minutes, perfect for busy weeknights or last-minute cravings.
- Simple Ingredients: No fancy grocery trips needed; you likely already have everything in your kitchen pantry.
- Perfect for Any Occasion: Great for holiday mornings, casual get-togethers, or just a cozy weekend treat.
- Crowd-Pleaser: Always gets rave reviews from kids and adults alike—seriously, no leftovers here.
- Unbelievably Delicious: The texture and flavor combo is pure, nostalgic comfort food with a modern twist.
What makes this recipe different? It’s all about the creamy filling—think ultra-smooth, whipped to perfection, and just the right balance of sweet and tangy. Plus, the moist red velvet cake is tender without being crumbly, thanks to a simple trick of adding buttermilk and a touch of vinegar. This isn’t just another whoopie pie recipe; it’s the best version you’ll find, tested and tweaked until it felt just right.
Let’s face it, this recipe isn’t just good—it’s the kind that makes you close your eyes after the first bite and sigh with pure satisfaction. Whether you’re impressing guests without stress or turning a simple snack into something memorable, these Moist Red Velvet Whoopie Pies have got your back.
What Ingredients You Will Need
This recipe uses simple, wholesome ingredients to deliver bold flavor and a satisfying texture without the fuss. Most are pantry staples, and a few little tips will help you get the best results.
- For the Red Velvet Batter:
- 1 ½ cups (190g) all-purpose flour – I prefer King Arthur for consistent results
- 2 tablespoons (15g) unsweetened cocoa powder – use Dutch-processed for a richer taste
- ½ teaspoon baking soda
- ¼ teaspoon salt
- ½ cup (115g) unsalted butter, softened (adds richness)
- ¾ cup (150g) granulated sugar
- 1 large egg, room temperature
- 1 teaspoon vanilla extract
- ½ cup (120ml) buttermilk (or make your own by adding 1 tablespoon vinegar to milk)
- 1 tablespoon red food coloring (gel recommended for vibrant color)
- 1 teaspoon white vinegar (helps tenderize and enhances the red color)
- For the Creamy Filling:
- ½ cup (115g) unsalted butter, softened
- 1 ½ cups (180g) powdered sugar, sifted
- 1 teaspoon vanilla extract
- 4 ounces (115g) cream cheese, softened – I recommend Philadelphia for smoothness
- 2 tablespoons (30ml) heavy cream or whole milk (adds creaminess)
Ingredient Substitutions: Use almond flour for a gluten-free option (note texture will be softer). Swap cream cheese with vegan cream cheese and use dairy-free milk for a dairy-free version. For a seasonal twist, try adding a teaspoon of orange zest to the filling or swap the cocoa with cinnamon for a warmer flavor profile.
Equipment Needed
- Mixing bowls – a medium and a large one
- Electric mixer or stand mixer – helps whip the filling to a perfect fluff
- Measuring cups and spoons – accuracy matters here!
- Rubber spatula – for folding ingredients gently
- Baking sheets – lined with parchment paper or silicone mats for easy cleanup
- Cookie scoop (2 tablespoon size) – for uniform whoopie pies
- Cooling racks – to let the pies cool completely before filling
If you don’t have a mixer, no worries! You can whisk by hand, but it’ll take a bit more elbow grease. Silicone mats are my favorite for baking these because they prevent sticking and help with even browning. Budget tip: parchment paper works great and is often easier to find.
Preparation Method
- Preheat your oven to 350°F (175°C). Line two baking sheets with parchment paper or silicone mats. This sets the stage for perfectly baked whoopie pies.
- Mix dry ingredients: In a medium bowl, sift together 1 ½ cups flour, 2 tablespoons cocoa powder, ½ teaspoon baking soda, and ¼ teaspoon salt. Set aside.
- Cream butter and sugar: In a large bowl, use your mixer to beat ½ cup softened butter with ¾ cup granulated sugar until light and fluffy, about 3-4 minutes. This step creates that tender crumb we love.
- Add egg and vanilla: Beat in 1 large egg and 1 teaspoon vanilla extract until combined. The mixture should be smooth and glossy.
- Incorporate food coloring and vinegar: Add 1 tablespoon red food coloring and 1 teaspoon white vinegar. Mix until the color is even and vibrant.
- Alternate adding dry ingredients and buttermilk: Gradually add the dry ingredients in three parts, alternating with ½ cup buttermilk (start and end with dry), mixing gently after each addition. Don’t overmix; the batter should be smooth but soft.
- Scoop batter: Use a 2-tablespoon cookie scoop to drop mounds about 2 inches apart on the baking sheets. The batter will spread slightly, so give them room.
- Bake: Place in the oven for 12-14 minutes, or until the tops spring back when lightly pressed. They’ll be soft but set.
- Cool: Let the cakes cool on the baking sheets for 5 minutes, then transfer to wire racks to cool completely. Patience here pays off; filling warm cakes can get messy!
- Make the filling: In a clean bowl, beat ½ cup softened butter and 4 ounces softened cream cheese until smooth and creamy. Slowly add 1 ½ cups powdered sugar and beat until fluffy. Mix in 1 teaspoon vanilla and 2 tablespoons heavy cream until light and spreadable.
- Assemble: Spread or pipe a generous dollop of filling on the flat side of one cake and sandwich with another, pressing gently to spread the filling evenly.
- Serve or chill: These are best after chilling at least 30 minutes, but honestly, I’ve been known to sneak one fresh from the fridge immediately!
Cooking Tips & Techniques
For that perfect Moist Red Velvet Whoopie Pies texture, don’t skip sifting your dry ingredients—it keeps the batter light and lump-free. A common mistake is overmixing once you add the flour; that can make the cakes tough, so mix just until combined.
When creaming butter and sugar, take your time—this air incorporation is the secret to tender, fluffy cakes. If you find your batter too thick, a splash of extra buttermilk can help without throwing off the balance.
Timing is key! Don’t overbake; these pies should be soft, not dry. I usually set my timer for 12 minutes and start checking early. Also, letting the cakes cool completely before filling prevents the cream cheese filling from melting—a lesson learned the hard way after a gooey kitchen disaster!
When assembling, chilling the whoopie pies for at least 30 minutes helps the filling firm up nicely and makes them easier to handle. For extra flair, dust the tops with a little powdered sugar or sprinkle with mini chocolate chips just before serving.
Variations & Adaptations
Feel like mixing things up? Here are some tasty twists I’ve tried and loved:
- Chocolate Lovers: Swap the cocoa powder with dark cocoa or add mini chocolate chips to the batter for an extra rich treat.
- Seasonal Spice: Add a teaspoon of pumpkin pie spice or cinnamon to the batter for fall vibes that warm the soul.
- Dairy-Free: Use coconut oil instead of butter and a vegan cream cheese alternative for the filling. Substitute plant-based milk for buttermilk using lemon juice or vinegar.
For different cooking methods, these cakes can be baked in mini muffin tins for bite-sized treats or even made in an air fryer for a quicker bake. Just keep an eye on them, as cooking times will vary.
My personal favorite is adding a hint of espresso powder to the batter—it deepens the cocoa flavor and makes the red velvet pop without tasting like coffee.
Serving & Storage Suggestions
Serve these Moist Red Velvet Whoopie Pies chilled or at room temperature for the best flavor and texture. They make a stunning dessert on their own but pair beautifully with a glass of cold milk, a cup of coffee, or even a fruity iced tea for a refreshing contrast.
To store, place them in an airtight container and refrigerate for up to 5 days. They also freeze well—wrap each pie individually in plastic wrap and place in a freezer bag for up to 2 months. When ready to enjoy, thaw overnight in the fridge and let come to room temperature for 20 minutes before serving.
The flavors actually deepen after a day or two, making these whoopie pies even more scrumptious. Just a heads-up—if you’re packing them for lunchboxes or picnics, keep them chilled to maintain their creamy filling integrity.
Nutritional Information & Benefits
Each Moist Red Velvet Whoopie Pie contains approximately 250-300 calories, with a balanced mix of fats, carbs, and proteins from the butter, cream cheese, and flour. The recipe includes calcium and vitamin A from dairy ingredients, while the cocoa powder adds antioxidants (a little bonus you can feel good about!).
This dessert isn’t low-calorie, but it’s made with real ingredients and no artificial fillers. You can customize it for dietary needs by swapping gluten-free flour blends or dairy-free products without losing that creamy, satisfying texture.
From a wellness perspective, I appreciate that this recipe feels indulgent yet approachable, letting you enjoy a nostalgic treat without complicated or hard-to-pronounce ingredients. Sometimes, comfort food is just what the soul needs.
Conclusion
In a world full of complicated desserts, these Moist Red Velvet Whoopie Pies stand out as a simple, delicious way to bring joy to your kitchen and your loved ones. They’re easy enough to whip up on a whim, yet special enough to impress without fuss.
Feel free to customize the filling or add your favorite flavors to make this recipe truly yours. Honestly, I love how this recipe brings a bit of old-fashioned comfort with a creamy, dreamy twist—plus, it’s a crowd favorite every single time.
If you give this recipe a try, I’d love to hear how you tweaked it or what your go-to variation is. Don’t forget to share it with friends and family who need a little sweet in their lives. Happy baking!
FAQs
What makes red velvet cakes red?
Red velvet gets its signature color from red food coloring combined with cocoa powder and a touch of vinegar, which reacts with baking soda to enhance the hue.
Can I make the filling ahead of time?
Absolutely! The creamy filling can be made a day ahead and stored in the fridge; just give it a quick whip before assembling the pies.
How do I prevent whoopie pies from sticking to the pan?
Line your baking sheets with parchment paper or silicone baking mats to keep the cakes from sticking and make cleanup a breeze.
Can I freeze the whoopie pies after assembling?
Yes! Wrap each pie tightly in plastic wrap and freeze for up to 2 months. Thaw in the fridge overnight before serving.
What’s the best way to get vibrant red color without artificial dyes?
Using gel food coloring gives the brightest color with less quantity, but for a natural option, beet juice or powder can add color, though it may alter flavor slightly.
Pin This Recipe!
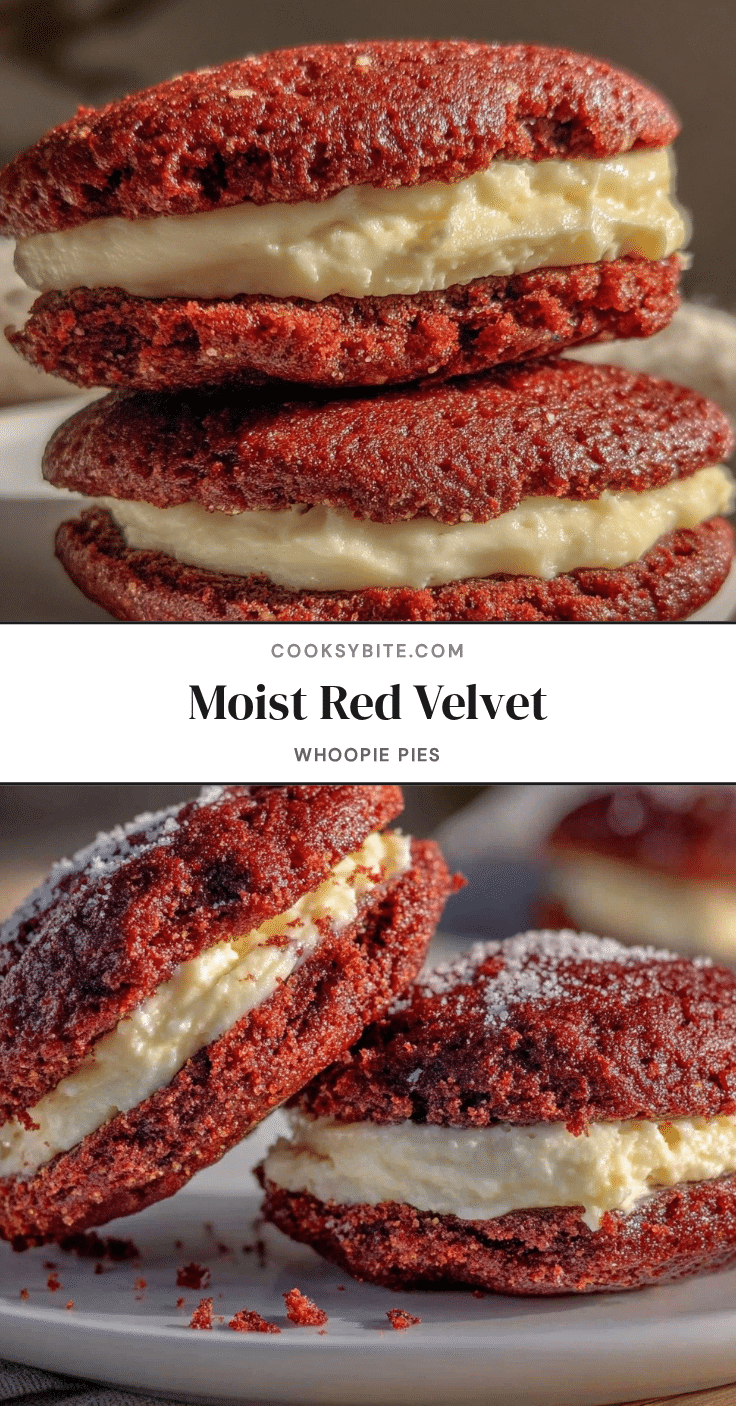
Moist Red Velvet Whoopie Pies Recipe Easy Homemade Creamy Filling

These Moist Red Velvet Whoopie Pies feature tender, moist red velvet cakes sandwiching a luscious, creamy filling. Perfect for any occasion, they are quick, easy, and irresistibly delicious.
- Prep Time: 15 minutes
- Cook Time: 14 minutes
- Total Time: 45 minutes
- Yield: 12 servings 1x
- Category: Dessert
- Cuisine: American
Ingredients
- 1 ½ cups (190g) all-purpose flour
- 2 tablespoons (15g) unsweetened cocoa powder (Dutch-processed recommended)
- ½ teaspoon baking soda
- ¼ teaspoon salt
- ½ cup (115g) unsalted butter, softened
- ¾ cup (150g) granulated sugar
- 1 large egg, room temperature
- 1 teaspoon vanilla extract
- ½ cup (120ml) buttermilk (or make your own by adding 1 tablespoon vinegar to milk)
- 1 tablespoon red food coloring (gel recommended)
- 1 teaspoon white vinegar
- ½ cup (115g) unsalted butter, softened (for filling)
- 1 ½ cups (180g) powdered sugar, sifted
- 1 teaspoon vanilla extract (for filling)
- 4 ounces (115g) cream cheese, softened
- 2 tablespoons (30ml) heavy cream or whole milk
Instructions
- Preheat your oven to 350°F (175°C). Line two baking sheets with parchment paper or silicone mats.
- In a medium bowl, sift together 1 ½ cups flour, 2 tablespoons cocoa powder, ½ teaspoon baking soda, and ¼ teaspoon salt. Set aside.
- In a large bowl, beat ½ cup softened butter with ¾ cup granulated sugar until light and fluffy, about 3-4 minutes.
- Beat in 1 large egg and 1 teaspoon vanilla extract until combined and smooth.
- Add 1 tablespoon red food coloring and 1 teaspoon white vinegar; mix until color is even.
- Gradually add the dry ingredients in three parts, alternating with ½ cup buttermilk (start and end with dry), mixing gently after each addition. Do not overmix.
- Use a 2-tablespoon cookie scoop to drop mounds about 2 inches apart on the baking sheets.
- Bake for 12-14 minutes, or until tops spring back when lightly pressed.
- Let the cakes cool on the baking sheets for 5 minutes, then transfer to wire racks to cool completely.
- For the filling, beat ½ cup softened butter and 4 ounces softened cream cheese until smooth and creamy.
- Slowly add 1 ½ cups powdered sugar and beat until fluffy.
- Mix in 1 teaspoon vanilla extract and 2 tablespoons heavy cream until light and spreadable.
- Spread or pipe a generous dollop of filling on the flat side of one cake and sandwich with another, pressing gently to spread the filling evenly.
- Chill assembled whoopie pies for at least 30 minutes before serving for best texture.
Notes
Do not overmix the batter to keep cakes tender. Let cakes cool completely before filling to prevent melting. Chill assembled pies for at least 30 minutes for best texture. Use gel food coloring for vibrant color. For gluten-free, substitute almond flour; for dairy-free, use vegan cream cheese and plant-based milk.
Nutrition
- Serving Size: 1 whoopie pie
- Calories: 275
- Sugar: 22
- Sodium: 180
- Fat: 15
- Saturated Fat: 9
- Carbohydrates: 32
- Fiber: 1
- Protein: 3
Keywords: red velvet, whoopie pies, creamy filling, easy dessert, homemade, baking, cocoa, cream cheese filling