Let me tell you, the scent of fresh strawberries mingling with warm, buttery oats baking in the oven is enough to make anyone’s mouth water. The first time I baked these easy strawberry crumble bars, I was instantly hooked — the kind of moment where you pause, take a deep breath, and just smile because you know you’re onto something truly special. It was years ago, on a rainy weekend when I was knee-high to a grasshopper, that my grandma pulled out her trusty recipe book and shared this gem with me. Honestly, I wish I’d discovered this recipe way sooner because it’s pure, nostalgic comfort packed into every bite.
My family couldn’t stop sneaking these bars off the cooling rack (and I can’t really blame them). It’s dangerously easy to whip up, and the buttery oat topping adds a lovely crunch that perfectly balances the juicy strawberry filling. You know what? These bars have become a staple for potlucks, afternoon treats for my kids, and even a sweet surprise for unexpected guests. Whether you’re looking to brighten up your dessert table or just want a quick, wholesome treat, these easy strawberry crumble bars with buttery oat topping will not disappoint.
I’ve tested this recipe more times than I can count (in the name of research, of course), and it never fails to bring smiles all around. If you love desserts that feel like a warm hug wrapped in a golden crust, you’re going to want to bookmark this one for sure.
Why You’ll Love This Recipe
Honestly, this easy strawberry crumble bars recipe isn’t just another dessert — it’s a tried-and-true family favorite that brings together simplicity and flavor with zero fuss. Here’s why it stands out:
- Quick & Easy: Comes together in under 45 minutes, perfect for busy weeknights or last-minute dessert cravings.
- Simple Ingredients: No fancy grocery runs needed; you likely have most things in your pantry already.
- Perfect for Potlucks & Gatherings: A sweet treat that’s always a hit, whether it’s a picnic, family dinner, or holiday spread.
- Crowd-Pleaser: Kids and adults alike can’t get enough, thanks to the perfect balance of sweet, tart, and buttery crunch.
- Unbelievably Delicious: The crumbly oat topping brings texture, while the strawberry filling bursts with fresh, juicy flavor.
What makes this recipe different? Well, I’ve perfected the oat crumble by using a mix of rolled oats and brown sugar, which gives that irresistible golden crunch. Plus, the strawberries are cooked just right — not too mushy, but wonderfully jammy. It’s not just good; it’s the kind of dessert you close your eyes for after the first bite. Whether you’re a seasoned baker or a newbie, this recipe nails that comforting homemade dessert vibe without any stress.
What Ingredients You Will Need
This easy strawberry crumble bars recipe calls for simple, wholesome ingredients that come together beautifully to deliver bold flavor and satisfying texture without the fuss. Most of these are pantry staples or seasonal picks you can find year-round.
- For the Base and Crumble:
- All-purpose flour (1 ½ cups / 190g) – forms the sturdy yet tender crust
- Rolled oats (1 cup / 90g) – adds that classic oat crunch
- Brown sugar, packed (⅔ cup / 135g) – brings caramel notes and sweetness
- Unsalted butter (¾ cup / 170g), softened – the secret to rich, buttery texture (I prefer Land O Lakes for consistent results)
- Baking powder (1 tsp) – helps lighten the crust
- Salt (¼ tsp) – balances sweetness
- For the Strawberry Filling:
- Fresh strawberries (4 cups / 600g), hulled and sliced – juicy and vibrant (in summer, swap for fresh; frozen works fine off-season)
- Granulated sugar (⅔ cup / 135g) – sweetens and macerates the berries
- Cornstarch (2 tbsp) – thickens the filling so it’s not runny
- Lemon juice (1 tbsp) – brightens the flavor
- Vanilla extract (1 tsp) – adds warmth and depth
For substitutions, you can swap regular flour with gluten-free all-purpose blend if needed. Use coconut oil or vegan butter for a dairy-free version, and replace sugar with coconut sugar or maple syrup for a natural sweetener twist. If you want to add a nutty note, toss in some chopped pecans or walnuts to the crumble topping (I’ve tried it, and it’s a lovely variation!).
Equipment Needed
- 9×9-inch baking pan (metal or glass) – I personally prefer glass since it heats evenly and browns the crust nicely, but metal works too.
- Mixing bowls – one large for the crust and crumble, one medium for the strawberry filling.
- Measuring cups and spoons – for precise ingredient amounts.
- Wooden spoon or silicone spatula – for mixing without overworking the dough.
- Knife and cutting board – to hull and slice strawberries.
- Cooling rack – to cool your bars properly and keep that crumbly top crisp.
Don’t have a 9×9 pan? An 8×8 will work fine, just expect slightly thicker bars and adjust baking time by a few minutes. No fancy tools needed here, which is part of why this recipe is so approachable. Keep your butter softened but not melted for the best crumb texture—if you forget, a quick 10-second zap in the microwave works wonders. For budget-friendly options, any decent quality butter and a sturdy pan will do just fine.
Preparation Method
- Preheat your oven to 350°F (175°C). Grease your 9×9-inch baking pan lightly with butter or line it with parchment paper for easy removal.
- Make the crust and crumble base: In a large bowl, combine 1 ½ cups (190g) all-purpose flour, 1 cup (90g) rolled oats, ⅔ cup (135g) brown sugar, 1 tsp baking powder, and ¼ tsp salt. Mix well.
- Add the softened butter (¾ cup / 170g) to the dry ingredients. Use your fingers or a pastry cutter to blend until the mixture resembles coarse crumbs with some pea-sized pieces. This texture is key—too fine and the crumble loses its lovely crunch.
- Press about two-thirds of this mixture firmly into the bottom of your prepared pan to form an even crust layer. You’ll want a nice compact base, so press down gently but firmly with your fingers or the back of a spoon. Pop this into the oven for 12-15 minutes until it’s lightly golden. This prebaking step prevents sogginess later.
- Prepare the strawberry filling: While the crust bakes, toss 4 cups (600g) sliced strawberries with ⅔ cup (135g) granulated sugar, 2 tbsp cornstarch, 1 tbsp lemon juice, and 1 tsp vanilla extract in a medium bowl. Let it sit for 10 minutes to macerate and thicken slightly.
- Once the crust is out of the oven, pour the strawberry filling evenly over it. Spread gently to cover all areas but avoid pressing too hard.
- Crumble the reserved oat mixture over the strawberry layer in even clumps. This gives the bars their signature buttery oat topping.
- Bake for another 35-40 minutes until the topping is golden brown and the strawberry filling is bubbly around the edges. Keep an eye—if the topping browns too fast, tent loosely with foil.
- Let the bars cool completely in the pan on a wire rack. This cooling step is crucial because the filling sets and you get those perfect sliceable bars.
- Cut into squares (around 12 bars) and serve. These bars taste amazing slightly warm or at room temperature.
Pro tip: Don’t rush the cooling—it can be tempting to dig in immediately, but letting them rest helps keep the crumble topping perfectly crisp and the filling from oozing.
Cooking Tips & Techniques
Getting these easy strawberry crumble bars just right comes down to a few key tips I’ve learned through trial and error. For starters, make sure your butter is softened but not melted. Warm butter can turn your crumble greasy and dense instead of light and crumbly. You know what? Cold butter chunks in the crumble don’t break down properly, so don’t skip this step.
Another tip: don’t skip prebaking the crust. It might feel like an extra step, but trust me — it keeps the base from getting soggy under that juicy strawberry filling. If you don’t have cornstarch, arrowroot powder works as a great thickener, too.
Watch your baking times closely. Ovens vary, and you don’t want to burn your oat topping while waiting for the filling to bubble. If the top is browning too fast, tent with foil after 25 minutes. Also, slicing bars while they’re still warm can cause crumbling, so patience here pays off.
Finally, when mixing the filling, let those strawberries sit with the sugar and lemon juice for at least 10 minutes — this step helps release their natural juices and thickens the filling beautifully. It’s one of those little tricks that takes the bars from good to memorable.
Variations & Adaptations
Honestly, this easy strawberry crumble bars recipe is a great canvas for all sorts of tweaks and twists. Here are a few of my favorite variations:
- Berry Medley: Swap half the strawberries for blueberries, raspberries, or blackberries for a colorful, flavor-packed mix.
- Gluten-Free: Use a gluten-free all-purpose flour blend and certified gluten-free oats. I’ve done this and the texture stays spot-on.
- Vegan Version: Replace butter with coconut oil or vegan butter, and use maple syrup instead of sugar for a plant-based treat.
- Cinnamon Twist: Add 1 tsp ground cinnamon to the crumble mixture for a warm, spicy note that pairs beautifully with strawberries.
- Nutty Crunch: Sprinkle chopped pecans or walnuts over the crumble topping before baking. It adds a lovely texture contrast.
For cooking method flexibility, you can also bake these bars in a muffin tin for portable, individual servings — just reduce baking time by 10-15 minutes and check doneness frequently. Or, try turning the filling into a no-bake jam layer and topping with a simple oat crust for a chilled, summery dessert.
Serving & Storage Suggestions
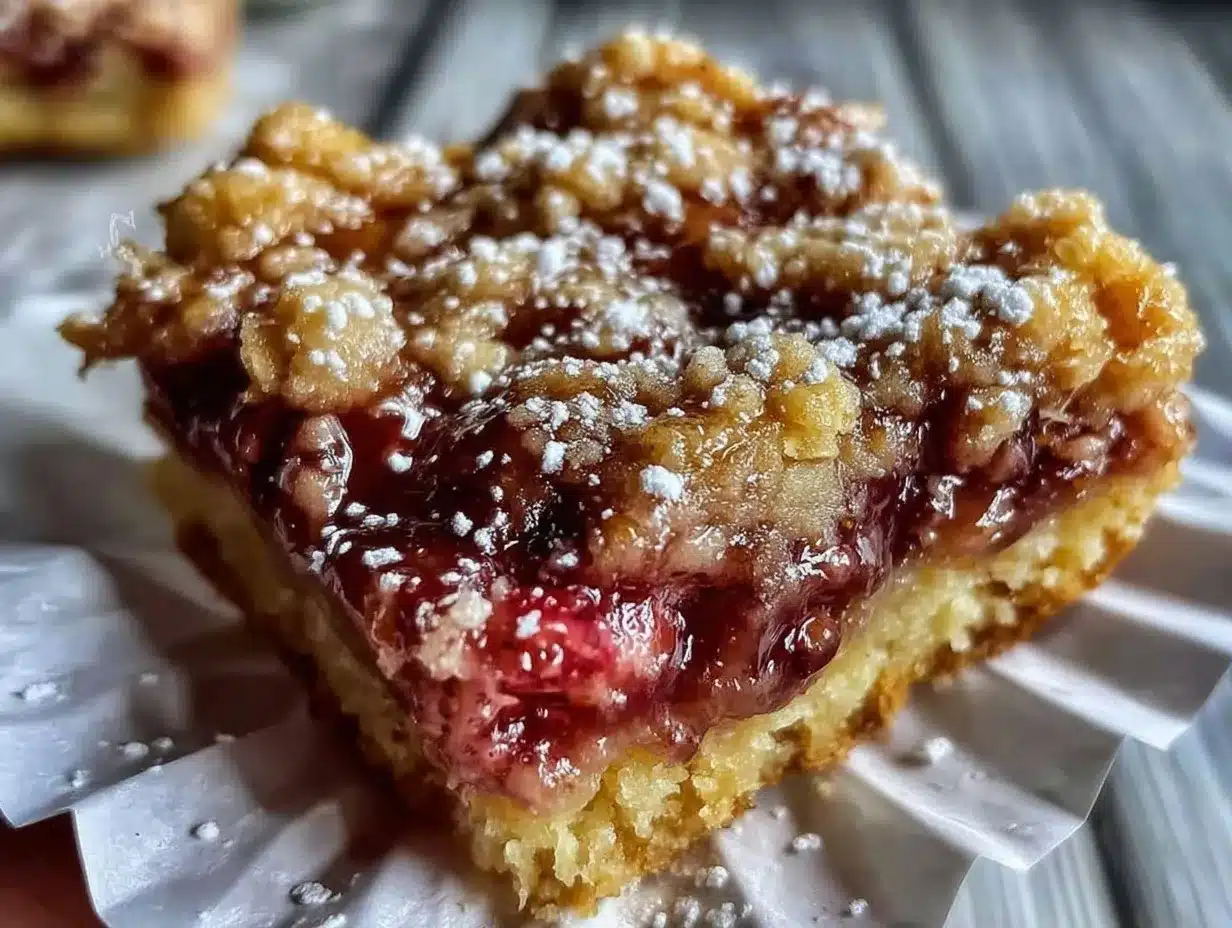
These easy strawberry crumble bars are best served at room temperature or slightly warm — the buttery oat topping is perfectly crisp, and the filling is luxuriously jammy. For a lovely presentation, dust with a little powdered sugar or serve with a dollop of whipped cream or vanilla ice cream.
They pair beautifully with a cup of tea or coffee for a cozy afternoon snack or alongside vanilla yogurt for breakfast.
To store, cover the bars tightly with plastic wrap or foil and keep in the refrigerator for up to 4 days. They also freeze beautifully; wrap individual bars in parchment and store in an airtight container for up to 3 months. When ready to enjoy, thaw overnight in the fridge and warm slightly in the oven or microwave for that just-baked feel.
Flavors actually deepen after a day or two, so if you can resist, letting the bars rest overnight really amps up the strawberry sweetness and oat crunch harmony.
Nutritional Information & Benefits
Each serving of these easy strawberry crumble bars offers a comforting mix of carbs, fats, and natural fruit sugars. A typical 1/12th bar contains roughly:
| Calories | 230-250 kcal |
|---|---|
| Fat | 12g (mostly from butter) |
| Carbohydrates | 30g (includes natural sugars from strawberries) |
| Fiber | 3g (from oats and strawberries) |
| Protein | 3g |
Strawberries are packed with vitamin C and antioxidants, making this dessert a somewhat guilt-light indulgence. The oats add heart-healthy fiber and slow-digesting carbs, which help keep you fuller longer than typical sweets.
This recipe can be made gluten-free and vegan with simple swaps, making it accessible for many dietary needs. Just a heads up — it contains dairy and gluten in the standard version, so plan accordingly.
From my wellness perspective, it’s a wonderful way to satisfy sweet cravings with some real food ingredients, and the homemade touch means you control the sugar and fats used.
Conclusion
So there you have it — easy strawberry crumble bars with a buttery oat topping that deliver pure, homemade dessert magic every time. This recipe is perfect for anyone who wants a simple, comforting treat without complicated steps or ingredients. You can customize it to fit your taste or dietary needs, but honestly, the classic version is a winner all on its own.
I love this recipe because it reminds me of family, cozy afternoons, and the joy of sharing something homemade with people you care about. Give it a try, tweak it how you like, and let me know your favorite spin — I’d love to hear how these bars find a place in your kitchen and heart.
Don’t forget to leave a comment or share your photos if you make these bars. Happy baking!
FAQs
Can I use frozen strawberries instead of fresh?
Yes! Just thaw and drain any excess liquid before mixing with sugar and cornstarch to avoid a runny filling.
How do I keep the crumble topping from getting soggy?
Prebaking the crust and using cornstarch to thicken the filling are key steps. Also, letting the bars cool completely helps keep the topping crisp.
Can I make these bars ahead of time?
Absolutely! They store well in the fridge for a few days and even freeze nicely for longer storage.
What’s the best way to reheat the bars?
Warm them gently in a 300°F (150°C) oven for 10-15 minutes or microwave for 20-30 seconds for a fresh-baked feel.
Are these bars gluten-free?
Not as written, but you can swap the flour for a gluten-free blend and use certified gluten-free oats to make them suitable.
Pin This Recipe!
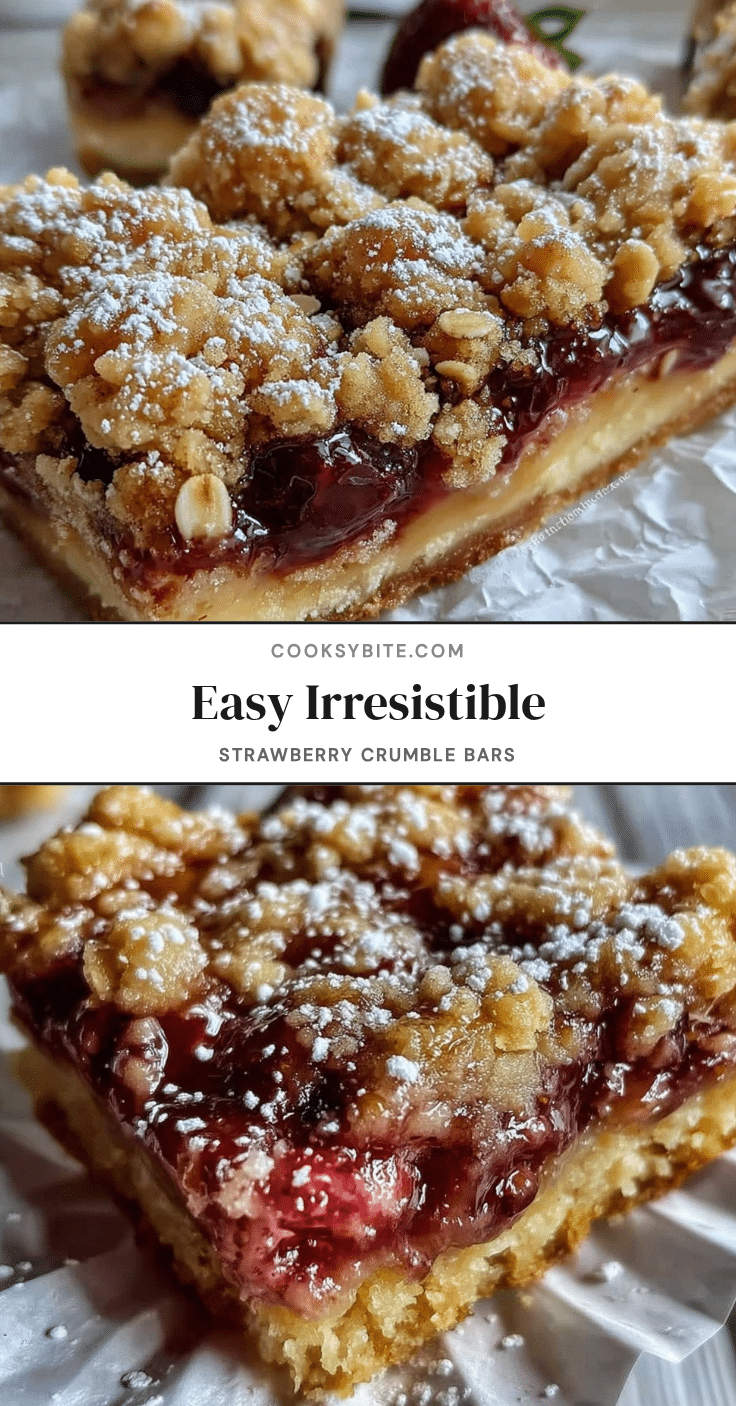
Easy Strawberry Crumble Bars Recipe with Buttery Oat Topping for Perfect Homemade Dessert
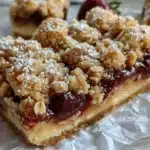
These easy strawberry crumble bars feature a buttery oat topping and a juicy strawberry filling, making a perfect homemade dessert that’s quick, simple, and crowd-pleasing.
- Prep Time: 15 minutes
- Cook Time: 50 minutes
- Total Time: 65 minutes
- Yield: 12 bars 1x
- Category: Dessert
- Cuisine: American
Ingredients
- 1 ½ cups (190g) all-purpose flour
- 1 cup (90g) rolled oats
- ⅔ cup (135g) packed brown sugar
- ¾ cup (170g) unsalted butter, softened
- 1 tsp baking powder
- ¼ tsp salt
- 4 cups (600g) fresh strawberries, hulled and sliced
- ⅔ cup (135g) granulated sugar
- 2 tbsp cornstarch
- 1 tbsp lemon juice
- 1 tsp vanilla extract
Instructions
- Preheat your oven to 350°F (175°C). Grease a 9×9-inch baking pan lightly with butter or line it with parchment paper.
- In a large bowl, combine 1 ½ cups all-purpose flour, 1 cup rolled oats, ⅔ cup brown sugar, 1 tsp baking powder, and ¼ tsp salt. Mix well.
- Add the softened butter (¾ cup) to the dry ingredients. Use your fingers or a pastry cutter to blend until the mixture resembles coarse crumbs with some pea-sized pieces.
- Press about two-thirds of this mixture firmly into the bottom of the prepared pan to form an even crust layer. Bake for 12-15 minutes until lightly golden.
- While the crust bakes, toss 4 cups sliced strawberries with ⅔ cup granulated sugar, 2 tbsp cornstarch, 1 tbsp lemon juice, and 1 tsp vanilla extract in a medium bowl. Let sit for 10 minutes.
- Pour the strawberry filling evenly over the prebaked crust. Spread gently to cover all areas.
- Crumble the reserved oat mixture over the strawberry layer in even clumps.
- Bake for another 35-40 minutes until the topping is golden brown and the filling is bubbly. Tent with foil if topping browns too fast.
- Let the bars cool completely in the pan on a wire rack to set the filling and keep the topping crisp.
- Cut into approximately 12 squares and serve warm or at room temperature.
Notes
Use softened but not melted butter for best crumble texture. Prebake the crust to prevent sogginess. Let bars cool completely before slicing to keep topping crisp. If topping browns too quickly, tent with foil. Frozen strawberries can be used if thawed and drained. For gluten-free, substitute flour and oats with certified gluten-free versions. For vegan, replace butter with coconut oil or vegan butter and sugar with maple syrup.
Nutrition
- Serving Size: 1 bar (1/12th of rec
- Calories: 240
- Sugar: 18
- Sodium: 150
- Fat: 12
- Saturated Fat: 7
- Carbohydrates: 30
- Fiber: 3
- Protein: 3
Keywords: strawberry crumble bars, oat topping, easy dessert, homemade dessert, strawberry bars, crumble bars, potluck dessert