The first time I tried making nian gao, or chewy sticky rice cake, it was a chilly winter evening filled with the aroma of sweet rice and subtle caramel notes wafting through my tiny kitchen. Honestly, I wasn’t sure what to expect—sticky rice cakes always sounded a bit intimidating, mostly because I’d only ever eaten the store-bought kind, which sometimes felt a little too dense or overly sweet. But that night, fueled by a late-night craving and a packet of glutinous rice flour tucked away in my pantry, I decided to give it a shot without much planning.
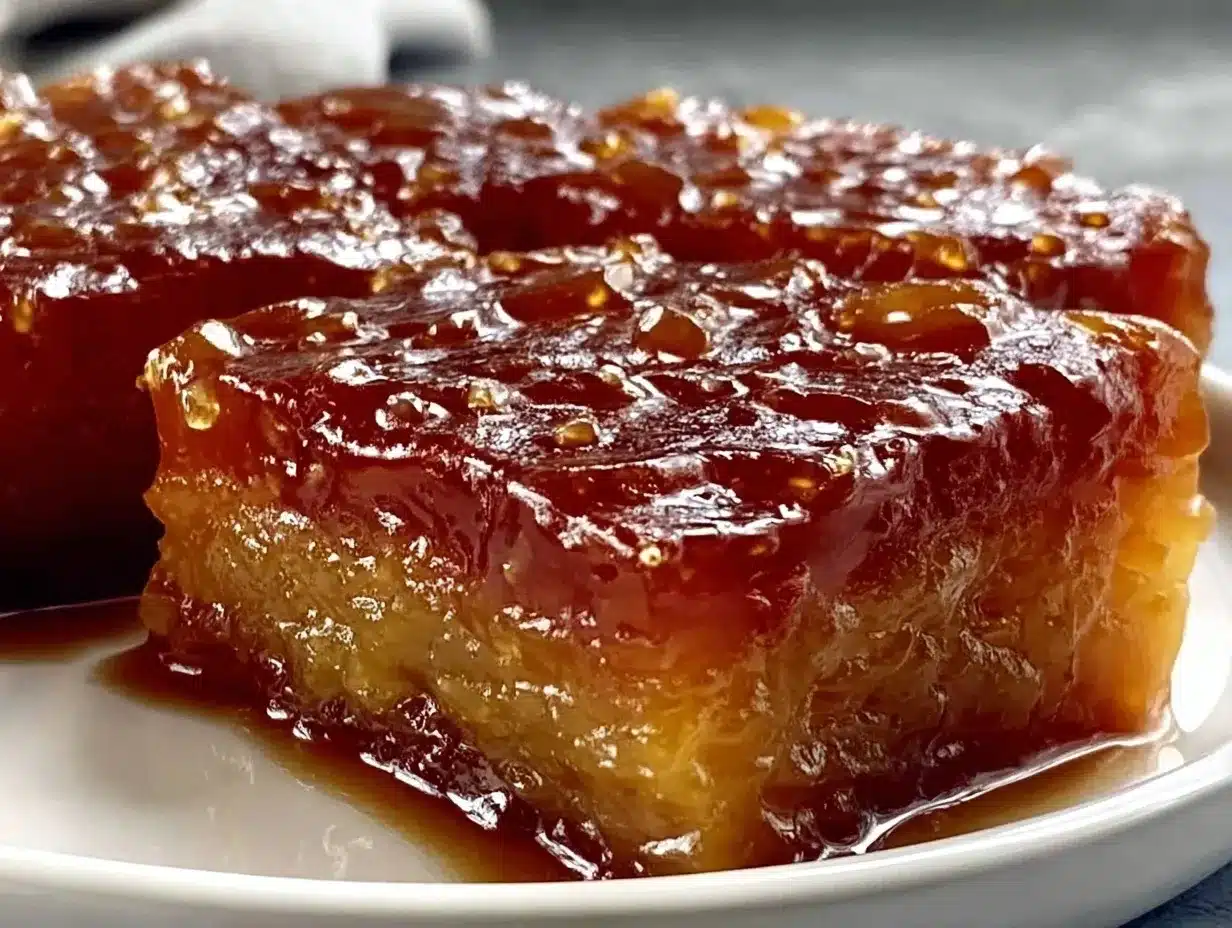
At first, the process seemed simple—mix, steam, and wait. Yet, as the sweet scent started to fill the air, I found myself pacing back and forth, staring at the steaming pot like it held some ancient secret. When I finally sliced into the warm cake, the texture was nothing like I expected. It was tender yet chewy, sticky yet light, and with just the right balance of sweetness that made me pause, close my eyes, and savor the moment quietly. That quiet, comforting experience—the kind you get when something homemade just clicks—is why this chewy sticky rice cake recipe has quietly become a favorite.
There’s something soothing about making nian gao that goes beyond the kitchen. Maybe it’s the slow steaming process that demands patience or the way the sticky rice flour transforms into a soft, almost bouncy cake. Either way, it’s not just a dessert; it’s a small, sweet ritual that’s stuck with me through cold evenings and festive mornings alike. If you’re someone who appreciates tradition wrapped up in simple ingredients and a chewy bite, this might just become your go-to treat too.
Why You’ll Love This Recipe
Having made this chewy sticky rice cake recipe multiple times, I can say it’s one of those dishes that wins you over with its simplicity and comforting texture. Here’s why it’s worth your time:
- Quick & Easy: This recipe comes together in under an hour, including steaming—perfect for a last-minute sweet fix or a cozy weekend project.
- Simple Ingredients: You likely have most of these staples on hand—glutinous rice flour, brown sugar, and water—no complicated shopping needed.
- Perfect for Celebrations: Traditionally enjoyed during Lunar New Year, it’s also great for potlucks, brunch spreads, or just because.
- Crowd-Pleaser: The chewy texture and gentle sweetness always get compliments from both kids and adults alike.
- Unique Texture: The magic lies in the sticky yet tender bite—different from any cake or pudding you’ve had before.
This recipe isn’t just another sticky rice cake; it’s the one I keep coming back to because it hits the sweet spot between traditional flavor and approachable technique. What sets it apart is the perfect balance of brown sugar, which brings a subtle caramel depth, without overpowering the delicate rice flavor. Plus, steaming instead of baking preserves that authentic, chewy softness that’s so hard to find in store-bought varieties.
Honestly, this recipe feels like sharing a little piece of heritage in every bite, and it’s the kind of treat that quietly impresses guests without any fuss. If you’re looking for a sweet that’s both nostalgic and surprisingly easy, this chewy sticky rice cake will not disappoint.
What Ingredients You Will Need
This recipe uses simple, wholesome ingredients to deliver bold flavor and that signature sticky yet tender texture without the fuss. Most are pantry staples, and substitutions are easy if needed.
- Glutinous Rice Flour: 2 cups (240 g) – This is the star ingredient, providing the chewy texture. I prefer Bob’s Red Mill for consistent results.
- Brown Sugar: 1 cup (200 g), packed – Use dark brown sugar for a richer caramel flavor. Light brown works if that’s what you have.
- Water: 1 ¾ cups (420 ml) – Lukewarm, to dissolve sugar and blend with flour smoothly.
- Vegetable Oil: 2 tablespoons (30 ml) – Neutral oil like canola or sunflower, helps with a smooth texture and prevents sticking.
- Optional Flavoring: 1 teaspoon vanilla extract or a pinch of grated ginger (adds warmth but totally optional).
If you want to experiment, you can swap brown sugar with coconut sugar for a different sweetness profile. For a gluten-free treat, glutinous rice flour is naturally gluten-free, but always check the packaging for cross-contamination if you’re sensitive.
For texture variations, some people fold in small bits of dried fruit or nuts, but I like to keep it pure and simple to highlight the chewy rice cake’s natural charm.
Equipment Needed
- Steaming Setup: A bamboo steamer or a metal steaming rack with a large pot works well. The key is to have a lid that fits tightly to trap steam.
- Mixing Bowl: A medium to large bowl for combining ingredients.
- Whisk or Spoon: For mixing the batter until smooth.
- Heatproof Pan or Cake Pan: A 7-inch (18 cm) round pan or square pan with at least 2-inch (5 cm) depth to hold the batter during steaming.
- Measuring Cups and Spoons: For precise ingredient amounts.
If you don’t have a bamboo steamer, no worries—a regular metal steamer basket or even a heat-safe dish set inside a pot with a rack at the bottom works just fine. I once improvised with a colander and a large pot lid, and it steamed perfectly!
Keep your steamer clean and dry before use to avoid any unwanted flavors. If using a bamboo steamer, occasionally oiling it lightly can prevent sticking and prolong its life.
Preparation Method
- Prepare the steaming setup: Fill your pot or wok with about 2 inches (5 cm) of water. Bring to a gentle boil over medium heat. Make sure the water doesn’t touch the bottom of your steaming pan.
- Mix the sugar and water: In a bowl, combine 1 cup (200 g) brown sugar with 1 ¾ cups (420 ml) lukewarm water. Stir until the sugar is completely dissolved. This may take 2-3 minutes. The mixture should be smooth and slightly golden.
- Add the oil and optional flavoring: Stir in 2 tablespoons (30 ml) vegetable oil and vanilla extract or grated ginger if using.
- Incorporate the glutinous rice flour: Gradually sift or add 2 cups (240 g) glutinous rice flour into the sugar mixture. Whisk continuously to avoid lumps, until you have a smooth, thin batter—think pancake batter consistency. This should take about 3-5 minutes.
- Prepare the pan: Lightly oil your steaming pan to prevent sticking. Pour the batter evenly into the pan, smoothing the top with a spatula.
- Steam the cake: Place the pan into the steamer. Cover with a tight-fitting lid to trap steam. Steam on medium heat for 45-50 minutes. Avoid opening the lid too often—steam is the magic here.
- Check for doneness: The cake should be firm and slightly translucent on top. Insert a toothpick or skewer; it should come out clean or with just a few sticky crumbs.
- Cool before slicing: Remove from steamer and let cool for at least 30 minutes. The cake firms up as it cools, making it easier to slice into squares or rectangles.
Pro tip: If you find lumps in your batter, don’t panic. Strain the mixture through a fine sieve before pouring into the pan. Also, steaming time can vary based on your equipment; if your cake feels too soft, give it another 5-10 minutes.
Cooking Tips & Techniques
Getting that perfect chewy texture can be a little tricky, but here are some tips I’ve learned from trial and error over the years:
- Don’t skip the oil: Adding a bit of vegetable oil keeps the cake smooth and prevents it from drying out or sticking too much to the pan.
- Mix thoroughly: The batter should be lump-free before steaming. Whisk slowly and evenly, and if needed, use a sieve to catch stubborn lumps.
- Maintain steady steam: Medium heat is key. Too high, and the outside cooks too fast leaving the inside underdone; too low, and it won’t cook well.
- Avoid opening the lid: Steam escapes quickly, and temperature drops can cause uneven cooking or a denser texture.
- Use quality glutinous rice flour: Different brands vary, so stick to ones you trust. I’ve found that fresh flour yields a more elastic cake.
One time, I rushed and sliced the cake too soon—it was gummy and stuck to my knife. Letting it rest completely makes slicing cleaner and the texture more satisfying. Also, using a wet knife can prevent sticking when cutting.
Variations & Adaptations
This chewy sticky rice cake recipe is a great base to customize, whether you want to tweak flavors, textures, or meet dietary needs.
- Flavor twists: Add a tablespoon of matcha powder to the batter for a green tea version, or fold in chopped red beans cooked with a bit of sugar for a traditional sweet filling.
- Vegan & Dairy-Free: The recipe is naturally vegan, just make sure your sugar is bone-char-free if that matters to you.
- Gluten-Free: Naturally gluten-free thanks to glutinous rice flour, but watch for cross-contamination if you have celiac disease.
- Alternative sweeteners: Swap brown sugar with palm sugar or coconut sugar for subtle flavor changes.
- Cooking methods: If steaming isn’t an option, you can try baking it at 325°F (160°C) in a water bath for about 50 minutes, though texture will be less traditional.
One variation I tried recently was swirling in a bit of black sesame paste on top before steaming. It added a lovely nutty contrast that got rave reviews at a family gathering.
Serving & Storage Suggestions
Serve your chewy sticky rice cake warm or at room temperature for the best texture and flavor. Slicing it into bite-sized pieces makes it easier to enjoy as a snack or dessert.
It pairs beautifully with a cup of jasmine tea or a light, floral oolong to balance the subtle sweetness.
To store, wrap leftovers tightly in plastic wrap or keep in an airtight container in the refrigerator for up to 5 days. The cake firms up in the fridge but gently reheating it—either steamed again for 5-7 minutes or microwaved with a damp paper towel—restores its softness.
For longer storage, you can freeze slices individually wrapped for up to a month. Thaw overnight in the fridge and re-steam before serving.
The flavors mellow and deepen a bit after a day or two, making it even tastier if you can wait that long!
Nutritional Information & Benefits
Estimated per serving (1 slice, about 60 g):
| Calories | 150 |
|---|---|
| Carbohydrates | 35 g |
| Fat | 1.5 g |
| Protein | 1 g |
| Sugar | 12 g |
Glutinous rice flour is a good source of energy and is naturally gluten-free, making this treat suitable for those avoiding gluten. Using brown sugar adds a touch of minerals like calcium and potassium compared to refined sugar. While it’s still a sweet treat, the simple ingredients mean no artificial additives or preservatives.
As someone mindful of balance, I find this recipe satisfies sweet cravings without going overboard. It’s a straightforward, traditional dessert that feels honest and homey.
Conclusion
This chewy sticky rice cake recipe is a humble yet rewarding treat that brings together tradition, simple ingredients, and comforting textures. Whether you’re celebrating a special occasion or just craving something sweet and satisfying, it’s a recipe worth keeping in your rotation.
The beauty of making nian gao at home is how easily you can adjust it to your taste and lifestyle, from sweetness levels to added flavors. Personally, it’s become a quiet ritual for me—something to slow down for and enjoy, bite by chewy bite.
Give it a try, and I’d love to hear how you make it your own. Share your tweaks, your favorite ways to serve it, or even your first impression. Here’s to sweet moments made from simple things, shared around the table.
FAQs
What is the difference between glutinous rice flour and regular rice flour?
Glutinous rice flour is made from sticky rice and gives a chewy, elastic texture. Regular rice flour is made from non-sticky rice and results in a crumbly texture. For this recipe, glutinous rice flour is essential.
Can I make nian gao without a steamer?
While steaming is traditional and best for texture, you can bake it in a water bath at 325°F (160°C) for about 50 minutes. The texture will be slightly different, less chewy but still delicious.
How long does homemade sticky rice cake last?
Stored in the refrigerator in an airtight container, it lasts about 5 days. You can freeze it for up to a month. Reheat by steaming or microwaving with a damp towel to soften.
Is nian gao gluten-free?
Yes, since it’s made from glutinous rice flour, it is naturally gluten-free. Just ensure the flour is certified gluten-free if you have severe allergies.
Can I add other flavors to this sticky rice cake?
Absolutely! You can mix in matcha, coconut, red bean paste, or even nuts and dried fruits to customize the flavor and texture to your liking.
Pin This Recipe!
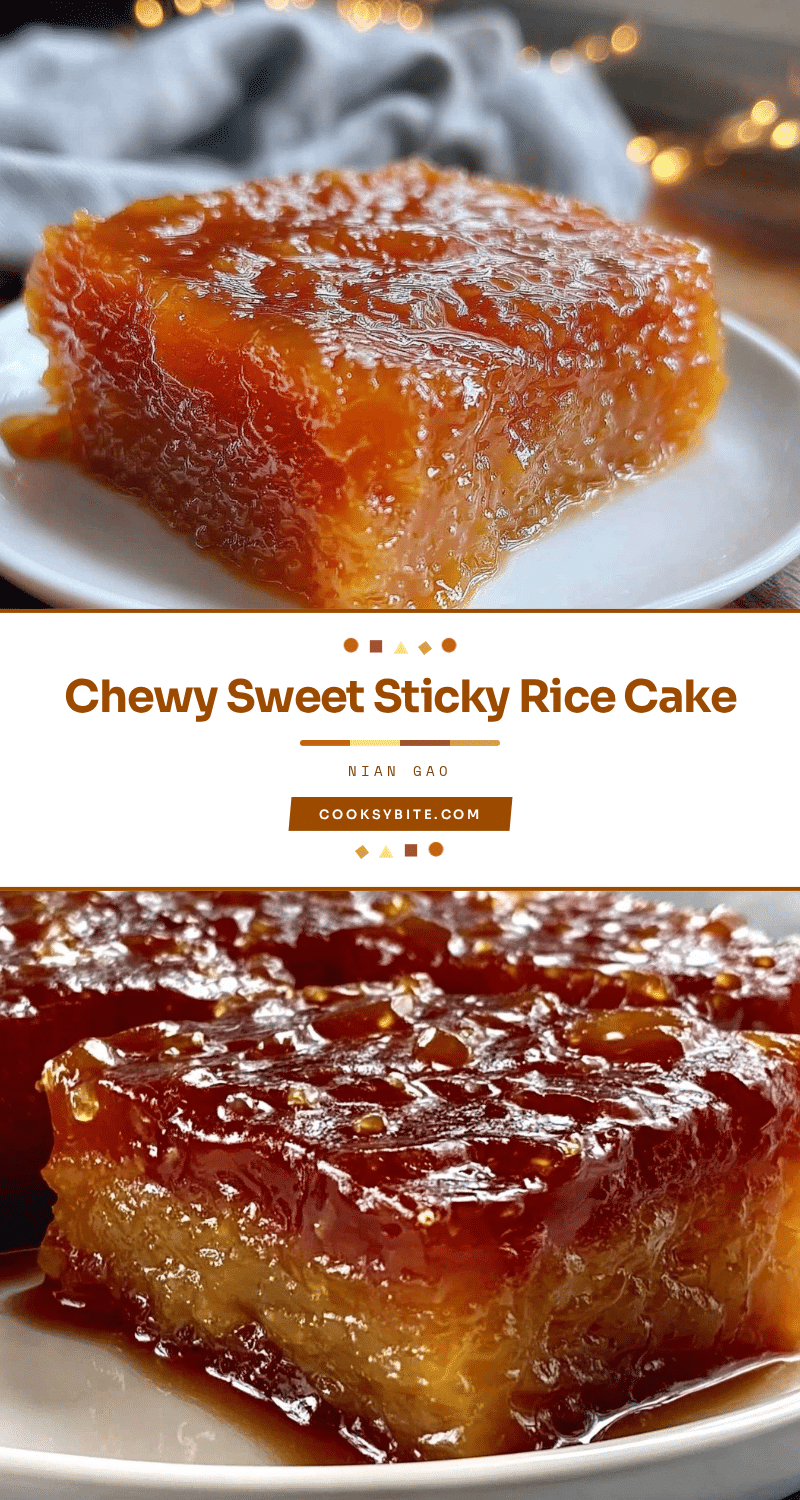
Chewy Sticky Rice Cake Nian Gao Recipe Easy Traditional Sweet Treat
A traditional chewy sticky rice cake with a perfect balance of sweetness and tender texture, steamed to perfection. This easy recipe uses simple ingredients and is perfect for celebrations or cozy treats.
- Prep Time: 10 minutes
- Cook Time: 50 minutes
- Total Time: 1 hour
- Yield: 8 servings 1x
- Category: Dessert
- Cuisine: Chinese
Ingredients
- 2 cups (240 g) glutinous rice flour
- 1 cup (200 g) brown sugar, packed (dark brown preferred)
- 1 ¾ cups (420 ml) lukewarm water
- 2 tablespoons (30 ml) vegetable oil (canola or sunflower)
- 1 teaspoon vanilla extract or a pinch of grated ginger (optional)
Instructions
- Prepare the steaming setup: Fill your pot or wok with about 2 inches (5 cm) of water. Bring to a gentle boil over medium heat. Make sure the water doesn’t touch the bottom of your steaming pan.
- Mix the sugar and water: In a bowl, combine 1 cup (200 g) brown sugar with 1 ¾ cups (420 ml) lukewarm water. Stir until the sugar is completely dissolved, about 2-3 minutes. The mixture should be smooth and slightly golden.
- Add the oil and optional flavoring: Stir in 2 tablespoons (30 ml) vegetable oil and vanilla extract or grated ginger if using.
- Incorporate the glutinous rice flour: Gradually sift or add 2 cups (240 g) glutinous rice flour into the sugar mixture. Whisk continuously to avoid lumps, until you have a smooth, thin batter—similar to pancake batter consistency, about 3-5 minutes.
- Prepare the pan: Lightly oil your steaming pan to prevent sticking. Pour the batter evenly into the pan, smoothing the top with a spatula.
- Steam the cake: Place the pan into the steamer. Cover with a tight-fitting lid to trap steam. Steam on medium heat for 45-50 minutes. Avoid opening the lid too often.
- Check for doneness: The cake should be firm and slightly translucent on top. Insert a toothpick or skewer; it should come out clean or with just a few sticky crumbs.
- Cool before slicing: Remove from steamer and let cool for at least 30 minutes. The cake firms up as it cools, making it easier to slice into squares or rectangles.
Notes
If lumps appear in the batter, strain through a fine sieve before pouring into the pan. Maintain medium heat for steady steam and avoid opening the lid during steaming to ensure even cooking. Let the cake cool completely before slicing for cleaner cuts. Using a wet knife helps prevent sticking. For baking alternative, use a water bath at 325°F (160°C) for about 50 minutes, though texture will be less traditional.
Nutrition
- Serving Size: 1 slice (about 60 g)
- Calories: 150
- Sugar: 12
- Fat: 1.5
- Carbohydrates: 35
- Protein: 1
Keywords: nian gao, sticky rice cake, chewy rice cake, traditional Chinese dessert, glutinous rice flour, steamed cake, Lunar New Year dessert