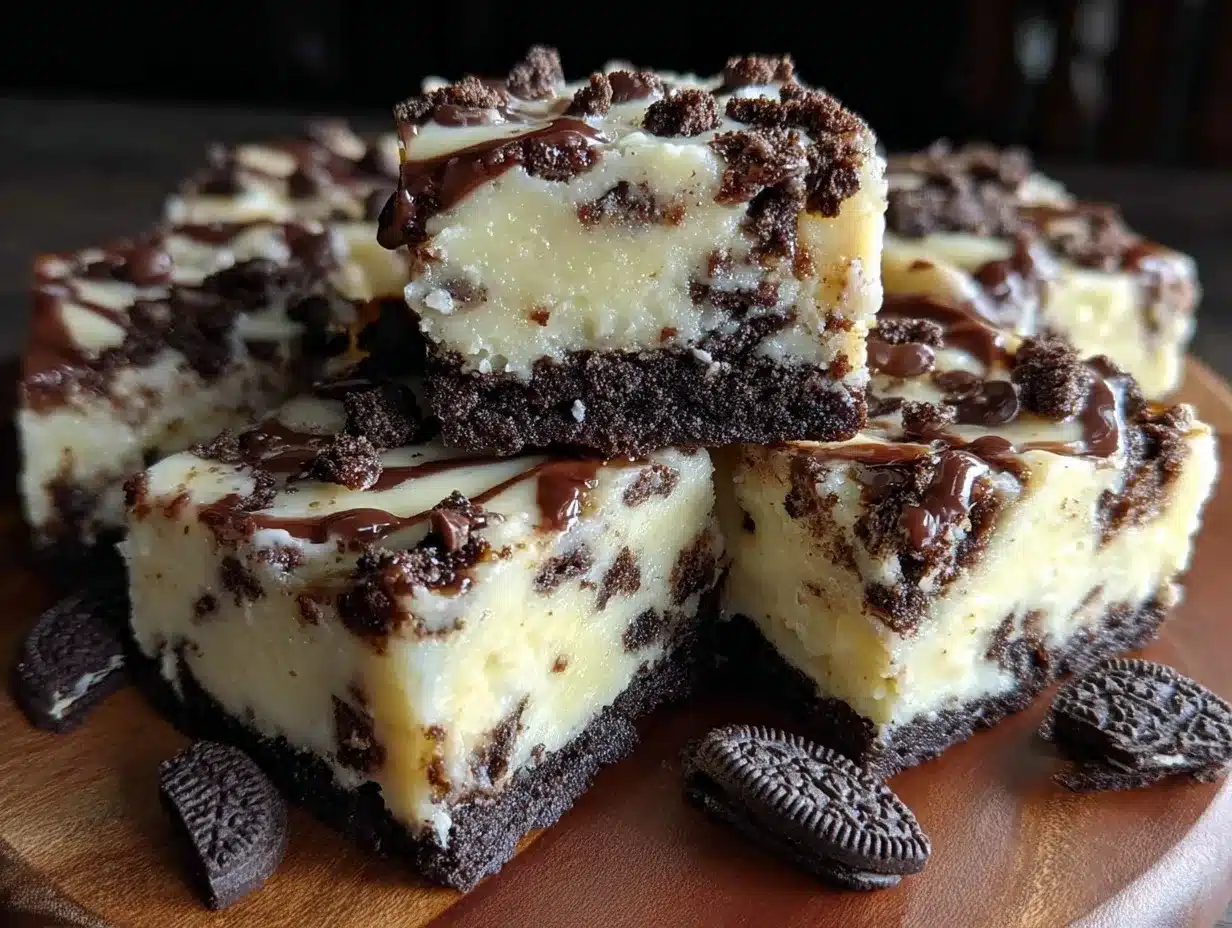
“You really don’t need to bake this,” my friend insisted as she handed me a slice of what looked like an ordinary cheesecake bar. Honestly, I was skeptical—cheesecake without the oven? But that first creamy bite of the Creamy No-Bake Oreo Cheesecake Bars completely changed my mind.
It all started on a chaotic afternoon when I barely had time to breathe, let alone prepare a fancy dessert for an unexpected guest. I rummaged through the fridge and pantry, grabbed a few ingredients, and threw together these bars without heating up the kitchen. The texture was silky, the Oreo crust delightfully crumbly, and the sweetness just right—nothing too heavy, nothing too light. It quickly became my go-to when I needed an easy yet impressive treat that didn’t involve fuss or fancy equipment.
What surprised me most wasn’t just how quick and simple they were to make, but how those familiar Oreo flavors found new life in this smooth cheesecake form. Over the weeks, I found myself making these bars multiple times, sometimes swapping out the Oreos for a different cookie or adding a hint of espresso for a subtle kick.
Now, these bars aren’t just a dessert—they’re a little comfort in bar form, a reliable friend on hectic days, and a sweet moment to savor without the oven’s heat. If you’re anything like me, juggling life’s little surprises, you’ll appreciate how this recipe feels like a secret weapon in your dessert arsenal.
Why You’ll Love This Recipe
Having tested this Creamy No-Bake Oreo Cheesecake Bars recipe more times than I can count, here’s what I can share about why it stands out:
- Quick & Easy: Comes together in under 20 minutes, perfect for busy weeknights or last-minute cravings.
- Simple Ingredients: Uses pantry staples and classic Oreos—no need for specialty shopping trips.
- Perfect for Any Occasion: Great for potlucks, family gatherings, or a casual weekend treat.
- Crowd-Pleaser: Kids and adults alike keep asking for more; the Oreo crust is always a hit.
- Unbelievably Delicious: The creamy filling balances perfectly with the crunchy cookie base, delivering a luscious mouthfeel.
This isn’t just another no-bake cheesecake bar. What sets it apart is the use of crushed Oreos folded right into a dreamy cream cheese mixture, giving it an indulgent texture without heaviness. Plus, the no-bake method means you get that cheesecake vibe without waiting hours or firing up the oven.
Honestly, this recipe feels like the dessert equivalent of slipping into your favorite cozy sweater—comforting, familiar, but with a little twist that makes it special. It’s the kind of treat that makes you pause, close your eyes after the first bite, and just savor. For stress-free dessert moments that still impress, these bars have your back.
What Ingredients You Will Need
This recipe relies on simple, wholesome ingredients to deliver a bold flavor and satisfying texture without any fuss. You likely have many of these on hand already!
- Oreo Cookies: About 24 whole Oreos, crushed finely (feel free to use the original or double-stuffed for extra creaminess). I prefer the classic Oreo brand because of its perfect balance of sweet and chocolate.
- Unsalted Butter: 6 tablespoons (85g), melted—this helps bind the crust together and adds richness.
- Cream Cheese: 16 ounces (450g), softened to room temperature for smooth blending. Use full-fat for best creaminess.
- Powdered Sugar: ¾ cup (90g), sifted to avoid lumps and add just the right sweetness.
- Heavy Whipping Cream: 1 cup (240ml), cold—to be whipped into soft peaks for that fluffy texture.
- Vanilla Extract: 1 teaspoon, for depth of flavor.
- Optional: A pinch of salt to balance the sweetness or a teaspoon of instant espresso powder if you like a subtle mocha twist.
For substitutions, you can swap heavy cream for full-fat coconut cream to keep it dairy-free, and almond flour can replace the crushed Oreos for a gluten-free crust (though it won’t taste quite the same!). I’ve also tried using store-bought whipped topping, but whipping your own cream really lifts the texture.
Equipment Needed
- 8×8-inch Baking Pan: Ideal size for these bars; you can also use a 9×9-inch pan but the bars will be slightly thinner. A springform pan isn’t necessary here.
- Mixing Bowls: At least two—one for the crust mixture, one for the cream cheese filling.
- Electric Mixer or Stand Mixer: Helpful for whipping the cream and blending the cream cheese smoothly. A hand mixer works fine too.
- Food Processor or Blender: To crush the Oreos finely. Alternatively, place Oreos in a sealed bag and crush with a rolling pin.
- Spatula: For folding the whipped cream into the cream cheese mixture gently.
If you don’t own a food processor, no worries—you can crush Oreos in a zip-top bag with a rolling pin or even the bottom of a heavy pan, though it takes a bit more elbow grease. I’ve found a silicone spatula is best for folding without deflating the cream.
Preparation Method
- Prepare the Oreo Crust: Crush 24 Oreos in your food processor until fine crumbs form (about 1 ½ cups). If using a bag and rolling pin, aim for a fine texture but leave a few small chunks for crunch. Transfer crumbs to a mixing bowl.
- Mix the Crust: Pour in 6 tablespoons (85g) melted unsalted butter. Stir until crumbs are fully coated and hold together when pressed. Press mixture firmly and evenly into the bottom of an 8×8-inch (20×20 cm) baking pan. Use the back of a spoon or the bottom of a glass to smooth and compact the crust. Chill in the fridge while preparing the filling (about 10 minutes).
- Make the Cheesecake Filling: In a large bowl, beat 16 ounces (450g) softened cream cheese with ¾ cup (90g) powdered sugar and 1 teaspoon vanilla extract until smooth and creamy. This should take about 3-4 minutes with an electric mixer on medium speed. If using espresso powder, add it here for a subtle mocha note.
- Whip the Cream: In a separate chilled bowl, whip 1 cup (240ml) heavy cream to soft peaks. This usually takes 3-5 minutes. Be careful not to overbeat; you want the cream to hold shape but still be light and fluffy.
- Fold Together: Gently fold the whipped cream into the cream cheese mixture in three additions, using a spatula. The goal is to keep the mixture airy—don’t overmix. Once combined, fold in another 10 crushed Oreos (coarsely chopped) for extra Oreo texture inside the bars.
- Assemble & Chill: Pour the filling over the chilled crust and spread evenly with a spatula. Cover tightly with plastic wrap and refrigerate for at least 4 hours or overnight. The longer it chills, the firmer and more sliceable it becomes.
- Serve: Once set, cut into 12 bars with a sharp knife. For cleaner cuts, dip the knife in hot water and wipe dry before slicing each time.
Pro tip: If you find the filling too soft after chilling, a little extra cream cheese or more chilling time usually solves the problem. Also, make sure your cream cheese is fully softened to avoid lumps in the filling.
Cooking Tips & Techniques
Making no-bake desserts can be a little intimidating if you’re used to oven-baked goodies, but these cheesecake bars are quite forgiving if you follow a few key tips.
- Softening Cream Cheese: Let it sit at room temperature for at least 30 minutes before mixing. Cold cream cheese lumps are the bane of smooth cheesecake filling!
- Whipping Cream Just Right: Chill your bowl and beaters beforehand for faster whipping. Stop whipping as soon as soft peaks form to keep the filling light.
- Folding Technique: Use a gentle folding motion to combine the whipped cream and cream cheese. This keeps the air in, resulting in a fluffy texture rather than dense.
- Crust Pressing: Firmly press the Oreo crust into the pan. If it’s loose, the bars won’t hold together well. I sometimes press with the bottom of a glass to get it nice and compact.
- Chilling Time: Don’t rush the chilling. While it’s tempting to dig in early, these bars really benefit from several hours in the fridge to set properly.
I learned the hard way that skipping the chilling step results in a filling that’s too soft to cut cleanly, so patience is key. Also, cleaning your knife between cuts makes slicing the bars easier and prettier.
Variations & Adaptations
One of the joys of this recipe is how adaptable it is! Here are some of my favorite twists:
- Mint Oreo Cheesecake Bars: Swap regular Oreos for Mint Oreos and add a drop of peppermint extract to the filling for a refreshing twist.
- Chocolate Lover’s Version: Mix in mini chocolate chips or drizzle melted dark chocolate on top after chilling for extra decadence.
- Gluten-Free Option: Use gluten-free chocolate sandwich cookies for the crust and filling. Make sure your cream cheese and other ingredients are certified gluten-free.
- Dairy-Free Adaptation: Substitute cream cheese with a dairy-free cream cheese alternative and heavy cream with coconut cream. The texture shifts slightly but stays delicious.
Personally, I once swapped the Oreos for crushed cherry chocolate brownies for a richer crust base—surprisingly fantastic for a special occasion twist. Also, you can turn these bars into individual servings by layering in small jars or ramekins, perfect for elegant gatherings.
Serving & Storage Suggestions
These bars are best served chilled straight from the fridge, but if you prefer a softer texture, let them sit at room temperature for 10 minutes before slicing.
Presentation-wise, a dusting of crushed Oreos or a drizzle of chocolate sauce adds a nice touch. They pair beautifully with a cup of strong coffee or even a glass of red wine, much like that rich chocolate cake recipe I love on slow evenings.
To store, cover tightly with plastic wrap or place in an airtight container. They keep well in the fridge for up to 5 days. For longer storage, freeze the bars for up to a month—just thaw in the fridge overnight before serving. Reheating is not recommended, but a brief 10-minute thaw at room temperature helps soften the bars without melting them.
Flavors tend to meld and deepen after a day in the fridge, so if you can resist, make them a day ahead to let the Oreo magic fully develop.
Nutritional Information & Benefits
Each bar (assuming 12 servings) contains roughly:
| Calories | Fat | Carbohydrates | Protein |
|---|---|---|---|
| 280 kcal | 20g | 22g | 4g |
The recipe offers a decent amount of calcium and protein thanks to the cream cheese and heavy cream. While these bars are definitely an indulgence, using quality ingredients like full-fat cream cheese and real butter adds richness without artificial fillers.
For those watching gluten or dairy, simple substitutions can make this dessert inclusive. Just keep an eye on the sugar content if you’re avoiding excess sweetness. From a personal wellness perspective, I find that treating myself occasionally to a dessert like this—balanced with wholesome meals—keeps the joy in eating without guilt.
Conclusion
The Creamy No-Bake Oreo Cheesecake Bars recipe is a trusty little gem when you want something special without the hassle. Its creamy texture, Oreo crunch, and simple prep make it a winner every time in my kitchen.
Feel free to tweak the flavors or try the variations to suit your mood or occasion. Whether you’re an Oreo fan or just crave a quick homemade dessert, this recipe fits the bill perfectly.
Honestly, it’s a dessert I keep coming back to—whether to impress friends or just to treat myself after a long day. If you give it a try, I’d love to hear how you made it your own!
Happy baking (or not baking)!
Frequently Asked Questions
Can I use regular cream instead of heavy whipping cream?
Regular cream usually has lower fat content and won’t whip as well, resulting in a less fluffy filling. Heavy whipping cream is best for this recipe to achieve the right texture.
How long do these bars need to chill before serving?
At least 4 hours in the fridge, preferably overnight for the best set and sliceability.
Can I freeze the cheesecake bars?
Yes, freeze them in an airtight container for up to one month. Thaw overnight in the fridge before serving.
Is there a way to make these bars without Oreos?
You can substitute with any chocolate sandwich cookie or even graham crackers for a different flavor and texture.
Can I make this recipe vegan?
With dairy-free cream cheese and coconut cream substitutions, plus vegan cookies, you can make a vegan-friendly version, though texture and taste will vary slightly.
Pin This Recipe!
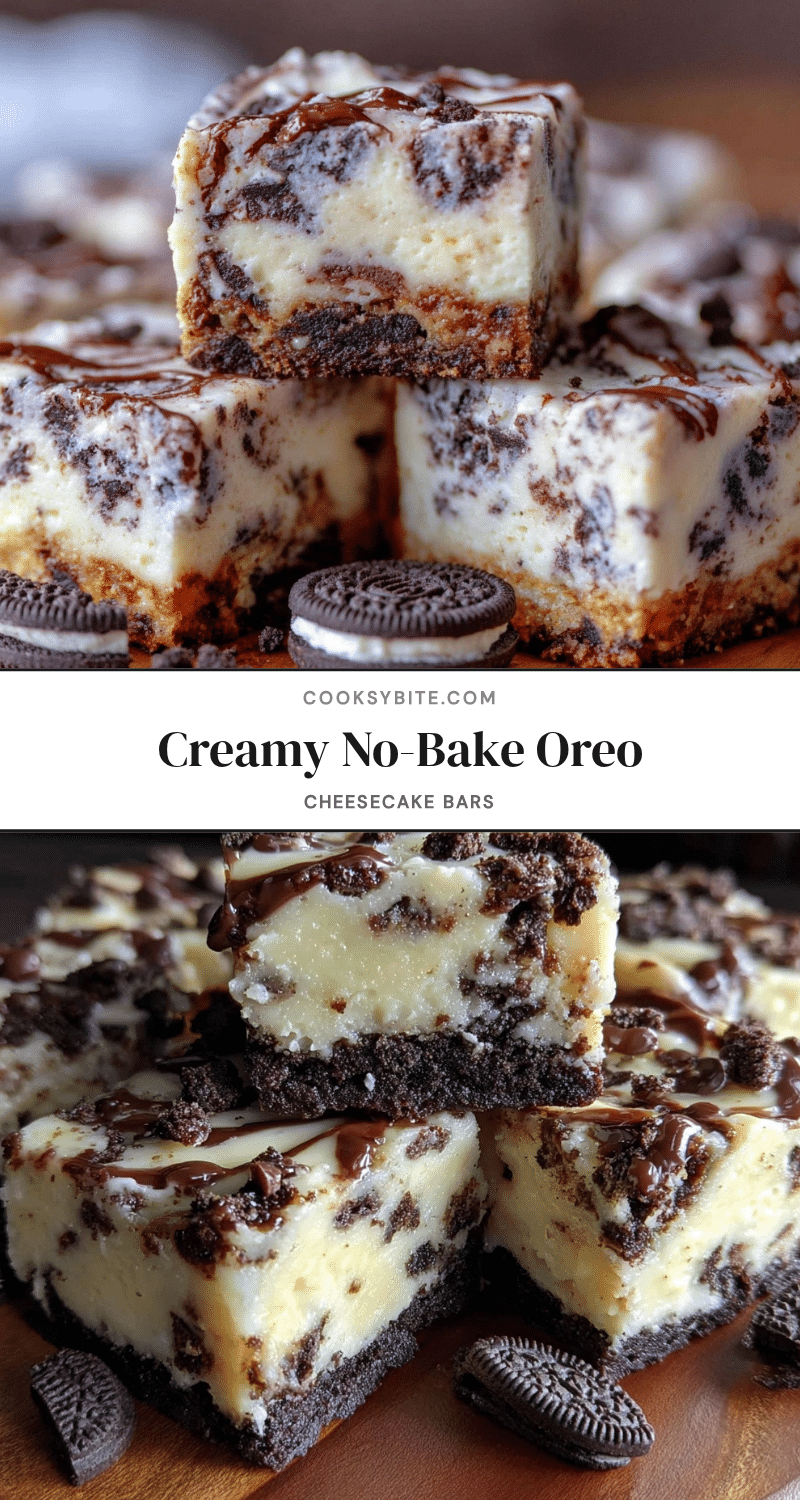
Creamy No-Bake Oreo Cheesecake Bars
A quick and easy no-bake dessert featuring a creamy cheesecake filling with Oreo cookie crust, perfect for busy days and last-minute treats.
- Prep Time: 15 minutes
- Cook Time: 0 minutes
- Total Time: 4 hours 15 minutes
- Yield: 12 servings 1x
- Category: Dessert
- Cuisine: American
Ingredients
- 24 whole Oreo cookies, crushed finely
- 6 tablespoons (85g) unsalted butter, melted
- 16 ounces (450g) cream cheese, softened to room temperature
- 3/4 cup (90g) powdered sugar, sifted
- 1 cup (240ml) heavy whipping cream, cold
- 1 teaspoon vanilla extract
- Optional: pinch of salt
- Optional: 1 teaspoon instant espresso powder
- Optional: substitutions – full-fat coconut cream for heavy cream (dairy-free), almond flour for crushed Oreos (gluten-free)
Instructions
- Crush 24 Oreos in a food processor until fine crumbs form (about 1 ½ cups). Alternatively, crush in a sealed bag with a rolling pin.
- Mix crushed Oreos with 6 tablespoons melted unsalted butter until crumbs are fully coated and hold together when pressed.
- Press the crust mixture firmly and evenly into the bottom of an 8×8-inch baking pan. Chill in the fridge for about 10 minutes.
- In a large bowl, beat 16 ounces softened cream cheese with 3/4 cup powdered sugar and 1 teaspoon vanilla extract until smooth and creamy (3-4 minutes). Add espresso powder if using.
- In a separate chilled bowl, whip 1 cup heavy cream to soft peaks (3-5 minutes).
- Gently fold whipped cream into the cream cheese mixture in three additions, keeping the mixture airy.
- Fold in 10 crushed Oreos (coarsely chopped) for extra texture.
- Pour the filling over the chilled crust and spread evenly.
- Cover tightly with plastic wrap and refrigerate for at least 4 hours or overnight.
- Cut into 12 bars with a sharp knife, dipping the knife in hot water and wiping dry between cuts for cleaner slices.
Notes
Let cream cheese soften at room temperature for at least 30 minutes for smooth blending. Chill bowl and beaters before whipping cream. Use gentle folding to keep mixture airy. Press crust firmly to hold bars together. Chill at least 4 hours or overnight for best set and sliceability. Dip knife in hot water and wipe dry between cuts for clean slices.
Nutrition
- Serving Size: 1 bar (1/12th of rec
- Calories: 280
- Fat: 20
- Carbohydrates: 22
- Protein: 4
Keywords: no-bake cheesecake, Oreo cheesecake bars, easy dessert bars, no oven dessert, creamy cheesecake, Oreo crust, quick dessert