“Hey, can you make a cake that looks like a graduation cap?” That text message arrived just a day before the big ceremony, and honestly, my first thought was, “Sure, why not?” With the chaos of last-minute plans swirling around me, I wasn’t exactly geared up for a baking marathon. But sometimes, those unexpected requests turn into the most satisfying kitchen projects. This Perfect Personalized Fondant Graduation Cap Chocolate Fudge Cake was born from that very scramble.
The rich scent of melting chocolate filled the air as I mixed the batter, the kitchen becoming a small island of calm amid all the hustle. The fondant work was a bit fiddly at first—there’s always that little voice in your head questioning if you’ve bitten off more than you can chew. But shaping the graduation cap, carefully smoothing the fondant, and adding that personalized touch made it feel not like a chore but like a celebration in itself.
What surprised me most was how this cake became the centerpiece of the party, not just because it looked impressive but because each bite was pure, fudgy comfort. I found myself making it several times that week, tweaking the chocolate balance and fondant thickness until it felt just right. It’s funny how a last-minute favor can turn into a recipe you trust on special occasions.
So, whether you’re a nervous first-timer or a seasoned baker looking for a show-stopping graduation cake, this recipe has that mix of simplicity and wow factor that sticks with you—kind of like the moment you see that cap tossed high into the air. Let me tell you, there’s something quietly satisfying about crafting a homemade treat that feels truly personal.
Why You’ll Love This Recipe
Creating this fondant graduation cap chocolate fudge cake isn’t just about the final look—though that’s a big part of the fun. Over countless trials, I found it nails that perfect balance between rich chocolate indulgence and smooth, elegant decoration. Here’s what makes this recipe stand apart:
- Quick & Easy: You can have this cake ready to decorate in under 90 minutes, ideal for when time isn’t exactly on your side.
- Simple Ingredients: No hunting down obscure baking supplies; most items are pantry staples or easy to find at any grocery store.
- Perfect for Celebrations: Beyond graduations, this cake shines at any milestone party or special occasion where you want a personal touch.
- Crowd-Pleaser: The dense chocolate fudge flavor consistently wins over even the pickiest eaters.
- Unbelievably Delicious: The fudge cake stays moist for days, and the silky chocolate ganache pairs beautifully with the smooth fondant.
What makes this recipe truly unique is the personalizing step—you can easily customize the fondant cap’s colors, add names or year numbers, and even play with edible accents to make it feel one-of-a-kind. Unlike many cakes that rely on complicated techniques, this recipe trusts straightforward methods to deliver maximum impact.
Honestly, this isn’t just another chocolate cake dressed up for the occasion. It’s the kind of treat that makes you pause after the first bite and appreciate the mix of nostalgia, accomplishment, and sweet reward.
What Ingredients You Will Need
This fondant graduation cap chocolate fudge cake recipe uses simple, wholesome ingredients to deliver bold flavor and satisfying texture without the fuss. Most of these are staples you likely have on hand, and substitutions are easy if you want to adapt for dietary needs.
- For the Cake Batter:
- All-purpose flour, 2 cups (240g) – the base for a tender crumb
- Cocoa powder, unsweetened, ¾ cup (75g) – I prefer Valrhona for rich flavor
- Baking powder, 1 ½ tsp – helps the cake rise evenly
- Baking soda, ½ tsp – balances acidity
- Salt, ½ tsp – enhances chocolate depth
- Granulated sugar, 1 ¾ cups (350g) – sweetens without overpowering
- Buttermilk, 1 cup (240ml), room temperature – adds moisture and subtle tang (can substitute with dairy-free milk + lemon juice)
- Vegetable oil, ½ cup (120ml) – keeps the cake moist
- Large eggs, 2, room temperature – for structure
- Vanilla extract, 2 tsp – classic warmth
- Hot water, 1 cup (240ml) – intensifies cocoa flavor
- For the Chocolate Ganache:
- Heavy cream, 1 cup (240ml) – for smooth richness
- Semisweet chocolate chips, 8 oz (225g) – I recommend Ghirardelli for glossy finish
- Unsalted butter, 2 tbsp (28g), softened – adds silkiness
- For the Fondant Decoration:
- Ready-to-roll fondant, black, 1 lb (450g) – pre-colored for ease
- White fondant, ½ lb (225g) – for personalization details
- Edible food coloring pens or gel colors – to write names or date
- Edible glue or water – to attach fondant pieces
Feel free to swap all-purpose flour with a gluten-free blend if needed, and if you want to lighten it up, try using Greek yogurt instead of buttermilk. For a dairy-free version, coconut cream works well for ganache, though the texture shifts slightly.
Equipment Needed
- Two 8-inch (20cm) round cake pans – nonstick or lined with parchment paper
- Mixing bowls – medium and large sizes
- Electric mixer or stand mixer – for easy batter mixing
- Measuring cups and spoons – precise measurements matter here
- Rubber spatula – perfect for folding ingredients gently
- Wire cooling rack – to cool the cakes evenly
- Offset spatula or butter knife – for spreading ganache smoothly
- Rolling pin – to roll out fondant evenly
- Sharp knife or pizza cutter – to shape fondant pieces
- Small paintbrush – to apply edible glue on fondant
If you don’t have a stand mixer, a handheld electric mixer works just fine. When it comes to rolling out fondant, a little cornstarch dusted on the surface prevents sticking. I’ve often used a simple glass bottle in a pinch, and it worked surprisingly well!
Preparation Method
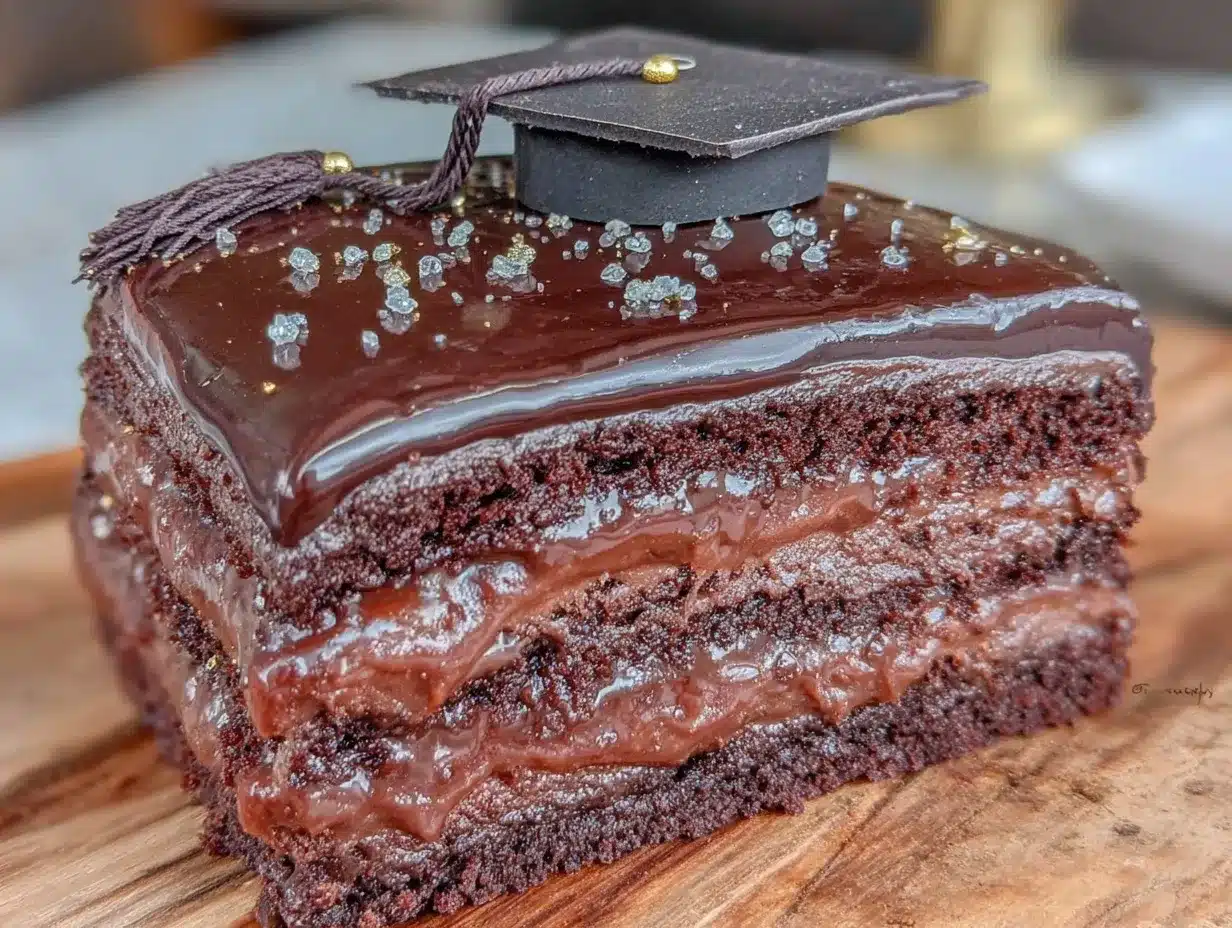
- Preheat and Prep: Preheat your oven to 350°F (175°C). Grease and flour two 8-inch (20cm) cake pans or line them with parchment paper. This step takes about 10 minutes.
- Mix Dry Ingredients: In a large bowl, sift together 2 cups (240g) all-purpose flour, ¾ cup (75g) unsweetened cocoa powder, 1 ½ tsp baking powder, ½ tsp baking soda, and ½ tsp salt. Whisk briefly to combine evenly. This ensures no clumps of cocoa or leaveners. (5 minutes)
- Combine Wet Ingredients: In a separate bowl, whisk 1 ¾ cups (350g) granulated sugar, 1 cup (240ml) buttermilk, ½ cup (120ml) vegetable oil, 2 large eggs, and 2 tsp vanilla extract until smooth and well blended.
- Mix Batter: Slowly add the wet ingredients to the dry mix, stirring gently with a rubber spatula until just combined. Avoid overmixing to keep the cake tender. (3-4 minutes)
- Add Hot Water: Carefully stir in 1 cup (240ml) of hot water. This step thins the batter and intensifies the cocoa flavor. The batter will be thin—don’t worry, that’s right! (2 minutes)
- Bake: Divide the batter evenly between the prepared pans. Bake for 30-35 minutes until a toothpick inserted in the center comes out with moist crumbs but not wet batter. Ovens vary, so start checking at 28 minutes. (30-35 minutes)
- Cool: Let the cakes cool in pans for 10 minutes, then turn them out onto a wire rack to cool completely before decorating. (At least 1 hour)
- Prepare Ganache: Heat 1 cup (240ml) heavy cream in a small saucepan over medium heat until just simmering. Pour over 8 oz (225g) semisweet chocolate chips in a heatproof bowl. Let sit 2 minutes, then stir until smooth. Add 2 tbsp (28g) softened unsalted butter and stir until glossy. Cool slightly to thicken. (10-15 minutes)
- Assemble Cake: Place one cake layer on your serving plate. Spread a thin layer of ganache on top. Add the second cake layer, then cover the entire cake with the remaining ganache, smoothing with an offset spatula. Chill briefly to set ganache. (15-20 minutes)
- Decorate with Fondant: Roll out the black fondant on a lightly cornstarch-dusted surface to about ¼ inch (6mm) thickness. Cut a square slightly larger than the cake top for the cap. Drape over the cake and smooth gently. Form the “mortarboard” base and “button” from fondant scraps. Use white fondant for personalized name or year details. Attach pieces with edible glue or water and write with edible food coloring pens. (30-40 minutes)
If the fondant tears, a bit of water brushed on the edges helps patch it without showing. I learned that the hard way during my first fondant cake attempt! Also, don’t rush cooling the ganache; if it’s too warm, the fondant won’t stick properly.
Cooking Tips & Techniques
When making this chocolate fudge cake, the devil’s in the details. Here’s what I’ve learned over the years to keep things smooth and stress-free:
- Measuring Cocoa Powder: Spoon and level the cocoa powder instead of scooping directly from the container to avoid dense patches that can affect texture.
- Room Temperature Ingredients: Eggs and buttermilk should be at room temperature for even mixing and better rise.
- Hot Water Addition: Adding hot water last thins the batter, but don’t skip it! It’s key for that moist, fudgy crumb.
- Ganache Consistency: Let ganache cool to a spreadable consistency before frosting to prevent it from sliding off the cake.
- Fondant Handling: Keep your hands dry and cornstarch handy. Fondant can be sticky or dry out quickly; a little practice smooths out imperfections.
- Timing is Everything: Assemble and decorate on a cool cake to avoid melting the ganache under the fondant.
- Don’t Rush Cooling: Patience with cooling both cake layers and ganache helps maintain a clean finish and prevents fondant sagging.
I once tried to decorate a warm cake, and the fondant started to droop before I could finish. It was a good lesson in patience and timing!
Variations & Adaptations
This recipe is flexible enough to fit various preferences or restrictions without losing its charm. Here are some ways to make it your own:
- Dietary: Use almond or oat flour blends instead of all-purpose flour for a gluten-free version. Swap heavy cream with coconut cream for a dairy-free ganache.
- Flavor Twists: Add a teaspoon of espresso powder to the batter to deepen the chocolate flavor. Or incorporate a layer of raspberry jam between cake layers for a fruity surprise.
- Color Customization: Use colored fondant to match your school colors or add edible gold dust for a touch of elegance.
- Alternative Decorations: Instead of fondant, try modeling chocolate or a smooth buttercream finish with piped graduation cap details.
- Personal Touch: I once made a version with tiny fondant diplomas and a tassel made from thin fondant strips—it was a hit!
For a quick alternative, you might enjoy pairing this cake with the rich berry notes from the decadent red wine chocolate cake with berries I made last fall.
Serving & Storage Suggestions
This cake is best served at room temperature to let the fudge ganache shine. Slice with a sharp, heated knife for clean edges—dip the knife in hot water and wipe dry between cuts.
It pairs wonderfully with a simple cup of coffee or a scoop of vanilla ice cream for extra indulgence. For a lighter touch, fresh berries complement the rich chocolate nicely.
Store leftovers covered tightly in the refrigerator for up to 5 days. Because of the ganache and fondant, freezing isn’t recommended as it can affect texture and decoration.
If you want to enjoy it later, bring slices to room temperature before serving. The flavors mellow and the cake softens, making every bite more decadent.
Over time, the chocolate ganache deepens in flavor, so if you have the patience, letting it sit overnight actually makes the cake taste even better.
Nutritional Information & Benefits
Each serving of this rich chocolate fudge cake contains approximately 420 calories, 25g fat, 45g carbohydrates, and 5g protein. While it’s definitely a treat, the use of real cocoa powder means you get antioxidants and a mood lift from the chocolate.
The buttermilk adds a pleasant tang and helps tenderize the crumb while providing calcium. Using quality dark chocolate in the ganache contributes to heart-healthy flavonoids.
This recipe can be adjusted to be gluten-free or dairy-free, making it accessible for various dietary needs. Just be mindful of allergens like eggs and dairy when serving to guests.
Honestly, it’s one of those desserts that feels indulgent but also a little comforting, which is perfect for marking milestones like graduation.
Conclusion
This Perfect Personalized Fondant Graduation Cap Chocolate Fudge Cake is more than just a dessert; it’s a way to mark a moment with something handcrafted and heartfelt. Whether you’re baking for your own graduate or a dear friend, this recipe strikes the right note between rich chocolate flavor and playful, personalized style.
Feel free to tweak the decorations, try out some of the variations, or pair it with other homemade favorites like the fluffy strawberry mousse cups for a full celebration spread. Each time I make this cake, it reminds me why I love baking—because it brings people together in the most delicious way.
If you try this recipe, I’d love to hear how you personalized your graduation cap or what flavors you added. Sharing your stories makes the kitchen feel a little more like home.
So, grab your rolling pin, warm up that mixer, and let this cake be the sweet highlight of your next celebration.
FAQs
Can I make the cake layers ahead of time?
Yes! Bake the cake layers up to two days in advance, wrap tightly in plastic wrap, and store at room temperature. Bring to room temperature before assembling.
How do I prevent fondant from cracking?
Keep fondant covered with plastic wrap when not in use to prevent drying out. Roll it evenly and avoid overstretching. If cracks appear, a little edible glue or water can smooth them over.
What’s the best way to store leftover cake?
Cover the cake tightly and store in the refrigerator for up to 5 days. Let it come to room temperature before serving to enjoy the best flavor and texture.
Can I substitute butter for oil in the cake?
You can, but oil keeps the cake moister and fudgier. Using butter will give a slightly different crumb texture, but it will still be delicious.
How do I write names or dates on the fondant?
Use edible food coloring pens or gel colors with a fine brush. Practice on parchment paper first to get comfortable with the flow.
Pin This Recipe!
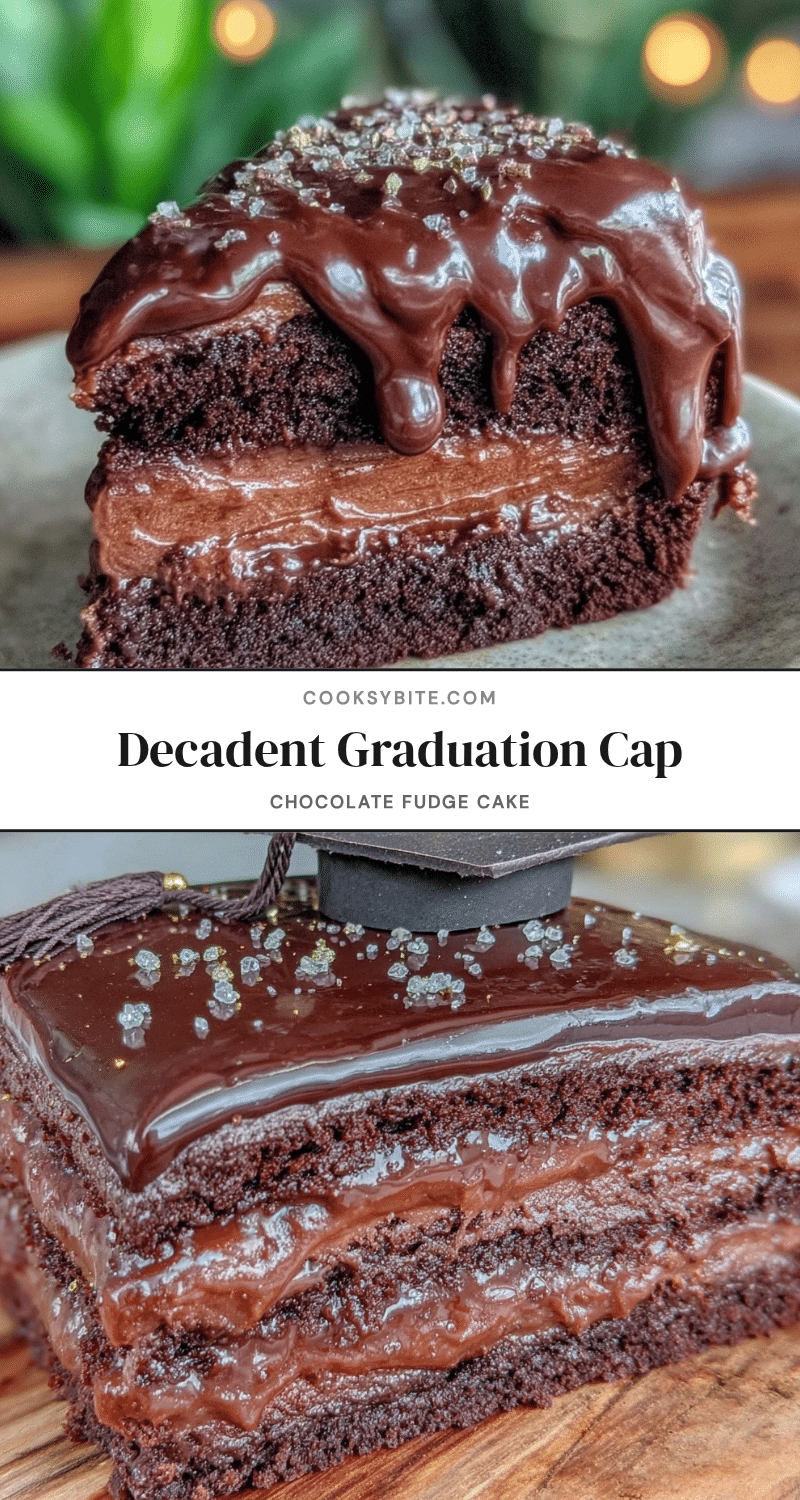
Perfect Personalized Fondant Graduation Cap Chocolate Fudge Cake
A rich, fudgy chocolate cake decorated with personalized fondant shaped like a graduation cap, perfect for celebrations and easy to make with simple ingredients.
- Prep Time: 20 minutes
- Cook Time: 35 minutes
- Total Time: 1 hour 45 minutes
- Yield: 12 servings 1x
- Category: Dessert
- Cuisine: American
Ingredients
- 2 cups (240g) all-purpose flour
- 3/4 cup (75g) unsweetened cocoa powder
- 1 1/2 tsp baking powder
- 1/2 tsp baking soda
- 1/2 tsp salt
- 1 3/4 cups (350g) granulated sugar
- 1 cup (240ml) buttermilk, room temperature
- 1/2 cup (120ml) vegetable oil
- 2 large eggs, room temperature
- 2 tsp vanilla extract
- 1 cup (240ml) hot water
- 1 cup (240ml) heavy cream
- 8 oz (225g) semisweet chocolate chips
- 2 tbsp (28g) unsalted butter, softened
- 1 lb (450g) ready-to-roll black fondant
- 1/2 lb (225g) white fondant
- Edible food coloring pens or gel colors
- Edible glue or water
Instructions
- Preheat oven to 350°F (175°C). Grease and flour two 8-inch (20cm) cake pans or line with parchment paper.
- In a large bowl, sift together flour, cocoa powder, baking powder, baking soda, and salt. Whisk briefly to combine.
- In a separate bowl, whisk sugar, buttermilk, vegetable oil, eggs, and vanilla extract until smooth.
- Slowly add wet ingredients to dry ingredients, stirring gently with a rubber spatula until just combined. Avoid overmixing.
- Carefully stir in hot water; batter will be thin.
- Divide batter evenly between prepared pans and bake for 30-35 minutes or until a toothpick inserted in the center comes out with moist crumbs.
- Cool cakes in pans for 10 minutes, then turn out onto wire racks to cool completely.
- Heat heavy cream in a small saucepan over medium heat until just simmering. Pour over chocolate chips in a heatproof bowl. Let sit 2 minutes, then stir until smooth.
- Add softened butter to ganache and stir until glossy. Cool slightly to thicken.
- Place one cake layer on serving plate. Spread a thin layer of ganache on top. Add second cake layer and cover entire cake with remaining ganache. Smooth with offset spatula and chill briefly to set.
- Roll out black fondant on a lightly cornstarch-dusted surface to about 1/4 inch (6mm) thickness. Cut a square slightly larger than cake top for the cap.
- Drape fondant over cake and smooth gently. Form mortarboard base and button from fondant scraps.
- Use white fondant for personalized name or year details. Attach pieces with edible glue or water and write with edible food coloring pens.
Notes
Use room temperature eggs and buttermilk for better rise. Add hot water last to thin batter and intensify cocoa flavor. Let ganache cool to spreadable consistency before frosting. Keep fondant covered to prevent drying. Assemble and decorate on a cool cake to avoid melting ganache. Use cornstarch to prevent fondant sticking. Store leftovers covered in refrigerator up to 5 days; bring to room temperature before serving.
Nutrition
- Serving Size: 1 slice (1/12th of c
- Calories: 420
- Sugar: 30
- Sodium: 300
- Fat: 25
- Saturated Fat: 10
- Carbohydrates: 45
- Fiber: 3
- Protein: 5
Keywords: graduation cake, chocolate fudge cake, fondant cake, celebration cake, personalized cake, easy chocolate cake, homemade cake


