“You brought what? Cookie bars?” my friend asked, raising an eyebrow as I unwrapped the pan at the potluck. Honestly, I wasn’t sure if these chewy red velvet white chocolate cookie bars would hold their own against the usual spread of fancy desserts. But that first bite — the way the white chocolate melted into the rich, velvety dough — shut down any doubts immediately. The contrast between the deep red crumb and creamy chunks of white chocolate creates this irresistible texture combo that’s honestly hard to describe without sounding biased.
Funny thing is, this recipe started as a happy accident. I was aiming for classic red velvet cupcakes but ran out of cupcake liners and didn’t want to waste the batter. So, I poured it into a pan, tossed in some white chocolate chips I’d found hiding in the back of the pantry, and baked it as one giant cookie bar. The way those chewy edges formed, with a soft center that almost melts in your mouth, was a total win. Since then, I’ve made these bars at least three times a week (no exaggeration) — they’re perfect for late-night snacking or impressing guests with minimal fuss.
What really sticks with me is how this recipe somehow manages to feel like a treat and a comfort food all at once. It’s far from ordinary — more like a cozy hug you can eat, with just the right touch of sweetness and that iconic red velvet charm. Plus, I love how it pairs so well with a cup of coffee or even a chilled glass of milk. Honestly, these chewy red velvet white chocolate cookie bars made me rethink what a cookie bar could be, and I’m betting you’ll feel the same once you try them.
Why You’ll Love This Recipe
After testing and tweaking this chewy red velvet white chocolate cookie bars recipe, I can say it’s become a staple in my baking routine. Here’s why it’s worth keeping on your radar:
- Quick & Easy: Ready in under 40 minutes, this recipe fits perfectly into busy evenings or last-minute dessert plans.
- Simple Ingredients: No obscure items required — you probably have everything in your pantry right now.
- Perfect for Gatherings: Whether it’s a casual get-together or a holiday treat, these bars make sharing simple and stress-free.
- Crowd-Pleaser: Kids love them, adults ask for seconds, and everyone appreciates the chewy, gooey texture.
- Unbelievably Delicious: The white chocolate chunks add richness without overpowering the classic red velvet flavor.
What sets this recipe apart is the balance it strikes. The dough is soft and chewy but not cakey, thanks to a special blend of cream cheese and cocoa powder (yes, real cocoa powder!). The white chocolate chunks don’t just melt — they stay a little firm, offering delightful pockets of sweetness. I’ve seen other recipes that try to mimic this, but the homemade touch here makes all the difference.
This recipe also feels versatile without being complicated. For instance, you can swap in dairy-free cream cheese or white chocolate chips if you need to, and it still comes out just right. Honestly, it’s the kind of dessert that makes you close your eyes after the first bite — that satisfying, “I’m glad I made this” moment.
What Ingredients You Will Need
This recipe uses simple, wholesome ingredients to deliver those chewy red velvet white chocolate cookie bars with bold flavor and satisfying texture — and no fuss. Here’s what you’ll gather before you start:
- All-purpose flour — 2 ½ cups (312 g), for structure and chew
- Cocoa powder — 2 tablespoons (unsweetened, good quality; I recommend Hershey’s)
- Baking soda — 1 teaspoon, for the perfect rise
- Salt — ½ teaspoon, to balance flavors
- Unsalted butter — 1 cup (226 g), softened, adds richness
- Granulated sugar — 1 ½ cups (300 g), for sweetness
- Eggs — 2 large, room temperature, to bind
- Vanilla extract — 2 teaspoons, for depth of flavor
- Red food coloring — 2 tablespoons (liquid or gel for vibrant color)
- Cream cheese — 4 ounces (113 g), softened; this keeps the bars chewy and moist
- White chocolate chips — 1 ½ cups (270 g), chunky pieces that add sweet pockets
If you want to experiment, you can swap the white chocolate chips for chunks of white chocolate bars or even mix in some macadamia nuts for crunch. For a dairy-free version, almond flour or gluten-free flour blends can substitute the all-purpose flour, and coconut oil can replace butter.
Equipment Needed
For making these chewy red velvet white chocolate cookie bars, you’ll need some basic kitchen tools:
- 9×13-inch baking pan: This size is perfect for evenly thick bars. I use a non-stick metal pan, but glass works fine too.
- Mixing bowls: One large for dry ingredients and one medium for wet ingredients.
- Electric mixer or stand mixer: Helpful for creaming butter and sugar until fluffy. A hand mixer works well too.
- Measuring cups and spoons: Precision counts for baking success.
- Spatula: For folding in white chocolate chips without overmixing.
- Parchment paper: Optional, but it makes removing bars from the pan a breeze and reduces cleanup.
If you don’t have a mixer, you can cream butter and sugar by hand with a sturdy wooden spoon—you just need a little extra elbow grease. I prefer using parchment paper because I’ve burned the edges a few times when not lining the pan, so trust me on this one.
Preparation Method

- Preheat your oven to 350°F (175°C). Line your 9×13-inch pan with parchment paper, leaving an overhang on the sides for easy removal later.
- Mix dry ingredients: In a large bowl, sift together 2 ½ cups (312 g) all-purpose flour, 2 tablespoons cocoa powder, 1 teaspoon baking soda, and ½ teaspoon salt. Set aside.
- Cream butter and sugar: Using an electric mixer, beat 1 cup (226 g) softened unsalted butter and 1 ½ cups (300 g) granulated sugar on medium speed until light and fluffy, about 3-5 minutes. This step is key for that chewy texture.
- Add eggs, vanilla, and cream cheese: Beat in 2 large eggs, one at a time, then 2 teaspoons vanilla extract, followed by 4 ounces (113 g) softened cream cheese. Mix until fully combined and smooth.
- Color the dough: Stir in 2 tablespoons red food coloring until the dough turns that signature deep red velvet shade. I prefer gel food coloring here for the richest color without adding extra liquid.
- Combine wet and dry: Gradually add the dry ingredient mixture to the wet ingredients, mixing on low speed or folding with a spatula until just combined. Avoid overmixing to keep the bars tender.
- Fold in white chocolate chips: Gently fold in 1 ½ cups (270 g) white chocolate chips, distributing them evenly throughout the dough.
- Transfer to pan: Spread the dough evenly into your prepared pan, smoothing the top with a spatula. The dough will be thick and sticky—that’s perfect.
- Bake: Place in the oven and bake for 28-32 minutes. Start checking at 28 minutes; the edges should be set and lightly golden, while the center remains soft but not wet. A toothpick inserted should come out with a few moist crumbs.
- Cool completely: Let the bars cool in the pan on a wire rack for at least 1 hour before slicing. This step helps them firm up and makes cutting cleaner.
Pro tip: If your white chocolate chips start melting too much and losing shape, try chilling the dough for 15 minutes before baking. It helps them hold their pockets of creamy goodness better.
Cooking Tips & Techniques
Making these chewy red velvet white chocolate cookie bars is straightforward, but a few tricks keep them consistently amazing:
- Softened vs. melted butter: Use softened butter, not melted. This traps air during creaming, which creates the perfect chewy texture.
- Don’t skip the cream cheese: It’s the secret ingredient that keeps these bars moist and adds a subtle tang that complements the cocoa.
- Food coloring choice matters: Gel food coloring gives a richer color without thinning the dough. Liquid can sometimes make the dough too loose.
- Watch your bake time: Overbaking dries out the bars. The center should look slightly underdone when you pull them out—they’ll finish setting as they cool.
- Mix-ins: White chocolate chips are classic here, but tossing in some chopped pecans or dried cherries adds a fun texture twist.
- Chill your dough if needed: If your kitchen is warm, chilling the dough for 20 minutes before baking helps the bars hold shape without spreading too much.
Funny enough, I once tried doubling the recipe and baked it in a larger pan. The bars ended up too thin and cakey, so stick to the recommended pan size for that chewy, dense bite everyone loves.
Variations & Adaptations
One of the best things about this chewy red velvet white chocolate cookie bars recipe is how easy it is to customize:
- Nut-Free: Simply omit nuts or substitute with seeds like pumpkin or sunflower if you want some crunch.
- Vegan Option: Use dairy-free butter and cream cheese alternatives, egg replacer (like flaxseed meal), and dairy-free white chocolate chips. Bake time might increase slightly.
- Berry Boost: Fold in ½ cup fresh or frozen raspberries or dried cranberries for a tart contrast to the sweet white chocolate.
- Spiced Twist: Add ½ teaspoon cinnamon and a pinch of nutmeg to the dry ingredients for a warm, cozy flavor.
- Double Chocolate: Swap half the white chocolate chips for dark chocolate chunks for a richer bar.
I’ve personally made a batch with crushed peppermint candies in December — those were a festive hit that paired beautifully with the red velvet base. It’s a recipe that’s easy to tweak depending on your mood or season.
Serving & Storage Suggestions
These chewy red velvet white chocolate cookie bars are best served at room temperature, when the white chocolate pockets are soft but not melted. They also make fantastic hand-held treats for picnics or lunchboxes.
Pair them with a glass of cold milk or a cup of rich coffee to balance the sweetness — a combo that never fails to satisfy. For something a bit fancy, try serving them alongside a scoop of vanilla ice cream or dollop of whipped cream for an indulgent dessert.
Store any leftovers in an airtight container at room temperature for up to 3 days. They maintain their chewy texture well but can dry out after that. For longer storage, wrap tightly and freeze for up to 2 months. Thaw at room temperature before serving.
Reheating for 10 seconds in the microwave brings back that soft, melty feel, just like fresh from the oven. The flavors also deepen a bit after resting overnight, so making them a day ahead can be a nice trick when entertaining.
Nutritional Information & Benefits
Each chewy red velvet white chocolate cookie bar (assuming 12 bars per pan) contains approximately:
| Nutrient | Amount per Serving |
|---|---|
| Calories | 280 |
| Fat | 14 g |
| Saturated Fat | 8 g |
| Carbohydrates | 35 g |
| Sugar | 22 g |
| Protein | 3 g |
The cream cheese adds a bit of calcium and protein, while the cocoa powder contributes antioxidants. Just keep in mind these bars do contain dairy, gluten, and eggs, so they aren’t suitable for some allergen-sensitive diets without substitutions.
From a wellness perspective, I think of these bars as a treat that hits the sweet spot without unnecessary complexity — the type of dessert that feels like a little reward after a busy day, especially when homemade with quality ingredients.
Conclusion
These chewy red velvet white chocolate cookie bars are a delightful twist on classic red velvet, combining a rich, tender crumb with gooey pockets of white chocolate. They’re simple enough for a weekday treat yet impressive enough to bring to any gathering. I love how they bring that cozy, comforting vibe to the table without any complicated steps.
Feel free to make this recipe your own by adding nuts, swapping chocolate types, or even experimenting with festive flavors. Baking is about joy and creativity, after all. When I make these, I always end up sharing more than I intended — and that’s the best kind of compliment.
If you give this recipe a try, I’d love to hear how you customize your chewy red velvet white chocolate cookie bars or what moments you enjoy them in. Happy baking and savor every bite!
FAQs About Chewy Red Velvet White Chocolate Cookie Bars
Can I use white chocolate chunks instead of chips?
Absolutely! White chocolate chunks work great and give bigger melty pockets, which some people prefer for extra gooey bites.
How do I prevent the bars from drying out?
Don’t overbake them — pull the bars out when the center is just set but still soft. Also, storing them in an airtight container helps retain moisture.
Can I make these gluten-free?
Yes, you can substitute the flour with a 1:1 gluten-free baking flour blend. Just make sure it contains xanthan gum for best texture.
Is it okay to freeze these cookie bars?
Definitely! Wrap them tightly in plastic wrap and foil, then freeze for up to 2 months. Thaw at room temperature before serving.
What’s the best way to cut these bars cleanly?
Use a sharp knife and wait until the bars are completely cooled. Wiping the knife between cuts helps keep edges neat.
For more delicious homemade treats, you might enjoy recipes like delicious cherry chocolate brownies or the moist pink velvet bundt cake with creamy vanilla glaze. Both bring a similar cozy vibe with unique flavors worth trying.
Pin This Recipe!
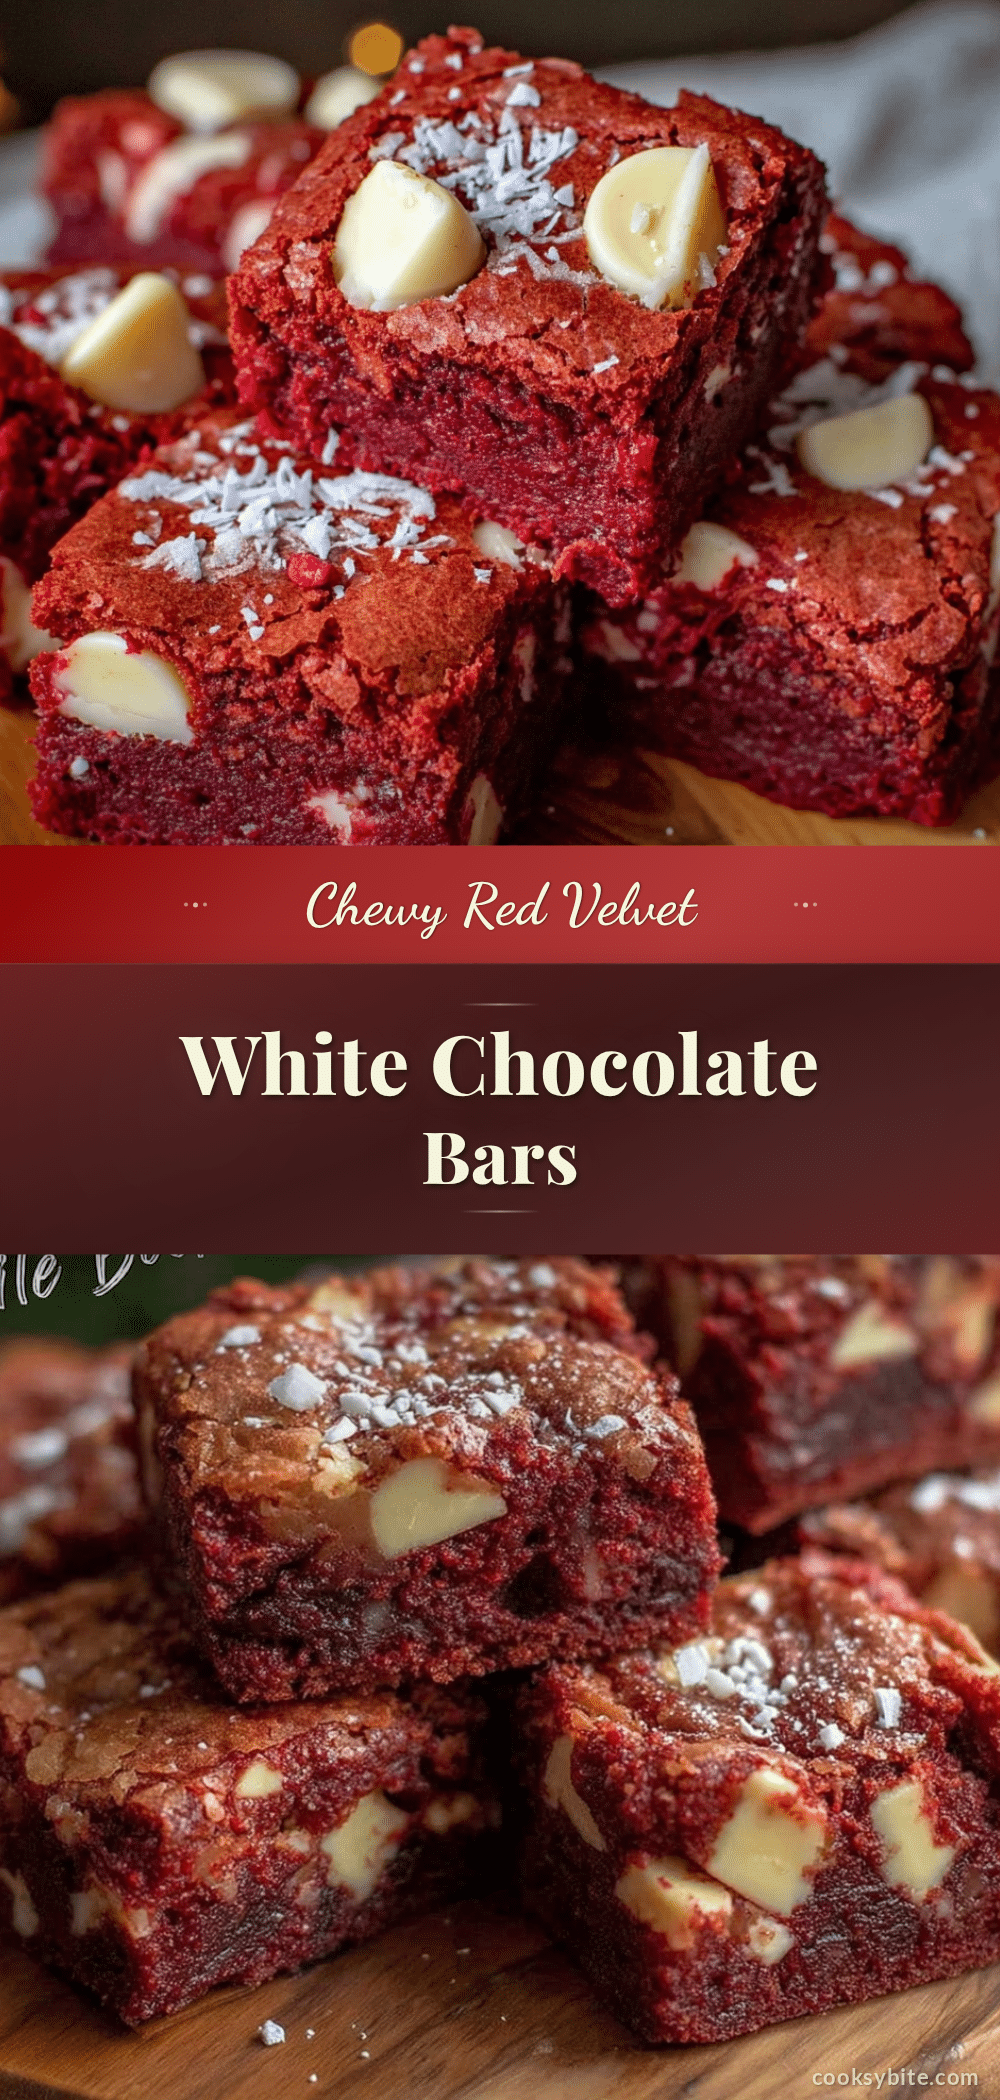
Chewy Red Velvet White Chocolate Cookie Bars

These chewy red velvet white chocolate cookie bars combine a rich, tender crumb with gooey pockets of white chocolate, perfect for a quick and easy homemade dessert that pleases any crowd.
- Prep Time: 15 minutes
- Cook Time: 30 minutes
- Total Time: 45 minutes
- Yield: 12 bars 1x
- Category: Dessert
- Cuisine: American
Ingredients
- 2 ½ cups (312 g) all-purpose flour
- 2 tablespoons unsweetened cocoa powder
- 1 teaspoon baking soda
- ½ teaspoon salt
- 1 cup (226 g) unsalted butter, softened
- 1 ½ cups (300 g) granulated sugar
- 2 large eggs, room temperature
- 2 teaspoons vanilla extract
- 2 tablespoons red food coloring (liquid or gel)
- 4 ounces (113 g) cream cheese, softened
- 1 ½ cups (270 g) white chocolate chips
Instructions
- Preheat your oven to 350°F (175°C). Line a 9×13-inch pan with parchment paper, leaving an overhang on the sides for easy removal.
- In a large bowl, sift together the all-purpose flour, cocoa powder, baking soda, and salt. Set aside.
- Using an electric mixer, beat the softened unsalted butter and granulated sugar on medium speed until light and fluffy, about 3-5 minutes.
- Beat in the eggs one at a time, then add the vanilla extract followed by the softened cream cheese. Mix until fully combined and smooth.
- Stir in the red food coloring until the dough turns a deep red velvet shade.
- Gradually add the dry ingredient mixture to the wet ingredients, mixing on low speed or folding with a spatula until just combined. Avoid overmixing.
- Gently fold in the white chocolate chips evenly throughout the dough.
- Spread the dough evenly into the prepared pan, smoothing the top with a spatula.
- Bake for 28-32 minutes, starting to check at 28 minutes. The edges should be set and lightly golden, while the center remains soft but not wet. A toothpick inserted should come out with a few moist crumbs.
- Let the bars cool completely in the pan on a wire rack for at least 1 hour before slicing.
Notes
Use softened butter, not melted, to trap air for chewy texture. Gel food coloring is preferred for richer color without thinning the dough. Avoid overbaking to keep bars moist and chewy. Chill dough for 15-20 minutes if kitchen is warm to help bars hold shape. Use parchment paper to prevent burning edges and ease removal. White chocolate chunks can be used instead of chips for bigger melty pockets.
Nutrition
- Serving Size: 1 bar (1/12th of the
- Calories: 280
- Sugar: 22
- Sodium: 150
- Fat: 14
- Saturated Fat: 8
- Carbohydrates: 35
- Fiber: 1
- Protein: 3
Keywords: red velvet, cookie bars, white chocolate, chewy dessert, easy homemade dessert, potluck dessert, baking


