Let me tell you, the scent of fresh lemons mingling with subtle hints of sugar and a buttery crust baking away is enough to make anyone’s mouth water. The first time I baked this Creamy Pink Lemonade Pie, I was instantly hooked—the kind of moment where you pause, take a deep breath, and just smile because you know you’re onto something truly special. Years ago, when I was knee-high to a grasshopper, my grandma used to make a version of this pie on hot summer afternoons. But honestly, this homemade flaky golden crust and that luscious, tangy pink filling? It feels like a bright, refreshing update to her classic treat that I wish I’d discovered way sooner.
You know what’s dangerous? My family couldn’t stop sneaking slices off the cooling rack (and I can’t really blame them). This pie brings a perfect balance of creamy sweetness and zesty brightness—pure, nostalgic comfort wrapped in a flaky, buttery hug. It’s perfect for potlucks, sweet treats for your kids, or even to brighten up your Pinterest cookie board with something a little unexpected but oh-so-delicious. After testing this recipe multiple times (in the name of research, of course), it’s now a staple for family gatherings and gifting. Honestly, this Creamy Pink Lemonade Pie feels like a warm hug on a plate, and you’re going to want to bookmark this one.
Why You’ll Love This Recipe
From my kitchen to yours, this Creamy Pink Lemonade Pie recipe is one you’ll come back to again and again. It’s been tested thoroughly—not just by me but by my family and friends who always ask for seconds. Here’s why it’s a keeper:
- Quick & Easy: Comes together in under 30 minutes, making it perfect for busy weeknights or last-minute dessert plans.
- Simple Ingredients: No fancy grocery trips needed; you likely have everything in your pantry already.
- Perfect for Summer: Great for backyard barbecues, picnics, or any warm-weather occasion.
- Crowd-Pleaser: Kids love the sweet, tangy flavor, and adults appreciate the light, creamy texture.
- Unbelievably Delicious: The combination of a perfectly flaky golden crust and silky pink lemonade filling is next-level comfort food.
What makes this recipe stand out? Well, the magic is in the crust—and the filling’s balance. Instead of a typical graham cracker base, this flaky crust is buttery and tender, holding the creamy filling without getting soggy. The filling itself is a little twist on classic lemonade, using real lemon juice with just the right touch of pink coloring and a creamy base that’s neither too sweet nor too tart. It’s comfort food reimagined—lighter, faster, but still soul-soothing.
This pie is perfect if you want to impress guests without stress or turn a simple dessert into something memorable. Trust me, after one bite, you’ll be closing your eyes and savoring that perfect blend of creamy and citrusy. It’s a recipe that’s as joyful to make as it is to eat.
What Ingredients You Will Need
This recipe uses simple, wholesome ingredients to deliver bold flavor and satisfying texture without the fuss. Most of these are pantry staples, and the fresh lemon juice is what really makes the filling sing.
- For the Flaky Golden Crust:
- 1 ¼ cups (160g) all-purpose flour (I recommend King Arthur for best consistency)
- ½ teaspoon salt
- 8 tablespoons (115g) unsalted butter, cold and cubed (adds richness and flakiness)
- 3-4 tablespoons ice water
- For the Creamy Pink Lemonade Filling:
- ¾ cup (180ml) fresh lemon juice (about 4-5 lemons, for bright tartness)
- 1 cup (200g) granulated sugar
- 3 large egg yolks, room temperature (for creamy richness)
- ¼ cup (30g) cornstarch (helps thicken the filling)
- 1 ½ cups (360ml) whole milk
- ¼ cup (60ml) heavy cream
- 2 teaspoons pink food coloring or 2 tablespoons natural beet juice (for that signature pink hue)
- 1 teaspoon vanilla extract (adds depth to the flavor)
- A pinch of salt
- For the Whipped Topping (optional but recommended):
- 1 cup (240ml) heavy cream, chilled
- 2 tablespoons powdered sugar
- ½ teaspoon vanilla extract
If you want a gluten-free version, swapping the all-purpose flour with almond flour or a gluten-free blend works well, though the texture of the crust will be slightly different. For dairy-free, use coconut cream in place of heavy cream and a plant-based milk like oat or almond milk. Just keep in mind the flavor will shift a bit, but the pie will still be delicious.
Equipment Needed
- 9-inch (23 cm) pie dish – glass or ceramic works best for even baking
- Mixing bowls – a few sizes to separate crust and filling prep
- Pastry cutter or fork – for cutting butter into the flour (if you don’t have one, two knives or your fingers work just fine)
- Whisk – essential for smooth filling
- Measuring cups and spoons – for precise ingredient amounts
- Rolling pin – key for rolling out that flaky crust evenly (a clean wine bottle can work in a pinch!)
- Medium saucepan – for cooking the filling
- Fine mesh sieve (optional) – to strain the filling for extra smoothness
- Electric mixer or hand whisk – for whipping the cream topping
I usually bake this pie in my trusty old ceramic pie dish—there’s something comforting about that classic look. If you’re on a budget, any pie plate you have will do, just keep an eye on baking times since thinner pans heat differently. Also, when using the pastry cutter, make sure your butter is cold to get those perfect flaky layers in the crust!
Preparation Method

- Make the Pie Crust: In a large bowl, whisk together the flour and salt. Add the cold, cubed butter and use a pastry cutter or two knives to cut it into the flour until the mixture resembles coarse crumbs with pea-sized bits of butter. This step is key for a flaky crust! (About 5 minutes)
- Add ice water, one tablespoon at a time, mixing gently with a fork until the dough just comes together. Don’t overwork it—stop as soon as it holds.
- Form the dough into a disk, wrap in plastic wrap, and chill in the fridge for at least 30 minutes. This lets the gluten relax and the butter firm up.
- Roll Out the Crust: On a lightly floured surface, roll the dough into a 12-inch (30 cm) circle. Carefully transfer it to your pie dish, pressing gently into the edges. Trim any excess dough, leaving about a ½-inch overhang. Fold the edges under and crimp as desired. Chill again for 15 minutes to prevent shrinking during baking.
- Blind Bake the Crust: Preheat your oven to 375°F (190°C). Line the crust with parchment paper and fill with pie weights or dried beans. Bake for 15 minutes, then remove the weights and parchment, and bake another 10 minutes until golden and crisp. Let cool slightly.
- Prepare the Filling: In a medium saucepan, whisk together sugar, cornstarch, and salt. Slowly whisk in the lemon juice, egg yolks, milk, and heavy cream until smooth.
- Cook over medium heat, stirring constantly, until the mixture thickens and bubbles (about 8-10 minutes). Remove from heat.
- Stir in the pink food coloring or beet juice and vanilla extract. If you want an ultra-smooth filling, strain it through a fine mesh sieve into a clean bowl.
- Pour the warm filling into the cooled crust. Cover with plastic wrap directly on the surface to prevent a skin from forming.
- Refrigerate the pie for at least 4 hours, preferably overnight, to set fully.
- Whip the Topping: Just before serving, whip the chilled heavy cream with powdered sugar and vanilla extract until soft peaks form. Spread or pipe onto the chilled pie.
Pro tip: When cooking the filling, keep stirring and watch for lumps—if you see any, whisk vigorously to smooth them out. Also, be patient letting the pie chill; it really needs that time to firm up properly for clean slices.
Cooking Tips & Techniques
Working with pastry dough can be intimidating, but here’s what I’ve learned from many experiments (and a few mishaps):
- Keep everything cold: Cold butter and ice water are your best friends for flaky crust. Warm butter makes the dough greasy and tough, not light and flaky.
- Don’t overmix the dough: Mix just until it comes together. Overworking develops gluten, which tightens the dough and ruins tenderness.
- Blind baking is a must: This prevents the crust from getting soggy once the filling goes in. Use pie weights or beans to keep the dough flat and even.
- Stir the filling constantly: The cornstarch can clump if you’re not vigilant. Keep whisking until it thickens nicely.
- Use fresh lemon juice: Bottled juice just won’t give you the same bright, zesty flavor.
- Chill, chill, chill: The filling sets better and slicing is easier when the pie is properly chilled.
Honestly, the first time I tried rushing the chilling step, the pie was a soupy mess. Learned that lesson the hard way! Also, when whipping cream, start with a chilled bowl and beaters for fluffier peaks. These little tricks make all the difference.
Variations & Adaptations
You can tweak this Creamy Pink Lemonade Pie recipe in several fun ways to suit your taste or dietary needs:
- Berry Twist: Add a layer of fresh raspberries or strawberries on top of the filling before chilling for a fruity surprise and extra color.
- Dairy-Free Version: Swap heavy cream and milk for coconut cream and almond milk. Use a dairy-free butter substitute in the crust. The texture changes a bit but remains delicious.
- Low-Sugar Option: Replace granulated sugar with a natural sweetener like erythritol or monk fruit sweetener. You might want to tweak the quantity slightly to taste.
- Crust Swap: For a quicker crust, use a graham cracker crust or crushed cookie base—though you’ll lose some of that buttery flakiness.
Personally, I tried adding a thin layer of toasted coconut flakes on the crust before pouring the filling once. It gave a delightful crunch and tropical hint that was unexpectedly tasty. Feel free to get creative—this pie is a great canvas!
Serving & Storage Suggestions
Serve this pie chilled for the cleanest slices and brightest flavors. I like to garnish with a few thin lemon slices or a sprinkle of pink sanding sugar for a pretty finish. It pairs wonderfully with a cup of iced tea, sparkling water with a splash of lemon, or even a light rosé if you’re feeling fancy.
Store leftovers covered tightly in the refrigerator. The pie stays fresh for up to 3 days—though I bet it won’t last that long! You can freeze the unbaked crust if you want to prep ahead, but the filling is best fresh or refrigerated. When reheating, avoid microwaving the whole pie; instead, let it come to room temp and enjoy as is or briefly warm a slice (without the topping) in a low oven.
Fun fact: The flavors deepen and mellow a bit after a day or two, making it even more luscious. So if you’re patient, you’re rewarded!
Nutritional Information & Benefits
This Creamy Pink Lemonade Pie is a sweet treat with a bit of brightness and moderation in mind. A typical slice (1/8 of the pie) contains approximately:
| Calories | 320 |
|---|---|
| Fat | 18g |
| Carbohydrates | 36g |
| Sugar | 22g |
| Protein | 4g |
Key ingredients like fresh lemon juice provide vitamin C, which supports immunity. Using whole milk and cream adds calcium and vitamin D, though this pie is definitely an indulgence rather than a health food. For those with gluten sensitivities, adapting the crust is straightforward, and you can also reduce sugar to fit your diet better.
From a wellness perspective, I appreciate that this pie uses fresh ingredients and no artificial flavorings. It’s a homemade joy that doesn’t feel like a guilty splurge but more like a little celebration on your plate.
Conclusion
Honestly, this Creamy Pink Lemonade Pie with its flaky golden crust is a recipe you’ll want to keep close. It’s simple, satisfying, and full of that sweet-tart charm that wakes up your taste buds without overwhelming them. Whether you’re baking for family, impressing friends, or just craving a slice of summer sunshine, this pie delivers every time.
Feel free to customize the colors, toppings, or crust to make it your own—this recipe is forgiving and fun. I love it because it’s a little nostalgic and a little new all at once, reminding me of warm afternoons and laughter around the table.
If you try it, please drop a comment below telling me how it went or your favorite twist! Sharing your baking wins (or funny fails) is what makes this community so special. Happy baking and enjoy every creamy, flaky bite!
FAQs about Creamy Pink Lemonade Pie
Can I make this pie ahead of time?
Yes! The pie actually tastes better after chilling overnight, so feel free to prepare it a day ahead.
What if I don’t have fresh lemons?
Fresh lemon juice is best for flavor, but in a pinch, bottled lemon juice works—just reduce sugar slightly as it’s usually more tart.
How do I prevent the crust from getting soggy?
Blind bake the crust before adding filling to keep it crisp. Also, chilling the pie thoroughly helps set the filling and maintain crust texture.
Can I use gelatin instead of cornstarch?
Yes, but you’ll need to adjust quantities and preparation methods. Cornstarch is easier for this creamy filling and provides a smooth texture.
Is this recipe suitable for kids?
Absolutely! The creamy, tangy flavor is a hit with kids, but be mindful that it contains raw egg yolks cooked in the filling, so use fresh, high-quality eggs or pasteurized eggs if preferred.
Pin This Recipe!
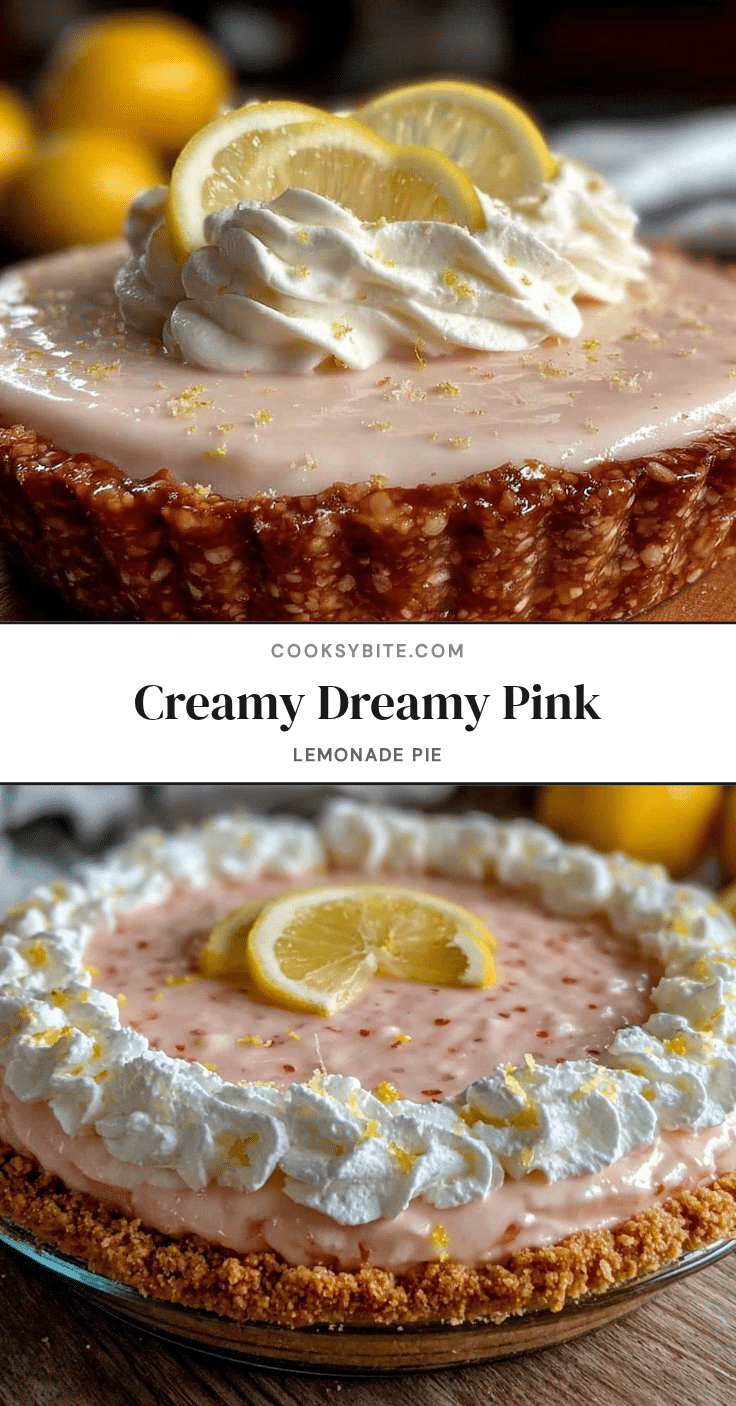
Creamy Pink Lemonade Pie

A refreshing and creamy pink lemonade pie with a flaky golden crust, perfect for summer gatherings and sweet treats. This pie balances creamy sweetness with zesty brightness for a nostalgic yet modern dessert.
- Prep Time: 15 minutes
- Cook Time: 35 minutes
- Total Time: 4 hours 50 minutes
- Yield: 8 servings 1x
- Category: Dessert
- Cuisine: American
Ingredients
- 1 1/4 cups (160g) all-purpose flour
- 1/2 teaspoon salt
- 8 tablespoons (115g) unsalted butter, cold and cubed
- 3–4 tablespoons ice water
- 3/4 cup (180ml) fresh lemon juice (about 4–5 lemons)
- 1 cup (200g) granulated sugar
- 3 large egg yolks, room temperature
- 1/4 cup (30g) cornstarch
- 1 1/2 cups (360ml) whole milk
- 1/4 cup (60ml) heavy cream
- 2 teaspoons pink food coloring or 2 tablespoons natural beet juice
- 1 teaspoon vanilla extract
- A pinch of salt
- 1 cup (240ml) heavy cream, chilled (for whipped topping, optional)
- 2 tablespoons powdered sugar (for whipped topping, optional)
- 1/2 teaspoon vanilla extract (for whipped topping, optional)
Instructions
- Make the Pie Crust: In a large bowl, whisk together the flour and salt. Add the cold, cubed butter and use a pastry cutter or two knives to cut it into the flour until the mixture resembles coarse crumbs with pea-sized bits of butter (about 5 minutes).
- Add ice water, one tablespoon at a time, mixing gently with a fork until the dough just comes together. Do not overwork it.
- Form the dough into a disk, wrap in plastic wrap, and chill in the fridge for at least 30 minutes.
- Roll Out the Crust: On a lightly floured surface, roll the dough into a 12-inch circle. Transfer it to a 9-inch pie dish, pressing gently into the edges. Trim excess dough leaving about a 1/2-inch overhang. Fold edges under and crimp as desired. Chill for 15 minutes.
- Blind Bake the Crust: Preheat oven to 375°F (190°C). Line crust with parchment paper and fill with pie weights or dried beans. Bake for 15 minutes, remove weights and parchment, then bake another 10 minutes until golden and crisp. Let cool slightly.
- Prepare the Filling: In a medium saucepan, whisk together sugar, cornstarch, and salt. Slowly whisk in lemon juice, egg yolks, milk, and heavy cream until smooth.
- Cook over medium heat, stirring constantly, until mixture thickens and bubbles (about 8-10 minutes). Remove from heat.
- Stir in pink food coloring or beet juice and vanilla extract. Optionally strain through a fine mesh sieve for extra smoothness.
- Pour warm filling into cooled crust. Cover with plastic wrap directly on the surface to prevent skin formation.
- Refrigerate pie for at least 4 hours or preferably overnight to set fully.
- Whip the Topping: Just before serving, whip chilled heavy cream with powdered sugar and vanilla extract until soft peaks form. Spread or pipe onto chilled pie.
Notes
Keep butter and water cold for flaky crust. Do not overmix dough to avoid toughness. Blind bake crust to prevent sogginess. Stir filling constantly to avoid lumps. Chill pie thoroughly for best slicing. Use fresh lemon juice for best flavor. For dairy-free or gluten-free versions, substitute ingredients as noted.
Nutrition
- Serving Size: 1 slice (1/8 of pie)
- Calories: 320
- Sugar: 22
- Fat: 18
- Carbohydrates: 36
- Protein: 4
Keywords: pink lemonade pie, creamy pie, flaky crust, summer dessert, lemon pie, homemade pie, easy pie recipe