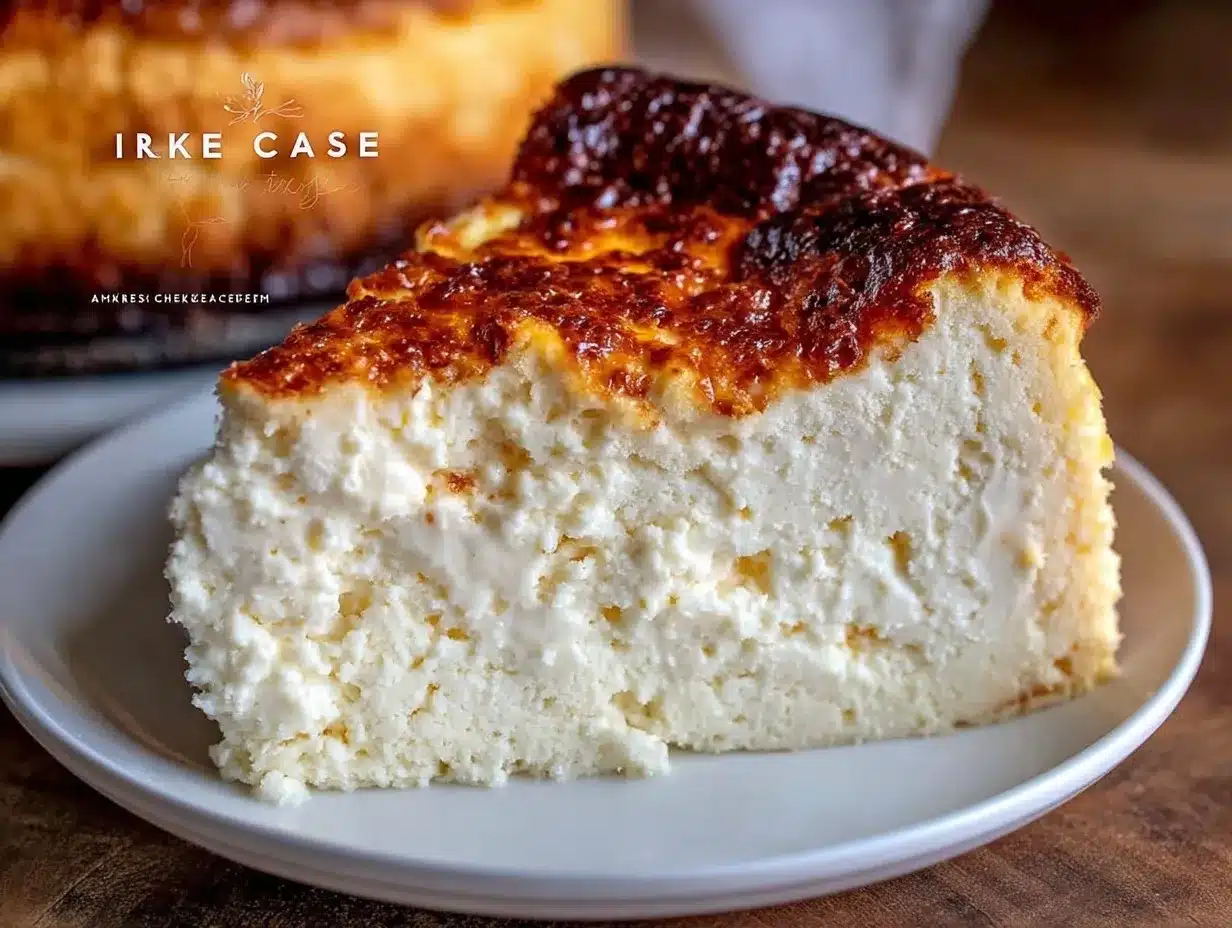
It was one of those rare, quiet Sunday mornings when the house feels like a gentle hug—soft light spilling through the curtains, the faint hum of the city outside, and me standing in the kitchen, staring at a bowl of cream cheese wondering if I could really pull off a dessert that looks and tastes like a cloud. Fluffy Japanese Cheesecake Delight wasn’t something I set out to master; honestly, I was skeptical at first. I mean, cheesecake that’s light and airy? It sounded like an oxymoron. But after a few tries, some burnt edges, and a lot of patience, this recipe became my go-to when I wanted something that feels fancy but is surprisingly forgiving.
The first time I served it to friends, I caught myself holding my breath. Would they notice the difference from a regular cheesecake? The nods and quiet “wow” moments said enough. It’s not just cheesecake, it’s a soft, melt-in-your-mouth experience that somehow manages to be both rich and delicate at the same time. That’s why this Fluffy Japanese Cheesecake Delight stuck with me—it’s more than a dessert; it’s that little moment of joy you didn’t expect but desperately needed.
This cheesecake’s airy texture comes from simple ingredients and a technique that feels almost like baking magic. And the best part? You don’t have to be a pastry chef to get it right. After a few batches, it became clear that this isn’t just a recipe; it’s a quiet win in the kitchen that I’m happy to share with you.
Why You’ll Love This Recipe
- Quick & Easy: This recipe comes together in about 45 minutes of prep time, perfect for those weekend baking sessions or spontaneous dessert cravings.
- Simple Ingredients: No need for fancy imports—just cream cheese, eggs, sugar, and a few pantry staples you probably have on hand.
- Perfect for Any Occasion: Whether it’s a casual tea time, a birthday celebration, or a cozy night in, this cheesecake fits right in.
- Crowd-Pleaser: Every time I’ve brought this to a gathering, it disappears fast. Kids love it, adults rave about it, and even cheesecake skeptics ask for seconds.
- Unbelievably Delicious: The combination of a light, airy texture with a subtly sweet and tangy flavor is what sets this cheesecake apart from your typical dense varieties.
- This recipe uses a unique folding technique that whips egg whites into a glossy meringue, lending it that signature fluffiness. Plus, the gentle water bath baking keeps it moist without drying it out.
- Once you taste this, it’s like a soft cloud of happiness that lingers—comfort food that feels light, making it easy to enjoy without the usual heaviness.
What Ingredients You Will Need
This recipe uses simple, wholesome ingredients to deliver bold flavor and that signature fluffy texture without the fuss. Most of these are pantry staples, and substitutions are easy if needed.
- Cream Cheese – 250g (about 9 oz), softened (I prefer Philadelphia for its smooth texture)
- Unsalted Butter – 50g (3.5 tablespoons), softened (adds richness and silkiness)
- Whole Milk – 100ml (about 3.4 fl oz), room temperature (use dairy-free milk like oat milk if needed)
- Large Eggs – 6, separated (room temperature eggs whip better for meringue)
- Granulated Sugar – 140g (about 2/3 cup), divided (helps stabilize the meringue and sweeten the batter)
- Cake Flour – 60g (about 1/2 cup), sifted (for lightness; use cornstarch plus all-purpose flour if necessary)
- Cornstarch – 20g (about 2 tablespoons), sifted (for structure without heaviness)
- Lemon Juice – 1 tablespoon (adds a hint of brightness and balances richness)
- Vanilla Extract – 1 teaspoon (for subtle warmth)
- Salt – a pinch (enhances all flavors)
For seasonal twists, sometimes I swap the lemon juice with a splash of yuzu juice for a fragrant citrus note. If you’re gluten-free, almond flour can replace cake flour, but the texture will be a bit denser. For a dairy-free version, try using vegan cream cheese and plant-based milk; results will vary but still delightful.
Equipment Needed
- 8-inch (20 cm) round springform pan – Essential for an easy release. If you don’t have one, a regular cake pan lined with parchment paper works too.
- Electric mixer or stand mixer – For whipping egg whites into stiff peaks; hand whisking is possible but will take longer and be more tiring.
- Mixing bowls – At least two, one for batter and one for meringue.
- Rubber spatula – For gentle folding of the meringue into the batter without deflating it.
- Fine mesh sieve – To sift the flour and cornstarch, ensuring a smooth texture.
- Roasting pan or deep baking dish – For the water bath; choose one large enough to hold your springform pan with room for water.
- Oven thermometer (optional) – I found this handy for keeping my oven temperature steady, which is key for the delicate bake.
For budget-friendly options, springform pans can be found reasonably priced, and silicone spatulas last forever with proper care. I learned early on that keeping meringue bowls grease-free is crucial—so a quick wipe with lemon juice or vinegar before whipping helps!
Preparation Method
- Preheat the oven to 320°F (160°C). Line the bottom and sides of your 8-inch springform pan with parchment paper. Wrap the outside with aluminum foil to prevent water from seeping in during the water bath.
- Prepare the cream cheese mixture: In a medium bowl, beat the softened cream cheese with the softened butter until smooth and creamy, about 2-3 minutes. Add the milk, lemon juice, and vanilla extract, mixing until fully combined and smooth.
- Sift the cake flour and cornstarch over the cream cheese mixture. Gently fold the dry ingredients into the wet mixture using a spatula, making sure there are no lumps but don’t overmix.
- Separate the eggs carefully. Place the six egg whites in a large, clean bowl and the yolks into the cream cheese mixture. Mix the yolks in thoroughly until smooth.
- Whip the egg whites: Using an electric mixer, whisk the egg whites until foamy. Gradually add half the sugar (about 70g or 1/3 cup) while continuing to beat until soft peaks form. Then add the remaining sugar in small increments until stiff, glossy peaks appear. The meringue should hold its shape but still be smooth and shiny.
- Fold the meringue gently into the cream cheese batter: Start by mixing a third of the meringue into the batter to lighten it, then carefully fold in the rest in two additions. Use a gentle motion—fold from the bottom up to avoid deflating the air bubbles that give the cheesecake its signature fluff.
- Pour the batter into the prepared pan. Tap the pan lightly on the counter to release large air bubbles.
- Set up the water bath: Place the springform pan in a larger roasting pan or baking dish. Carefully pour hot water into the outer pan until it reaches about halfway up the sides of the cheesecake pan.
- Bake for 55-60 minutes. The top should be golden brown and a toothpick inserted near the center comes out mostly clean with a few moist crumbs. The cheesecake will jiggle slightly but will firm up as it cools.
- Turn off the oven and leave the cheesecake inside for 15 minutes to prevent cracking. Then remove from the water bath and cool completely on a wire rack. Chill in the refrigerator for at least 4 hours or overnight for best texture.
Pro tip: If the top browns too quickly, tent loosely with foil halfway through baking. Also, using room temperature ingredients helps the batter blend smoothly and rise evenly.
Cooking Tips & Techniques
Getting the fluffy Japanese cheesecake just right takes some patience, but once you know the tricks, it’s pretty straightforward. First off, separating the eggs carefully is a must—any yolk in the whites can deflate your meringue and lead to a denser cake. I learned this the hard way when my first attempt was more of a sad pancake than a cloud.
Whipping the meringue to stiff peaks is key, but don’t overbeat. The glossy sheen is your cue. The folding technique is where many go wrong; a heavy hand will knock out the air and leave you with a flat cheesecake. I like to use a wide spatula and a slow, deliberate folding motion—think gentle, respectful mixing.
Water bath baking keeps the cheesecake moist and prevents cracks, which is a common problem with dense cheesecakes. Make sure your pan is well wrapped so no water seeps in. Also, avoid opening the oven door during the first 40 minutes to maintain a steady temperature.
Cooling is just as important as baking. The cheesecake continues to set as it cools, so resist the urge to slice it right away. Waiting overnight really helps the flavors meld and the texture become just right.
Variations & Adaptations
- Matcha Japanese Cheesecake: Add 1-2 tablespoons of high-quality matcha powder to the dry ingredients. It gives a beautiful green hue and a subtle earthy flavor that pairs wonderfully with the light cake.
- Berry Swirl: Fold in a few spoonfuls of fresh or frozen berry puree into the batter before folding in the meringue. This adds a tangy burst and pretty marbling effect.
- Vegan Version: Substitute cream cheese with a vegan alternative, use aquafaba (chickpea brine) instead of egg whites for meringue, and plant-based milk. Baking time may vary slightly, but it’s a rewarding challenge.
- Gluten-Free: Replace cake flour with a gluten-free flour blend or almond flour, but reduce the amount slightly to keep the texture light.
- Once, I tried adding a teaspoon of orange zest to the batter, and that subtle citrus note gave the cheesecake a refreshing lift that surprised me—and my guests!
Serving & Storage Suggestions
This Fluffy Japanese Cheesecake Delight is best served chilled or at room temperature. I find slicing it with a warm, clean knife helps get clean edges without sticking. It pairs beautifully with a simple dusting of powdered sugar or a light drizzle of honey.
For a special touch, serve with fresh berries or a dollop of whipped cream. A cup of green tea or a mild coffee complements the delicate sweetness perfectly.
Store leftovers in an airtight container in the refrigerator for up to 4 days. It keeps well and the flavors actually deepen overnight. You can freeze slices wrapped tightly in plastic wrap and foil for up to a month; thaw overnight in the fridge before serving.
Reheating is generally not recommended since this cheesecake is best enjoyed cold, but if you prefer it slightly warm, a few seconds in the microwave (about 10-15 seconds) works.
Nutritional Information & Benefits
Each slice (based on 8 servings) contains approximately 230 calories, 15g fat, 18g carbohydrates, and 6g protein. The recipe uses cream cheese and eggs, which provide a good dose of calcium and protein.
This cheesecake is lower in sugar compared to traditional dense cheesecakes, and since it relies on whipped egg whites for volume, it’s lighter in calories per serving. Gluten-free and dairy-free adaptations are possible, making it suitable for various dietary needs.
The lemon juice adds a touch of vitamin C, and the minimal flour keeps it relatively low-carb. For those watching their intake, portion control is key, but honestly, this is a dessert you can feel good about enjoying once in a while.
Conclusion
This Fluffy Japanese Cheesecake Delight is one of those recipes that becomes a quiet favorite—comforting without weighing you down, impressive without fuss, and utterly delicious every time. It’s perfect if you want a dessert that feels special but isn’t intimidating to make.
Feel free to tweak it—add your favorite flavors, try different toppings, or bake it for different occasions. I love it because it’s forgiving, light, and reminds me that sometimes the best things in the kitchen come from a little patience and a lot of heart.
Give it a shot, and I hope it becomes one of your kitchen wins too.
FAQs
- Can I use regular all-purpose flour instead of cake flour?
Yes, but cake flour is preferred for a lighter texture. If using all-purpose flour, try mixing it with cornstarch to mimic cake flour’s softness. - Why does my cheesecake crack on top?
Cracks often happen if the oven temperature is too high or if the cake cools too quickly. Using a water bath and gentle cooling helps prevent this. - Can I make this cheesecake ahead of time?
Absolutely! It actually tastes better after chilling overnight, which helps set the texture and flavors. - What if I don’t have a springform pan?
You can use a regular cake pan lined with parchment paper, but removing the cheesecake might be trickier. Cooling completely before slicing helps. - Is it possible to make this dairy-free?
Yes, by substituting cream cheese and milk with plant-based alternatives and using aquafaba for the meringue, though texture and flavor will differ slightly.
Pin This Recipe!
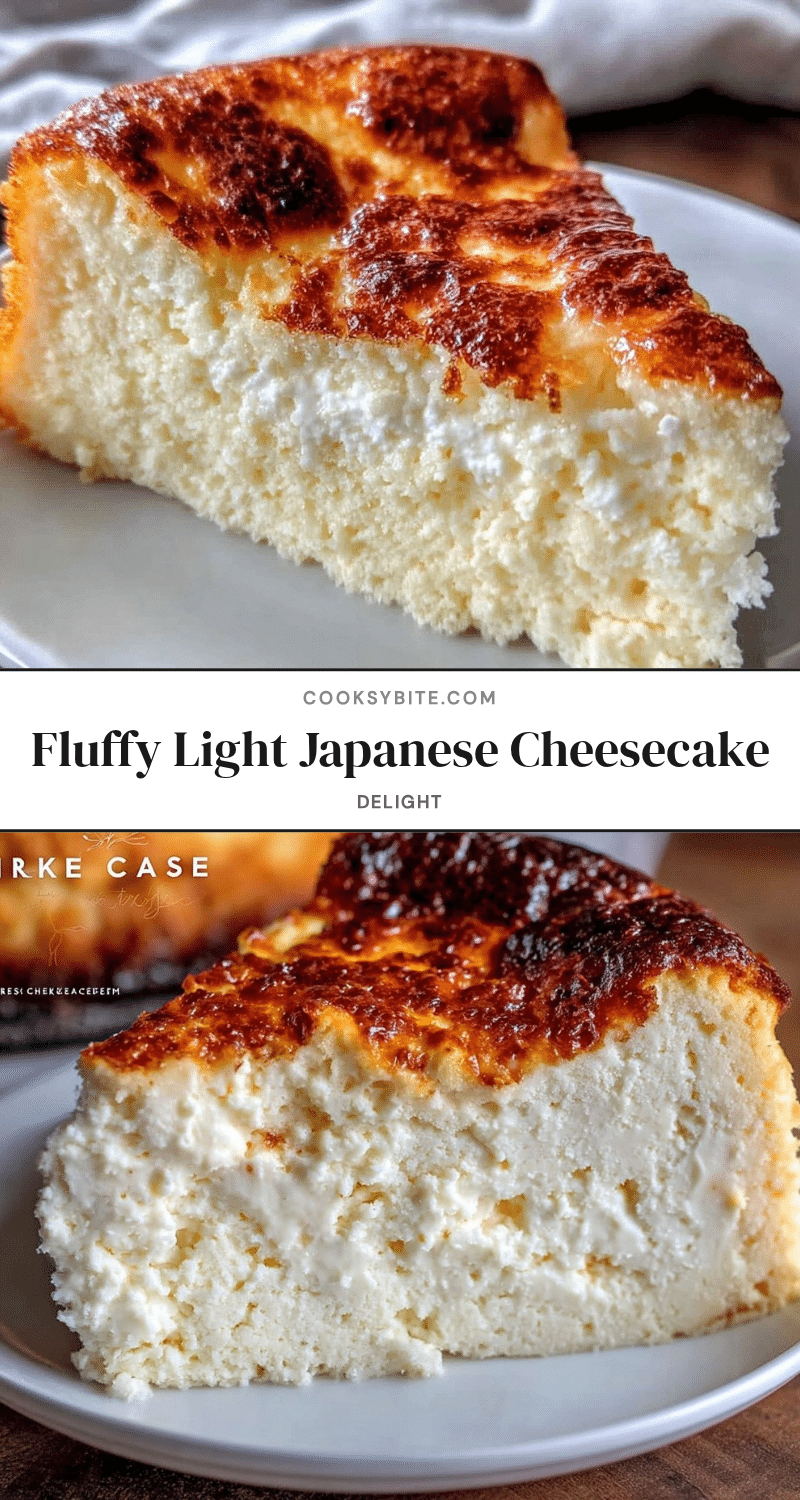
Fluffy Japanese Cheesecake Delight

A light, airy Japanese cheesecake with a soft, melt-in-your-mouth texture that combines richness and delicacy. Perfect for any occasion and surprisingly easy to make.
- Prep Time: 45 minutes
- Cook Time: 60 minutes
- Total Time: 1 hour 45 minutes
- Yield: 8 servings 1x
- Category: Dessert
- Cuisine: Japanese
Ingredients
- 250g (9 oz) cream cheese, softened
- 50g (3.5 tablespoons) unsalted butter, softened
- 100ml (3.4 fl oz) whole milk, room temperature
- 6 large eggs, separated, room temperature
- 140g (2/3 cup) granulated sugar, divided
- 60g (1/2 cup) cake flour, sifted
- 20g (2 tablespoons) cornstarch, sifted
- 1 tablespoon lemon juice
- 1 teaspoon vanilla extract
- Pinch of salt
Instructions
- Preheat the oven to 320°F (160°C). Line the bottom and sides of an 8-inch springform pan with parchment paper and wrap the outside with aluminum foil.
- Beat the softened cream cheese with softened butter until smooth and creamy, about 2-3 minutes. Add milk, lemon juice, and vanilla extract; mix until smooth.
- Sift cake flour and cornstarch over the cream cheese mixture. Gently fold in using a spatula without overmixing.
- Separate eggs carefully. Add the yolks to the cream cheese mixture and mix until smooth.
- Whip egg whites with an electric mixer until foamy. Gradually add half the sugar (70g) and beat until soft peaks form. Add remaining sugar gradually until stiff, glossy peaks form.
- Fold one-third of the meringue into the cream cheese batter to lighten it, then gently fold in the remaining meringue in two additions, folding from the bottom up to preserve air bubbles.
- Pour batter into the prepared pan and tap lightly to release large air bubbles.
- Place the springform pan in a larger roasting pan and pour hot water halfway up the sides of the cheesecake pan to create a water bath.
- Bake for 55-60 minutes until the top is golden brown and a toothpick inserted near the center comes out mostly clean with a few moist crumbs. The cheesecake will jiggle slightly.
- Turn off the oven and leave the cheesecake inside for 15 minutes to prevent cracking. Remove from water bath and cool completely on a wire rack.
- Chill in the refrigerator for at least 4 hours or overnight for best texture.
Notes
Use room temperature ingredients for better mixing and rising. Wrap the pan well to prevent water from seeping in during the water bath. Avoid opening the oven door during the first 40 minutes. If the top browns too quickly, tent with foil halfway through baking. Chill overnight for best texture and flavor. For dairy-free or gluten-free versions, substitute ingredients accordingly but expect slight texture changes.
Nutrition
- Serving Size: 1 slice (1/8 of cake
- Calories: 230
- Fat: 15
- Carbohydrates: 18
- Protein: 6
Keywords: Japanese cheesecake, fluffy cheesecake, light dessert, airy cheesecake, easy cheesecake recipe, water bath cheesecake