There was this one chilly Saturday afternoon when I found myself rummaging through the kitchen, craving something warm and sweet but without the energy for fussing over a complicated dessert. Honestly, I wasn’t even sure if I wanted to bake at all. I spotted a few apples on the counter—just the last of the batch from the farmers market—and a half-used stick of butter languishing in the fridge. That’s when the idea of making a Perfect Caramelized Tarte Tatin popped into my head, almost like a quiet dare to myself.
I’d always been a little skeptical about Tarte Tatin. The idea of cooking apples in caramel, then flipping the whole thing out of the pan? It sounded finicky and risky, and I’m far from a “fancy baker.” But on that restless afternoon, I decided to throw caution to the wind. I grabbed my cast iron skillet and got to work, thinking, “What’s the worst that could happen?”
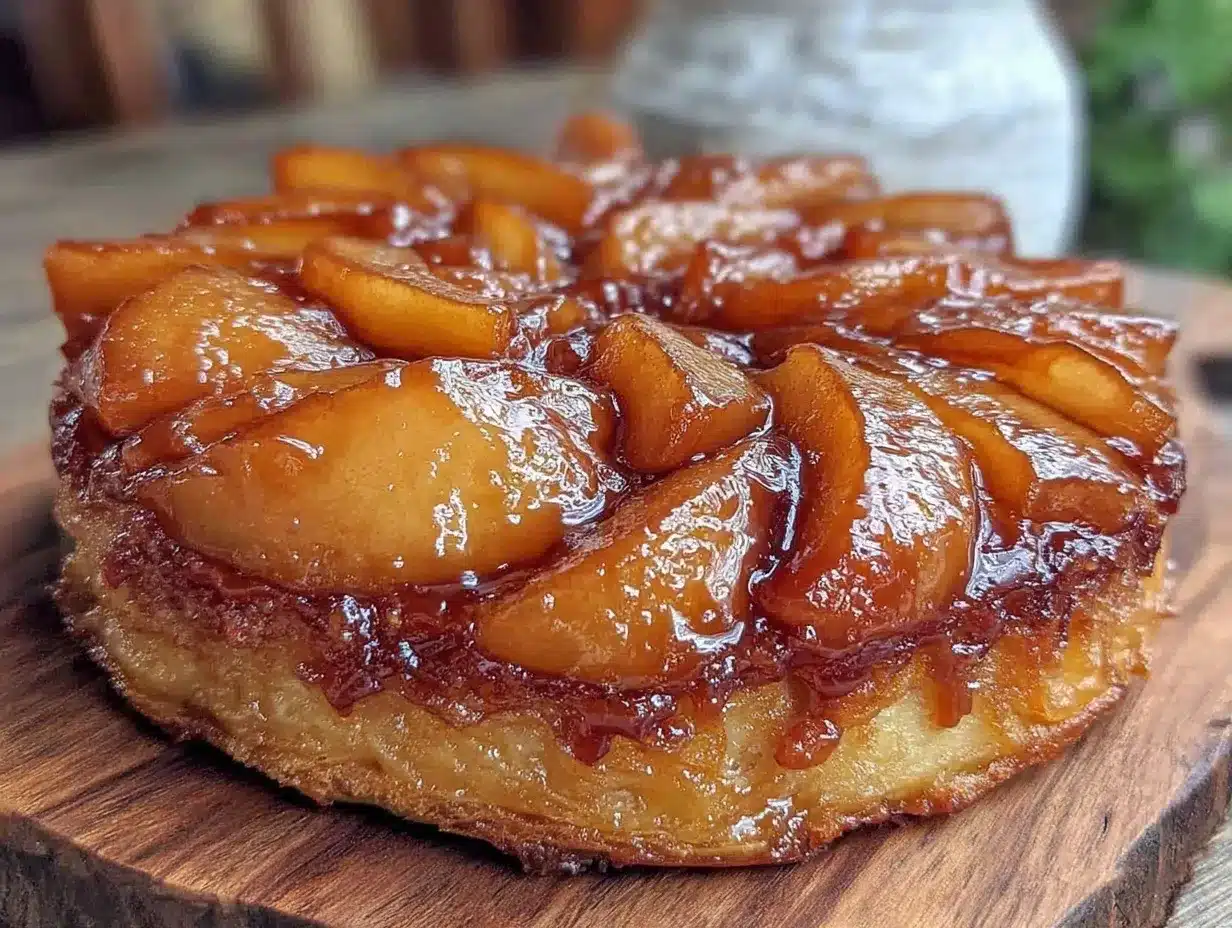
Fast forward an hour: the kitchen was filled with this intoxicating aroma of caramelized apples and browned butter, and when I finally lifted that golden, glossy tart from the pan, I was surprised—no, impressed. The crust was perfectly flaky, the apples tender and sticky with just the right hint of caramel bitterness. It was the kind of dessert that makes you pause, savor that first bite, and feel like you’re secretly indulging in something truly special without a lot of effort.
That afternoon turned into several weekends of perfecting my method, tweaking the caramel, and learning to trust the flip. Now, this Perfect Caramelized Tarte Tatin feels like that cozy, comforting friend who shows up when you least expect it—but always hits the spot. It’s simple, classic, and honestly, a bit magical.
Why You’ll Love This Recipe
- Quick & Easy: You can pull this together in under an hour, which is perfect when you want something impressive but don’t have all day.
- Simple Ingredients: No need for exotic items here—just apples, sugar, butter, and pastry. I usually keep these pantry staples on hand, so it’s a go-to dessert.
- Perfect for Any Occasion: Whether it’s a cozy weekend brunch, an unexpected dinner party, or a quiet night in, this tart fits right in.
- Crowd-Pleaser: People often ask for the recipe after tasting it—kids and adults both can’t get enough of that caramel-apple combo.
- Unbelievably Delicious: The magic is in the caramelization—the rich, buttery sauce with the soft, slightly tart apples creates this addictive texture and flavor balance you won’t find in your average apple tart.
- This isn’t just a regular apple tart; it’s the classic French version that’s been perfected through trial and a few kitchen mishaps (like learning to get the caramel just right without burning it!).
- It’s the kind of recipe that turns a simple fruit into a centerpiece, making you feel a little fancy without the fuss.
What Ingredients You Will Need
This recipe relies on straightforward, wholesome ingredients that come together to create bold flavor and satisfying texture without any fuss. Most of these are pantry staples, and if you pick the right apples, it really makes all the difference.
- Apples: 6 medium tart apples (such as Granny Smith, Braeburn, or Pink Lady) — firm and slightly tart apples hold their shape well during cooking.
- Unsalted Butter: 4 tablespoons (about 57 grams), softened — for that rich, golden caramel flavor. I prefer Kerrygold for its deep buttery taste.
- Granulated Sugar: 3/4 cup (150 grams) — this creates the caramel base; use pure white sugar for a clean flavor.
- Puff Pastry: 1 sheet (about 8×8 inches or 20×20 cm), thawed — store-bought works fine, but if you want to make it from scratch, go for a classic French-style pate feuilletée.
- Lemon Juice: 1 tablespoon (freshly squeezed) — helps prevent apples from browning and adds a fresh note.
- Salt: A pinch — balances the sweetness and enhances the caramel’s depth.
- Optional: A dash of ground cinnamon or vanilla extract (about 1/2 teaspoon) — adds warmth and complexity, especially in cooler months.
Ingredient tips: When choosing apples, I avoid super sweet varieties to keep the tart balanced. If you want a gluten-free option, try a gluten-free puff pastry or make a simple almond flour crust. For dairy-free, swap butter with vegan margarine, though the flavor will be a bit different.
Equipment Needed
- Oven-safe Skillet or Tarte Tatin Pan: An 8-inch (20 cm) cast iron skillet works perfectly; alternatively, a heavy-bottomed ovenproof frying pan is great. Avoid non-stick pans since caramel can stick and burn.
- Sharp Knife: For peeling and slicing apples evenly — I like a paring knife for control.
- Wooden Spoon or Heatproof Spatula: To stir the caramel gently without scratching your pan.
- Pastry Brush: Optional, but handy for brushing lemon juice or egg wash if you choose to glaze the pastry.
- Baking Sheet: To place under your skillet in case of spills (caramel can bubble over).
Personally, I swear by my well-seasoned cast iron skillet for even heat distribution and that rustic presentation. For those on a budget, a sturdy stainless steel pan without plastic handles is a solid choice. Just be sure it’s oven-safe! To keep your skillet in good shape, avoid harsh detergents and dry thoroughly after washing.
Preparation Method
- Preheat your oven to 375°F (190°C). This ensures your oven is ready when the tart is assembled.
- Prepare the apples: Peel, core, and quarter the apples. Toss them immediately with the lemon juice to prevent browning. Set aside.
- Make the caramel: In your oven-safe skillet, melt the butter over medium heat. Once melted, add the sugar evenly across the pan’s surface. Let it cook without stirring for about 5 minutes, or until it turns a golden amber color. (Tip: If it starts to smoke or smell burnt, remove from heat immediately.)
- Arrange the apples: Carefully place the apple quarters upright in the caramel, fitting them snugly since they will shrink during cooking. Sprinkle a pinch of salt and cinnamon (if using) over the apples. Cook on medium-low heat for 15 minutes, allowing the caramel to thicken and the apples to soften slightly. You’ll see the edges starting to caramelize beautifully.
- Prepare the puff pastry: While apples cook, roll out your puff pastry sheet on a lightly floured surface to about 10 inches (25 cm) square. If needed, trim to fit your skillet with a slight overhang.
- Assemble the tart: Remove the skillet from heat. Carefully drape the puff pastry over the apples, tucking the edges down around the fruit inside the pan. This traps the apples and caramel underneath.
- Bake: Place the skillet on a baking sheet and bake in the preheated oven for 25-30 minutes, or until the pastry is puffed and golden brown. You’ll know it’s ready when the crust is crisp and deeply golden.
- Cool and flip: Remove the tart from the oven and let it rest for 5 minutes. Place a large plate over the skillet and carefully invert the tart in one swift motion. Watch as the caramelized apples glisten on top. (Caution: The caramel will be hot and may drip.)
- Serve: Best enjoyed warm, either on its own or with a dollop of crème fraîche or vanilla ice cream.
Pro tip: Don’t rush the caramel step—patience here means a richer flavor and perfect golden color. If your caramel hardens before assembling, gently rewarm the pan over low heat to loosen it.
Cooking Tips & Techniques
Getting that perfect caramelized tarte tatin texture and flavor takes some care, but trust me, it’s worth the effort. One of the trickiest parts is the caramel itself. I’ve burned more batches than I’d like to admit, so here’s what works for me:
- Even heat is crucial: Melt your butter and sugar slowly over medium heat without stirring too vigorously. Once the sugar begins to melt, you can gently swirl the pan to promote even cooking.
- Use the right apples: Firm, tart apples hold their shape and balance the rich sweetness of caramel beautifully. Softer apples tend to mush and lose that signature texture.
- Don’t overcrowd the pan: Giving apple slices some breathing room helps them cook evenly and soak up the caramel.
- Let the tart rest before flipping: This step lets the caramel sauce thicken slightly, reducing drips and making the flip cleaner.
- Practice your flip: If you’re nervous about the classic inversion, try it over the sink or with oven mitts for extra grip and safety.
- Timing is everything: Keep an eye on the pastry as it bakes—too long and it might burn; too short and it’ll be doughy.
One time, I rushed the caramel stage and ended up with a bitter mess. Since then, I learned to trust the color and aroma cues rather than the clock. Also, prepping all ingredients beforehand (mise en place) keeps the process smooth and stress-free.
Variations & Adaptations
The Perfect Caramelized Tarte Tatin is surprisingly versatile, so you can tweak it to suit your mood or dietary needs:
- Seasonal fruit swaps: Swap apples for pears, quinces, or even peaches in summer. Pear Tarte Tatin is especially lovely with a touch of ginger.
- Vegan version: Use plant-based butter and a dairy-free puff pastry. Maple syrup can replace sugar for a different caramel note.
- Spiced twist: Add star anise or cardamom to the caramel for a warm, aromatic flavor—perfect for holiday gatherings.
- Gluten-free crust: Make a simple almond flour crust or use a store-bought gluten-free pastry sheet.
- Mini Tarte Tatins: Use a muffin tin and smaller apple pieces for individual servings—great for parties or portion control.
I once made a version with salted caramel and a hint of bourbon, which was a surprising hit at a friend’s dinner. Don’t be afraid to play around and find your twist!
Serving & Storage Suggestions
This tarte tatin is best served warm, straight from the skillet flip. The contrast between the crispy, buttery pastry and the sticky, tender apples is heavenly when fresh. I like to add a scoop of vanilla ice cream or a spoonful of crème fraîche on the side, but even plain is wonderful.
For storage, keep leftovers covered in the fridge for up to 2 days. To reheat, warm gently in a 325°F (160°C) oven for about 10 minutes to crisp the pastry back up. Avoid microwaving if you want to keep that flaky texture.
Interestingly, the flavors mellow and deepen after a day, so if you’re not in a rush, letting it rest overnight can make the caramel taste even richer.
Pair this tart with a cup of strong black coffee or a glass of dessert wine for a simple yet satisfying dessert experience.
Nutritional Information & Benefits
This classic tart offers a moderately indulgent treat that balances natural fruit sugars with rich butter and caramel. Here’s a rough estimate per serving (assuming 8 servings):
| Nutrient | Amount |
|---|---|
| Calories | 320 kcal |
| Carbohydrates | 45 g |
| Fat | 14 g |
| Protein | 2 g |
| Fiber | 3 g |
Apples provide dietary fiber and vitamin C, contributing to digestion and immune health. Using unsalted butter and controlling sugar amounts keeps the recipe from feeling overly heavy, while the caramelized apples offer a touch of natural sweetness that feels indulgent but not overwhelming.
This dessert is naturally gluten-containing unless you swap the puff pastry. It’s not low-carb, but perfect for a balanced occasional treat.
Conclusion
Making this Perfect Caramelized Tarte Tatin has been a little adventure in my kitchen that keeps giving back—whether it’s a quiet weekend treat or a show-stopping dessert for guests. The balance of buttery caramel and tart, tender apples wrapped in flaky pastry is a timeless combo that never gets old.
Feel free to make it your own by adjusting the spices, fruit, or crust. Trust me, once you get the hang of the caramel, this will become your go-to French classic that’s as comforting as it is impressive.
If you try it out, I’d love to hear how you made it your own or what little tweaks you came up with. Happy baking, and here’s to creating sweet moments one slice at a time!
FAQs
What type of apples work best for Tarte Tatin?
Firm and slightly tart apples like Granny Smith, Braeburn, or Pink Lady hold their shape well and balance the sweetness of the caramel.
Can I use homemade pastry instead of store-bought puff pastry?
Absolutely! A classic French puff pastry (pâte feuilletée) works beautifully if you have the time. Otherwise, store-bought puff pastry is a convenient and tasty shortcut.
How do I prevent the caramel from burning?
Cook the sugar and butter over medium heat and watch closely. Remove from heat as soon as the caramel reaches a rich amber color and smells nutty. Swirling gently rather than stirring helps even cooking.
Can I prepare the tart in advance?
You can prepare the caramelized apples and assemble the tart ahead, then refrigerate before baking. Bake fresh when ready to serve for the best texture.
What should I do if the tart sticks to the pan after baking?
Let the tart cool for a few minutes before flipping. Running a thin knife around the edges before inverting can help loosen it. Using a well-seasoned cast iron skillet also reduces sticking.
Pin This Recipe!
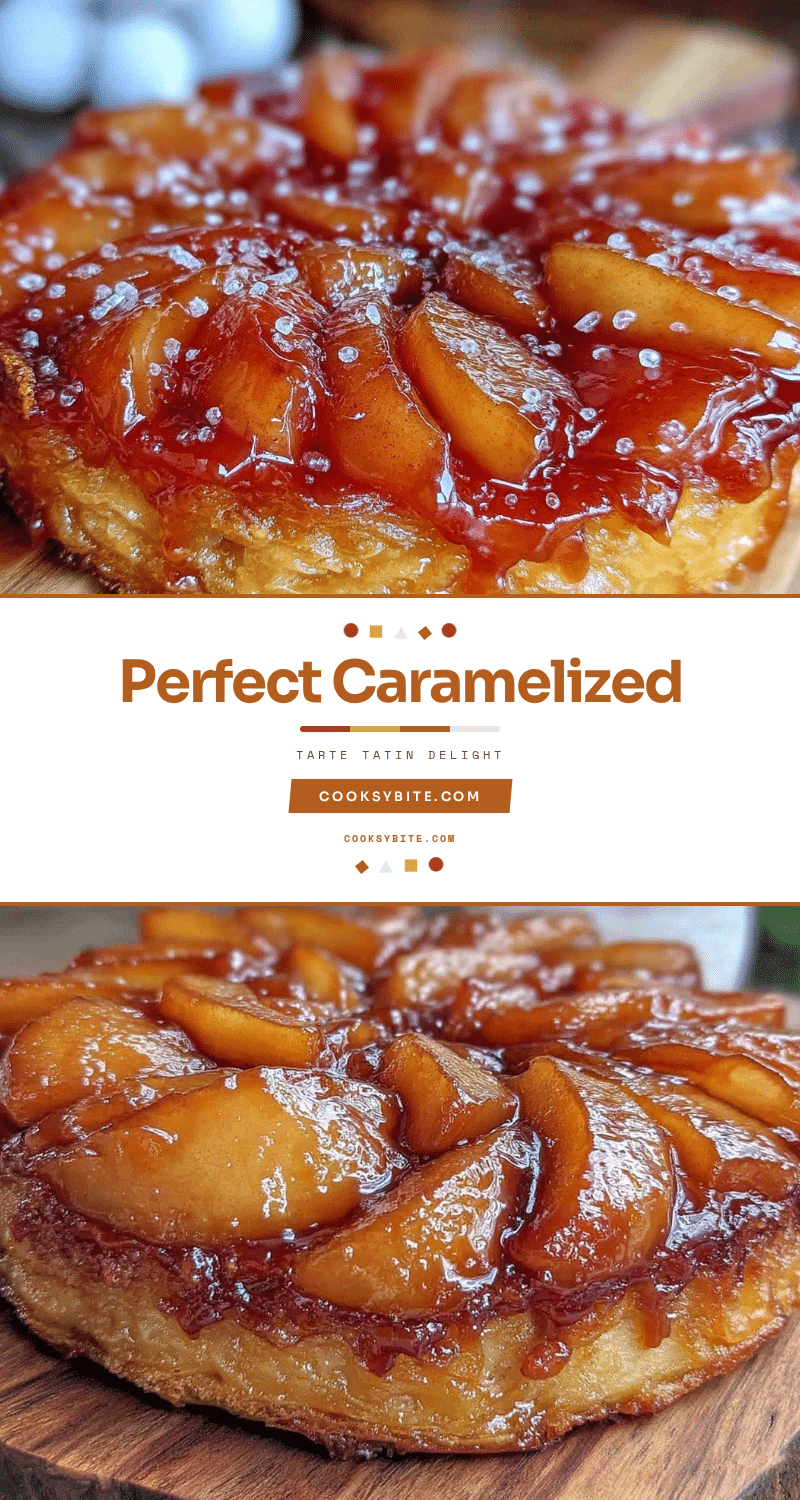
Perfect Caramelized Tarte Tatin Recipe Easy Classic French Apple Tart
A simple and classic French apple tart featuring caramelized apples cooked in butter and sugar, topped with flaky puff pastry. This recipe is quick, easy, and perfect for any occasion.
- Prep Time: 15 minutes
- Cook Time: 40 minutes
- Total Time: 55 minutes
- Yield: 8 servings 1x
- Category: Dessert
- Cuisine: French
Ingredients
- 6 medium tart apples (such as Granny Smith, Braeburn, or Pink Lady)
- 4 tablespoons unsalted butter (about 57 grams), softened
- 3/4 cup granulated sugar (150 grams)
- 1 sheet puff pastry (about 8x8 inches or 20x20 cm), thawed
- 1 tablespoon freshly squeezed lemon juice
- A pinch of salt
- Optional: 1/2 teaspoon ground cinnamon or vanilla extract
Instructions
- Preheat your oven to 375°F (190°C).
- Peel, core, and quarter the apples. Toss them immediately with the lemon juice to prevent browning. Set aside.
- In your oven-safe skillet, melt the butter over medium heat. Once melted, add the sugar evenly across the pan’s surface. Let it cook without stirring for about 5 minutes, or until it turns a golden amber color. If it starts to smoke or smell burnt, remove from heat immediately.
- Carefully place the apple quarters upright in the caramel, fitting them snugly since they will shrink during cooking. Sprinkle a pinch of salt and cinnamon (if using) over the apples. Cook on medium-low heat for 15 minutes, allowing the caramel to thicken and the apples to soften slightly.
- While apples cook, roll out your puff pastry sheet on a lightly floured surface to about 10 inches (25 cm) square. Trim if needed to fit your skillet with a slight overhang.
- Remove the skillet from heat. Carefully drape the puff pastry over the apples, tucking the edges down around the fruit inside the pan.
- Place the skillet on a baking sheet and bake in the preheated oven for 25-30 minutes, or until the pastry is puffed and golden brown.
- Remove the tart from the oven and let it rest for 5 minutes. Place a large plate over the skillet and carefully invert the tart in one swift motion. Be cautious as the caramel will be hot and may drip.
- Serve warm, optionally with a dollop of crème fraîche or vanilla ice cream.
Notes
Do not rush the caramel step to avoid burning; patience ensures a richer flavor and perfect golden color. If caramel hardens before assembling, gently rewarm the pan over low heat. Use firm, tart apples to hold shape and balance sweetness. Let the tart rest before flipping to thicken caramel and reduce drips. Practice the flip over a sink or with oven mitts for safety.
Nutrition
- Serving Size: 1 slice (1/8 of tart
- Calories: 320
- Fat: 14
- Carbohydrates: 45
- Fiber: 3
- Protein: 2
Keywords: Tarte Tatin, caramelized apples, French dessert, apple tart, easy dessert, classic French recipe, caramel tart