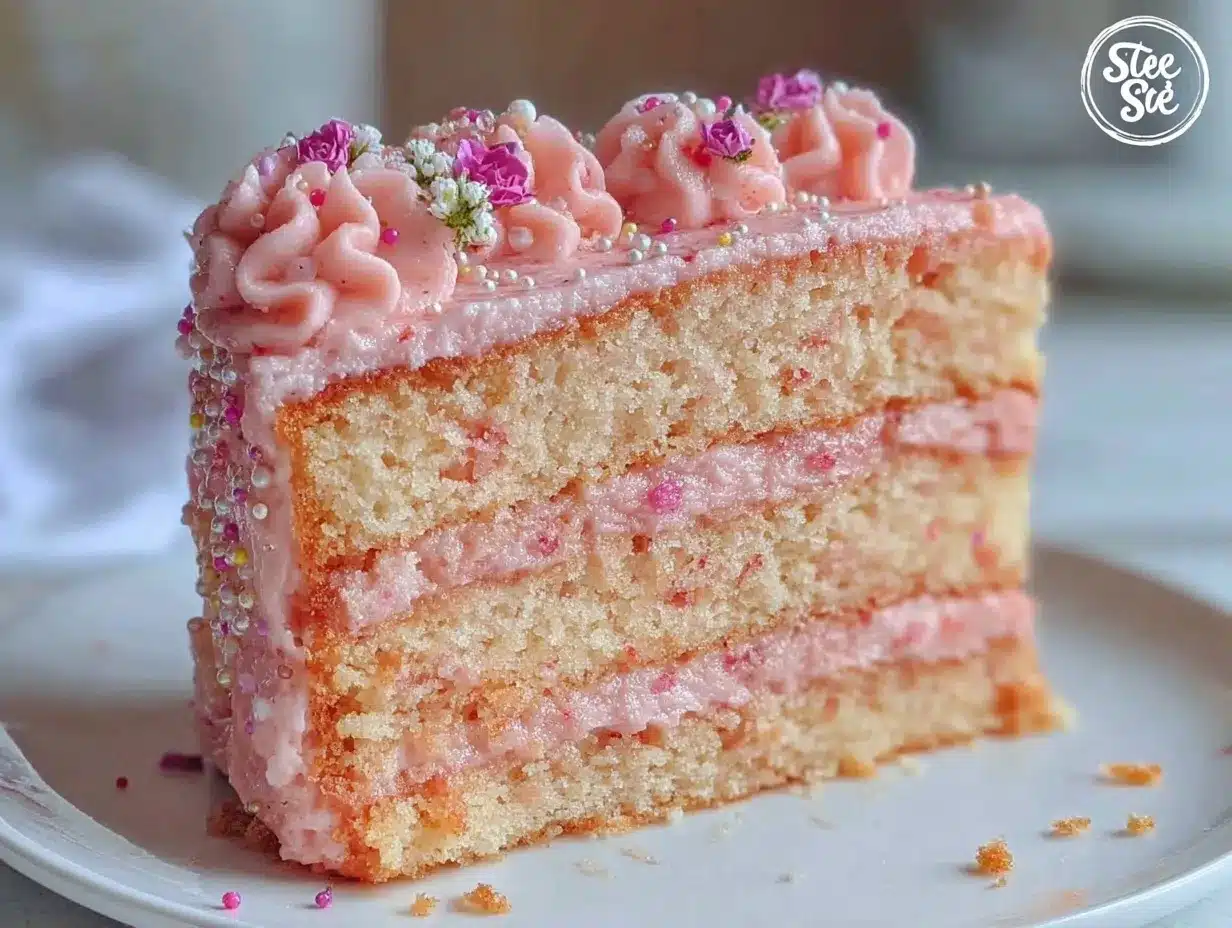
Let me tell you, the sight of a Perfect Pink Ombré Layer Cake sitting proudly on the table is enough to make anyone’s heart skip a beat. The gentle gradient of blush to rose pink hues, stacked high in fluffy layers, is like a dream come true for anyone who loves a touch of elegance with their dessert. The first time I baked this cake, I was hosting a birthday party, and honestly, I was a bit nervous about pulling off that smooth color transition. But when I sliced into it, the moment I took that first bite was the kind of moment where you pause, take a deep breath, and just smile because you know you’re onto something truly special.
Years ago, when I was knee-high to a grasshopper, my grandma baked the most stunning cakes for every occasion, but nothing quite captured that modern, chic vibe like this Perfect Pink Ombré Layer Cake. I stumbled upon the idea while trying to brighten up a rainy weekend with some baking therapy. What I wish I’d discovered back then was how wonderfully simple this cake can be, despite its fancy look.
My family couldn’t stop sneaking slices off the cooling rack (and I can’t really blame them). It’s dangerously easy to make and brings pure, nostalgic comfort with a sophisticated twist. Whether you’re planning a bridal shower, a baby girl’s birthday, or just want to brighten up your Pinterest cookie board with a centerpiece, this cake fits the bill perfectly. After multiple tests (in the name of research, of course), this recipe has become a staple for family gatherings and gifting. Trust me, this cake feels like a warm hug you’ll want to revisit again and again.
Why You’ll Love This Recipe
Honestly, this Perfect Pink Ombré Layer Cake isn’t just another pretty dessert; it’s a labor of love that’s been fine-tuned to make your celebrations shine without the stress. Here’s why you’re going to adore it:
- Quick & Easy: Comes together in under 90 minutes—perfect for those last-minute celebration plans or spontaneous baking moods.
- Simple Ingredients: No need for fancy or hard-to-find items; you probably have everything in your pantry already.
- Perfect for Elegant Celebrations: Whether it’s birthdays, showers, or tea parties, this cake brings that wow factor effortlessly.
- Crowd-Pleaser: Kids and adults alike rave about the moist layers and silky buttercream frosting.
- Unbelievably Delicious: The light crumb and creamy frosting combo is pure comfort with a touch of sophistication.
What makes this recipe stand out? It’s the way the layers blend from pale pink to a rich rose, achieved using a subtle touch of natural food coloring and a perfectly balanced vanilla batter. Plus, whipping the buttercream with a little cream cheese gives it that tangy smoothness that keeps you coming back for more. This isn’t just any cake—it’s your best version, the one that gets those spontaneous “Can I have another slice?” requests. It’s comfort food with a feminine, elegant twist that makes every bite feel like a celebration.
What Ingredients You Will Need
This recipe uses simple, wholesome ingredients to deliver bold flavor and a satisfying texture without the fuss. Most are pantry staples, with a few tweaks to get that perfect pink ombré effect.
- For the Cake Batter:
- All-purpose flour, 2 ½ cups (320g) – I prefer King Arthur for consistent results
- Baking powder, 2 ½ teaspoons – helps give the cake a nice rise
- Salt, ½ teaspoon – balances sweetness
- Unsalted butter, 1 cup (227g), softened – use good-quality butter for richness
- Granulated sugar, 2 cups (400g) – sweet but not overpowering
- Large eggs, 4, room temperature – brings structure and moisture
- Pure vanilla extract, 2 teaspoons – the soul of this cake
- Whole milk, 1 cup (240ml), room temperature – for tender crumb
- Pink gel food coloring, natural or artificial, divided – start with 1 teaspoon and adjust for ombré shades
- For the Buttercream Frosting:
- Unsalted butter, 1 cup (227g), softened
- Cream cheese, 4 ounces (113g), softened – adds tang and silkiness
- Powdered sugar, 4 cups (480g), sifted – for smooth texture
- Pure vanilla extract, 1 teaspoon
- Heavy cream, 2-3 tablespoons – to adjust consistency
- Pink gel food coloring, a few drops – for that perfect blush finish
Feel free to swap whole milk for almond or oat milk for a dairy-free twist. I’ve tried a version using coconut yogurt in the frosting with great success for those avoiding dairy. If you want a gluten-free option, almond flour works well but expect a slightly denser crumb. For seasonal variations, fresh strawberries or raspberries folded into the frosting add a lovely fruity note.
Equipment Needed
- Three 8-inch (20 cm) round cake pans – If you don’t have three, bake layers one or two at a time.
- Electric mixer (stand or hand) – Vital for whipping the buttercream to fluffy perfection.
- Mixing bowls – At least two, one for batter, one for frosting.
- Measuring cups and spoons – Accurate measurements are key here.
- Rubber spatula – For folding and scraping bowls clean.
- Cooling racks – To cool the layers evenly and avoid sogginess.
- Offset spatula or butter knife – Helps with smooth frosting application.
- Bench scraper (optional) – For that sleek, professional finish.
If you’re on a budget, basic cake pans and a good hand mixer will do just fine. Just remember to grease and flour your pans properly (or line with parchment) to avoid sticking. I used a vintage offset spatula from my grandma—nothing fancy, but it does the trick every time!
Preparation Method
- Preheat your oven to 350°F (175°C). Grease and flour three 8-inch pans, or line with parchment circles. This helps the layers release easily.
- Mix the dry ingredients: In a medium bowl, whisk together 2 ½ cups (320g) flour, 2 ½ teaspoons baking powder, and ½ teaspoon salt. Set aside.
- Cream the butter and sugar: In a large bowl, beat 1 cup (227g) softened butter with 2 cups (400g) sugar until fluffy and pale, about 3-4 minutes on medium speed. This step is crucial for a light cake.
- Add eggs: Beat in 4 large eggs, one at a time, scraping down the sides after each. Add 2 teaspoons vanilla extract.
- Alternate adding dry ingredients and milk: Starting and ending with the dry mix, add it in three parts alternating with 1 cup (240ml) whole milk. Beat gently after each addition until just combined. Overmixing will toughen the cake.
- Divide the batter into four bowls: Leave one bowl batter uncolored (for the lightest layer). In the other three, add increasing amounts of pink gel food coloring to create a gradient from pale blush to deeper rose. Stir well.
- Pour each batter into cake pans: If you only have three pans, bake the lightest layer separately. Smooth the tops with a spatula.
- Bake for 25-30 minutes: Or until a toothpick inserted in the center comes out clean. Rotate pans halfway through baking for even color and rise.
- Cool layers completely: Let cakes cool in pans for 10 minutes, then turn out onto cooling racks. Cool fully before frosting to avoid melting the buttercream.
- Make the buttercream: Beat 1 cup (227g) softened butter and 4 oz (113g) cream cheese until creamy. Gradually add 4 cups (480g) powdered sugar, beating on low to prevent a sugar cloud. Add 1 teaspoon vanilla and 2-3 tablespoons heavy cream to reach spreadable consistency. Tint with a few drops of pink gel for a soft blush color.
- Assemble the cake: Place the darkest pink layer on your cake stand or plate. Spread a generous layer of frosting on top. Repeat with the medium and light pink layers. Finish with the uncolored or very pale layer on top.
- Crumb coat: Apply a thin layer of frosting around the entire cake to seal in crumbs. Chill for 15-20 minutes.
- Final frosting: Apply a thicker, smooth layer of frosting all over. Use an offset spatula or bench scraper to create clean edges. Chill again to set.
Quick tip: If your frosting feels too soft, pop it in the fridge for a bit, then whip again before applying. Always slice with a sharp serrated knife for neat layers. This recipe takes about 90 minutes total, but the results are so worth the wait!
Cooking Tips & Techniques
Getting this Perfect Pink Ombré Layer Cake just right is easier than you think, but a few insider tips can help you avoid common hiccups. First, be patient when creaming butter and sugar—it’s the secret to a light, airy crumb. I learned this the hard way by rushing and ending up with dense layers.
When adding eggs, blend them in one at a time to avoid curdling. Also, alternating dry ingredients with milk keeps the batter smooth without overmixing, which can make your cake tough.
For the ombré effect, gel food coloring is your best friend because it doesn’t thin the batter like liquid dyes. Start with tiny amounts—you can always add more. My tip? Use a toothpick to apply the color so you don’t overdo it.
Crumb coating is crucial. Skipping this step usually means crumbs in your final frosting layer, which is a bit of a bummer for a cake that’s meant to look polished. Chill the cake after crumb coating to make the final layer go on smoothly.
Lastly, when slicing, wipe your knife clean after each cut to get those perfect, clean layers. Multitasking while baking? I like prepping my frosting while the layers cool—saves time and keeps things moving.
Variations & Adaptations
This Perfect Pink Ombré Layer Cake is a flexible canvas, so you can adapt it to suit your taste and dietary needs. Here are a few ideas:
- Flavor Variations: Swap vanilla for almond extract for a nutty twist or fold in finely chopped freeze-dried raspberries into the batter for a subtle berry surprise.
- Dietary Adaptations: For a gluten-free version, use a 1:1 gluten-free baking flour blend. If dairy is off the table, substitute butter with coconut oil and use plant-based cream cheese and milk alternatives.
- Seasonal Twists: In summer, try adding fresh strawberry puree to the frosting layers for a fresh, fruity flavor. For winter, sprinkle edible gold dust or silver dragees on the frosting for a festive touch.
- Cooking Method: If you want to skip the ombré, bake a single large cake and frost with tinted buttercream swirls for a quicker, yet still pretty, look.
Personally, I once tried a lemon version with a light lemon zest in the batter and cream cheese frosting with a hint of lemon juice. It was a refreshing change that made the pink hues pop even more.
Serving & Storage Suggestions
Serve this cake chilled or at room temperature for the best flavor and texture. If you’re showing it off at a party, let it sit out for 15-20 minutes before slicing so the buttercream softens just right. Pair it with a cup of Earl Grey tea or a glass of sparkling rosé for elegant tastes that match the cake’s vibe.
To store, cover the cake loosely with plastic wrap or a cake dome and refrigerate. It keeps beautifully for up to 4 days. For longer storage, freeze individual slices wrapped tightly in plastic and foil; they’ll keep well for up to 2 months. When ready to eat, thaw in the fridge overnight and bring to room temp before serving.
Pro tip: The flavors meld and deepen after a day, so if you can plan ahead, it tastes even better the next day. Just don’t expect it to last that long once guests get a glimpse!
Nutritional Information & Benefits
Each slice of this Perfect Pink Ombré Layer Cake packs approximately 400 calories, with 20g of fat, 50g of carbohydrates, and 4g of protein, depending on portion size. The key ingredients like butter and cream cheese provide richness and calcium, while the eggs add protein and essential nutrients.
For those mindful of dietary needs, this cake can be adjusted to be gluten-free or dairy-free, making it suitable for various lifestyles. The use of natural food coloring options can reduce artificial additives, and you can control sugar levels by opting for organic powdered sugar.
While this isn’t a health food, it’s a treat that brings joy and comfort, which honestly is part of wellness too. Baking and sharing this cake creates moments that feed the soul, and sometimes that’s just as important as counting calories.
Conclusion
The Perfect Pink Ombré Layer Cake is more than just a dessert—it’s a celebration in every slice. Whether you’re impressing guests or simply treating yourself, this cake’s easy recipe and stunning look make it a winner every time. The best part? You can tweak it to fit your style and needs, making it truly your own.
I love this recipe because it combines nostalgia with a fresh, elegant twist. It reminds me of childhood parties and grown-up celebrations all at once, and honestly, it’s just plain fun to make and eat. So, go ahead, give it a try, and let me know how your cake turns out! Don’t forget to share your photos and any personal spins you put on it—I’m always excited to see your creations.
Happy baking and here’s to many beautiful, delicious celebrations ahead!
FAQs About Perfect Pink Ombré Layer Cake
How do I get a smooth ombré gradient on the cake layers?
Divide the batter into separate bowls and add increasing amounts of pink gel food coloring for each layer. Pour the lightest color in one pan and the deepest in another. Be sure to mix well for even color. Baking in separate pans helps keep the layers distinct.
Can I make this cake ahead of time?
Yes! The cake layers can be baked up to 2 days ahead and stored in airtight containers. Assemble and frost the cake the day you plan to serve for the freshest taste.
What if I don’t have gel food coloring?
Gel food coloring works best for vibrant color without thinning the batter, but you can use liquid food coloring if that’s all you have—just use less and be mindful it may affect the batter’s texture slightly.
How do I prevent the cake from drying out?
Make sure not to overbake the layers. Check with a toothpick a few minutes before the timer ends. Also, frosting helps lock in moisture, so don’t skip the crumb coat and chilling steps.
Is this recipe suitable for beginners?
Absolutely! The steps are straightforward, and the ingredients are simple. The ombré effect looks impressive but is easy to achieve with a little patience and care.
Pin This Recipe!
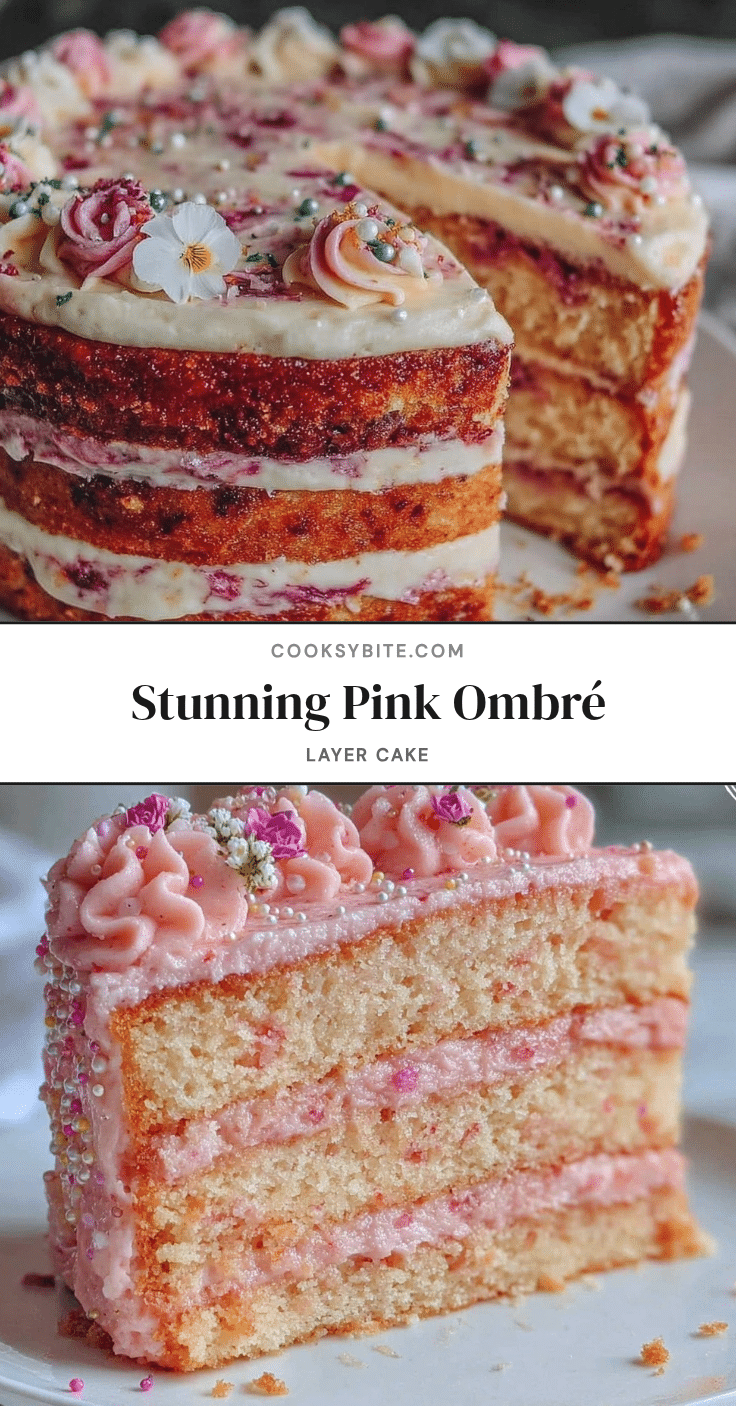
Perfect Pink Ombré Layer Cake
An elegant and easy-to-make celebration cake featuring fluffy layers with a beautiful pink ombré gradient and silky cream cheese buttercream frosting.
- Prep Time: 30 minutes
- Cook Time: 30 minutes
- Total Time: 90 minutes
- Yield: 12 servings 1x
- Category: Dessert
- Cuisine: American
Ingredients
- 2 ½ cups (320g) all-purpose flour
- 2 ½ teaspoons baking powder
- ½ teaspoon salt
- 1 cup (227g) unsalted butter, softened
- 2 cups (400g) granulated sugar
- 4 large eggs, room temperature
- 2 teaspoons pure vanilla extract
- 1 cup (240ml) whole milk, room temperature
- Pink gel food coloring, natural or artificial, divided
- 1 cup (227g) unsalted butter, softened (for frosting)
- 4 ounces (113g) cream cheese, softened
- 4 cups (480g) powdered sugar, sifted
- 1 teaspoon pure vanilla extract (for frosting)
- 2–3 tablespoons heavy cream
- A few drops pink gel food coloring (for frosting)
Instructions
- Preheat your oven to 350°F (175°C). Grease and flour three 8-inch pans, or line with parchment circles.
- In a medium bowl, whisk together flour, baking powder, and salt. Set aside.
- In a large bowl, beat softened butter and sugar until fluffy and pale, about 3-4 minutes on medium speed.
- Beat in eggs one at a time, scraping down the sides after each addition. Add vanilla extract.
- Alternate adding dry ingredients and milk in three parts, starting and ending with dry mix. Beat gently until just combined.
- Divide batter into four bowls. Leave one uncolored for the lightest layer. Add increasing amounts of pink gel food coloring to the other three bowls to create an ombré gradient.
- Pour each batter into cake pans. If only three pans, bake the lightest layer separately. Smooth tops with a spatula.
- Bake for 25-30 minutes or until a toothpick inserted in the center comes out clean. Rotate pans halfway through baking.
- Cool layers in pans for 10 minutes, then turn out onto cooling racks. Cool completely before frosting.
- For the buttercream, beat softened butter and cream cheese until creamy. Gradually add powdered sugar, beating on low speed.
- Add vanilla extract and heavy cream to reach spreadable consistency. Tint with a few drops of pink gel food coloring.
- Assemble cake by placing the darkest pink layer on a cake stand or plate. Spread a generous layer of frosting on top. Repeat with medium and light pink layers. Finish with the uncolored or very pale layer on top.
- Apply a thin crumb coat of frosting around the entire cake. Chill for 15-20 minutes.
- Apply a thicker, smooth final layer of frosting. Use an offset spatula or bench scraper for clean edges. Chill again to set.
- Slice with a sharp serrated knife for neat layers.
Notes
Use gel food coloring for best ombré effect without thinning batter. Chill cake after crumb coating for smooth final frosting. Slice with a sharp serrated knife and wipe clean after each cut. Can substitute whole milk with almond or oat milk for dairy-free version. Almond flour can be used for gluten-free but expect denser crumb.
Nutrition
- Serving Size: 1 slice (1/12 of cak
- Calories: 400
- Fat: 20
- Carbohydrates: 50
- Protein: 4
Keywords: pink ombré cake, layer cake, celebration cake, buttercream frosting, elegant dessert, birthday cake, easy cake recipe