I figured candy corn Rice Krispie treats would be a cute novelty thing — something that looked better than it tasted. It took about one bite to realize how wrong I was.
The whole idea started because I had a half-empty bag of candy corn sitting on my counter after Halloween. You know how that goes. You buy three bags because they were on sale, and suddenly you’re eating handfuls of candy corn while standing in front of the pantry at 10 PM. I needed to do something with it that wasn’t just mindless snacking.
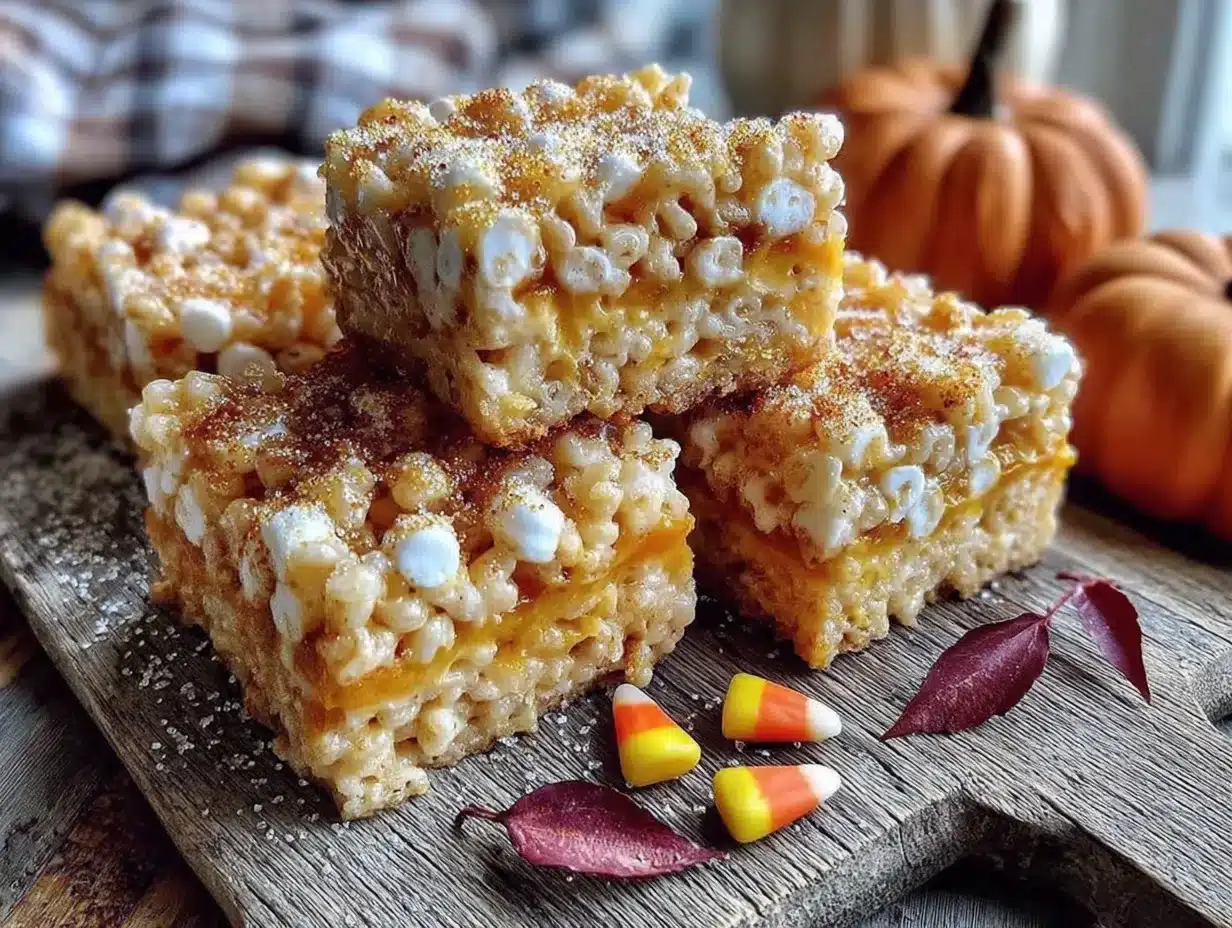
So I tossed a handful into a pot of melting marshmallows (just to see what would happen) and stirred. The candy corn melted into this gorgeous, sunset-orange swirl that looked like a stained glass window. The smell — sweet vanilla with that distinct candy corn honey note — filled my kitchen. I pressed the mixture into a pan, let it set, and cut a wonky square off the edge.
The texture surprised me most. The candy corn adds this subtle chewiness that regular Rice Krispie treats don’t have. It’s not overwhelming. It’s just enough to make you go “hmm” and take another bite. My kids descended on the pan before I could even get a proper photo.
Honestly, this recipe stuck because it’s the kind of happy accident that makes you feel like you accidentally discovered something. It’s not trying too hard. It’s just candy corn and marshmallows and cereal doing what they do best — being sweet and crunchy and completely irresistible.
Why You’ll Love This Recipe
Let me tell you why these Easy Candy Corn Rice Krispie Treats have become my most-requested fall dessert. I’ve made them for school bake sales, Halloween parties, and even a few “just because” Tuesday afternoons.
- Unbelievably Easy : You’re looking at about 15 minutes of active work. If you can melt marshmallows, you can make these.
- Simple Ingredients : Three main ingredients plus a little butter. No weird stuff. No trips to specialty stores.
- Perfect for Fall Gatherings : These scream Halloween without being too on-the-nose. Great for classroom parties, potlucks, or movie nights.
- Crowd-Pleaser : Kids go absolutely bonkers for them. Adults pretend they’re too sophisticated, then eat three.
- Unbelievably Delicious : The candy corn melts into the marshmallow base, creating this caramel-vanilla flavor that’s way more complex than you’d expect.
What makes these different from every other Rice Krispie treat recipe out there? It’s the way the candy corn integrates. Most recipes just sprinkle candy corn on top as decoration. That’s fine, but it’s not the same. When you melt the candy corn into the marshmallow mixture, it changes everything. The candy corn dissolves partially, leaving behind tiny bits of chewy sweetness throughout the whole treat. Every bite has that candy corn flavor, not just the top.
This is the kind of recipe that makes you close your eyes after the first bite. It’s nostalgic but unexpected. It’s comfort food with a twist — faster than baking cookies, more fun than plain treats, and way more satisfying than you’d guess from the ingredient list.
What Ingredients You Will Need
This recipe keeps things simple. You probably have most of these in your kitchen right now. The magic happens when these few ingredients come together.
- 6 cups Rice Krispies cereal (or any crisp rice cereal — store brand works fine here)
- 10 oz bag mini marshmallows (regular size works too, but mini melts faster and more evenly)
- 1 cup candy corn (I prefer Brach’s for the classic flavor, but any brand works)
- 3 tablespoons unsalted butter (salted butter is okay, just skip any extra salt)
- Pinch of salt (optional, but it balances the sweetness beautifully)
A few notes on ingredient selection. For the candy corn, freshness matters. Stale candy corn gets hard and doesn’t melt as smoothly. If your bag has been sitting open for weeks, it’s better to buy fresh. I learned this the hard way when I made a batch that had crunchy bits of unmelted candy corn — not terrible, but not the smooth texture we’re going for.
The marshmallows — use the standard Jet-Puffed or store brand. Avoid the fancy artisan marshmallows. They have different moisture content and don’t melt the same way. Trust me on this one.
For the cereal, Rice Krispies are classic because they stay crunchy. But I’ve used Cocoa Krispies for a chocolate version (more on that in variations) and it works great. Just keep in mind the flavor profile changes significantly.
If you’re looking for a dairy-free option, plant-based butter works perfectly. I’ve used Earth Balance with no issues. The treats set up exactly the same.
Equipment Needed
You don’t need fancy equipment for these Easy Candy Corn Rice Krispie Treats. Here’s what you’ll need:
- Large pot (at least 5-quart — you need room to stir without flinging cereal everywhere)
- 9×13 inch baking pan (glass or metal both work; I prefer glass so I can see if the bottom layer is even)
- Spatula (silicone is best — nothing sticks to it)
- Parchment paper (non-negotiable. Trust me on this)
- Measuring cups and spoons
- Sharp knife (for cutting clean squares)
Pro tip on the spatula: spray it lightly with non-stick cooking spray before you press the mixture into the pan. The marshmallow mixture is sticky, and this simple trick saves so much frustration. I keep a separate spray bottle of oil just for this purpose.
If you don’t have a 9×13 pan, you can use a 9×9 for thicker treats or a rimmed baking sheet for thinner, crunchier ones. Just adjust the pressing technique — thinner treats need less pressing, thicker ones need more.
Preparation Method
Let me walk you through this step by step. I’ve made these Easy Candy Corn Rice Krispie Treats probably twenty times now, so I’ve got all the little tricks dialed in.
- Prep your pan. Line your 9×13 baking pan with parchment paper, leaving overhang on two sides. This creates little handles so you can lift the whole block out later. Spray the parchment lightly with non-stick spray.
- Melt the butter. Place your large pot over medium-low heat. Add 3 tablespoons of butter and let it melt slowly. Don’t rush this — butter burns easily, and burnt butter flavor ruins the whole batch. Swirl the pot occasionally as it melts.
- Add the marshmallows. Once the butter is fully melted (about 2 minutes), dump in the entire 10 oz bag of mini marshmallows. Stir constantly with your silicone spatula. The marshmallows will start to puff up and melt. This takes about 3-4 minutes. Keep the heat on medium-low — low and slow is the name of the game here.
- Add the candy corn. When the marshmallows are about 75% melted (you’ll still see some puffy white bits), add 1 cup of candy corn. Stir continuously. The candy corn will start to melt and turn the whole mixture a warm orange color. This is where the magic happens. Keep stirring until everything is smooth and uniform, about 2 more minutes. The mixture should look like melted orange marshmallow with tiny specks of undissolved candy corn — that’s perfect.
- Remove from heat. Take the pot off the burner immediately. You don’t want to overcook the marshmallow mixture — it gets tough and loses that soft, gooey texture.
- Add the cereal. Pour in 6 cups of Rice Krispies cereal all at once. Fold gently with your spatula. Don’t stir aggressively — you’ll crush the cereal and end up with dense, sad treats. Fold until the cereal is evenly coated. This should take about 1 minute. You’ll see orange streaks from the candy corn throughout the mixture. Beautiful.
- Press into pan. Scrape the mixture into your prepared pan. Here’s the trick: spray your spatula with non-stick spray, then gently press the mixture into an even layer. Don’t smash it flat — you want some air pockets for that perfect crispy texture. If the mixture is too sticky to work with, spray your hands lightly with non-stick spray and use your fingers to press it out.
- Let it set. Let the treats cool at room temperature for about 30 minutes. Don’t put them in the fridge — that creates condensation and makes them soggy. I know it’s tempting to speed things up, but room temperature is the way to go.
- Cut and serve. Once set, lift the whole block out using the parchment paper handles. Place on a cutting board. Use a sharp knife to cut into squares. I usually do 12 large squares or 24 smaller ones. Wipe the knife clean between cuts for neat edges.
Cooking Tips & Techniques
I’ve made every mistake in the book with Rice Krispie treats, so you don’t have to. Here’s what I’ve learned.
The heat is everything. I ruined my first three batches by cranking the heat to high because I was impatient. The marshmallows scorched, the candy corn seized up, and I ended up with a brown, bitter mess. Medium-low heat. I cannot stress this enough. If you’re using an electric stove, keep it at a 3 or 4. Gas stove? Keep that flame low.
Fresh marshmallows matter. Stale marshmallows don’t melt smoothly. They get this weird, lumpy texture that never fully integrates. If your marshmallows are more than a month old, buy fresh. Same goes for the candy corn — fresh candy corn is soft and pliable. Stale candy corn is hard and doesn’t melt properly.
Don’t overmix. I know it’s tempting to keep folding until everything looks perfect, but overmixing crushes the cereal. You want those crispy, airy pockets. Fold just until the cereal is coated. A few streaks of unmixed marshmallow are fine — they’ll distribute as you press the mixture into the pan.
Timing strategy. Have everything measured and ready before you start. Once the marshmallows start melting, you don’t have time to measure cereal or find your spatula. Mise en place, my friends. It makes the difference between a smooth process and a sticky disaster.
The pressing technique. I used to press down hard, thinking I needed compact treats. Wrong. Light, even pressure is all you need. You want the mixture to hold together, not become a dense brick. Think of it like tucking someone into bed — gentle, not aggressive.
Variations & Adaptations
These Easy Candy Corn Rice Krispie Treats are surprisingly versatile. Here are some variations I’ve tried and loved.
Chocolate Candy Corn Treats. Substitute 3 cups of Cocoa Krispies for 3 cups of regular Rice Krispies. The chocolate pairs beautifully with the candy corn’s honey-vanilla flavor. It’s like a chocolate caramel situation. I made this version for a Halloween party and people lost their minds.
White Chocolate Drizzle. Melt 1/2 cup of white chocolate chips with 1 teaspoon of coconut oil. Drizzle over the set treats. The white chocolate adds a nice sweetness and makes them look fancy. I do this when I’m bringing them to a gathering where people expect presentation.
Peanut Butter Swirl. Warm 1/4 cup of creamy peanut butter in the microwave for 15 seconds. Drizzle it over the marshmallow mixture before adding the cereal, then fold once or twice — don’t fully incorporate it. You want peanut butter ribbons throughout. This is my husband’s favorite version.
Gluten-Free Option. Rice Krispies are naturally gluten-free, but check the label if you’re serving someone with celiac disease. Some store brands use malt flavoring that contains gluten. Bob’s Red Mill makes a certified gluten-free crisp rice cereal that works perfectly.
Vegan Version. Use vegan marshmallows (Dandies is my go-to brand) and plant-based butter. The texture is slightly different — vegan marshmallows don’t get quite as gooey — but the flavor is still fantastic. I’ve made this for vegan friends and they were thrilled.
Serving & Storage Suggestions
These treats are best served at room temperature. The texture is perfect — soft, chewy, with that satisfying crunch from the cereal. If you’re serving them at a party, arrange them on a platter in a single layer. They look beautiful with their orange-speckled appearance.
For storage, keep them in an airtight container at room temperature. They’ll stay fresh for up to 5 days. Layer them between sheets of parchment paper if you’re stacking them — they can stick together otherwise.
Here’s something I discovered: these treats actually get better after a day. The flavors meld together, and the candy corn flavor becomes more pronounced. Day-old treats are my favorite. The texture softens slightly, but in a good way.
If you need to freeze them, wrap individual treats tightly in plastic wrap, then place them in a freezer bag. They’ll keep for up to 3 months. Thaw at room temperature for about 30 minutes before serving. Don’t microwave frozen treats — they get rubbery.
For a fun serving idea, cut them into Halloween shapes using cookie cutters. Pumpkin shapes, ghost shapes, whatever you have. The scraps make great chef’s snacks. Just make sure your cookie cutter is sharp and well-oiled.
These pair beautifully with a glass of cold milk or a warm cup of apple cider. For a grown-up twist, serve them alongside a cup of coffee or a pink champagne jello shot for a fun Halloween party combo.
Nutritional Information & Benefits
Let’s be real — these are treats, not health food. But here’s what you’re looking at per serving (based on 12 servings):
- Calories: Approximately 220
- Carbohydrates: 45g
- Sugar: 28g
- Fat: 4g
- Protein: 2g
The main ingredients — marshmallows and candy corn — are primarily sugar, so these aren’t something you’d eat every day. But as an occasional treat? Absolutely fine. The Rice Krispies provide a small amount of iron and B vitamins from fortification.
If you’re looking to reduce sugar, you can cut back on the candy corn to 1/2 cup. The treats will be less sweet and have fewer orange streaks, but they’ll still taste great.
For those with dietary restrictions: these treats contain dairy (butter) and are not suitable for vegans unless you use substitutions. They are naturally nut-free, but check your marshmallow and cereal labels if cross-contamination is a concern.
Conclusion
These Easy Candy Corn Rice Krispie Treats are proof that the best recipes often come from happy accidents. What started as a way to use up leftover Halloween candy turned into one of my most-loved fall desserts.
The beauty of this recipe is how adaptable it is. You can dress them up with a white chocolate drizzle, keep them simple for a kid’s party, or experiment with different cereal combinations. However you make them, they’ll disappear fast. I promise.
I love this recipe because it reminds me that cooking doesn’t have to be complicated to be good. Sometimes the simplest combinations — marshmallows, cereal, and a handful of candy corn — create something genuinely special. It’s the kind of recipe that makes you feel like a kitchen genius with almost zero effort.
Give these a try. Make a batch for your next Halloween gathering, or just because it’s Tuesday and you deserve something sweet. And when someone asks for the recipe (they will), tell them it’s our little secret.
If you’re looking for other easy party desserts, check out my pink velvet bundt cake or these mini lemon blueberry cheesecakes — both are crowd-pleasers that come together quickly.
Drop a comment below and let me know how yours turned out. Did you add any fun twists? I’d love to hear about your version!
Frequently Asked Questions
Can I use stale candy corn for this recipe?
Fresh candy corn works best. Stale candy corn is harder and won’t melt as smoothly, leaving you with crunchy bits throughout the treats. If you only have stale candy corn, try microwaving it for 10 seconds to soften it before adding to the marshmallow mixture.
Why did my treats turn out hard and dense?
This usually happens from overmixing or pressing the mixture too firmly into the pan. Fold gently until just combined, and use light pressure when pressing into the pan. You want air pockets for that perfect crispy texture.
Can I make these ahead of time for a party?
Absolutely. Make them up to 2 days in advance and store in an airtight container at room temperature. The flavor actually improves after a day as the candy corn flavor melds with the marshmallow. Just don’t refrigerate them — condensation makes them soggy.
How do I get clean cuts without the treats crumbling?
Use a sharp knife and wipe it clean between each cut. For the cleanest edges, spray your knife lightly with non-stick cooking spray before cutting. Let the treats set completely at room temperature before cutting — about 30 minutes minimum.
Can I use other cereals besides Rice Krispies?
Yes! Cocoa Krispies, Fruity Pebbles, or even crushed graham crackers all work well. Each cereal changes the flavor and texture slightly, so feel free to experiment. Just keep the total cereal amount at 6 cups.
Pin This Recipe!

50 Easy Candy Corn Rice Krispie Treats Recipe
These Easy Candy Corn Rice Krispie Treats are a happy accident turned into a beloved fall dessert. Candy corn melts into the marshmallow base, creating a caramel-vanilla flavor with a subtle chewiness that makes these treats completely irresistible.
- Prep Time: 15 minutes
- Cook Time: 10 minutes
- Total Time: 55 minutes
- Yield: 12 servings 1x
- Category: Dessert
- Cuisine: American
Ingredients
- 6 cups Rice Krispies cereal (or any crisp rice cereal)
- 10 oz bag mini marshmallows (regular size works too, but mini melts faster)
- 1 cup candy corn (preferably Brach’s for classic flavor)
- 3 tablespoons unsalted butter (salted butter is okay, just skip extra salt)
- Pinch of salt (optional, balances sweetness)
Instructions
- Prep your pan. Line a 9×13 baking pan with parchment paper, leaving overhang on two sides. Spray the parchment lightly with non-stick spray.
- Melt the butter. Place a large pot over medium-low heat. Add 3 tablespoons of butter and let it melt slowly, about 2 minutes. Swirl occasionally.
- Add the marshmallows. Once butter is fully melted, add the entire 10 oz bag of mini marshmallows. Stir constantly with a silicone spatula over medium-low heat until about 75% melted, about 3-4 minutes.
- Add the candy corn. When marshmallows are about 75% melted, add 1 cup of candy corn. Stir continuously until everything is smooth and uniform, about 2 more minutes. The mixture should look like melted orange marshmallow with tiny specks of undissolved candy corn.
- Remove from heat. Take the pot off the burner immediately to avoid overcooking.
- Add the cereal. Pour in 6 cups of Rice Krispies cereal all at once. Fold gently with a spatula until evenly coated, about 1 minute. Do not stir aggressively.
- Press into pan. Scrape mixture into prepared pan. Spray spatula with non-stick spray, then gently press into an even layer. Do not smash flat; leave some air pockets.
- Let it set. Cool at room temperature for about 30 minutes. Do not refrigerate.
- Cut and serve. Lift the block out using parchment handles. Place on a cutting board and cut into squares with a sharp knife. Wipe knife clean between cuts for neat edges.
Notes
Fresh candy corn is essential for smooth melting; stale candy corn will leave crunchy bits. Use standard marshmallows, not artisan varieties. For clean cuts, spray knife with non-stick spray. Treats actually improve after a day as flavors meld. Store in airtight container at room temperature for up to 5 days. Can be frozen for up to 3 months.
Nutrition
- Serving Size: 1 square (based on 1
- Calories: 220
- Sugar: 28
- Sodium: 150
- Fat: 4
- Saturated Fat: 2
- Carbohydrates: 45
- Protein: 2
Keywords: candy corn rice krispie treats, easy halloween dessert, fall treats, no-bake dessert, rice krispie treats with candy corn, halloween party treats, kid-friendly dessert


