The buttercream turned the exact shade of chartreuse I’d been chasing, and my friend just stared at the cake stand. “You made this for me?” she whispered, and I knew I’d finally cracked it. Not just the color, but the whole thing—a cake that felt like it was made for someone specific, not just a generic birthday dessert.
It started because I was tired of the same old birthday cake routine. You know, the one where you grab a box mix and some canned frosting, and it’s fine, but it doesn’t really mean anything. I wanted something that said, “I see you, I know you, and this cake was made with you in mind.” For my Virgo friend, that meant precision, quality, and a little bit of unexpected beauty. This Perfect Virgo Birthday Cake with Green Buttercream is the result of that obsession.
Honestly, I messed up the first two attempts. The first cake was too dry (I overbaked it by three minutes—classic), and the second buttercream was a sad, swampy green. But the third time? That was the charm. The cake was tender, the buttercream was silky, and that green was so perfectly, unmistakably Virgo. It’s the kind of cake that makes you feel like you’ve really accomplished something, not just in the kitchen, but in the whole “showing someone you care” department.
Why You’ll Love This Recipe
This isn’t just another vanilla cake with colored frosting. This cake has a soul, and it’s built for the Virgo energy in all of us—the one that appreciates details, quality ingredients, and a dessert that looks as good as it tastes.
- Perfectly Moist & Tender: The secret is in the buttermilk and the precise baking time. No dry crumbs here, just a soft, melt-in-your-mouth crumb that stays moist for days.
- Naturally Vibrant Green Buttercream: We’re not using a ton of artificial food coloring. A little goes a long way, and the result is a beautiful, sophisticated green that feels intentional, not gimmicky.
- Made for Celebrating: Whether it’s a Virgo birthday, a spring gathering, or just a Tuesday that needs a little more color, this cake fits the bill. It’s a showstopper without being overly complicated.
- Simple Ingredients, Stunning Result: You probably have most of these ingredients in your pantry already. No fancy extracts or hard-to-find flours—just good, honest baking staples that come together beautifully.
- The Kind of Cake People Remember: This is the cake that gets photographed, the one people ask for the recipe for. It’s a conversation starter, and honestly, it’s just really, really delicious.
What makes this different from every other birthday cake out there? It’s the combination of a foolproof, tender cake base with a buttercream that’s not just sweet—it’s balanced, creamy, and has that perfect shade of green that feels both earthy and celebratory. It’s a cake that says, “I put thought into this,” without you having to say a word.
What Ingredients You Will Need
This recipe uses simple, wholesome ingredients to deliver a cake that’s both tender and flavorful. Most of these are pantry staples, which makes this perfect for a last-minute celebration or a planned weekend bake.
For the Cake
- 2 ½ cups (312g) all-purpose flour: Spoon and level for accuracy. I prefer King Arthur Flour for consistent results.
- 2 ½ teaspoons baking powder: Make sure it’s fresh for the best rise.
- ½ teaspoon baking soda: Helps with browning and tenderness.
- 1 teaspoon salt: Balances the sweetness and enhances flavor.
- 1 cup (226g) unsalted butter, softened: Room temperature is crucial for a smooth, fluffy batter.
- 1 ¾ cups (350g) granulated sugar: Adds sweetness and structure.
- 4 large eggs, room temperature: Cold eggs can seize the batter. Let them sit out for 30 minutes.
- 1 tablespoon vanilla extract: Use pure, not imitation, for the best flavor.
- 1 cup (240ml) buttermilk, room temperature: The acid in buttermilk makes the cake incredibly tender. You can substitute with 1 cup milk + 1 tablespoon lemon juice, let sit for 5 minutes.
For the Green Buttercream
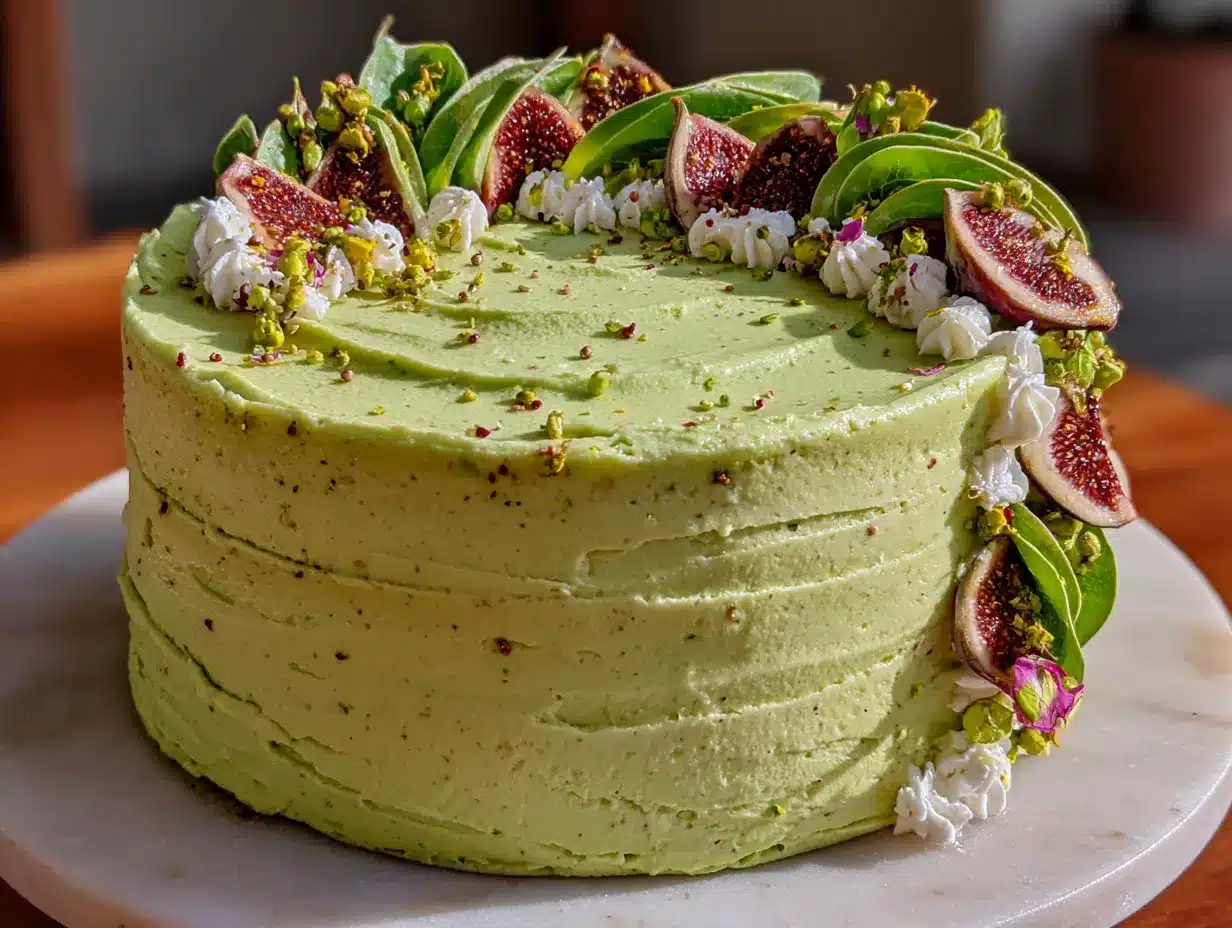
- 1 ½ cups (339g) unsalted butter, softened: The base of a good buttercream. Don’t skip the softening step!
- 5 cups (600g) powdered sugar, sifted: Sifting prevents lumps and ensures a silky smooth frosting.
- ¼ cup (60ml) heavy cream: Adds richness and helps achieve the perfect consistency.
- 2 teaspoons vanilla extract: For flavor depth.
- Pinch of salt: To cut the sweetness.
- Green food coloring (gel-based): Start with a tiny amount and build up. I recommend AmeriColor or Wilton gels for vibrant colors without altering the consistency. A toothpick dip is often enough!
Equipment Needed
You don’t need a professional bakery setup for this cake, but a few key tools will make your life much easier.
- Two 9-inch round cake pans: I love my Fat Daddio’s anodized aluminum pans—they heat evenly and don’t warp.
- Stand mixer or hand mixer: A stand mixer is ideal for the buttercream, but a hand mixer works perfectly fine for both the cake and frosting.
- Parchment paper: Cut circles to line the bottom of your pans for easy release.
- Cooling rack: Essential for letting the cakes cool completely before frosting.
- Offset spatula: For smooth, professional-looking frosting application.
- Cake turntable (optional but helpful): Makes frosting so much easier and more even.
- Measuring cups and spoons: Accuracy is key in baking. Use a kitchen scale for the best results.
- Mixing bowls: A few different sizes will come in handy.
Preparation Method
Let’s get baking! Follow these steps carefully, and you’ll have a stunning cake in no time.
- Preheat and Prepare: Preheat your oven to 350°F (175°C). Grease two 9-inch round cake pans, line the bottoms with parchment paper circles, and then grease the parchment. Dust with a little flour, tapping out the excess. This ensures your cakes won’t stick.
- Whisk Dry Ingredients: In a medium bowl, whisk together the flour, baking powder, baking soda, and salt. Set aside. This aerates the flour and distributes the leavening agents evenly.
- Cream Butter and Sugar: In the bowl of your stand mixer fitted with the paddle attachment (or using a hand mixer), beat the softened butter and granulated sugar on medium-high speed until light, fluffy, and pale in color. This takes about 3-5 minutes. Scrape down the sides and bottom of the bowl as needed. This step is crucial for a tender crumb.
- Add Eggs and Vanilla: Add the eggs one at a time, beating well after each addition until fully incorporated. Beat in the vanilla extract. The mixture should look smooth and glossy.
- Alternate Dry and Wet: With the mixer on low speed, add the dry ingredients in three additions, alternating with the buttermilk in two additions. Start and end with the dry ingredients. Mix just until combined after each addition—do not overmix! Overmixing develops gluten and can make the cake tough. The batter will be thick and smooth.
- Divide and Bake: Divide the batter evenly between the two prepared pans. Use a kitchen scale for accuracy if you have one. Smooth the tops with a spatula. Bake for 25-30 minutes, or until a toothpick inserted into the center comes out clean or with a few moist crumbs. The cakes should be golden brown and spring back lightly when touched.
- Cool Completely: Let the cakes cool in the pans on a wire rack for 10 minutes. Then, carefully turn them out onto the rack, remove the parchment paper, and let them cool completely. This is non-negotiable—frosting a warm cake is a recipe for a melty disaster.
- Make the Buttercream: While the cakes cool, make the buttercream. In the bowl of your stand mixer fitted with the paddle attachment, beat the softened butter on medium-high speed until smooth and creamy, about 2 minutes.
- Add Sugar and Cream: With the mixer on low speed, gradually add the sifted powdered sugar, one cup at a time. The mixture will look thick and crumbly at first—that’s normal. Add the heavy cream, vanilla extract, and salt. Increase the speed to medium-high and beat for 3-5 minutes, until the buttercream is light, fluffy, and perfectly smooth. Scrape down the bowl as needed.
- Color the Buttercream: Add a tiny amount of green gel food coloring using a toothpick. Beat on low to combine, then check the color. Add a tiny bit more if needed until you reach your desired shade of green. Remember, the color will deepen slightly as it sits.
- Assemble and Frost: Place one cooled cake layer on your serving plate or cake stand. Spread a generous layer of green buttercream on top. Place the second cake layer on top, flat side up. Apply a thin “crumb coat” of buttercream all over the cake to seal in any loose crumbs. Refrigerate for 15-20 minutes to set the crumb coat.
- Final Frosting: Apply the remaining buttercream to the chilled cake, using your offset spatula to create smooth sides and a decorative top. Get creative with swirls or rustic swoops!
Cooking Tips & Techniques
I’ve made every mistake in the book, so you don’t have to. Here are my hard-won tips for cake success.
- Room Temperature is Everything: Seriously, don’t skip this. Cold butter won’t cream properly, and cold eggs can cause the batter to curdle. Set your ingredients out at least 30 minutes before you start.
- Don’t Overmix the Batter: Once you add the flour, mix only until it’s just combined. A few streaks of flour are okay. Overmixing develops gluten, leading to a dense, tough cake instead of a tender one.
- The Toothpick Test is Your Friend: Oven temperatures vary. Start checking your cakes at the 25-minute mark. If the toothpick comes out wet with batter, bake for another 2-3 minutes and check again. If it comes out clean, they’re done.
- Patience with Buttercream: If your buttercream looks curdled or separated, don’t panic! It’s usually too cold or too warm. If it’s too cold, place the bowl over a pot of warm water for a few seconds and re-beat. If it’s too warm, pop it in the fridge for 10 minutes and then re-beat.
- Chill for Clean Slices: For the neatest slices, refrigerate the fully frosted cake for about 30 minutes before cutting. Use a sharp, serrated knife and wipe it clean between cuts.
Variations & Adaptations
This cake is a wonderful base for creativity. Here are a few ways to make it your own.
- Lemon Virgo Cake: Add the zest of two lemons to the sugar and rub it in with your fingers before creaming the butter. Add 2 tablespoons of fresh lemon juice to the batter along with the buttermilk. The lemon pairs beautifully with the green buttercream.
- Gluten-Free Version: Substitute the all-purpose flour with a high-quality 1:1 gluten-free baking flour blend that contains xanthan gum. I’ve had great success with King Arthur Measure for Measure. The texture will be slightly different, but still delicious.
- Different Buttercream Colors: While green is perfect for a Virgo, you can easily change the color to match any theme or preference. Try pink for a Pink Velvet Bundt Cake vibe, or even a deep red for a Decadent Red Wine Chocolate Cake inspired look.
- Add a Filling: For extra decadence, spread a layer of raspberry jam, lemon curd, or fluffy strawberry mousse between the cake layers before frosting.
- Cupcake Version: This batter makes about 24 cupcakes. Bake at 350°F (175°C) for 18-20 minutes. Frost with the same green buttercream for a portable treat.
Serving & Storage Suggestions
This cake is best served at room temperature, which allows the buttercream to soften and the cake to be perfectly tender. Take it out of the fridge about 30-45 minutes before you plan to serve it.
For a beautiful presentation, place the cake on a simple white cake stand. The green buttercream pops beautifully against a neutral background. You can garnish with a few edible flowers, fresh mint leaves, or even a light dusting of powdered sugar for a sophisticated finish.
This cake pairs wonderfully with a cup of strong coffee, a glass of cold milk, or even a pink champagne jello shot for a fun, celebratory twist.
Storage: Store any leftover cake in an airtight container at room temperature for up to 2 days, or in the refrigerator for up to 5 days. The buttercream will firm up in the fridge, so let it come to room temperature before serving.
Freezing: You can freeze the unfrosted cake layers, tightly wrapped in plastic wrap and then foil, for up to 3 months. Thaw at room temperature before frosting. The frosted cake can also be frozen for up to 2 months. Thaw in the refrigerator overnight.
Nutritional Information & Benefits
Please note that these are estimates and will vary based on specific ingredients used and serving sizes.
| Nutrient | Per Serving (1 slice, 1/12 of cake) |
|---|---|
| Calories | ~480 |
| Fat | ~28g |
| Saturated Fat | ~17g |
| Carbohydrates | ~58g |
| Sugar | ~45g |
| Protein | ~5g |
While this is a treat, the buttermilk provides a small amount of calcium and probiotics. The butter, while rich, is a source of fat-soluble vitamins like vitamin A. This cake is a celebration, meant to be enjoyed in moderation as part of a balanced lifestyle. It’s a reminder that food is also about joy, connection, and marking special moments.
Conclusion
This Perfect Virgo Birthday Cake with Green Buttercream is more than just a recipe—it’s a way to show someone you care. It’s for the friend who notices the details, the one who deserves a cake as thoughtful and precise as they are. The process is rewarding, the result is stunning, and the taste is absolutely worth every minute.
I love this cake because it feels like a secret weapon. It’s simple enough for a beginner baker to tackle, but impressive enough to be the centerpiece of any celebration. The green buttercream is my favorite part—it’s unexpected, beautiful, and just a little bit magical.
So go ahead, make this cake for your favorite Virgo (or for yourself!). Customize the color, add your favorite filling, and make it your own. When you do, I’d love to hear about it. Drop a comment below and tell me how it turned out, or share a photo of your creation. Happy baking, friends!
Frequently Asked Questions
Can I use a different type of food coloring?
Yes, you can use liquid food coloring, but you’ll need more of it to achieve a vibrant green, which can thin out your buttercream. Gel-based colors are highly concentrated and won’t affect the consistency, making them the best choice for this recipe.
My cake layers are domed on top. What should I do?
A slight dome is normal! Once the cakes are completely cool, use a serrated knife to gently slice off the domed top to create a flat, even surface for stacking. This gives you a professional-looking, level cake.
Can I make this cake dairy-free?
Absolutely! Substitute the butter with a high-quality vegan butter stick (like Miyoko’s or Earth Balance) and use a dairy-free milk alternative (like oat or almond milk) mixed with 1 tablespoon of lemon juice to create a vegan buttermilk. The texture will be slightly different but still delicious.
How do I get a really vibrant green color without using a lot of dye?
Start with a tiny amount of gel food coloring on the tip of a toothpick. Mix it in, and you’ll be surprised how far it goes. If you want a deeper, more earthy green, add a tiny, tiny speck of brown or purple food coloring to deepen the shade without needing more green dye.
Why is my buttercream too thick or too thin?
Buttercream consistency is all about balance. If it’s too thick, beat in a little more heavy cream (1 tablespoon at a time). If it’s too thin, add a bit more sifted powdered sugar (¼ cup at a time) until it reaches a spreadable, pipeable consistency. The environment’s temperature also plays a role—warm kitchens make softer buttercream.
Pin This Recipe!
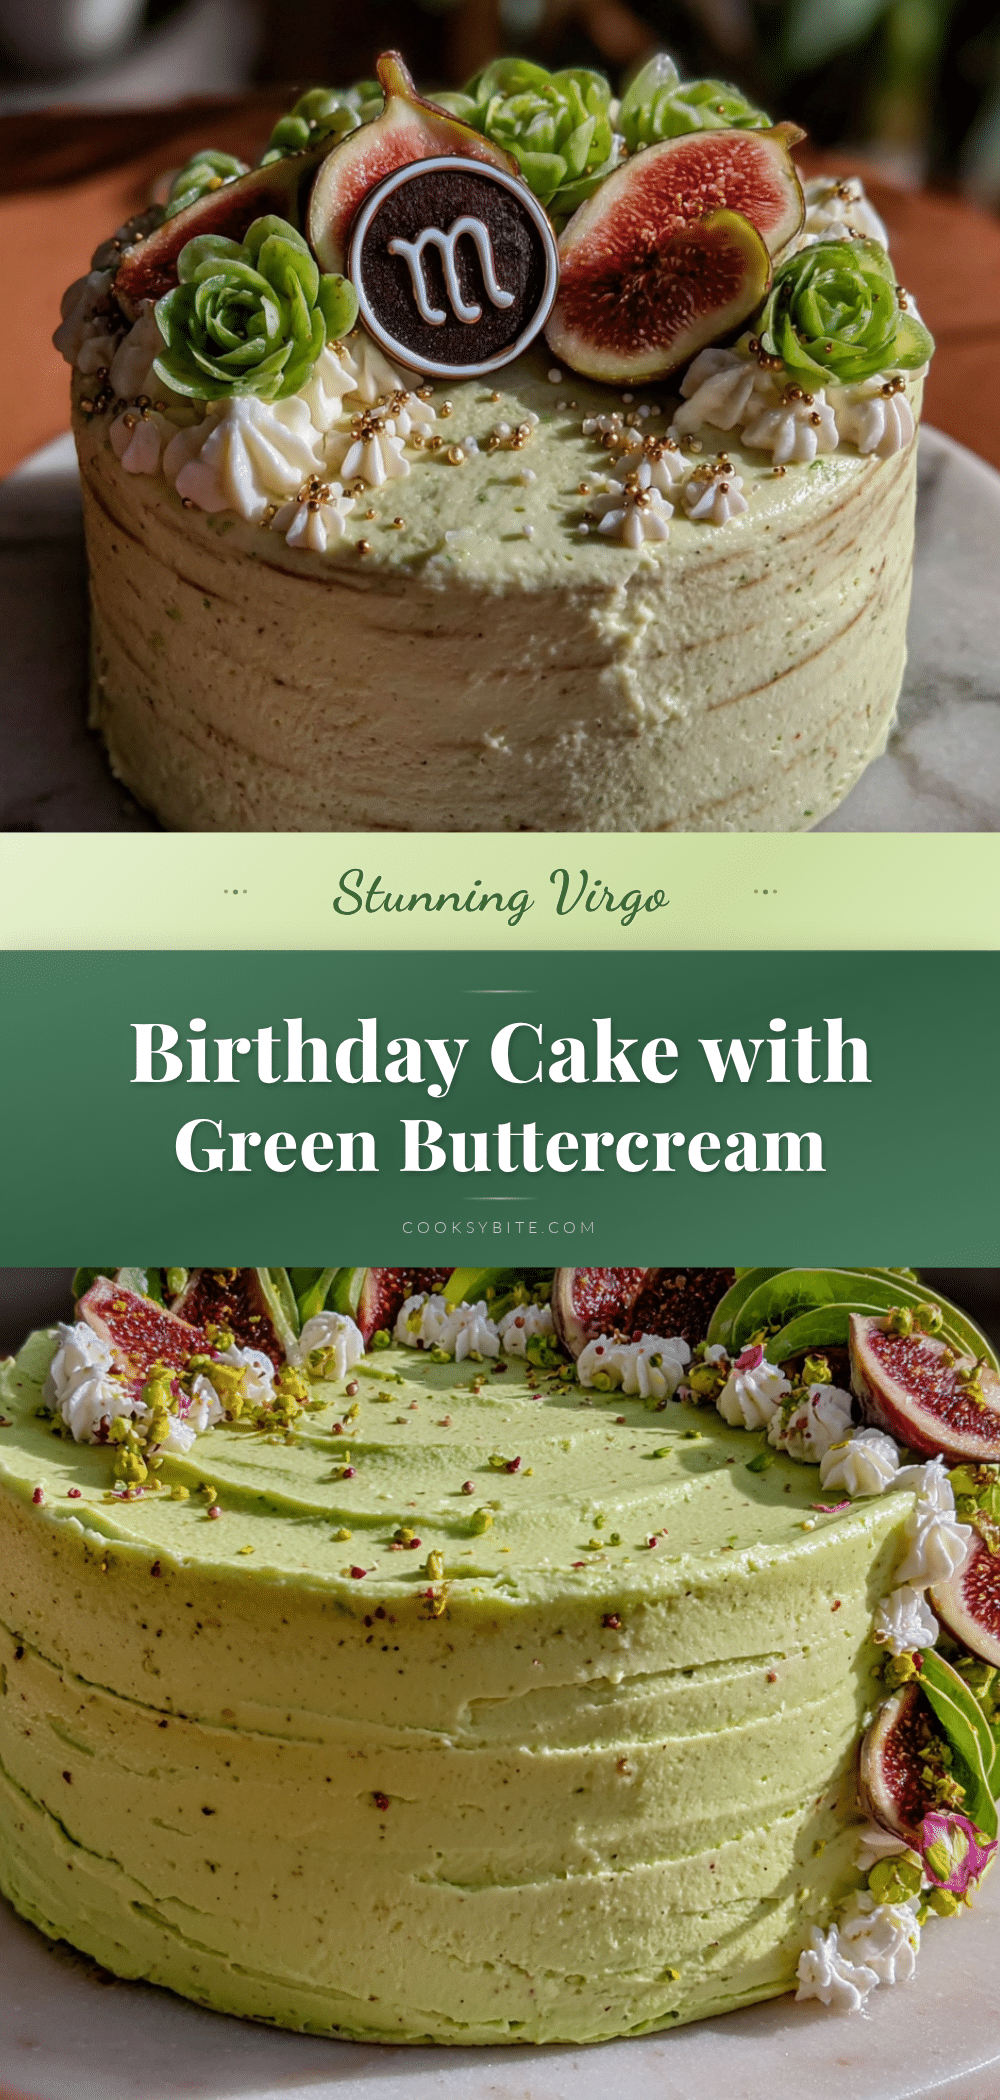
Perfect Virgo Birthday Cake with Easy Green Buttercream
A tender, moist vanilla cake with a naturally vibrant green buttercream, designed to celebrate the Virgo energy of precision, quality, and unexpected beauty. This cake is a showstopper that feels personal and thoughtful.
- Prep Time: 30 minutes
- Cook Time: 30 minutes
- Total Time: 1 hour 30 minutes
- Yield: 12 servings 1x
- Category: Dessert
- Cuisine: American
Ingredients
- 2 ½ cups (312g) all-purpose flour
- 2 ½ teaspoons baking powder
- ½ teaspoon baking soda
- 1 teaspoon salt
- 1 cup (226g) unsalted butter, softened
- 1 ¾ cups (350g) granulated sugar
- 4 large eggs, room temperature
- 1 tablespoon vanilla extract
- 1 cup (240ml) buttermilk, room temperature
- 1 ½ cups (339g) unsalted butter, softened (for buttercream)
- 5 cups (600g) powdered sugar, sifted
- ¼ cup (60ml) heavy cream
- 2 teaspoons vanilla extract (for buttercream)
- Pinch of salt (for buttercream)
- Green food coloring (gel-based)
Instructions
- Preheat oven to 350°F (175°C). Grease two 9-inch round cake pans, line bottoms with parchment paper, grease parchment, and dust with flour.
- In a medium bowl, whisk together flour, baking powder, baking soda, and salt. Set aside.
- In a stand mixer with paddle attachment, beat softened butter and granulated sugar on medium-high until light, fluffy, and pale (3-5 minutes). Scrape bowl as needed.
- Add eggs one at a time, beating well after each. Beat in vanilla extract until smooth and glossy.
- With mixer on low, add dry ingredients in three additions, alternating with buttermilk in two additions, starting and ending with dry. Mix just until combined; do not overmix.
- Divide batter evenly between prepared pans. Smooth tops. Bake 25-30 minutes until a toothpick inserted in center comes out clean or with a few moist crumbs.
- Cool cakes in pans on a wire rack for 10 minutes. Turn out onto rack, remove parchment, and cool completely.
- For buttercream: In stand mixer with paddle attachment, beat softened butter on medium-high until smooth and creamy (about 2 minutes).
- With mixer on low, gradually add sifted powdered sugar, one cup at a time. Mixture will look thick and crumbly. Add heavy cream, vanilla extract, and salt. Increase speed to medium-high and beat 3-5 minutes until light, fluffy, and smooth.
- Add a tiny amount of green gel food coloring using a toothpick. Beat on low to combine, then adjust color as needed.
- Place one cooled cake layer on serving plate. Spread a generous layer of green buttercream on top. Place second cake layer on top, flat side up. Apply a thin crumb coat of buttercream all over. Refrigerate 15-20 minutes to set.
- Apply remaining buttercream to chilled cake, using an offset spatula to create smooth sides and decorative top.
Notes
Room temperature ingredients are crucial for best results. Do not overmix the batter. For clean slices, refrigerate the frosted cake for 30 minutes before cutting. Buttercream can be adjusted with more cream if too thick or more powdered sugar if too thin.
Nutrition
- Serving Size: 1 slice (1/12 of cak
- Calories: 480
- Sugar: 45
- Fat: 28
- Saturated Fat: 17
- Carbohydrates: 58
- Protein: 5
Keywords: birthday cake, vanilla cake, green buttercream, Virgo cake, homemade cake, celebration cake, easy cake recipe


