My husband took one bite, stopped mid-chew, and just pointed at the plate with this look on his face—like I had accidentally stumbled onto something I had no business making. And honestly? He wasn’t wrong. I had thrown this baked cheese ball together on a whim, mostly because I needed something warm and dippable for a Sunday game day gathering, and I was tired of the same old cold cheese platters that everyone picks at without enthusiasm. The thing about a baked cheese ball is that it doesn’t announce itself. It just sits there, all golden and bubbling, until someone finally digs in and then suddenly it’s the only thing on the table that’s empty within twenty minutes.
I remember standing in the kitchen, staring at the cream cheese and shredded cheddar, wondering if I was wasting good ingredients on a gamble. But I had this hunch that baking the whole thing—melting the cheeses together with a few savory stir-ins—would turn something ordinary into something people actually fight over. And that’s exactly what happened. The first time I pulled it out of the oven, the top was bronzed and the edges were oozing just slightly. I set it down next to a pile of crackers and watched as people went back for thirds without even pretending to be polite about it.
This is the kind of recipe that makes you look like you planned something brilliant when really you just followed a hunch. It’s warm, gooey, salty, and just a little bit tangy from the cream cheese. The outside gets this beautiful golden crust while the inside stays soft and dippable. And the best part? It comes together with ingredients you probably already have in your fridge. No special trips to the store, no fancy cheese boards, no stress. Just honest, crowd-pleasing comfort food that disappears fast. So if you’re looking for the best game day appetizer that actually delivers, this baked cheese ball is it.
Why You’ll Love This Recipe
Let me tell you why this baked cheese ball has earned a permanent spot in my game day rotation. I’ve tested it through multiple football Sundays, birthday parties, and even one awkward office potluck where it saved me from total embarrassment. It’s not just good—it’s the kind of good that makes people ask for the recipe before they’ve even finished chewing.
- Quick & Easy: From fridge to table in under 35 minutes. Mix, shape, bake, and serve. That’s it. No complicated steps, no waiting for dough to rise, no fussy techniques.
- Simple Ingredients: Cream cheese, shredded cheddar, a handful of seasonings, and some chopped nuts. You probably have most of these in your kitchen right now. No fancy cheese monger trips required.
- Perfect for Game Day: This isn’t a dainty appetizer that gets ignored. It’s warm, cheesy, and absolutely addictive. Perfect for halftime snacking or grazing through the whole game.
- Crowd-Pleaser: I’ve served this to kids, picky eaters, and serious foodies. Every single person went back for more. It’s one of those rare dishes that appeals to everyone regardless of age or taste preference.
- Unbelievably Delicious: The combination of melted cream cheese, sharp cheddar, and a crunchy pecan coating is next-level comfort food. The texture contrast between the soft interior and the crispy exterior is what makes it unforgettable.
What sets this recipe apart from every other cheese ball you’ve tried is the baking step. Most cheese balls are served cold, which means the flavors are muted and the texture is dense. Baking transforms it completely—the cheese melts into a luscious, dippable consistency, the nuts toast and become fragrant, and the whole thing develops this golden crust that’s honestly irresistible. It’s not just another version of a cheese ball. It’s the best version, and once you try it baked, you’ll never go back to cold.
This recipe is the kind that makes you close your eyes after the first bite. It’s comfort food reimagined—warmer, gooier, and more satisfying than you expected. Perfect for impressing guests without breaking a sweat, or turning a simple snack table into something people actually remember.
Ingredients Needed
This recipe uses simple, everyday ingredients to create something that tastes like you spent hours in the kitchen. The magic is in the combination of textures and flavors, not in fancy or hard-to-find items.
For the Cheese Ball Base
- 16 oz cream cheese, softened to room temperature (I recommend Philadelphia for the creamiest texture; the store brands can sometimes be a bit grainy)
- 2 cups sharp cheddar cheese, shredded (buy a block and shred it yourself—pre-shredded cheese has anti-caking agents that prevent smooth melting)
- 1/2 cup sour cream (adds richness and helps create that soft, dippable interior)
- 1 teaspoon garlic powder
- 1 teaspoon onion powder
- 1/2 teaspoon smoked paprika (trust me on this one—it adds a subtle smokiness that makes the cheese ball taste more complex)
- 1/4 teaspoon cayenne pepper (optional, but I love the tiny kick it gives; leave it out if you’re sensitive to heat)
- 1/2 teaspoon salt
- 1/4 teaspoon black pepper
- 2 tablespoons fresh chives, finely chopped (or 1 tablespoon dried chives if that’s what you have)
For the Coating
- 1 cup pecans, finely chopped (you can also use walnuts or almonds; pecans give the best buttery flavor in my opinion)
- 1/4 cup fresh parsley, finely chopped (optional, but it makes the presentation look gorgeous)
- 1/2 teaspoon smoked paprika (for the coating, to add color and flavor)
For Serving
- Crackers of your choice (I like buttery Ritz crackers or sturdy wheat crackers; baguette slices also work beautifully)
- Fresh vegetable sticks like celery, carrot sticks, or bell pepper strips (for a crunchier, lighter option)
Ingredient Selection Tips: When buying cream cheese, look for blocks rather than tubs—the block form has a higher fat content and melts more smoothly. For the cheddar, I prefer sharp or extra sharp because the flavor stands up well to baking. Mild cheddar will work, but you’ll lose some of that tangy punch. If you’re dairy-sensitive, you can use dairy-free cream cheese and shredded vegan cheddar, though the texture will be slightly different—still good, just not as gooey.
Substitution Guidance: No pecans? Use crushed pretzels for a salty crunch or even crushed pork rinds for a keto-friendly option. Want it spicier? Add a chopped jalapeño to the cheese mixture or use pepper jack cheese instead of cheddar. For a milder version, stick with Monterey Jack and skip the cayenne entirely.
Equipment Needed
You don’t need a lot of fancy tools for this recipe, which is one of the reasons I love it. Here’s what you’ll need:
- Large mixing bowl – for combining the cheese mixture
- Hand mixer or stand mixer – this makes softening and combining the cream cheese much easier, but you can absolutely do it by hand with a sturdy spatula if you’re patient
- Rubber spatula – for scraping every last bit of cheesy goodness from the bowl
- Plastic wrap – for shaping the cheese ball and chilling it
- Baking sheet – lined with parchment paper or a silicone baking mat
- Small skillet – for toasting the pecans (optional, but recommended for maximum flavor)
- Sharp knife and cutting board – for chopping nuts and herbs
- Serving platter – something wide enough to hold the cheese ball surrounded by crackers and veggies
If you don’t have a hand mixer, don’t worry. Let the cream cheese sit out for an extra 30 minutes to soften fully, then mix everything with a wooden spoon. It’ll take a bit more elbow grease, but the result is the same. I’ve made this recipe in a tiny apartment kitchen with nothing but a bowl and a fork, and it still turned out amazing.
For the baking sheet, any rimmed sheet pan works fine. I prefer using parchment paper because cleanup is a breeze—the cheese ball can get a little messy as it bakes, and parchment keeps things from sticking. If you don’t have parchment, a light spray of nonstick cooking spray on the baking sheet does the job.
Preparation Method
Alright, let’s get to the fun part. Follow these steps, and you’ll have a baked cheese ball that’ll make you the hero of game day.
- Preheat your oven to 375°F (190°C). Line a baking sheet with parchment paper or a silicone mat. Getting the oven hot before you start ensures even baking.
- Soften the cream cheese. Take your 16 oz of cream cheese out of the fridge about 30-45 minutes before you start. It should be soft enough that you can easily press your finger into it. If you’re short on time, cut the cream cheese into smaller cubes and let them sit for 15 minutes—it speeds things up considerably.
- Toast the pecans. In a small skillet over medium heat, add the chopped pecans. Stir them constantly for 3-4 minutes until they smell fragrant and have darkened slightly. Be careful—nuts burn fast. Once they’re toasted, pour them into a shallow bowl and let them cool completely. This step is optional but absolutely worth it for the depth of flavor it adds.
- Mix the cheese base. In a large mixing bowl, combine the softened cream cheese, shredded cheddar, sour cream, garlic powder, onion powder, smoked paprika, cayenne (if using), salt, pepper, and fresh chives. Using a hand mixer on medium speed, beat everything together until smooth and well combined. Scrape down the sides of the bowl with a rubber spatula halfway through. The mixture should be thick, creamy, and uniform in color—no streaks of white cream cheese remaining.
- Shape the cheese ball. Scoop the cheese mixture onto a large piece of plastic wrap. Use the plastic wrap to help you shape it into a ball—lift the edges of the wrap and gently press the mixture into a round shape. You want it to be about 5-6 inches in diameter. Twist the top of the plastic wrap to seal it tightly. Don’t worry if it’s not perfectly round; rustic shapes look more homemade and inviting anyway.
- Chill the cheese ball. Place the wrapped cheese ball in the refrigerator for at least 30 minutes, or up to 24 hours. Chilling firms it up so it holds its shape during baking. If you’re in a rush, pop it in the freezer for 15 minutes—just don’t forget about it!
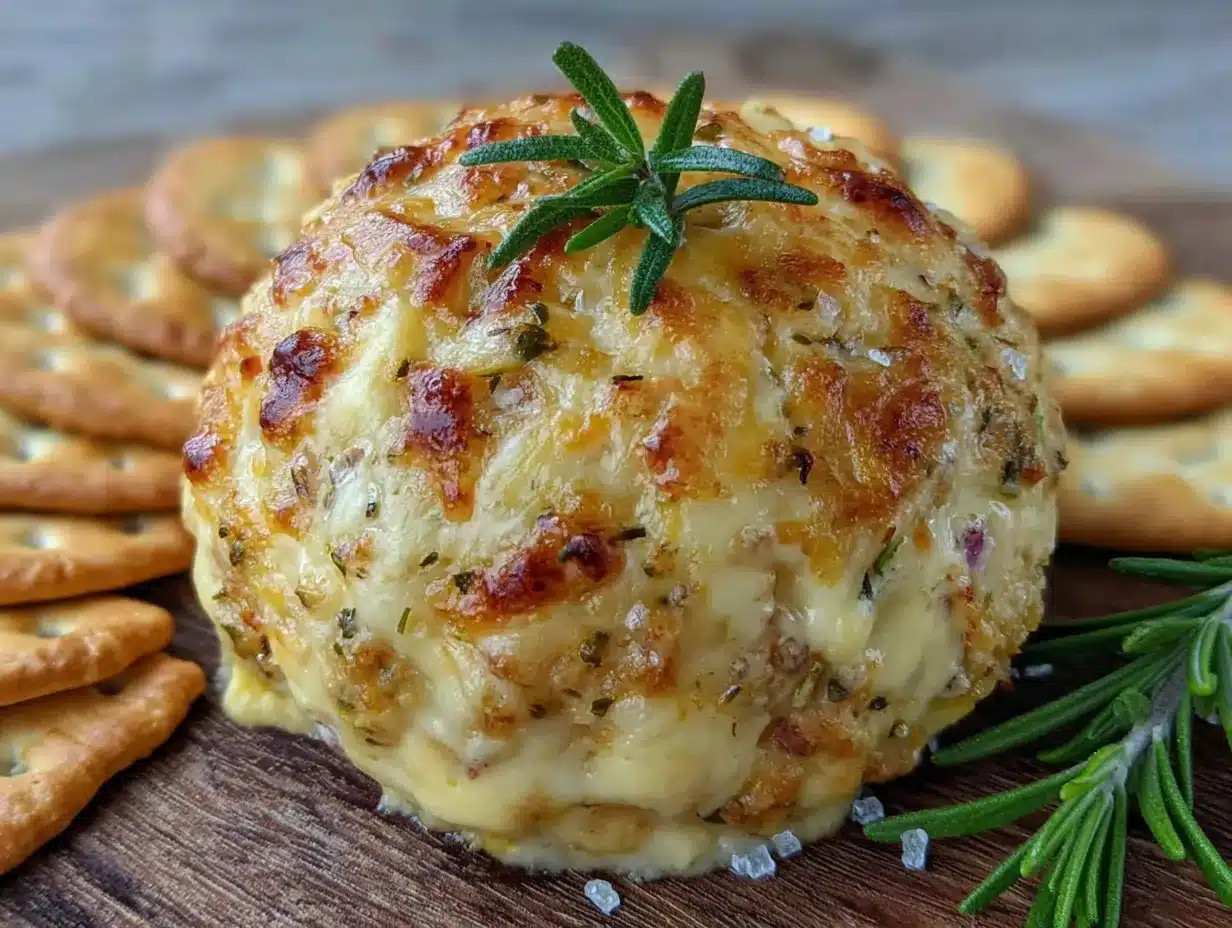
- Coat the cheese ball. Once the cheese ball is firm, unwrap it. In a shallow bowl, combine the cooled toasted pecans, chopped parsley (if using), and the remaining 1/2 teaspoon smoked paprika. Roll the cheese ball in the nut mixture, pressing gently so the coating adheres to all sides. Use your hands to pat on any extra coating where it looks sparse.
- Bake the cheese ball. Place the coated cheese ball on your prepared baking sheet. Bake at 375°F (190°C) for 18-22 minutes. You’ll know it’s done when the outside is golden brown and the cheese is bubbling slightly around the edges. The center should be hot and soft when you press it gently with a spoon. If you want a deeper golden color, broil for the last 1-2 minutes—but watch it closely so it doesn’t burn.
- Let it rest. Remove the cheese ball from the oven and let it sit on the baking sheet for 5 minutes. This resting period allows the cheese to set just enough that it doesn’t turn into a puddle when you transfer it to your serving platter. It will still be plenty warm and gooey.
- Serve immediately. Carefully transfer the baked cheese ball to a serving platter. Surround it with crackers, baguette slices, and fresh vegetable sticks. Serve while it’s still warm and melty. I promise you, it won’t last long.
Sensory Cues: At step 4, the mixture should look like a thick, creamy spread—no lumps. When you bake it, your kitchen will fill with the smell of toasted nuts and melted cheese. The top should be golden with darker brown spots where the cheese has caramelized slightly. If you see the edges bubbling, that’s perfect—it means the cheese is melted and gooey inside.
Personal Tip: I always make two of these for big gatherings because one disappears in about 15 minutes. Also, if you’re making this ahead of time, you can prepare and chill the cheese ball (uncoated) up to 2 days in advance. Coat it right before baking for the freshest nut flavor.
Cooking Tips & Techniques
Over the years, I’ve made this baked cheese ball more times than I can count, and I’ve learned a few things the hard way. Let me save you some trouble.
The Softening Mistake: I once tried to rush the cream cheese softening by microwaving it. Big mistake. The edges got hot and melted while the center stayed cold, and the mixture turned out lumpy and uneven. Always let cream cheese soften at room temperature. If you’re truly in a bind, cut it into small cubes and let it sit for 20 minutes—that’s the fastest safe method I’ve found.
Shred Your Own Cheese: I know it’s tempting to buy pre-shredded cheddar for convenience, but please don’t. Pre-shredded cheese is coated with cellulose and other anti-caking agents that prevent it from melting smoothly. Your cheese ball will end up grainy instead of silky. Shredding a block of cheddar takes two minutes and makes a noticeable difference in texture.
Don’t Skip the Chill: I made the mistake of skipping the chilling step once because I was impatient. The cheese ball spread out into a flat disc in the oven instead of staying round and tall. Chilling firms up the fat in the cream cheese, which helps the ball hold its shape during baking. Thirty minutes is non-negotiable.
Toasting Nuts Matters: Raw nuts on top of a baked cheese ball taste flat. Toasting them first brings out their natural oils and makes them fragrant and crunchy. It’s a small step that adds a huge layer of flavor. Just watch them closely—I’ve burned more batches than I care to admit because I walked away for “just a second.”
Timing Strategy: If you’re hosting a party, make the cheese ball mixture the day before and chill it overnight. About 45 minutes before guests arrive, coat it with the nut mixture and pop it in the oven. By the time people are settling in with drinks, the cheese ball is hot, bubbly, and ready to go. This timing also means your kitchen won’t be hot and chaotic right when guests show up.
Consistency Check: If your cheese mixture feels too soft to shape into a ball after mixing, don’t panic. Just chill it for an extra 15 minutes before shaping. If it’s too firm to mix easily, let it sit at room temperature for 10 minutes before continuing. The ideal consistency is like thick cookie dough—pliable but not sticky.
Variations & Adaptations
One of the best things about this baked cheese ball is how versatile it is. Here are some variations I’ve tried and loved:
Spicy Bacon Cheddar Version
Cook 6 strips of bacon until crispy, crumble them, and mix half into the cheese base. Use the remaining bacon bits in the coating along with the pecans. Add an extra 1/4 teaspoon cayenne for heat. This version is absolutely ridiculous in the best way—smoky, salty, and completely addictive. It pairs perfectly with pink champagne jello shots for a game day spread that balances savory and sweet.
Herb & Garlic Lovers Version
Double the fresh chives and add 2 tablespoons each of fresh dill and fresh parsley to the cheese base. Use a coating of crushed pistachios instead of pecans for a beautiful green color. This version feels lighter and fresher, perfect for spring gatherings or brunch tables.
Keto/Low-Carb Adaptation
Skip the crackers and serve with cucumber rounds, bell pepper strips, celery sticks, and pork rinds. Use full-fat cream cheese and shredded cheddar (both are naturally low in carbs). The pecan coating is already keto-friendly. This version is so satisfying that even non-keto eaters will love it.
Sweet & Savory Twist
Add 1/4 cup of dried cranberries or chopped dried apricots to the cheese mixture. Use a coating of toasted walnuts and a drizzle of honey right before serving. The sweetness cuts through the richness of the cheese beautifully. I made this for a holiday party once, and it was gone before the main course even came out.
Make It a Meal
Leftover baked cheese ball (if you somehow have any) is incredible spread on a burger or stirred into warm pasta. I’ve also used it as a filling for stuffed mushrooms—just spoon a bit into mushroom caps and bake for 10 minutes. It’s like a whole new appetizer from the same base.
Serving & Storage Suggestions
Serving Temperature: This baked cheese ball is best served warm, straight from the oven. The cheese is at its gooiest and most flavorful when it’s hot. If it cools down, the texture becomes firmer and less dippable. I recommend serving it within 10-15 minutes of pulling it out of the oven. If you’re hosting, you can bake it just before guests arrive and let it rest on the counter while people grab drinks.
Presentation Ideas: Place the cheese ball in the center of a large wooden board or platter. Arrange crackers, baguette slices, and vegetable sticks in concentric circles around it. Sprinkle a few extra toasted pecans and fresh herbs on top for color. A small bowl of honey or hot honey on the side adds a lovely sweet-spicy contrast that guests can drizzle on themselves.
Complementary Dishes: This cheese ball pairs beautifully with other party favorites. Try serving it alongside red wine chocolate cake with berries for a sweet finish, or balance the richness with fluffy strawberry mousse cups for a lighter dessert option. For a full spread, add a charcuterie board with cured meats, olives, and pickles.
Storage Instructions: Baked cheese ball can be stored in an airtight container in the refrigerator for up to 4 days. The texture will firm up as it cools, so it won’t be as dippable as when it was fresh. To reheat, place it in a 350°F (175°C) oven for 8-10 minutes until warmed through. Avoid microwaving—it makes the cheese rubbery and unevenly hot.
Freezer Instructions: You can freeze the unbaked, uncoated cheese ball for up to 3 months. Wrap it tightly in plastic wrap, then in foil. When you’re ready to bake, thaw it in the refrigerator overnight, coat it with the nut mixture, and bake as directed. The texture holds up surprisingly well.
Flavor Development: Like many cheese dishes, this baked cheese ball actually tastes better after the flavors have had time to meld. If you make the mixture a day ahead and chill it, the garlic, onion, and paprika flavors become more pronounced and integrated. It’s a great make-ahead option for busy hosts.
Nutritional Information & Benefits
While this baked cheese ball is definitely a treat, it does offer some nutritional perks worth noting. Here’s a rough breakdown per serving (based on 12 servings):
- Calories: Approximately 280-320 per serving
- Protein: 8-10g
- Fat: 24-28g
- Carbohydrates: 4-6g
- Fiber: 1-2g
- Calcium: 15-20% of daily value
Health Benefits: Cream cheese and cheddar provide calcium for bone health and protein for satiety. Pecans are rich in healthy monounsaturated fats, antioxidants, and magnesium, which supports heart health and reduces inflammation. The garlic and onion powders add flavor without extra sodium, and they contain compounds that may support immune function.
Dietary Considerations: This recipe is naturally low-carb and keto-friendly (approximately 4-6g net carbs per serving). It’s also vegetarian. For a gluten-free option, serve with gluten-free crackers or vegetable sticks. The recipe is not dairy-free, but you can substitute dairy-free cream cheese and vegan cheddar shreds if needed—just note that the texture will be less gooey.
Potential Allergens: Contains dairy (cream cheese, cheddar, sour cream) and tree nuts (pecans). If you’re serving a crowd with allergies, consider offering a separate nut-free version using crushed pretzels or sesame seeds for the coating.
Personal Wellness Perspective: I believe in balance. This baked cheese ball is indulgent, and that’s okay. It’s the kind of food you share with people you love on a special occasion. Pair it with fresh vegetables and a big salad on the side, and you’ve got a meal that feels both celebratory and nourishing. Enjoy the cheese ball, savor every bite, and don’t apologize for it.
Conclusion
This baked cheese ball is honestly one of those recipes that feels like a secret weapon. It’s simple enough to throw together on a lazy Sunday, but impressive enough to be the star of your game day spread. The warm, gooey center, the crunchy nut coating, the savory depth from the smoked paprika—every bite is exactly what you want from comfort food.
What I love most about this recipe is how forgiving it is. You can tweak the seasonings, swap the nuts, add bacon or leave it out, and it still turns out amazing. It’s the kind of dish that makes you look like you know what you’re doing in the kitchen, even when you’re just following your instincts. And honestly, that’s the best kind of recipe to have in your back pocket.
I’d love to hear how yours turns out. Did you add a twist? Serve it with something unexpected? Burn the nuts like I did the first time? Drop a comment below and let me know—your feedback helps other readers and honestly, I just love hearing about your kitchen wins. If you’re looking for more party-perfect recipes, check out our full recipe collection for more inspiration. Now go preheat that oven and make something delicious. You’ve got this!
Frequently Asked Questions
Can I make this baked cheese ball ahead of time?
Absolutely. You can prepare the cheese mixture, shape it into a ball, and refrigerate it (uncoated) for up to 2 days. When you’re ready to serve, coat it with the nut mixture and bake as directed. You can also freeze the unbaked, uncoated cheese ball for up to 3 months—just thaw overnight in the fridge before coating and baking.
Why did my cheese ball spread out flat in the oven?
This usually happens if the cheese mixture wasn’t chilled long enough before baking. The cream cheese needs to be firm so it holds its shape as it heats up. Make sure you chill the shaped cheese ball for at least 30 minutes, or up to 24 hours. If your mixture feels soft even after chilling, add an extra 15 minutes in the freezer before baking.
Can I use different types of cheese?
Yes, but stick with cheeses that melt well. Sharp cheddar is my go-to for flavor, but you can use Monterey Jack, Gouda, or a mix of your favorites. Avoid using only hard cheeses like Parmesan (they don’t melt smoothly) or soft cheeses like feta (they don’t provide the right texture). A blend of cream cheese with one melting cheese works best.
What should I serve with this baked cheese ball?
The options are endless! Classic buttery crackers, baguette slices, and sturdy wheat crackers are all great. For a low-carb option, try cucumber rounds, bell pepper strips, celery sticks, or pork rinds. I also love serving it with apple slices for a sweet-savory combo that’s surprisingly delicious.
Can I reheat leftovers?
Yes, but the texture won’t be quite as gooey as the first time. Place leftover baked cheese ball in a 350°F (175°C) oven for 8-10 minutes until warmed through. Avoid the microwave—it makes the cheese rubbery and can cause the nuts to become soggy. Leftover cheese ball is also delicious cold, spread on crackers like a savory cheesecake.
Pin This Recipe!
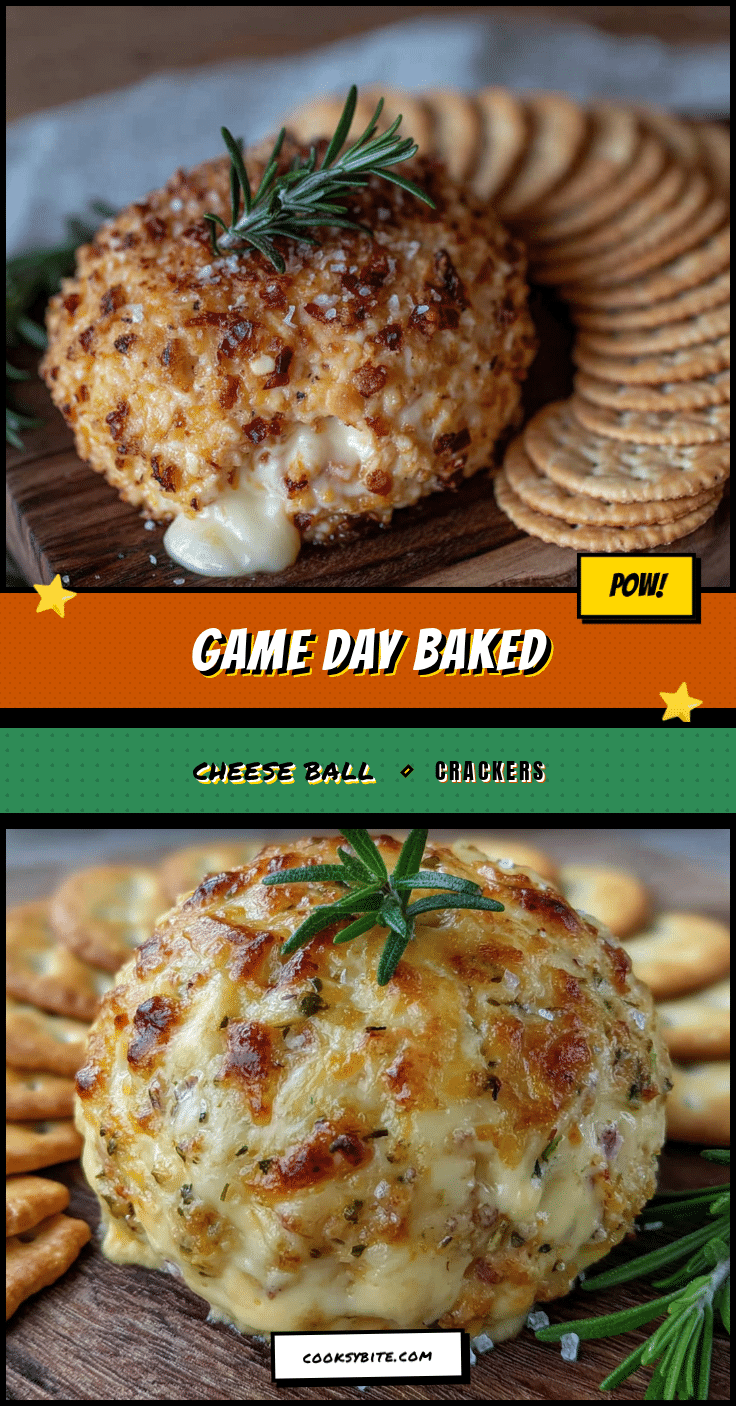
Best Baked Cheese Ball Recipe for Game Day

A warm, gooey baked cheese ball with a golden pecan crust, perfect for game day gatherings. This crowd-pleasing appetizer combines cream cheese and sharp cheddar with savory seasonings, baked until bubbly and irresistible.
- Prep Time: 15 minutes
- Cook Time: 20 minutes
- Total Time: 35 minutes
- Yield: 12 servings 1x
- Category: Appetizer
- Cuisine: American
Ingredients
- 16 oz cream cheese, softened to room temperature
- 2 cups sharp cheddar cheese, shredded
- 1/2 cup sour cream
- 1 teaspoon garlic powder
- 1 teaspoon onion powder
- 1/2 teaspoon smoked paprika
- 1/4 teaspoon cayenne pepper (optional)
- 1/2 teaspoon salt
- 1/4 teaspoon black pepper
- 2 tablespoons fresh chives, finely chopped
- 1 cup pecans, finely chopped
- 1/4 cup fresh parsley, finely chopped (optional)
- 1/2 teaspoon smoked paprika (for coating)
- Crackers of your choice, for serving
- Fresh vegetable sticks (celery, carrot sticks, bell pepper strips), for serving
Instructions
- Preheat your oven to 375°F (190°C). Line a baking sheet with parchment paper or a silicone mat.
- Soften the cream cheese: Take the cream cheese out of the fridge about 30-45 minutes before starting. It should be soft enough to easily press your finger into it.
- Toast the pecans: In a small skillet over medium heat, add the chopped pecans. Stir constantly for 3-4 minutes until fragrant and slightly darkened. Pour into a shallow bowl and let cool completely.
- Mix the cheese base: In a large mixing bowl, combine the softened cream cheese, shredded cheddar, sour cream, garlic powder, onion powder, 1/2 teaspoon smoked paprika, cayenne (if using), salt, pepper, and fresh chives. Beat with a hand mixer on medium speed until smooth and well combined.
- Shape the cheese ball: Scoop the cheese mixture onto a large piece of plastic wrap. Use the wrap to shape it into a ball about 5-6 inches in diameter. Twist the top to seal tightly.
- Chill the cheese ball: Place the wrapped cheese ball in the refrigerator for at least 30 minutes, or up to 24 hours.
- Coat the cheese ball: Once firm, unwrap the cheese ball. In a shallow bowl, combine the cooled toasted pecans, chopped parsley (if using), and remaining 1/2 teaspoon smoked paprika. Roll the cheese ball in the nut mixture, pressing gently to adhere.
- Bake the cheese ball: Place the coated cheese ball on the prepared baking sheet. Bake at 375°F (190°C) for 18-22 minutes, until golden brown and bubbling slightly around the edges.
- Let it rest: Remove from the oven and let sit on the baking sheet for 5 minutes.
- Serve immediately: Transfer to a serving platter and surround with crackers, baguette slices, and fresh vegetable sticks. Serve warm.
Notes
For best results, shred your own cheddar cheese from a block—pre-shredded cheese contains anti-caking agents that prevent smooth melting. Chilling the cheese ball for at least 30 minutes is essential to help it hold its shape during baking. Toasting the pecans before coating adds depth of flavor. The cheese ball can be prepared (uncoated) up to 2 days in advance and refrigerated. For a deeper golden color, broil for the last 1-2 minutes, watching closely to prevent burning.
Nutrition
- Serving Size: 1 serving (based on
- Calories: 300
- Sugar: 2
- Sodium: 320
- Fat: 26
- Saturated Fat: 12
- Carbohydrates: 5
- Fiber: 1
- Protein: 9
Keywords: baked cheese ball, game day appetizer, warm cheese dip, cream cheese appetizer, party snack, easy appetizer


