I want a slice of that creamy, spiced pumpkin cheesecake bar right now, and I have everything except the patience to turn on the oven. That’s the thought that hit me last October, standing in my kitchen with a can of pumpkin puree staring at me from the pantry. I had been craving that perfect balance of silky pumpkin filling and buttery crunch, but the idea of waiting for a water bath and worrying about cracks? Not today.
So I grabbed my food processor and started experimenting. The graham cracker crust came together in five minutes—just crumbs, melted butter, and a little sugar pressed into a pan. For the filling, I blended cream cheese with pumpkin, warm spices, and a secret ingredient that makes it set without baking. No gelatin. No eggs. Just a few hours in the fridge doing all the work for me. Honestly, I was skeptical the first time. Would it really slice cleanly? Would it taste as indulgent as the baked version?
It did. Better, actually. The texture is almost mousse-like, impossibly creamy, and the no-bake method keeps the pumpkin flavor bright and un-muddled. These bars became my go-to for fall gatherings, Thanksgiving potlucks, and those evenings when you need dessert but don’t need the stress. This easy no-bake pumpkin cheesecake bars recipe is about to become yours too.
Why You’ll Love This Recipe
Let me tell you why this recipe sticks—and I do mean sticks, because once you make these bars, you’ll make them again and again.
- No Oven Required: It’s a no-bake wonder. Perfect for when it’s too hot to bake, or when you’ve already got a turkey in the oven and need a dessert that doesn’t compete for space.
- Simple Ingredients: You probably have most of these in your kitchen right now. No fancy stabilizers or hard-to-find extracts. Just real cream cheese, pumpkin, and a few pantry staples.
- Perfect for Fall Gatherings: Whether it’s a Friendsgiving, a Halloween party, or a cozy Sunday dessert, these bars fit right in. They’re elegant enough for company but easy enough for a weeknight treat.
- Crowd-Pleaser: I’ve brought these to three different gatherings this season, and the pan comes back empty every single time. Kids love the creamy texture, and adults appreciate that familiar pumpkin spice flavor without being overly sweet.
- Unbelievably Delicious: The texture is what gets people. It’s dense but silky, rich but light. One bite and you’ll understand why I stopped making baked cheesecake for fall.
What makes this recipe different from the rest? It’s the method. By using a specific ratio of cream cheese to pumpkin and a gentle folding technique, you get a filling that sets firmly without being rubbery. No water bath, no cracked tops, no stress. Just perfect slices every time. This isn’t just another version—it’s the version that makes you wonder why you ever bothered with the oven.
What Ingredients You Will Need
This recipe uses simple, wholesome ingredients to deliver that bold pumpkin flavor and velvety texture without any fuss. Most are pantry staples, especially if you do any fall baking.
For the Graham Cracker Crust
- Graham cracker crumbs – 2 cups (about 14-16 full sheets). You can buy pre-crushed or pulse whole crackers in a food processor.
- Granulated sugar – 3 tablespoons. Adds just enough sweetness to balance the buttery crumbs.
- Unsalted butter – ½ cup (1 stick), melted. I prefer unsalted so I can control the salt level. If using salted butter, skip the added salt.
- Pinch of salt – Optional but recommended. It enhances the buttery flavor.
For the Pumpkin Cheesecake Filling
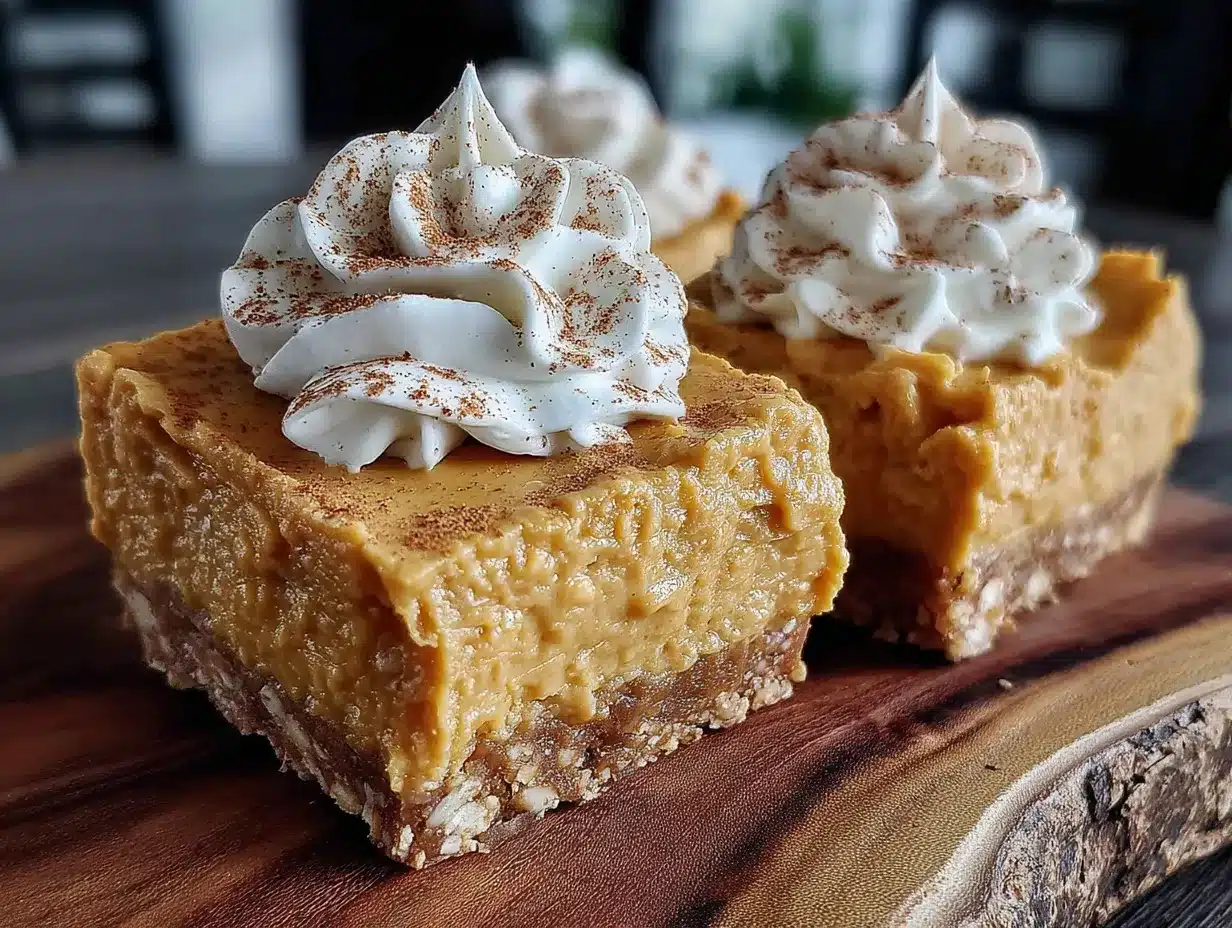
- Cream cheese – 16 ounces (two 8-ounce blocks), softened to room temperature. This is non-negotiable for a smooth filling. Cold cream cheese will give you lumps.
- Pumpkin puree – 1 cup (not pumpkin pie filling). I recommend Libby’s for consistent texture and flavor.
- Powdered sugar – 1 cup. It dissolves easily and keeps the filling silky without the grittiness of granulated sugar.
- Heavy cream – ½ cup. This is the secret to the mousse-like texture. It lightens the filling without making it unstable.
- Vanilla extract – 1 teaspoon. Pure, not imitation, for the best flavor.
- Pumpkin pie spice – 1½ teaspoons. You can use store-bought or make your own with cinnamon, nutmeg, ginger, and cloves.
- Ground cinnamon – ½ teaspoon. For an extra layer of warmth.
For the Topping (Optional but Recommended)
- Whipped cream – 1 cup, homemade or store-bought. I love a dollop on each bar.
- Caramel sauce – For drizzling. A little goes a long way.
- Toasted pecans – ¼ cup, chopped. Adds crunch and a nutty contrast.
For substitutions: Use a gluten-free graham cracker or crushed ginger snaps for the crust if needed. Dairy-free cream cheese and coconut cream work, but the texture will be slightly less firm. I’ve tested it with Kite Hill cream cheese, and it sets well, just not as sliceable.
Equipment Needed
You don’t need a lot of fancy tools for this recipe, which is part of its charm.
- 9×9-inch square baking pan – This is the ideal size for thick, satisfying bars. An 8×8-inch pan works too, but your bars will be slightly taller.
- Parchment paper – Essential for easy removal. Leave an overhang on two sides to lift the whole block out.
- Food processor – Great for crushing graham crackers quickly, but a zip-top bag and rolling pin work too.
- Electric hand mixer or stand mixer – For beating the cream cheese until smooth. A whisk and some elbow grease will work, but it takes longer.
- Medium mixing bowls – One for the crust, one for the filling.
- Spatula – For folding the whipped cream into the cream cheese mixture gently.
- Measuring cups and spoons – Accuracy matters, especially for the spices.
I’ve made the crust with a rolling pin and a bag more times than I can count. It’s a great arm workout, honestly. But if you have a food processor, use it—it’s faster and gives you uniform crumbs.
Preparation Method
Step 1: Prepare the Pan
Line your 9×9-inch pan with parchment paper, leaving a 2-inch overhang on two opposite sides. This will be your handle for lifting the bars out later. Lightly grease the paper with a little butter or non-stick spray.
Step 2: Make the Graham Cracker Crust
In a medium bowl, combine 2 cups of graham cracker crumbs, 3 tablespoons of granulated sugar, and a pinch of salt. Pour in ½ cup of melted butter and stir with a fork until the mixture looks like wet sand and holds together when pressed. Transfer to the prepared pan and press firmly into an even layer. Use the bottom of a measuring cup to really compact it—this prevents a crumbly crust later. Place the pan in the refrigerator while you make the filling.
Step 3: Whip the Cream
In a clean, chilled bowl, pour ½ cup of heavy cream. Using an electric mixer with the whisk attachment, beat on medium-high speed until soft peaks form. This takes about 2-3 minutes. You want the cream to be billowy and hold its shape but not be stiff. Set it aside in the refrigerator.
Step 4: Beat the Cream Cheese
In a large mixing bowl, beat 16 ounces of softened cream cheese with an electric mixer on medium speed until smooth and fluffy, about 2 minutes. Scrape down the sides and bottom of the bowl with a spatula. Add 1 cup of powdered sugar, 1 teaspoon of vanilla extract, 1½ teaspoons of pumpkin pie spice, and ½ teaspoon of ground cinnamon. Beat on low speed until combined, then increase to medium and beat for another minute until the mixture is silky and free of lumps.
Step 5: Add the Pumpkin
Add 1 cup of pumpkin puree to the cream cheese mixture. Beat on low speed until just combined. Do not overmix, or the filling can become too thin. You want a uniform, pale orange color with no streaks of white cream cheese.
Step 6: Fold in the Whipped Cream
Remove the whipped cream from the refrigerator. Using a rubber spatula, gently fold the whipped cream into the pumpkin-cream cheese mixture. Use a light hand—cut through the center, scrape along the bottom, and turn the bowl. Repeat until no white streaks remain. This folding technique is what gives the bars their airy, mousse-like texture.
Step 7: Assemble and Chill
Pour the filling over the chilled crust. Spread it into an even layer with an offset spatula or the back of a spoon. Tap the pan gently on the counter to release any air bubbles. Cover the pan with plastic wrap and refrigerate for at least 6 hours, but overnight is better. The bars need this time to set firmly.
Step 8: Slice and Serve
Once fully set, lift the bars out of the pan using the parchment overhang. Place on a cutting board and use a sharp knife to slice into 9 or 16 squares. For clean slices, wipe the knife clean between cuts. Serve cold, topped with whipped cream, a drizzle of caramel sauce, and a sprinkle of toasted pecans if desired.
Cooking Tips & Techniques
I’ve made this recipe about a dozen times, and I’ve learned a few things the hard way. Let me save you the trouble.
Room temperature cream cheese is not optional. I know, I know—you’re in a hurry. But cold cream cheese will leave you with lumps that no amount of beating can fix. Take it out of the fridge 30 minutes before you start. If you forgot, cut it into cubes and microwave on low power for 10-second intervals until soft.
Don’t over-whip the cream. Soft peaks are what you want. If you go too far, you’ll end up with butter, and nobody wants butter in their cheesecake. Stop when the cream holds a gentle peak that flops over slightly.
Press the crust firmly. This is the most common mistake I see. A loosely packed crust will crumble when you cut the bars. Use the bottom of a flat measuring cup or a glass to really compact it. I press for a full 30 seconds per section.
Patience with chilling. Six hours is the absolute minimum. If you try to cut them earlier, the filling will be soft and messy. Overnight is ideal. The flavors meld, and the texture becomes perfectly sliceable.
For clean slices, use a hot knife. Run your knife under hot water, wipe it dry, then slice. Repeat between cuts. This gives you those beautiful, Instagram-worthy edges.
Variations & Adaptations
This recipe is wonderfully adaptable. Here are a few ways I’ve changed it up.
1. Gluten-Free Version
Swap the graham crackers for gluten-free graham crackers or crushed gluten-free ginger snaps. The rest of the recipe is naturally gluten-free. I’ve used Schär’s graham-style crackers with great results.
2. Vegan Adaptation
Use vegan cream cheese (I like Miyoko’s or Violife), coconut cream instead of heavy cream, and a plant-based butter for the crust. The texture will be slightly softer, so chill for a full 12 hours. I tested this for a friend’s dairy-free gathering, and it was a hit.
3. Spice It Up
Add ¼ teaspoon of ground ginger or a pinch of cayenne pepper to the filling for a subtle kick. The cayenne doesn’t make it spicy—it just deepens the warmth of the pumpkin spice. I tried this on a whim and now do it every time.
4. Chocolate Twist
Add ½ cup of melted semi-sweet chocolate to the filling before folding in the whipped cream. Swirl it in gently for a marbled effect. This turns it into a pumpkin-chocolate cheesecake bar that’s dangerously good.
5. Individual Servings
Instead of a 9×9 pan, use a muffin tin lined with paper liners. Press about 1½ tablespoons of crust into each cup, then fill with the cheesecake mixture. These mini bars are perfect for parties or lunchbox treats. Chill for 4 hours instead of 6.
Serving & Storage Suggestions
These bars are best served cold, straight from the refrigerator. The texture is firm but creamy, and the flavors are most pronounced when chilled. For an extra touch, let them sit at room temperature for 5 minutes before serving—it softens the texture slightly without making it unstable.
Presentation ideas: Arrange the bars on a platter with a dollop of whipped cream on each. Drizzle caramel sauce in a zigzag pattern and sprinkle with toasted pecans or a dusting of cinnamon. For a fall-themed party, serve them on a wooden board with apple slices and cinnamon sticks.
Storage: Place leftover bars in an airtight container in the refrigerator. They’ll stay fresh for up to 5 days. I’ve never had them last longer than that because they disappear too fast.
Freezing: These bars freeze beautifully. Place them on a baking sheet in the freezer for 1 hour until firm, then transfer to a freezer-safe container with parchment paper between layers. Freeze for up to 3 months. Thaw in the refrigerator overnight before serving.
Flavor development: Honestly, these bars taste even better on day two. The spices meld with the cream cheese, and the crust softens slightly into the filling. If you can wait, make them a day ahead.
If you’re planning a fall party, these pair wonderfully with a decadent red wine chocolate cake with berries for a dessert spread that covers all the bases. Or, for a lighter option, serve them alongside fluffy strawberry mousse cups for a color contrast that’s stunning on the table.
Nutritional Information & Benefits
Here’s an estimated nutritional breakdown per bar (based on 9 servings):
| Nutrient | Amount |
|---|---|
| Calories | 385 |
| Total Fat | 27g |
| Saturated Fat | 16g |
| Cholesterol | 85mg |
| Sodium | 310mg |
| Total Carbohydrates | 32g |
| Dietary Fiber | 2g |
| Sugars | 22g |
| Protein | 5g |
While this is an indulgent dessert, it does offer some nutritional benefits. Pumpkin is rich in vitamin A, which supports eye health and immune function. It also provides fiber and antioxidants. The cream cheese adds calcium and protein, though it’s also high in saturated fat, so moderation is key.
For a lighter version, you can use reduced-fat cream cheese and skip the whipped cream topping. The texture will be slightly less creamy, but the flavor is still fantastic. This recipe is vegetarian and can be made gluten-free and vegan with the substitutions mentioned above.
If you’re watching your sugar intake, you can reduce the powdered sugar to ¾ cup. The bars will be less sweet but still delicious. I’ve done this for a friend who’s diabetic, and she loved them.
Frequently Asked Questions
Can I use pumpkin pie filling instead of pumpkin puree?
No, don’t do that. Pumpkin pie filling is pre-sweetened and spiced, which will throw off the balance of the recipe. Stick with 100% pure pumpkin puree for the best results.
How do I know when the bars are fully set?
The surface should be firm to the touch and not jiggle when you gently shake the pan. If you press it lightly with a finger, it should feel solid, not soft. This usually takes 6-8 hours in the refrigerator.
Can I make these bars in a different pan size?
Yes. A 9×13-inch pan will give you thinner bars, so reduce the chilling time to 4 hours. An 8×8-inch pan will give you taller bars, so you might need to increase the chilling time to 8 hours. Adjust the crust amount slightly if needed.
Why did my crust crumble when I cut the bars?
This usually happens if the crust wasn’t pressed firmly enough into the pan. Make sure to compact it well with a flat-bottomed glass or measuring cup. Also, ensure the butter is fully incorporated into the crumbs.
Can I add a layer of caramel or chocolate on top?
Absolutely. After the bars are fully set, you can drizzle caramel sauce or melted chocolate over the top. Let it set for 10 minutes before slicing. For a more decadent version, spread a thin layer of ganache on top before chilling.
Conclusion
These creamy no-bake pumpkin cheesecake bars are everything I want in a fall dessert—easy, impressive, and deeply satisfying. They’ve become my go-to for every autumn gathering, and I honestly make them just for myself sometimes. There’s something about that cold, silky filling paired with the buttery, crunchy crust that hits just right.
I hope you give this recipe a try and make it your own. Maybe you’ll add a little extra cinnamon, or swap the pecans for walnuts, or drizzle it with chocolate instead of caramel. That’s the beauty of a simple recipe—it leaves room for your personal touch.
If you make these bars, I’d love to hear about it. Drop a comment below and let me know how they turned out, or share a photo of your creation. And if you’re looking for more easy dessert ideas, check out our full collection of recipes for inspiration. Happy no-baking, friends!
Pin This Recipe!
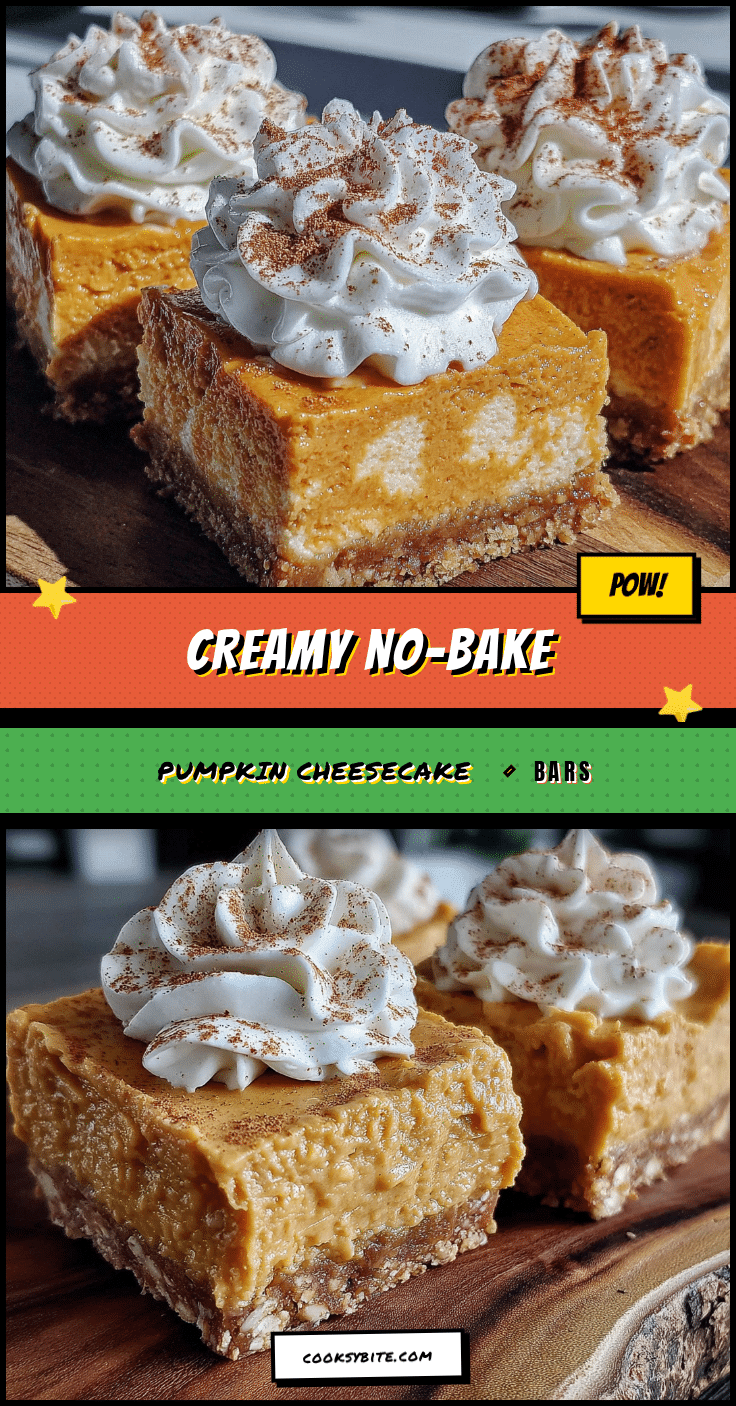
Easy No-Bake Pumpkin Cheesecake Bars Recipe
These creamy no-bake pumpkin cheesecake bars are everything you want in a fall dessert—easy, impressive, and deeply satisfying. With a buttery graham cracker crust and a silky, mousse-like pumpkin filling, they set perfectly in the fridge without any oven time.
- Prep Time: 20 minutes
- Cook Time: 0 minutes
- Total Time: 6 hours 20 minutes (includes chilling time)
- Yield: 9 servings 1x
- Category: Dessert
- Cuisine: American
Ingredients
- 2 cups graham cracker crumbs (about 14–16 full sheets)
- 3 tablespoons granulated sugar
- ½ cup unsalted butter, melted
- Pinch of salt (optional)
- 16 ounces cream cheese, softened to room temperature
- 1 cup pumpkin puree (not pumpkin pie filling)
- 1 cup powdered sugar
- ½ cup heavy cream
- 1 teaspoon vanilla extract
- 1½ teaspoons pumpkin pie spice
- ½ teaspoon ground cinnamon
- 1 cup whipped cream (for topping, optional)
- Caramel sauce (for drizzling, optional)
- ¼ cup toasted pecans, chopped (optional)
Instructions
- Line a 9×9-inch baking pan with parchment paper, leaving a 2-inch overhang on two opposite sides. Lightly grease the paper.
- In a medium bowl, combine graham cracker crumbs, granulated sugar, and a pinch of salt. Pour in melted butter and stir until the mixture resembles wet sand. Press firmly into an even layer in the prepared pan using the bottom of a measuring cup. Refrigerate while making the filling.
- In a clean, chilled bowl, beat heavy cream with an electric mixer on medium-high speed until soft peaks form, about 2-3 minutes. Refrigerate until needed.
- In a large mixing bowl, beat softened cream cheese on medium speed until smooth and fluffy, about 2 minutes. Scrape down the sides. Add powdered sugar, vanilla extract, pumpkin pie spice, and ground cinnamon. Beat on low until combined, then increase to medium and beat for 1 minute until silky.
- Add pumpkin puree to the cream cheese mixture. Beat on low speed until just combined and uniform in color. Do not overmix.
- Gently fold the whipped cream into the pumpkin-cream cheese mixture using a rubber spatula. Fold until no white streaks remain.
- Pour the filling over the chilled crust and spread into an even layer. Tap the pan gently on the counter to release air bubbles. Cover with plastic wrap and refrigerate for at least 6 hours, preferably overnight.
- Once fully set, lift the bars out of the pan using the parchment overhang. Place on a cutting board and slice into 9 or 16 squares using a sharp knife. Wipe the knife clean between cuts for neat edges. Serve cold, topped with whipped cream, caramel sauce, and toasted pecans if desired.
Notes
Room temperature cream cheese is essential for a smooth filling. Press the crust firmly to prevent crumbling. Chill for at least 6 hours, but overnight is best for clean slices. For clean cuts, use a hot knife wiped clean between slices. These bars freeze well for up to 3 months.
Nutrition
- Serving Size: 1 bar (based on 9 se
- Calories: 385
- Sugar: 22
- Sodium: 310
- Fat: 27
- Saturated Fat: 16
- Carbohydrates: 32
- Fiber: 2
- Protein: 5
Keywords: no-bake pumpkin cheesecake bars, easy pumpkin dessert, fall dessert, pumpkin cheesecake, no-bake cheesecake, pumpkin bars


