By the third time I made this no-bake pumpkin pie in a single week, I stopped pretending it was for recipe testing and admitted the truth — I just couldn’t stop. The first attempt was a happy accident born from a broken oven and a desperate craving for something autumnal. The second was proof it wasn’t a fluke. By the third, I was eating a slice at 10 AM with my coffee, telling myself it counted as a vegetable serving because, well, pumpkin. (It doesn’t. I checked.)
There’s something almost magical about a dessert that tastes like you spent hours in the kitchen but actually came together while you were waiting for your kettle to boil. This easy no-bake pumpkin pie with whipped cream topping is that kind of recipe — the kind that makes you look like a hero with almost no effort. The filling is ridiculously creamy, perfectly spiced, and sets up firm enough to slice cleanly without a single crack. And the topping? Fluffy, lightly sweetened whipped cream that sits on top like a little cloud of approval.
I’ll be honest — I wasn’t sure a no-bake version could deliver the same depth of flavor as a traditional baked pumpkin pie. But after tweaking the spice ratio and letting it chill overnight (the secret nobody tells you), this version actually won over my family. My mom, a devoted baked-pie purist, asked for the recipe. That’s when I knew it was a keeper.
Why You’ll Love This Recipe
Let me tell you why this no-bake pumpkin pie has earned a permanent spot in my fall dessert rotation. It solves pretty much every problem a traditional pumpkin pie throws at you.
- No oven required. Your oven is free for the main course, or you can make this in the middle of a heatwave without breaking a sweat. Perfect for Thanksgiving when oven space is prime real estate.
- Comes together in 20 minutes. Seriously. Mix the filling, pour it into the crust, and let the fridge do the work. No blind baking, no water baths, no stress.
- Uses simple ingredients. Canned pumpkin, cream cheese, whipped topping, and a store-bought graham cracker crust. You probably have most of this in your kitchen right now.
- No cracks, no fuss. Traditional baked pumpkin pies crack when you look at them wrong. This one sets perfectly every single time — I promise.
- Tastes even better the next day. The flavors meld together overnight, giving you a deeper, richer pumpkin spice experience. Make it a day ahead and thank yourself later.
I’ve tested this recipe with both homemade and store-bought crusts, different brands of cream cheese, and even a dairy-free version using coconut cream. The version I’m sharing today is the one that got the most enthusiastic thumbs-up from my taste testers (aka my very honest family).
This isn’t just another no-bake pie. The secret is in the technique — whipping the cream cheese until it’s silky smooth before adding the pumpkin, and using just the right amount of gelatin to give it that perfect sliceable texture without any jiggly weirdness. It’s foolproof, I promise.
What Ingredients You Will Need
This recipe uses straightforward ingredients, but a few specific choices make a real difference in the final texture and flavor. Let me walk you through each one.
- Graham cracker crust (9-inch) — You can use a store-bought crust for convenience (I like Keebler’s ready-made crust), or make your own from crushed graham crackers, melted butter, and a pinch of sugar. If you’re feeling fancy, a shortbread or ginger snap crust works beautifully too.
- Cream cheese (8 oz, softened) — Full-fat cream cheese gives the richest, creamiest texture. Let it sit at room temperature for at least 30 minutes before mixing, or microwave it in 10-second bursts until softened but not warm. Philadelphia brand is my go-to for consistent results.
- Pumpkin puree (1 cup, not pumpkin pie filling) — Make sure you grab 100% pure pumpkin puree, not the pre-sweetened pie filling. Libby’s is widely available and reliable. If you’re feeling ambitious, homemade roasted pumpkin puree works too — just make sure it’s well-drained so your pie isn’t watery.
- Powdered sugar (1/2 cup) — Dissolves instantly into the filling without any graininess. No need to sift unless your sugar is particularly lumpy.
- Pumpkin pie spice (2 teaspoons) — You can use store-bought blend or make your own with 1 teaspoon cinnamon, 1/2 teaspoon ginger, 1/4 teaspoon nutmeg, and 1/4 teaspoon cloves. I actually prefer making my own because I can dial up the cinnamon.
- Vanilla extract (1 teaspoon) — Pure vanilla extract adds warmth and depth. Imitation vanilla works in a pinch, but pure is worth the splurge here.
- Unflavored gelatin (1 tablespoon) — This is the magic ingredient that helps the pie set without baking. Bloom it in cold water first, then dissolve it gently. Don’t skip this — it’s what gives you those clean, beautiful slices.
- Cold water (3 tablespoons) — Used to bloom the gelatin. Just regular tap water is fine.
- Heavy whipping cream (1 cup) — For the topping. Look for cream with at least 36% milk fat for the best volume and stability. Chill your bowl and beaters beforehand for fluffier whipped cream.
- Powdered sugar (2 tablespoons, for topping) — Sweetens the whipped cream without making it grainy. Add it after the cream starts to thicken.
- Optional garnishes — A sprinkle of cinnamon, a few toasted pecans, or a drizzle of caramel sauce. These aren’t required, but they make the pie look absolutely gorgeous.
One thing I learned the hard way — don’t use low-fat cream cheese. The texture turns out grainy and the pie doesn’t set as firmly. Trust me on this one.
Equipment Needed
You don’t need a fancy kitchen to pull this off. Here’s what you’ll need:
- Electric hand mixer or stand mixer — Whipping cream cheese by hand is possible but exhausting. A mixer makes the filling silky smooth in under two minutes.
- Large mixing bowl — For the filling. Glass or stainless steel works best.
- Medium microwave-safe bowl — For blooming and dissolving the gelatin.
- Spatula — A rubber spatula helps you scrape every last bit of filling into the crust.
- 9-inch pie dish — If you’re using a store-bought crust, it comes in its own disposable pan. For homemade crust, a standard glass pie dish works perfectly.
- Measuring cups and spoons — Precision matters with gelatin, so use proper measuring tools.
- Small saucepan (optional) — You can dissolve the gelatin on the stovetop instead of the microwave if you prefer.
I’ve made this pie with a $20 hand mixer and it turned out just as good as when I use my fancy stand mixer. Don’t overthink the equipment — just make sure your beaters are clean and dry before you start whipping that cream.
Preparation Method
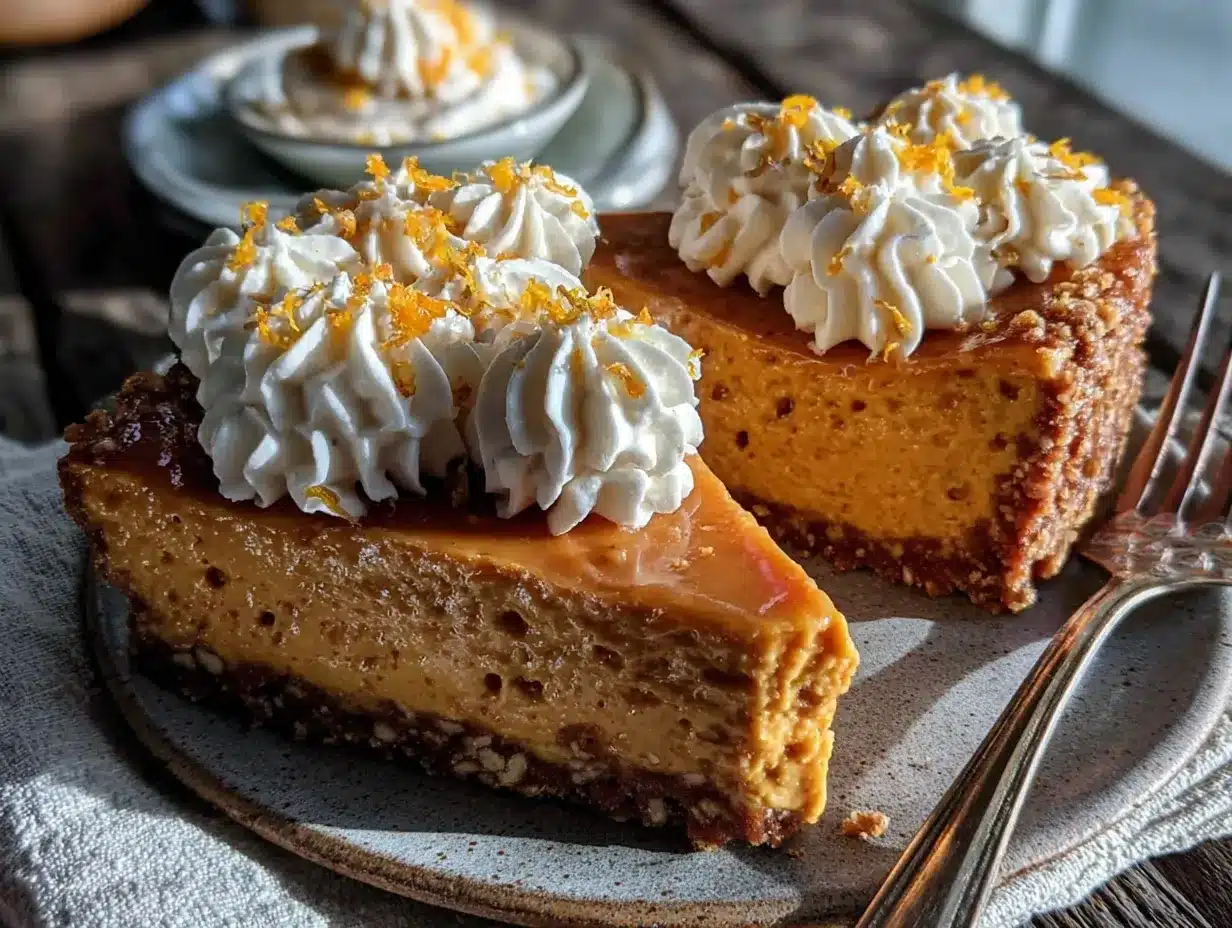
Let me walk you through this step by step. I’ve included all the little details I wish someone had told me the first time I made it.
Step 1: Prepare the Gelatin
Pour 3 tablespoons of cold water into a small microwave-safe bowl. Sprinkle 1 tablespoon of unflavored gelatin evenly over the surface. Let it sit for 5 minutes without stirring — this is called blooming, and it’s essential for the gelatin to dissolve properly. After 5 minutes, microwave the bowl for 10-15 seconds until the gelatin is fully dissolved and the mixture is clear. Set it aside to cool slightly while you prepare the filling.
Step 2: Whip the Cream Cheese
In a large mixing bowl, beat the softened cream cheese with an electric mixer on medium speed until it’s completely smooth and fluffy — about 2 minutes. Scrape down the sides of the bowl with a spatula halfway through. This step is crucial because any lumps in the cream cheese will show up in your final pie.
Step 3: Add the Pumpkin and Spices
Add 1 cup of pumpkin puree, 1/2 cup of powdered sugar, 2 teaspoons of pumpkin pie spice, and 1 teaspoon of vanilla extract to the bowl. Beat on medium speed until everything is well combined and smooth — about 1 minute. The mixture should look uniform and smell absolutely amazing at this point.
Step 4: Incorporate the Gelatin
With the mixer running on low speed, slowly pour the dissolved gelatin into the pumpkin mixture. Mix just until it’s fully incorporated — about 30 seconds. Don’t overmix or you’ll deflate the filling. The gelatin is what gives the pie its sliceable structure, so make sure it’s evenly distributed.
Step 5: Fill the Crust
Pour the filling into your prepared graham cracker crust. Use a spatula to spread it evenly and smooth the top. Tap the pie dish gently on the counter a few times to release any air bubbles. The filling should come right to the edge of the crust.
Step 6: Chill the Pie
Place the pie in the refrigerator, uncovered, for at least 4 hours. Overnight is even better — the flavors deepen and the texture firms up beautifully. Don’t rush this step. A properly chilled pie slices cleanly and holds its shape on the plate.
Step 7: Make the Whipped Cream Topping
About 30 minutes before serving, pour 1 cup of cold heavy whipping cream into a chilled bowl. Beat on medium-high speed until soft peaks form — about 2-3 minutes. Add 2 tablespoons of powdered sugar and beat for another 30 seconds until stiff peaks form. Be careful not to overbeat, or you’ll end up with butter.
Step 8: Assemble and Serve
Spread or pipe the whipped cream over the chilled pie. I like to pile it high and create little swirls with the back of a spoon. Sprinkle a dusting of cinnamon on top for a pretty finish. Slice with a sharp knife, wiping it clean between cuts for the neatest slices.
Cooking Tips & Techniques
I’ve made this pie more times than I care to count, and I’ve learned a few things along the way. Here are my best tips for perfect results every time.
Temperature matters. Make sure your cream cheese is fully softened before you start. Cold cream cheese creates lumps that are nearly impossible to beat out. Leave it on the counter for at least 30 minutes, or cut it into small cubes and microwave it in 10-second bursts.
Don’t skip the gelatin. I know it’s an extra step, but it’s what gives this pie its firm, sliceable texture. Without it, you’d end up with a pumpkin mousse — delicious, but not pie. If you’re vegetarian, you can use agar agar powder instead, but the texture will be slightly different.
Chill time is non-negotiable. Four hours is the absolute minimum. If you try to slice it after two hours, you’ll get a messy, soft slice. Overnight chilling gives you the cleanest cuts and the best flavor development.
Whip your cream properly. Cold cream, cold bowl, cold beaters. Warm cream won’t whip properly. And stop as soon as you see stiff peaks — overwhipped cream turns grainy and eventually becomes butter.
One mistake I made early on — I used pumpkin pie filling instead of pure pumpkin puree. The filling already has sugar and spices, which threw off the balance completely. The pie was overly sweet and didn’t set right. Stick with 100% pure pumpkin puree.
Variations & Adaptations
This recipe is wonderfully adaptable. Here are some of my favorite variations.
- Dairy-free version: Use dairy-free cream cheese (I like Kite Hill or Violife) and coconut cream instead of heavy whipping cream. The texture will be slightly softer, but it’s still delicious. Chill the coconut cream can overnight and scoop only the solid white part.
- Gluten-free option: Most graham cracker crusts contain gluten, but you can easily find gluten-free graham cracker crusts at most grocery stores. Or make your own with gluten-free graham crackers or crushed gluten-free cookies.
- Spice it up: Add a pinch of cayenne pepper or black pepper to the filling for a subtle warmth that complements the pumpkin beautifully. A teaspoon of orange zest also brightens the flavor nicely.
- Chocolate pumpkin twist: Melt 2 ounces of dark chocolate and drizzle it over the crust before adding the filling. The chocolate sets into a thin layer that adds a lovely contrast to the creamy pumpkin.
- Maple version: Replace the powdered sugar in the filling with 1/3 cup of pure maple syrup. Reduce the pumpkin pie spice slightly to let the maple flavor shine. The texture will be a bit softer, so chill it overnight for best results.
I tried the maple version last Thanksgiving and it was a huge hit. My brother-in-law, who claims he doesn’t like pumpkin pie, ate two slices. That’s when I knew I had something special.
Serving & Storage Suggestions
This pie is best served cold, straight from the refrigerator. The contrast between the creamy filling, the buttery crust, and the fluffy whipped cream is pure perfection.
How to serve: Slice the pie with a sharp knife, wiping the blade clean between cuts for the neatest slices. Serve on chilled plates if you’re feeling fancy. A light dusting of cinnamon or nutmeg on top adds a beautiful finishing touch.
What to serve with it: A cup of hot coffee or spiced chai tea is my favorite pairing. For a full fall dessert spread, this pie goes beautifully alongside decadent red wine chocolate cake with berries or mini lemon blueberry cheesecakes for a dessert table that has something for everyone.
Storage: Cover the pie loosely with plastic wrap or aluminum foil and store it in the refrigerator for up to 5 days. The whipped cream topping will soften slightly after a day or two, but the pie itself stays delicious. I actually prefer the flavor on day two — it’s deeper and more rounded.
Freezing instructions: You can freeze the pie (without the whipped cream topping) for up to 3 months. Wrap it tightly in plastic wrap, then a layer of aluminum foil. Thaw it overnight in the refrigerator, then add fresh whipped cream before serving. The texture holds up remarkably well.
Reheating: Don’t. This is a no-bake pie meant to be served cold. If you want a warm pumpkin dessert, try a pumpkin crumble instead.
Nutritional Information & Benefits
Here’s the approximate nutritional breakdown for one slice (based on 8 servings):
- Calories: 320
- Total Fat: 22g
- Saturated Fat: 13g
- Cholesterol: 65mg
- Sodium: 280mg
- Total Carbohydrates: 28g
- Dietary Fiber: 2g
- Sugars: 18g
- Protein: 5g
Pumpkin is packed with vitamin A, which supports eye health and immune function. It’s also a good source of fiber and potassium. The cream cheese and whipped cream add calcium and protein, making this a more balanced dessert than you might expect.
This recipe contains dairy and gluten (from the crust). For dairy-free or gluten-free options, check the variations section above.
I’m not a nutritionist, and these numbers are estimates. If you have specific dietary needs, I recommend calculating the nutrition based on your exact ingredients.
Conclusion
This easy no-bake pumpkin pie with whipped cream topping has become my go-to fall dessert for a reason. It’s simple enough to make on a random Tuesday when you’re craving something cozy, yet impressive enough to bring to Thanksgiving dinner without feeling embarrassed.
What I love most about this recipe is how forgiving it is. You don’t need to be a pastry chef or own a fancy kitchen. You just need a few basic ingredients, a little patience while it chills, and the willingness to make it at least twice because the first slice will disappear before you get a photo.
I’d love to hear how yours turns out. Did you add your own twist? Did your family love it as much as mine did? Drop a comment below and let me know. And if you’re looking for more easy dessert inspiration, check out fluffy strawberry mousse cups with whipped cream or browse our full collection of recipes for more no-bake goodness.
Happy fall baking — or should I say, happy fall no-baking!
Frequently Asked Questions
Can I use homemade pumpkin puree instead of canned?
Absolutely. Just make sure you drain it well after roasting. Homemade pumpkin puree tends to be more watery than canned, so spread it on a paper towel-lined plate for 10 minutes before using it to remove excess moisture. Otherwise, your pie might be too soft to slice cleanly.
How long does this pie need to chill?
At least 4 hours, but overnight is ideal. The gelatin needs time to fully set, and the flavors meld together beautifully as it sits. If you’re short on time, you can speed things up by placing the pie in the freezer for 2 hours, but the texture won’t be quite as creamy.
Can I use a different crust?
Yes! Ginger snap crust, shortbread crust, Oreo crust, or even a pecan crust all work beautifully. Just make sure whatever crust you use is fully set before adding the filling. If you’re making a homemade crust, bake it according to the recipe instructions and let it cool completely.
Why did my pie turn out runny?
This usually happens for one of three reasons: the gelatin wasn’t fully dissolved, the pie didn’t chill long enough, or you used pumpkin pie filling instead of pure pumpkin puree. Make sure your gelatin is completely clear before adding it, and give the pie at least 4 hours in the fridge.
Can I make this pie ahead of time for a party?
Yes, and I actually recommend it. Make the pie (without the whipped cream topping) up to 2 days in advance and keep it covered in the refrigerator. Add the whipped cream topping just before serving for the best presentation. The pie actually tastes better on day two because the flavors have had time to meld.
Pin This Recipe!
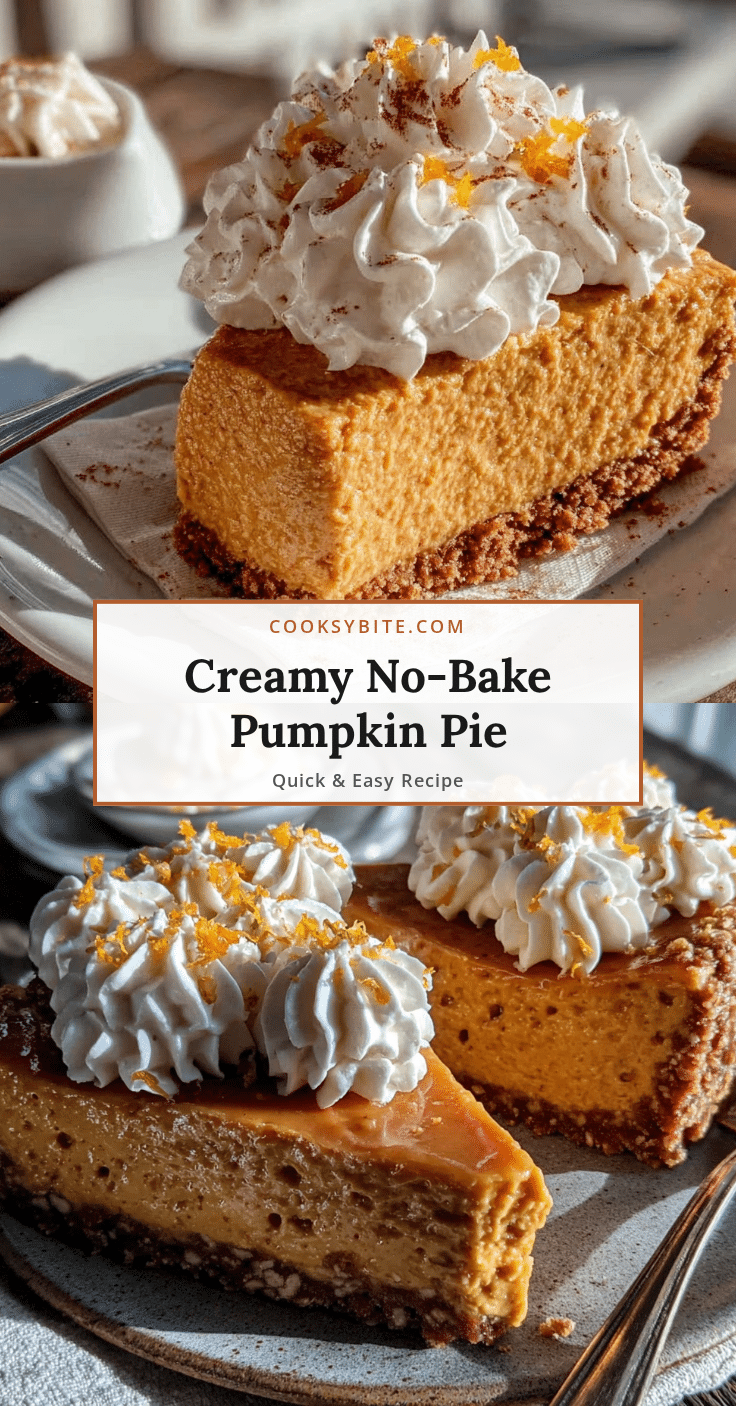
Easy No-Bake Pumpkin Pie with Perfect Whipped Cream

This easy no-bake pumpkin pie with whipped cream topping is a creamy, perfectly spiced dessert that sets up firm without cracking. It comes together in 20 minutes and requires no oven, making it perfect for Thanksgiving or any fall occasion.
- Prep Time: 20 minutes
- Cook Time: 0 minutes
- Total Time: 4 hours 20 minutes (includes chilling)
- Yield: 8 servings 1x
- Category: Dessert
- Cuisine: American
Ingredients
- 1 (9-inch) graham cracker crust
- 8 oz cream cheese, softened
- 1 cup pumpkin puree (not pumpkin pie filling)
- 1/2 cup powdered sugar
- 2 teaspoons pumpkin pie spice
- 1 teaspoon vanilla extract
- 1 tablespoon unflavored gelatin
- 3 tablespoons cold water
- 1 cup heavy whipping cream
- 2 tablespoons powdered sugar (for topping)
- Optional: cinnamon, toasted pecans, or caramel sauce for garnish
Instructions
- Prepare the gelatin: Pour 3 tablespoons of cold water into a small microwave-safe bowl. Sprinkle 1 tablespoon of unflavored gelatin evenly over the surface. Let it sit for 5 minutes without stirring. Microwave for 10-15 seconds until fully dissolved and clear. Set aside to cool slightly.
- Whip the cream cheese: In a large mixing bowl, beat the softened cream cheese with an electric mixer on medium speed until smooth and fluffy, about 2 minutes. Scrape down the sides halfway through.
- Add the pumpkin and spices: Add 1 cup pumpkin puree, 1/2 cup powdered sugar, 2 teaspoons pumpkin pie spice, and 1 teaspoon vanilla extract. Beat on medium speed until well combined and smooth, about 1 minute.
- Incorporate the gelatin: With the mixer running on low speed, slowly pour the dissolved gelatin into the pumpkin mixture. Mix just until fully incorporated, about 30 seconds.
- Fill the crust: Pour the filling into the graham cracker crust. Spread evenly and smooth the top. Tap the pie dish gently on the counter to release air bubbles.
- Chill the pie: Refrigerate uncovered for at least 4 hours, preferably overnight.
- Make the whipped cream topping: About 30 minutes before serving, pour 1 cup cold heavy whipping cream into a chilled bowl. Beat on medium-high speed until soft peaks form, about 2-3 minutes. Add 2 tablespoons powdered sugar and beat until stiff peaks form, about 30 seconds more.
- Assemble and serve: Spread or pipe the whipped cream over the chilled pie. Sprinkle with cinnamon if desired. Slice with a sharp knife, wiping clean between cuts.
Notes
Make sure cream cheese is fully softened to avoid lumps. Do not skip the gelatin—it ensures a firm, sliceable texture. Chill for at least 4 hours, but overnight is best for flavor and texture. For dairy-free, use dairy-free cream cheese and coconut cream. For gluten-free, use a gluten-free graham cracker crust.
Nutrition
- Serving Size: 1 slice
- Calories: 320
- Sugar: 18
- Sodium: 280
- Fat: 22
- Saturated Fat: 13
- Carbohydrates: 28
- Fiber: 2
- Protein: 5
Keywords: no-bake pumpkin pie, easy pumpkin pie, pumpkin pie with whipped cream, no-bake dessert, fall dessert, Thanksgiving pie


