I figured one-bowl pumpkin bread was just the easy part — the compromise you make when you don’t feel like washing dishes. It took about one bite of this version for that assumption to fall apart completely. The chocolate chips melt into pockets of gooey richness, the pumpkin keeps everything absurdly moist, and the whole thing comes together in a single bowl that somehow tastes like you spent hours layering flavors. Honestly, I was half-convinced I’d messed something up. How could something this simple taste this good?
I’d been testing pumpkin recipes for weeks — some required separating eggs, others called for browning butter, a few demanded I break out the stand mixer. Each one was fine. But none of them felt like the kind of bread you’d make on a Tuesday afternoon just because you had a can of pumpkin staring at you from the pantry. You know that feeling? When you want something warm and spiced and chocolatey, but you also want to be eating it within the hour, not still scrubbing a mixer bowl thirty minutes later.
That’s where this best-ever one-bowl pumpkin chocolate chip bread came from. It wasn’t born from a chef’s notebook or a fancy test kitchen. It came from a rainy afternoon, a half-empty bag of chocolate chips, and the stubborn belief that easy shouldn’t mean boring. The first loaf came out lopsided and a little too dark on one side — my oven runs hot, and I was too impatient to rotate the pan. But that first slice, still warm, with the chocolate still soft? I knew I’d found something worth keeping.
This recipe stuck because it does exactly what it promises. It’s the kind of bread you can whip up while the kids are doing homework, or while you’re half-listening to a podcast, or when you realize company’s coming in an hour and you want the house to smell like fall. It doesn’t demand perfection. It just delivers.
Why You’ll Love This Recipe
Let’s be real for a second. There are a lot of pumpkin chocolate chip bread recipes out there. Some are dense as bricks. Some are dry. Some taste more like spice cake than pumpkin. This one? It hits that sweet spot where the pumpkin actually shines, the chocolate doesn’t sink to the bottom, and the crumb stays tender for days.
- One Bowl, No Fuss — You don’t need a mixer. You don’t need to cream butter and sugar. Just a bowl, a whisk, and a spatula. The whole thing comes together in about ten minutes of active work.
- Simple Pantry Ingredients — No weird extracts, no specialty flours, no hunting down obscure ingredients. If you’ve got canned pumpkin, flour, sugar, eggs, oil, and chocolate chips, you’re in business.
- Perfect for Fall Baking (or Any Season, Honestly) — This bread is great for Thanksgiving brunch, Halloween parties, or just a cozy Sunday morning. It also freezes beautifully, so you can make two and save one for later.
- Crowd-Pleaser Every Time — I’ve brought this to potlucks, office parties, and family dinners. It disappears fast. Kids love the chocolate, adults love the pumpkin, and everyone asks for the recipe.
- Unbelievably Moist Without Being Heavy — The trick is using oil instead of butter and not overmixing the batter. The result is a tender crumb that stays soft for days — if it lasts that long.
What makes this recipe different from the rest? Two things. First, I add a touch of brown sugar alongside the granulated — it gives the bread a deeper, almost caramel-like sweetness that plays beautifully with the pumpkin and chocolate. Second, I fold the chocolate chips into the flour mixture first, which keeps them suspended evenly throughout the loaf instead of sinking to the bottom. It’s a small tweak, but it makes a big difference.
This isn’t just good pumpkin bread. It’s the kind you close your eyes for after the first bite. The kind that makes you wonder why you ever bothered with complicated recipes in the first place. It’s comfort food, simplified.
What Ingredients You Will Need
This recipe keeps things straightforward. Most of these ingredients are probably in your kitchen right now. If not, they’re easy to find at any grocery store. Here’s what you’ll need and why each one matters.
For the Pumpkin Bread Batter
- 1 ¾ cups (220g) all-purpose flour — Spoon and level it. Don’t scoop directly from the bag or you’ll end up with too much flour and a dry loaf. I use Gold Medal or King Arthur for consistent results.
- 1 teaspoon baking soda — This gives the bread its lift. Make sure it’s fresh — test it by dropping a pinch into vinegar; if it fizzes, you’re good.
- ½ teaspoon baking powder — Works with the baking soda for a balanced rise.
- 1 ½ teaspoons ground cinnamon — The backbone of the spice blend. I prefer McCormick or Simply Organic.
- ½ teaspoon ground nutmeg — Freshly grated if you have it, but pre-ground works fine.
- ½ teaspoon ground ginger — Adds warmth without overpowering.
- ¼ teaspoon ground cloves — Just a pinch. Cloves are potent, so don’t go overboard.
- ½ teaspoon salt — Balances the sweetness and enhances the pumpkin flavor.
- 1 cup (200g) granulated sugar — Provides structure and sweetness.
- ½ cup (100g) packed light brown sugar — Adds moisture and a deeper, molasses-like sweetness. Don’t skip this — it makes the bread more interesting.
- 2 large eggs, room temperature — Room temperature eggs incorporate more easily and create a smoother batter. If you forgot to take them out of the fridge, soak them in warm water for five minutes.
- 1 cup (240g) pumpkin puree — Not pumpkin pie filling. Make sure you grab 100% pure pumpkin. Libby’s is my go-to. If you’re using homemade pumpkin puree, drain off any excess liquid first.
- ½ cup (120ml) vegetable oil — Keeps the bread moist without adding butter flavor. Canola or grapeseed oil also work. Avoid olive oil — the flavor is too strong here.
- 1 teaspoon vanilla extract — Rounds out the flavors. Pure vanilla is best, but imitation works in a pinch.
- 2 tablespoons milk (any kind) — Adds a touch more moisture and helps the batter come together smoothly. Use dairy or non-dairy — whatever you have.
For the Chocolate Chips
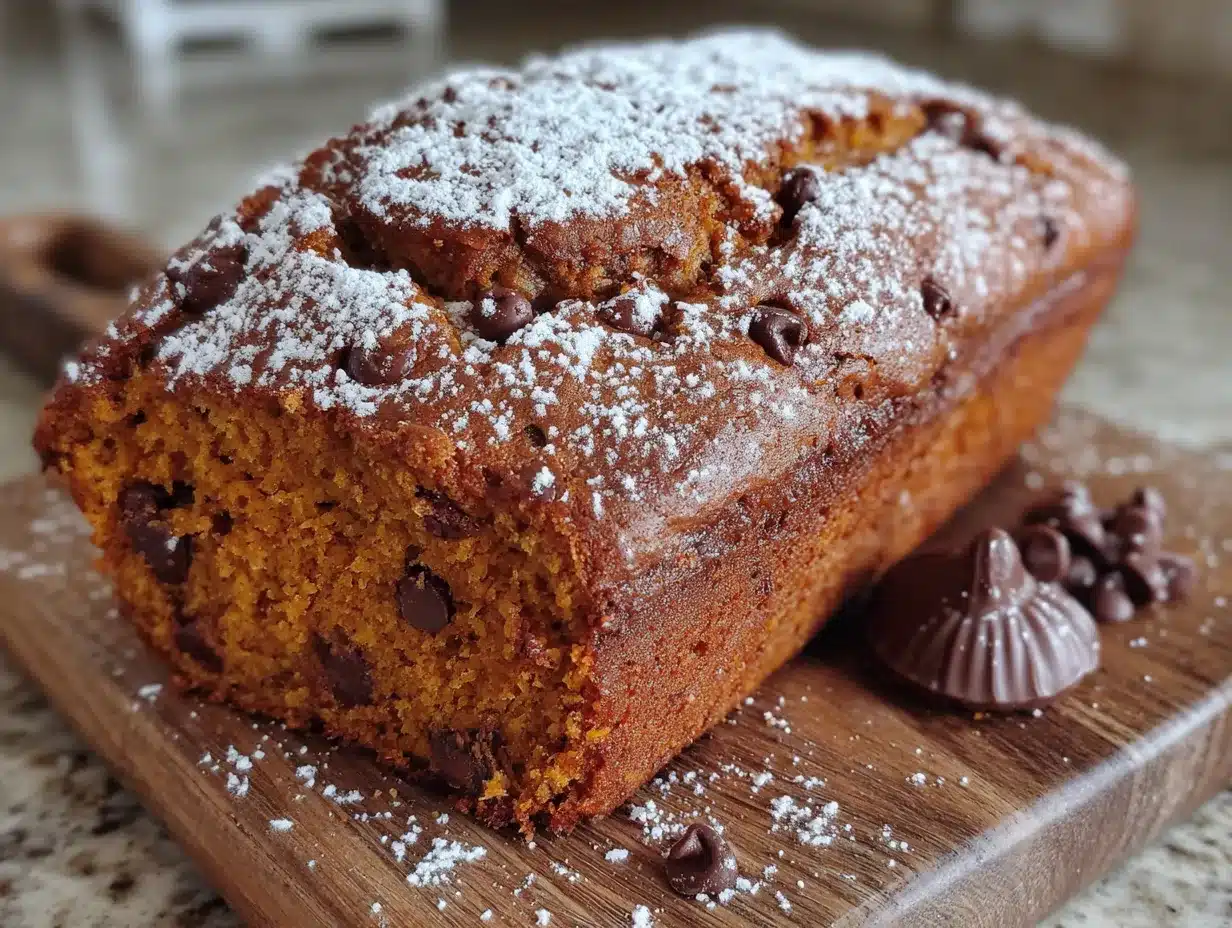
- 1 cup (175g) semi-sweet chocolate chips — I prefer Ghirardelli or Guittard for that rich, melty texture. You can also use dark chocolate chips if you want a less sweet bread, or milk chocolate if you have a serious sweet tooth. For a fun twist, try chocolate chunks instead — they create bigger, more dramatic pockets of melted chocolate.
Substitution Guidance: If you’re gluten-free, swap the all-purpose flour for a 1:1 gluten-free baking blend (I like Bob’s Red Mill). For a dairy-free version, use any plant-based milk and ensure your chocolate chips are dairy-free (many dark chocolate chips are naturally dairy-free). To reduce sugar, you can cut the granulated sugar to ¾ cup, but the bread will be slightly less tender.
Equipment Needed
The beauty of this recipe is that you don’t need much. Here’s the short list:
- Large mixing bowl — Big enough to whisk everything without splashing. I use a 4-quart stainless steel bowl.
- Whisk — For combining dry ingredients and beating the eggs and sugar.
- Rubber spatula — For folding in the chocolate chips and scraping the bowl clean.
- 9×5-inch loaf pan — Standard size. If you use an 8×4-inch pan, the bread will take longer to bake and may dome more. Glass, ceramic, or metal all work — just adjust baking time slightly for glass (it conducts heat differently).
- Parchment paper — Not strictly necessary, but it makes lifting the bread out of the pan so much easier. Leave overhang on two sides for easy removal.
- Cooling rack — Lets air circulate around the loaf so it cools evenly and doesn’t get soggy on the bottom.
- Toothpick or cake tester — For checking doneness. A wooden skewer also works.
Budget-friendly tip: If you don’t have parchment paper, grease the pan thoroughly with butter or cooking spray and dust it with a light coating of flour. Tap out the excess before pouring in the batter. Works like a charm.
Preparation Method
Alright, let’s make some bread. Preheat your oven to 350°F (175°C) and position the rack in the center. Line your loaf pan with parchment paper, leaving a couple inches of overhang on the long sides. If you’re not using parchment, grease and flour the pan now.
- Whisk the dry ingredients together. In your large bowl, combine the flour, baking soda, baking powder, cinnamon, nutmeg, ginger, cloves, and salt. Whisk until everything is evenly distributed — about 20 seconds. This step ensures the spices and leaveners are spread throughout the batter, so you don’t end up with a pocket of baking soda in one slice.
- Add the sugars and wet ingredients. Dump the granulated sugar and brown sugar right into the bowl with the flour mixture. Add the eggs, pumpkin puree, vegetable oil, vanilla extract, and milk. Stir everything together with your rubber spatula or a wooden spoon until just combined. Don’t overmix — stop as soon as you no longer see streaks of flour. A few small lumps are totally fine. Overmixing develops gluten and makes the bread tough, and nobody wants tough pumpkin bread.
- Fold in the chocolate chips. Toss the chocolate chips into the batter and fold them in gently with your spatula. About 6 to 8 strokes should do it. You want them evenly distributed, not broken up. If you’re feeling fancy, reserve a tablespoon of chocolate chips to sprinkle on top of the batter once it’s in the pan — it makes for a prettier loaf.
- Pour the batter into the prepared pan. Scrape every last bit out of the bowl — that’s the best part. Spread the batter into an even layer with your spatula. It will be thick and slightly sticky, which is exactly what you want. If you reserved chocolate chips, sprinkle them on top now, pressing them in gently so they don’t roll off during baking.
- Bake for 55 to 65 minutes. Place the pan in the preheated oven and bake until the top is golden brown and a toothpick inserted into the center comes out clean or with just a few moist crumbs attached. If you hit a chocolate chip (which you probably will), try a different spot. The bread is done when the internal temperature reaches about 200°F (93°C) on an instant-read thermometer. My oven takes exactly 58 minutes — yours might be different, so start checking at 50 minutes.
- Cool in the pan for 15 minutes. Set the pan on a cooling rack and let it rest. This gives the structure time to set so the bread doesn’t fall apart when you remove it. After 15 minutes, lift the bread out using the parchment paper overhang and transfer it directly to the cooling rack.
- Cool completely before slicing. I know — waiting is the hardest part. But if you slice it while it’s still warm, the bread will crumble and the chocolate will smear everywhere. Give it at least an hour. If you can’t wait (and I’ve been there), use a serrated knife and slice gently. Just know the texture will be better if you let it cool fully.
Sensory cues to watch for: The batter should be thick and slightly glossy, the color of a autumn sunset. When the bread is baking, your kitchen will smell like a candle store — warm cinnamon, nutty pumpkin, and sweet chocolate. The top should crack slightly as it bakes, which is a good sign. When you tap the center, it should feel firm but spring back lightly.
Cooking Tips & Techniques
I’ve made this bread at least a dozen times, and I’ve learned a few things the hard way. Let me save you some trouble.
Don’t overmix. This is the number one mistake I see. You mix the wet and dry ingredients until they just come together, then you stop. Those few seconds of extra stirring might not seem like a big deal, but they activate the gluten and turn your tender loaf into a rubber brick. Trust me — I made that mistake on loaf number three. It was edible. It was not good.
Room temperature ingredients matter more than you think. Cold eggs and cold milk can seize the oil and make the batter lumpy. Take them out of the fridge about 30 minutes before you start. If you forgot, place the eggs in a bowl of warm water for 5 minutes and microwave the milk for 10 seconds. Easy fix.
Check your oven temperature. Most home ovens run hot or cold. I keep an oven thermometer inside mine at all times because I’ve learned the hard way that the dial lies. If your bread is browning too fast on top but still raw in the middle, tent it loosely with aluminum foil for the last 15 minutes of baking.
Let the bread rest overnight for deeper flavor. This is a pro tip I stumbled on by accident. I made a loaf one evening, wrapped it in plastic wrap after it cooled, and forgot about it until the next morning. The flavor had deepened overnight — the spices had mellowed and melded together, and the pumpkin taste was more pronounced. If you can plan ahead, bake this bread a day before you want to serve it.
Rotate the pan halfway through. About 30 minutes in, quickly rotate the pan 180 degrees. This ensures even browning, especially if your oven has hot spots. Don’t leave it in too long — you don’t want the oven door open for more than a few seconds, or the temperature will drop.
Variations & Adaptations
This recipe is a great starting point, but it’s also incredibly flexible. Here are some ways to change it up.
Gluten-Free Version: Substitute the all-purpose flour with a 1:1 gluten-free baking blend that contains xanthan gum. I’ve tested this with Bob’s Red Mill 1:1 Baking Flour, and it works beautifully. The texture is slightly more delicate, so let the bread cool completely before slicing.
Dairy-Free Version: Use any plant-based milk (oat milk works great) and make sure your chocolate chips are dairy-free. Most dark chocolate chips are naturally dairy-free, but check the label to be safe. The bread will taste virtually identical.
Lower Sugar Version: Reduce the granulated sugar to ¾ cup and keep the brown sugar at ½ cup. The bread will be less sweet, but the pumpkin and chocolate will still shine. You can also swap the chocolate chips for sugar-free ones, though the texture will be slightly different.
Add Nuts or Seeds: Fold in ½ cup of chopped walnuts, pecans, or pepitas along with the chocolate chips. Toast the nuts first for extra flavor — spread them on a baking sheet and bake at 350°F for 5-7 minutes until fragrant.
Spice It Up: Add ¼ teaspoon of cardamom or allspice to the spice blend for a more complex flavor profile. Or try a pumpkin chai version by adding 1 teaspoon of chai spice blend.
Make It a Loaf Cake: Top the baked bread with a simple cream cheese glaze — 4 ounces softened cream cheese, 2 tablespoons butter, 1 cup powdered sugar, and 1 teaspoon vanilla extract, whisked until smooth. Drizzle over the cooled loaf for a decadent treat.
Personal variation I love: I once made this with white chocolate chips and dried cranberries instead of semi-sweet chocolate. The sweetness was different — more mellow, more festive. It reminded me of a pumpkin scone from a coffee shop, but better because it was homemade and had that perfect moist crumb.
Serving & Storage Suggestions
This bread is wonderful on its own, but here are some ways to make it even better.
Serving temperature: Room temperature is ideal. The flavors are most balanced, and the texture is at its peak. If you want to warm a slice, pop it in the microwave for 10-15 seconds or toast it lightly in a toaster oven. The chocolate gets all melty again — pure heaven.
Presentation ideas: Slice the bread into thick, even pieces and arrange them on a wooden cutting board or a simple white plate. Dust with powdered sugar for a pretty finish. Serve with a pat of salted butter on the side — the saltiness contrasts beautifully with the sweet pumpkin and chocolate.
What to serve with it: A cup of hot coffee or chai tea is the perfect companion. For brunch, pair it with scrambled eggs and fresh fruit for a balanced meal. For dessert, a scoop of vanilla ice cream or a dollop of whipped cream turns it into something special.
Storage instructions: Wrap the cooled loaf tightly in plastic wrap or aluminum foil and store at room temperature for up to 4 days. The bread actually gets more moist on day two as the flavors settle. If you live in a humid climate, store it in an airtight container instead to prevent mold.
Freezing instructions: This bread freezes beautifully. Wrap the fully cooled loaf (or individual slices) tightly in plastic wrap, then again in aluminum foil. Place in a freezer-safe bag and freeze for up to 3 months. To thaw, leave at room temperature for a few hours or microwave individual slices for 20-30 seconds.
How flavors develop: The pumpkin and spice flavors become more pronounced after a day or two. The chocolate chips firm up slightly, creating a nice contrast with the soft crumb. Honestly, I sometimes prefer day-old pumpkin bread over fresh-baked for that reason. The patience pays off.
Nutritional Information & Benefits
Here’s the estimated nutritional breakdown for one slice (based on 10 slices per loaf):
| Nutrient | Amount Per Slice |
|---|---|
| Calories | 320 |
| Total Fat | 14g |
| Saturated Fat | 4g |
| Cholesterol | 35mg |
| Sodium | 220mg |
| Total Carbohydrates | 47g |
| Dietary Fiber | 2g |
| Sugars | 30g |
| Protein | 4g |
Health benefits to note: Pumpkin is packed with vitamin A (beta-carotene), which supports eye health and immune function. It’s also a good source of fiber and potassium. The cinnamon in this recipe may help regulate blood sugar levels. And dark chocolate? It contains antioxidants called flavonoids that are good for heart health. So while this is definitely a treat, it’s not completely devoid of nutritional value.
Dietary considerations: This recipe contains gluten, dairy (milk), and eggs. It can be made gluten-free and dairy-free with the substitutions listed above. It’s not suitable for a vegan diet as written, but you could experiment with flax eggs and plant-based milk — though I haven’t tested that version myself.
My personal perspective: I don’t believe in labeling food as “good” or “bad.” This bread is a comfort food, something to enjoy in moderation. It’s perfect for special occasions, holiday mornings, or those days when you just need something warm and sweet. One slice is enough to satisfy a craving without going overboard.
Conclusion
This best-ever one-bowl pumpkin chocolate chip bread has become a staple in my kitchen for good reason. It’s simple enough for a beginner baker to nail on the first try, but delicious enough to impress even the pickiest eaters. The one-bowl method means less cleanup, the pumpkin keeps everything moist, and the chocolate chips make every bite feel like a little reward.
What I love most about this recipe is how adaptable it is. You can tweak the spices, swap the chocolate chips for nuts or dried fruit, or turn it into a loaf cake with a creamy glaze. It’s forgiving — if you forget an ingredient or need to make a substitution, it usually works out fine. That’s the kind of recipe I want in my back pocket, and I think you will too.
I’d love to hear how yours turns out. Did you add anything extra? Did you serve it for breakfast or dessert? Drop a comment below and let me know. And if you’re looking for more pumpkin inspiration, check out our full collection of recipes — from cherry chocolate brownies to red wine chocolate cake, there’s something for every craving.
Happy baking, friends. Your kitchen is about to smell amazing.
Frequently Asked Questions
Can I use fresh pumpkin instead of canned?
Yes, you can. If you’re using fresh pumpkin puree, make sure to drain off any excess liquid first. Canned pumpkin is more consistent in moisture content, which is why I prefer it for this recipe. If your fresh puree seems watery, let it sit in a fine-mesh strainer for 30 minutes before using.
Why did my pumpkin bread sink in the middle?
This usually happens when the bread is underbaked or when the oven temperature is too low. Make sure your oven is fully preheated to 350°F and check doneness with a toothpick. Also, don’t open the oven door during the first 30 minutes of baking — the cold air can cause the bread to collapse.
Can I make this recipe into muffins?
Absolutely. Divide the batter evenly among 12 lined muffin cups and bake at 350°F for 18-22 minutes, or until a toothpick comes out clean. Muffins will bake faster than a loaf, so start checking at 15 minutes. This is a great option if you want individual portions or need something portable.
How do I keep the chocolate chips from sinking to the bottom?
The trick is to toss the chocolate chips with a tablespoon of the flour mixture before folding them into the batter. The flour coating helps suspend the chips throughout the batter. Also, make sure your batter is thick enough — if it’s too thin, the chips will sink. This recipe’s batter is naturally thick, so that shouldn’t be an issue.
Can I double this recipe?
Yes, you can easily double the ingredients to make two loaves. Use two separate loaf pans and bake them on the same rack, leaving space between them for air circulation. The baking time may increase by 5-10 minutes, so start checking at the 55-minute mark. Doubling works great for gifting or freezing one loaf for later.
Pin This Recipe!
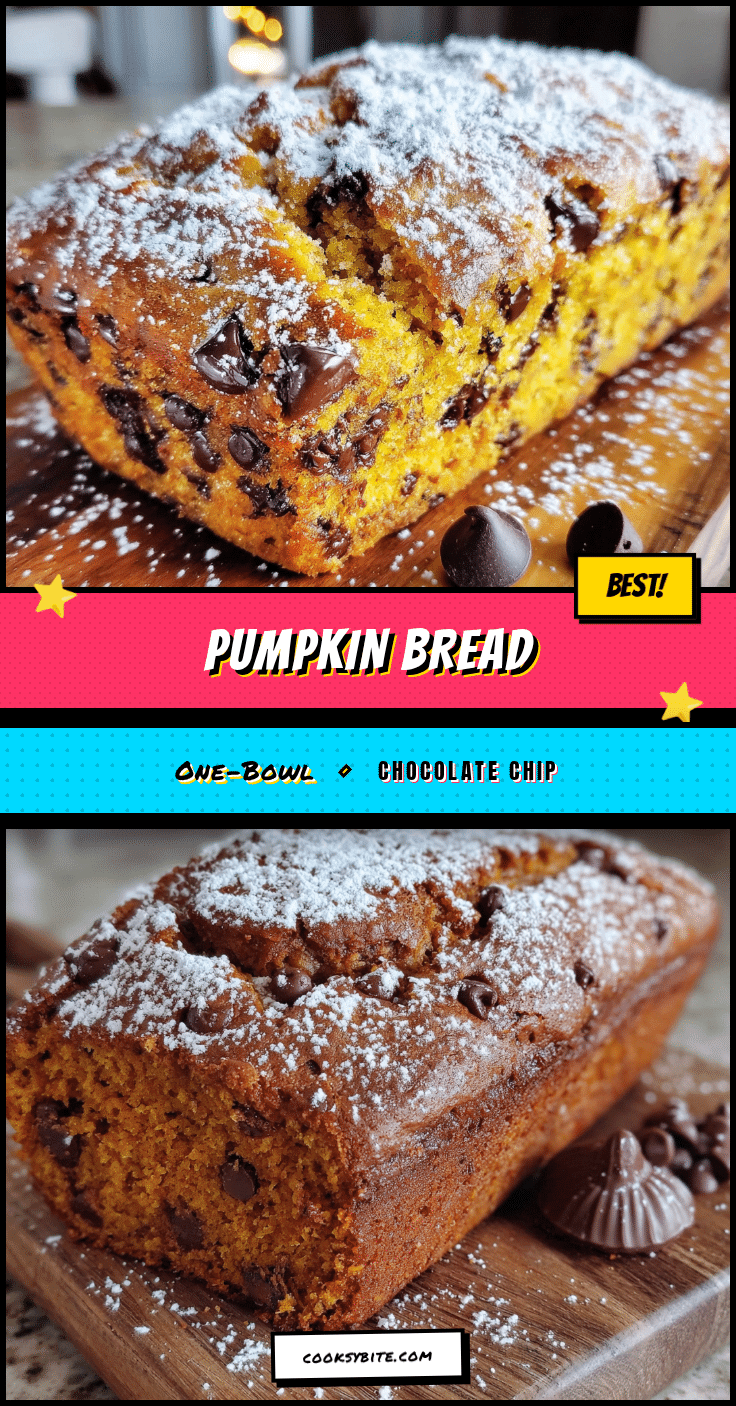
Best-Ever One-Bowl Pumpkin Chocolate Chip Bread
This one-bowl pumpkin chocolate chip bread is incredibly moist, packed with chocolate chips, and comes together in a single bowl with no mixer needed. It’s the perfect easy fall treat that tastes like you spent hours in the kitchen.
- Prep Time: 10 minutes
- Cook Time: 55 minutes
- Total Time: 1 hour 5 minutes
- Yield: 10 servings 1x
- Category: Dessert
- Cuisine: American
Ingredients
- 1 ¾ cups (220g) all-purpose flour
- 1 teaspoon baking soda
- ½ teaspoon baking powder
- 1 ½ teaspoons ground cinnamon
- ½ teaspoon ground nutmeg
- ½ teaspoon ground ginger
- ¼ teaspoon ground cloves
- ½ teaspoon salt
- 1 cup (200g) granulated sugar
- ½ cup (100g) packed light brown sugar
- 2 large eggs, room temperature
- 1 cup (240g) pumpkin puree
- ½ cup (120ml) vegetable oil
- 1 teaspoon vanilla extract
- 2 tablespoons milk (any kind)
- 1 cup (175g) semi-sweet chocolate chips
Instructions
- Preheat oven to 350°F (175°C). Line a 9×5-inch loaf pan with parchment paper, leaving overhang on the long sides. Alternatively, grease and flour the pan.
- In a large bowl, whisk together flour, baking soda, baking powder, cinnamon, nutmeg, ginger, cloves, and salt until evenly distributed.
- Add granulated sugar, brown sugar, eggs, pumpkin puree, vegetable oil, vanilla extract, and milk. Stir with a rubber spatula or wooden spoon until just combined. Do not overmix; a few lumps are fine.
- Fold in chocolate chips gently with a spatula. Reserve a tablespoon of chips to sprinkle on top if desired.
- Pour batter into prepared pan and spread evenly. Sprinkle reserved chocolate chips on top, pressing gently.
- Bake for 55 to 65 minutes, until a toothpick inserted in the center comes out clean or with a few moist crumbs. Internal temperature should reach about 200°F (93°C).
- Cool in the pan for 15 minutes, then lift out using parchment overhang and transfer to a cooling rack.
- Cool completely before slicing, at least 1 hour.
Notes
For deeper flavor, let the bread rest overnight wrapped in plastic wrap. Rotate the pan halfway through baking for even browning. If bread browns too quickly, tent with foil for the last 15 minutes.
Nutrition
- Serving Size: 1 slice
- Calories: 320
- Sugar: 30
- Sodium: 220
- Fat: 14
- Saturated Fat: 4
- Carbohydrates: 47
- Fiber: 2
- Protein: 4
Keywords: pumpkin bread, chocolate chip bread, one bowl, easy pumpkin bread, fall baking, pumpkin chocolate chip


