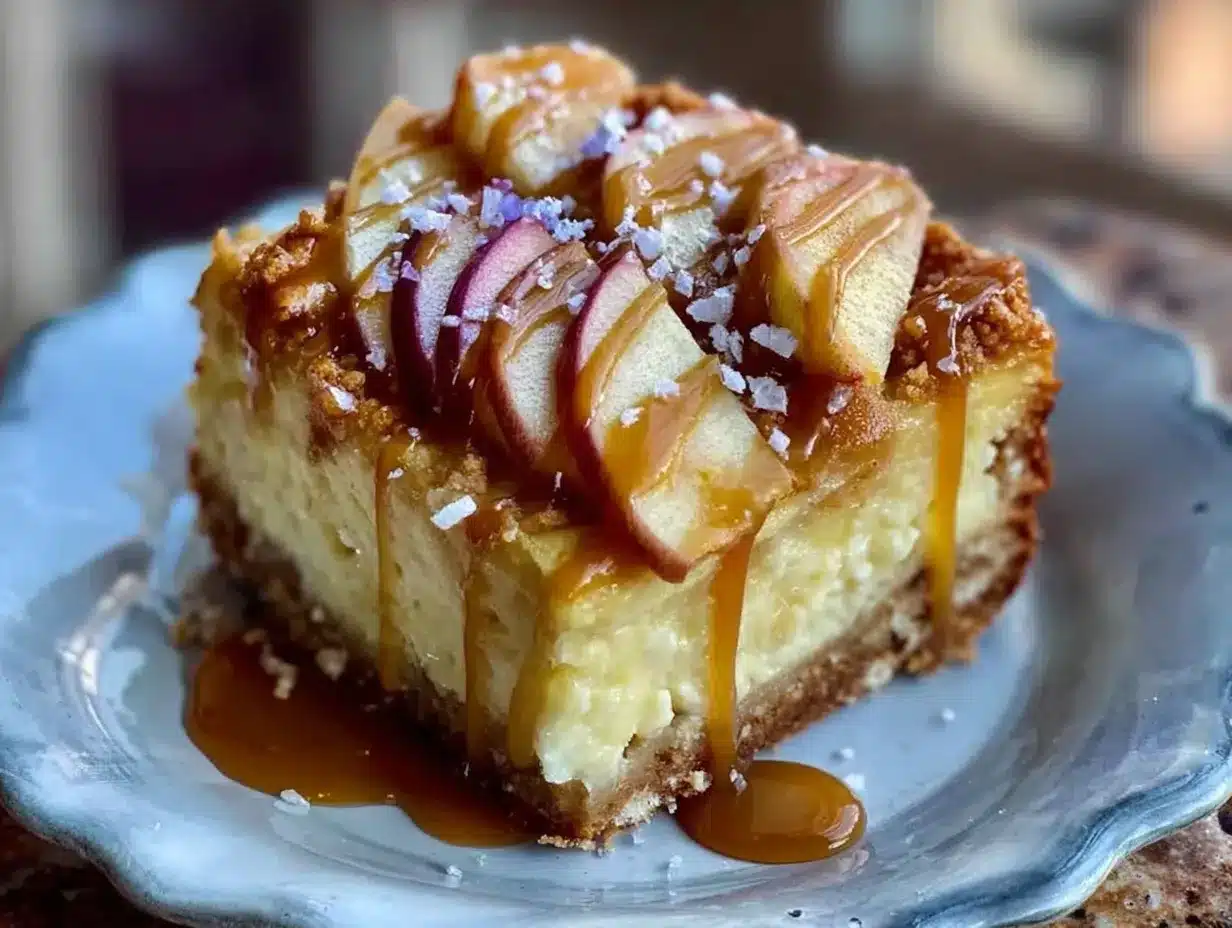
The crack of the caramel layer is what gets me every single time. Not the apples, not the cheesecake—that brittle, amber-colored lid that shatters under the tines of a fork before melting into everything below. I made these bars for a friend’s fall gathering last October, mostly because I had three Honeycrisp apples sitting on my counter getting soft and I refused to make another pie. Pies are fussy. Pies demand attention. These bars? They just sit there looking impossibly stacked, like you spent hours when really you just layered things in a pan and let the oven do the heavy lifting.
I brought them to that party in a beat-up metal baking dish (no presentation skills whatsoever) and watched a woman in cashmere go back for seconds before she even finished her first. That’s when I knew—this wasn’t just a good recipe. It was the kind of dessert that makes people pause mid-conversation. The kind where someone corners you by the punch bowl to ask for the recipe, and you have to decide how much of the truth you’re willing to share.
The Honeycrisp apples are non-negotiable here. They hold their shape when baked, offering little pops of sweet-tart resistance against the creamy cheesecake layer. And the caramel? It seeps into every crevice, pooling around the crust like a slow-moving river. I’ve made these bars four times since that party, tweaking the salt level in the caramel, adjusting the bake time, and I’ve finally landed on a version that feels complete. Not perfect—just done. The kind of dessert you make when you want to impress without pretending.
Why You’ll Love This Recipe
Let me tell you what makes these bars different from every other apple cheesecake situation you’ve seen online. I tested this recipe with three different apple varieties before landing on Honeycrisp, and I learned the hard way that Granny Smith turns to mush while Fuji just disappears into the cheesecake layer. Honeycrisp gives you that perfect texture—firm enough to bite through but tender enough to melt into the filling.
- No Water Bath Required — Cheesecake bars skip the fussy water bath that full cheesecakes demand. You get the same creamy texture without the anxiety of a leaking springform pan.
- Make-Ahead Friendly — These bars actually taste better after a night in the fridge. The flavors meld together, the caramel soaks into the crust, and slicing becomes effortless.
- Perfect for Fall Gatherings — Whether it’s a Thanksgiving dessert table or a casual Sunday brunch, these bars look impressive without requiring a pastry degree.
- Budget-Friendly Ingredients — Aside from the apples, everything here is a pantry staple. Cream cheese, butter, sugar, and flour—you probably have most of it already.
- Crowd-Pleasing Texture — The contrast between the buttery shortbread crust, the velvety cheesecake, the tender apples, and that crackly caramel topping is what makes people close their eyes while eating.
I’ve made these for picky eaters, for gluten-free friends (just swap the flour), and for people who swear they don’t like baked fruit. Every single time, the pan comes back empty. That’s not luck—that’s the Honeycrisp doing its thing.
What Ingredients You Will Need
This recipe uses simple, honest ingredients that work together to create something greater than the sum of their parts. The shortbread crust provides a sturdy foundation, the cheesecake layer brings tangy richness, the apples add texture and natural sweetness, and the caramel ties everything together in a sticky embrace.
For the Shortbread Crust
- 1½ cups all-purpose flour (spooned and leveled—don’t scoop straight from the bag or you’ll end up with a dry crust)
- ½ cup powdered sugar (granulated works in a pinch, but powdered gives a finer, more tender crumb)
- ¾ cup unsalted butter, cold and cubed (I use Kerrygold for the richness, but any good-quality butter works)
- ¼ teaspoon salt (fine sea salt, not kosher—it dissolves more evenly)
For the Cheesecake Layer
- 16 ounces cream cheese, softened to room temperature (Philadelphia is my go-to; store brands sometimes have a gummier texture)
- ½ cup granulated sugar
- 2 large eggs, room temperature (cold eggs will seize the batter and leave you with lumps)
- 1 teaspoon vanilla extract (use pure, not imitation—the flavor difference is real)
- 2 tablespoons all-purpose flour (helps stabilize the filling and prevents cracking)
For the Apple Layer
- 3 medium Honeycrisp apples, peeled, cored, and thinly sliced (about ⅛-inch thick—use a mandoline if you have one for consistent thickness)
- 2 tablespoons granulated sugar
- 1 teaspoon ground cinnamon
- ¼ teaspoon ground nutmeg (freshly grated if you have it—it makes a subtle difference)
- 1 tablespoon lemon juice (keeps the apples from browning and brightens the flavor)
For the Caramel Topping
- ½ cup unsalted butter
- 1 cup packed brown sugar (dark brown gives a deeper flavor, light brown is milder—both work)
- ½ cup heavy cream (don’t substitute milk here; the caramel won’t set properly)
- ¼ teaspoon salt (plus a pinch of flaky sea salt for finishing, like Maldon)
- 1 teaspoon vanilla extract
Equipment Needed
You don’t need a professional pastry kitchen for these bars, but a few specific tools make the process smoother. Here’s what you’ll want on hand:
- 9×13-inch baking pan — Glass or metal both work, but glass lets you see the crust color through the bottom. If using metal, line with parchment for easier removal.
- Parchment paper — Non-negotiable. Leave overhang on two sides to lift the bars out cleanly. I learned this after destroying my first batch trying to pry them out of an unlined pan.
- Electric hand mixer or stand mixer — A whisk and some elbow grease will work for the crust, but the cheesecake layer needs that smooth, lump-free texture that only a mixer provides.
- Mandoline slicer or sharp knife — Consistent apple slices mean even baking. A mandoline is faster, but a good chef’s knife and patience work just fine.
- Medium saucepan — For the caramel. Light-colored metal is ideal so you can see the color change as it cooks.
- Candy thermometer (optional) — Helpful if you’re nervous about caramel, but the visual cues I’ll share work just as well.
- Offset spatula — Makes spreading the cheesecake layer effortless. A regular spatula works too, just take your time.
Preparation Method
- Preheat and Prep — Preheat your oven to 350°F (175°C). Line your 9×13-inch baking pan with parchment paper, leaving about 2 inches of overhang on the long sides. This is your lifeline for lifting the finished bars out cleanly. Trust me on this.
- Make the Shortbread Crust — In a large bowl, combine the flour, powdered sugar, and salt. Add the cold, cubed butter and cut it in using a pastry cutter, two forks, or your fingertips until the mixture resembles coarse sand with a few pea-sized butter pieces remaining. Don’t overwork it—you want tenderness, not toughness. Press the mixture firmly into the prepared pan, making sure to get into the corners and create an even layer. Bake for 18-20 minutes until the edges are just barely golden. The center will look pale—that’s fine. Set aside to cool while you make the filling.
- Prepare the Apples — While the crust bakes, peel and core your Honeycrisp apples. Slice them thinly—about ⅛-inch thick. In a medium bowl, toss the slices with the sugar, cinnamon, nutmeg, and lemon juice. Let them sit while you make the cheesecake layer. The sugar will draw out some moisture, which is exactly what you want. Set a timer for 10 minutes and let them macerate.
- Make the Cheesecake Filling — In a large mixing bowl, beat the softened cream cheese with the granulated sugar until smooth and fluffy, about 2-3 minutes. Scrape down the sides and bottom of the bowl—cream cheese hides lumps in the corners. Add the eggs one at a time, beating on low speed after each addition just until combined. Overbeating incorporates too much air, which leads to cracking. Add the vanilla and flour, mixing on low until just incorporated. The batter should be silky and smooth, with no streaks of flour.
- Assemble the Layers — Pour the cheesecake filling over the cooled crust and spread it evenly with your offset spatula. Arrange the sliced apples in overlapping rows on top of the cheesecake layer. Don’t just dump them—take the extra minute to fan them out in a neat pattern. It matters for even baking and for presentation. Pour any remaining juices from the apple bowl over the top.
- Bake the Bars — Bake at 350°F (175°C) for 35-40 minutes, or until the edges are set and the center jiggles slightly when you gently shake the pan. A knife inserted near the center should come out mostly clean, with a little creamy residue. Don’t overbake—the cheesecake will continue to set as it cools. Let it cool completely on a wire rack, about 1 hour.
- Make the Caramel — While the bars cool, make the caramel. In a medium saucepan over medium heat, melt the butter. Add the brown sugar and stir until combined. Bring to a gentle boil, then cook for 2 minutes without stirring. Add the heavy cream slowly—it will bubble up vigorously—and stir until smooth. Remove from heat, stir in the salt and vanilla. Let it cool for 10 minutes, then pour over the cooled bars. Sprinkle with flaky sea salt if you’re feeling fancy.
- Chill and Slice — Refrigerate the bars for at least 4 hours, preferably overnight. This step is non-negotiable. The caramel needs to set, the cheesecake needs to firm up, and the flavors need to mingle. When you’re ready to serve, lift the bars out using the parchment overhang and slice with a sharp knife, wiping the blade clean between cuts for neat edges.
Cooking Tips & Techniques
I’ve made these bars enough times to know where things go wrong, and I want you to skip those mistakes entirely. Here’s what I’ve learned:
Room temperature ingredients matter. Cold cream cheese creates lumps that no amount of mixing will fully fix. Leave your cream cheese and eggs on the counter for at least 30 minutes before starting. I once tried to speed things up by microwaving the cream cheese and ended up with melted spots that made the filling grainy. Not worth it.
Don’t overmix the cheesecake batter. I know it’s tempting to keep beating until everything looks perfectly smooth, but overmixing incorporates too much air. Those air bubbles expand during baking and create cracks on the surface. Mix just until the ingredients come together, then stop.
Let the caramel cool before pouring. I poured hot caramel over my first batch and watched it slide right off the apples and pool at the edges of the pan. Letting it cool for 10-15 minutes gives it a thicker consistency that stays put. You want it to cling to the apples, not run away from them.
Slice with a hot, wet knife. Run your knife under hot water, dry it off, then slice. The heat helps the knife glide through the caramel without dragging it. Wipe the blade clean between each cut for those beautiful, clean slices that make people think you bought these from a bakery.
Patience is the secret ingredient. These bars need time to set. Four hours in the fridge is the minimum, but overnight is better. I’ve cut into bars after only two hours and ended up with a messy, delicious but structurally compromised situation. The wait is worth it.
Variations & Adaptations
One of the best things about this recipe is how adaptable it is. Here are a few variations I’ve tried and loved:
Gluten-Free Version — Swap the all-purpose flour in the crust and cheesecake layer with a 1:1 gluten-free baking flour blend. I’ve used Bob’s Red Mill and King Arthur with great results. The crust will be slightly more crumbly, but the flavor is still spot-on.
Dairy-Free Adaptation — Use dairy-free cream cheese (Kite Hill works well) and coconut cream instead of heavy cream in the caramel. The texture will be slightly less creamy, but the flavor profile still works beautifully. Use plant-based butter for the crust.
Spiced Apple Variation — Add ¼ teaspoon of cardamom and a pinch of cloves to the apple mixture alongside the cinnamon and nutmeg. The warm spices complement the caramel beautifully and give the bars a more complex flavor profile.
Nutty Crunch Addition — Sprinkle ½ cup of toasted pecans or walnuts over the caramel while it’s still warm. The nuts add a crunchy contrast to the soft layers and make the bars feel even more indulgent.
Caramel Apple Cheesecake Bars with Streusel — For an extra layer of texture, make a simple streusel by combining ½ cup flour, ¼ cup brown sugar, ¼ cup cold butter, and ½ teaspoon cinnamon. Sprinkle it over the apples before baking. The streusel creates a crunchy top layer that contrasts with the creamy cheesecake.
If you’re hosting a party and want to pair these bars with another crowd-pleasing dessert, I highly recommend checking out my mini lemon blueberry cheesecakes for a bright, citrusy counterpoint to the rich caramel apple flavor.
Serving & Storage Suggestions
These bars are best served chilled, straight from the refrigerator. The cold temperature keeps the cheesecake layer firm and the caramel set, creating that perfect textural contrast. Let them sit at room temperature for about 5-10 minutes before serving to take the chill off, but don’t let them warm up completely or the caramel will start to slide.
Presentation Ideas — Dust the tops with a light sprinkle of cinnamon before serving. A dollop of freshly whipped cream on each bar adds a lovely lightness that balances the richness. For a truly decadent presentation, drizzle extra caramel sauce over each slice and add a pinch of flaky sea salt.
Storage — Store leftover bars in an airtight container in the refrigerator for up to 5 days. Place a sheet of parchment paper between layers to prevent sticking. The caramel may soften slightly over time, but the bars will still taste fantastic.
Freezing Instructions — These bars freeze beautifully. Wrap the entire slab (or individual slices) tightly in plastic wrap, then in aluminum foil. Freeze for up to 3 months. Thaw overnight in the refrigerator before serving. The caramel may lose some of its crackly texture after freezing, but the flavor remains intact.
Reheating — If you prefer warm bars, microwave individual slices for 10-15 seconds. This softens the cheesecake slightly and warms the apples without melting the caramel completely. I actually prefer them cold, but my husband insists on warming his every time.
For another fall-inspired treat that pairs beautifully with these bars, try my red wine chocolate cake—the deep, fruity notes complement the apple and caramel flavors perfectly.
Nutritional Information & Benefits
Let’s be real—these are an indulgence. But there are a few redeeming qualities worth mentioning:
Estimated Nutritional Values (per bar, based on 12 servings):
- Calories: 485
- Fat: 28g
- Carbohydrates: 55g
- Protein: 6g
- Fiber: 2g
- Sugar: 38g
Health Highlights — Honeycrisp apples are rich in fiber and vitamin C, and they contain antioxidants that support heart health. The cream cheese provides calcium and protein, though it’s also high in saturated fat. The cinnamon in the apple mixture has anti-inflammatory properties and may help regulate blood sugar.
Dietary Considerations — This recipe contains gluten, dairy, and eggs. For a gluten-free version, use a 1:1 gluten-free flour blend. For a dairy-free version, substitute dairy-free cream cheese and coconut cream. The bars are not suitable for vegan diets in their current form.
My Take — I believe in balance. These bars are a special occasion dessert, not an everyday snack. Enjoy them mindfully, savor every bite, and don’t stress about the numbers. Food is meant to bring joy, and these bars deliver plenty of that.
Conclusion
These Ultimate Honeycrisp Caramel Apple Cheesecake Bars are everything I want in a fall dessert—comforting, impressive, and deeply satisfying. The buttery shortbread crust, the velvety cheesecake, the tender apples, and that crackly caramel topping come together in a way that feels both familiar and special.
What I love most about this recipe is how forgiving it is. You don’t need to be a pastry chef to nail it. You just need good ingredients, a little patience, and the willingness to let the bars set before diving in. The first time I made these, I was nervous about the caramel. Now I make it without thinking twice.
I’d love to hear how these turn out for you. Did you try a variation? Add a different spice? Serve them at a holiday gathering? Drop a comment below and let me know—your feedback helps other readers and honestly, I just love hearing about people enjoying food I’ve created. And if you’re looking for more fall dessert inspiration, don’t miss my cherry chocolate brownies or the fluffy strawberry mousse cups for something lighter.
Happy baking, friends. Make these bars, share them with people you love, and watch the magic happen.
Frequently Asked Questions
Can I use a different type of apple?
Yes, but the texture will vary. Granny Smith apples hold up well but are more tart. Fuji and Gala apples tend to break down more during baking. Honeycrisp is ideal because it maintains its shape while softening beautifully. If you must substitute, stick with firm, crisp varieties.
Why did my cheesecake layer crack?
Cracks usually happen from overmixing the batter or overbaking. Mix just until the ingredients are combined—no more. And pull the bars out when the center still jiggles slightly. The residual heat will finish the cooking process as they cool. If cracks do appear, the caramel layer covers them completely, so nobody will know.
Can I make these bars ahead of time?
Absolutely. In fact, they’re better made a day ahead. The flavors meld together overnight, and the bars slice much more cleanly after a full chill. Make them up to 2 days in advance and store in the refrigerator. Add the caramel topping the day before serving for the best texture.
How do I prevent the crust from getting soggy?
Pre-baking the crust for 18-20 minutes creates a barrier that prevents the cheesecake filling from soaking in. Make sure the crust is fully cooled before adding the cheesecake layer. Also, don’t skip the parchment paper—it helps the crust stay crisp by allowing air to circulate around the edges.
Can I use store-bought caramel sauce instead of making my own?
You can, but the texture will be different. Homemade caramel sets into a firmer, more crackly layer that contrasts beautifully with the creamy cheesecake. Store-bought caramel sauce is thinner and won’t create that satisfying snap. If you’re short on time, look for a thick, high-quality caramel sauce and reduce the amount slightly.
Pin This Recipe!
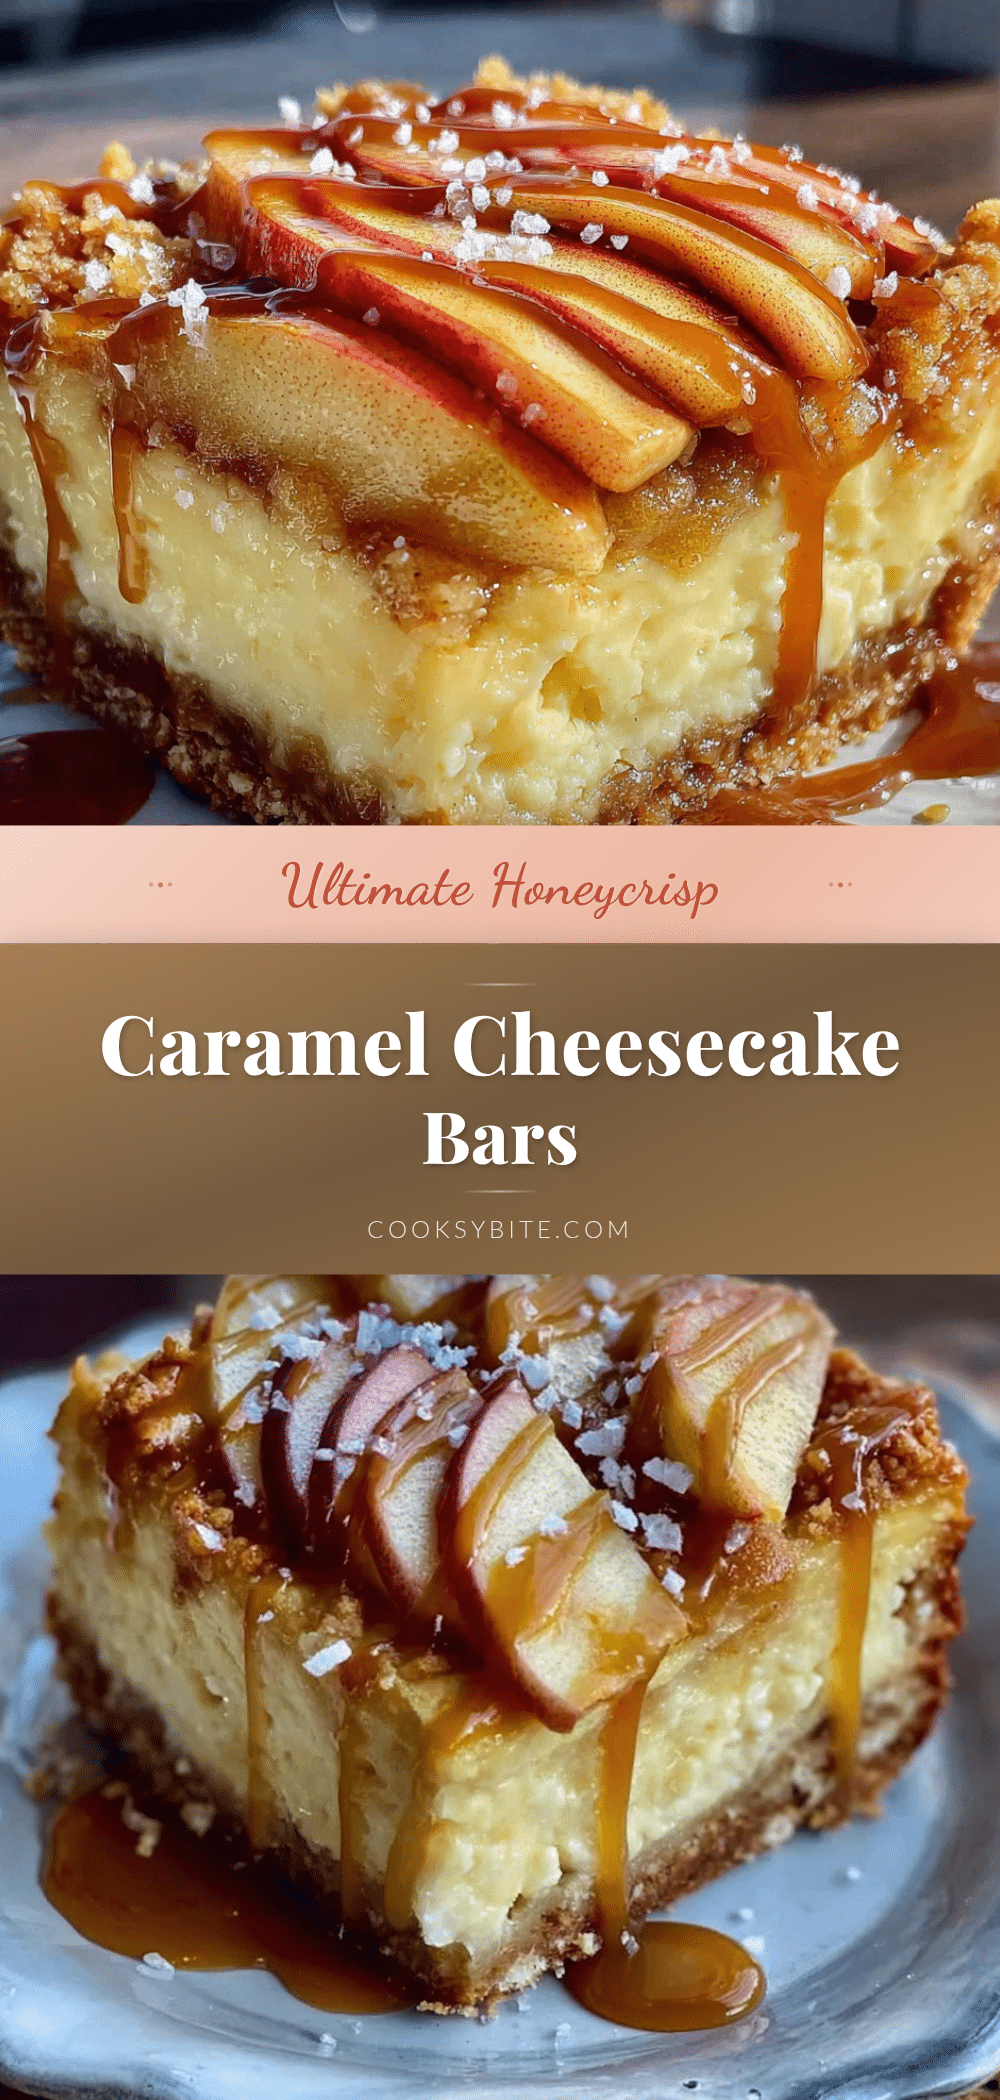
Ultimate Honeycrisp Caramel Apple Cheesecake Bars: Easy Fall Dessert
These Ultimate Honeycrisp Caramel Apple Cheesecake Bars feature a buttery shortbread crust, velvety cheesecake, tender Honeycrisp apples, and a crackly caramel topping. They’re an impressive yet forgiving fall dessert that’s perfect for gatherings.
- Prep Time: 30 minutes
- Cook Time: 55-60 minutes
- Total Time: 5 hours 30 minutes (includes chilling)
- Yield: 12 servings 1x
- Category: Dessert
- Cuisine: American
Ingredients
- 1½ cups all-purpose flour (spooned and leveled)
- ½ cup powdered sugar
- ¾ cup unsalted butter, cold and cubed
- ¼ teaspoon fine sea salt
- 16 ounces cream cheese, softened to room temperature
- ½ cup granulated sugar
- 2 large eggs, room temperature
- 1 teaspoon pure vanilla extract
- 2 tablespoons all-purpose flour
- 3 medium Honeycrisp apples, peeled, cored, and thinly sliced (about ⅛-inch thick)
- 2 tablespoons granulated sugar
- 1 teaspoon ground cinnamon
- ¼ teaspoon ground nutmeg (freshly grated preferred)
- 1 tablespoon lemon juice
- ½ cup unsalted butter
- 1 cup packed brown sugar (dark or light brown)
- ½ cup heavy cream
- ¼ teaspoon salt
- 1 teaspoon vanilla extract
- Flaky sea salt for finishing (optional)
Instructions
- Preheat your oven to 350°F (175°C). Line a 9×13-inch baking pan with parchment paper, leaving about 2 inches of overhang on the long sides.
- Make the shortbread crust: In a large bowl, combine 1½ cups flour, ½ cup powdered sugar, and ¼ teaspoon salt. Add ¾ cup cold cubed butter and cut it in using a pastry cutter, two forks, or your fingertips until the mixture resembles coarse sand with a few pea-sized butter pieces remaining. Press firmly into the prepared pan in an even layer. Bake for 18-20 minutes until edges are just barely golden. Set aside to cool.
- Prepare the apples: While the crust bakes, peel, core, and thinly slice the Honeycrisp apples (about ⅛-inch thick). In a medium bowl, toss slices with 2 tablespoons sugar, 1 teaspoon cinnamon, ¼ teaspoon nutmeg, and 1 tablespoon lemon juice. Let sit for 10 minutes to macerate.
- Make the cheesecake filling: In a large mixing bowl, beat 16 ounces softened cream cheese with ½ cup granulated sugar until smooth and fluffy, about 2-3 minutes. Scrape down sides. Add 2 eggs one at a time, beating on low after each addition just until combined. Add 1 teaspoon vanilla and 2 tablespoons flour, mixing on low until just incorporated.
- Assemble the layers: Pour cheesecake filling over cooled crust and spread evenly. Arrange sliced apples in overlapping rows on top. Pour any remaining juices from the apple bowl over the top.
- Bake at 350°F (175°C) for 35-40 minutes, until edges are set and center jiggles slightly. Let cool completely on a wire rack, about 1 hour.
- Make the caramel: In a medium saucepan over medium heat, melt ½ cup butter. Add 1 cup brown sugar and stir until combined. Bring to a gentle boil, cook for 2 minutes without stirring. Slowly add ½ cup heavy cream (it will bubble up), stir until smooth. Remove from heat, stir in ¼ teaspoon salt and 1 teaspoon vanilla. Let cool for 10 minutes, then pour over cooled bars. Sprinkle with flaky sea salt if desired.
- Refrigerate for at least 4 hours, preferably overnight. Lift bars out using parchment overhang, slice with a sharp knife (wipe blade clean between cuts), and serve chilled.
Notes
Room temperature ingredients are crucial for a smooth cheesecake layer. Don’t overmix the cheesecake batter to prevent cracking. Let caramel cool for 10-15 minutes before pouring so it clings to the apples. For clean slices, use a hot, wet knife and wipe between cuts. These bars taste better after a night in the fridge. For gluten-free, use a 1:1 gluten-free flour blend. For dairy-free, use dairy-free cream cheese and coconut cream.
Nutrition
- Serving Size: 1 bar
- Calories: 485
- Sugar: 38
- Sodium: 320
- Fat: 28
- Saturated Fat: 17
- Carbohydrates: 55
- Fiber: 2
- Protein: 6
Keywords: caramel apple cheesecake bars, Honeycrisp apple dessert, fall dessert, cheesecake bars, apple cheesecake, easy dessert recipe


