The crackle on top of a perfectly chilled Biscoff cheesecake bar—that thin, taut, almost-glasslike surface that shatters when you press a fork into it—is what I made these for. Everything else is secondary. I mean, sure, the filling is absurdly creamy, and the crust is basically crushed-up cookies held together by butter and hope, but that crackle? That’s the thing I keep coming back to. It’s not something you can fake, either. You have to let the bars set long enough, and you have to resist the urge to mess with them while they’re cooling.
I first made these on a Tuesday night in February, which is exactly the kind of specific detail that makes me sound like I have my life together. I did not. I had a jar of Biscoff spread that had been sitting in my pantry since Christmas, a block of cream cheese that needed using up, and a vague sense that I wanted something sweet but not too complicated. (You know the feeling. The one where you want dessert but you also don’t want to stand at the mixer for twenty minutes.) These bars came together in about fifteen minutes of active work, and then they sat in my fridge, doing their thing, while I cleaned up and watched something mindless on TV.
The next morning, I cut into them, and that crackle—that perfect, glossy, slightly firm surface—gave way to the silkiest cheesecake I’d ever made at home. It wasn’t showy. It wasn’t piled high with frosting or drizzled with caramel. It was just right. And honestly? That’s the kind of recipe that sticks.
These creamy Biscoff cheesecake bars with cookie butter swirl are not going to win any awards for complexity. But they will win over anyone who takes a bite. And that’s the better prize, if you ask me.
Why You’ll Love This Recipe
I tested this recipe four times before I landed on the version I’m sharing today. The first batch was too dense. The second had a weird graininess from over-mixing. The third? Perfect texture, but the swirl sank into the batter. The fourth—the one you’re getting here—nailed everything. The crackle, the creaminess, the way the cookie butter ribbons stay suspended right where you put them.
- Quick & Easy: Fifteen minutes of hands-on time, and your oven does the rest. These are perfect for when you want a showstopper dessert without the showstopper effort.
- Simple Ingredients: Cream cheese, Biscoff spread, cookies, butter, eggs, sugar, vanilla. That’s it. No weird specialty items or trips to three different stores.
- Perfect for Parties: These bars slice cleanly, travel well, and look gorgeous on a platter. I’ve brought them to potlucks and watched them disappear before the brownies. They’d be right at home alongside something like these pink champagne jello shots for a dessert table that covers all bases.
- Crowd-Pleaser: Kids love the cookie butter swirl. Adults appreciate that it’s not cloyingly sweet. Everyone agrees on seconds.
- Unbelievably Delicious: The texture is the star here. That crackly top, the velvety cheesecake, the crunchy crust—it’s a whole mouthfeel experience, not just a flavor one.
What makes these different from every other cheesecake bar recipe out there? Two things. First, I use room-temperature eggs and cream cheese, and I mean actually room temperature, not “left on the counter for ten minutes” room temperature. It makes a difference in how smooth the batter gets. Second, I layer the cookie butter swirl in a specific way so it doesn’t sink to the bottom. I’ll show you exactly how in the method section.
This is the kind of recipe that makes you close your eyes after the first bite. It’s comfort food reimagined—familiar but surprising, simple but unforgettable. And it’s perfect for impressing guests without any stress, or for turning a regular Wednesday into something a little more special.
What Ingredients You Will Need
This recipe uses straightforward, pantry-friendly ingredients to create something that tastes far more complicated than it is. Here’s what you’ll need, along with a few notes on what to look for and what you can swap.
For the Crust
- 200g (about 2 cups) Biscoff cookie crumbs — You can crush whole Biscoff cookies in a food processor or seal them in a bag and go at them with a rolling pin. I prefer the food processor for a finer, more even crumb. Lotus Biscoff is the standard brand here, and it works perfectly.
- 85g (6 tablespoons) unsalted butter, melted — Salted butter works in a pinch, just skip the added salt in the crust. I use Kerrygold for its richness, but any good unsalted butter will do.
- 1 tablespoon granulated sugar — This adds a tiny bit of sweetness and helps the crust hold together. You can omit it if you’re using the sweetened cookie crumbs as-is.
- Pinch of salt — Only if using unsalted butter. It balances the sweetness of the cookies.
For the Cheesecake Filling
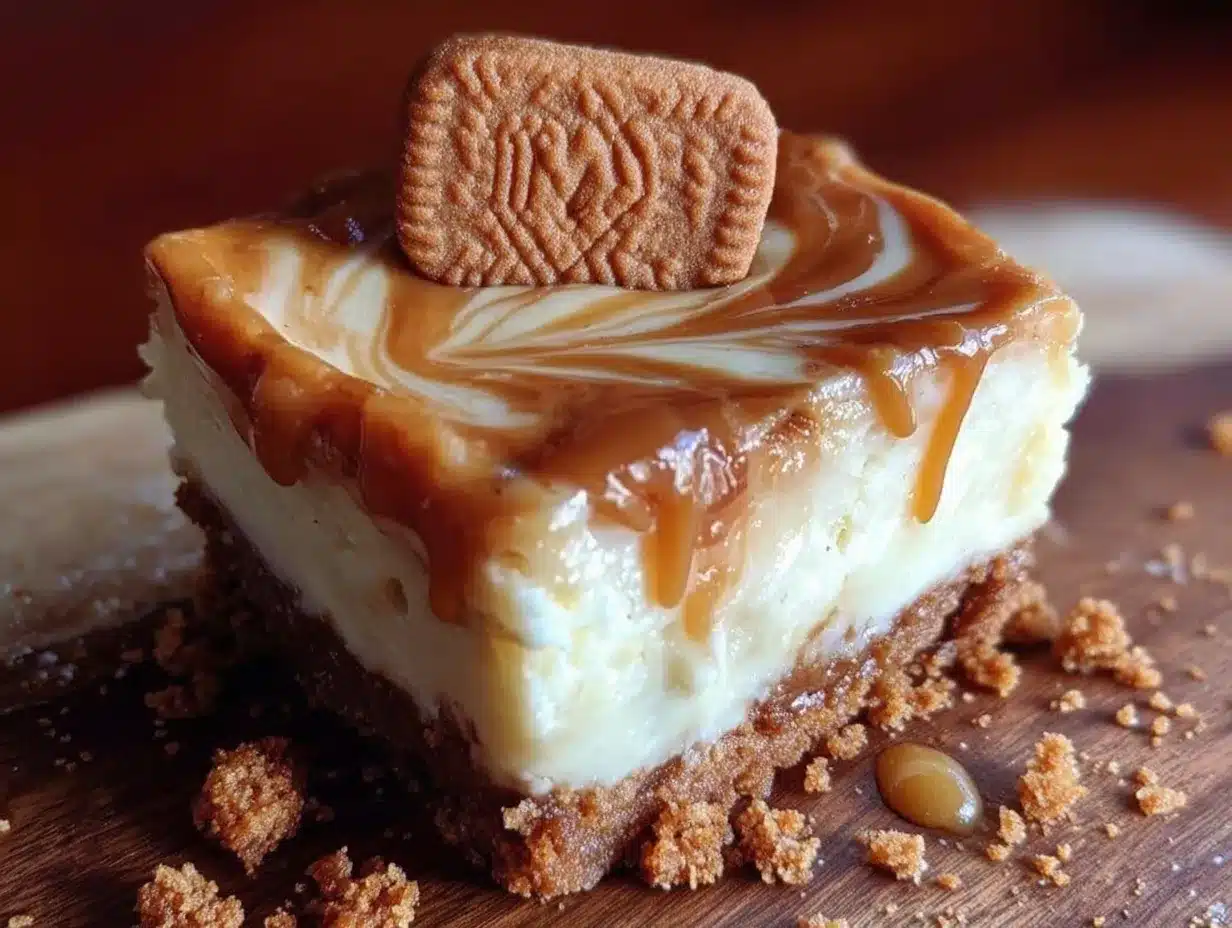
- 450g (2 blocks) full-fat cream cheese, softened to room temperature — This is non-negotiable. Low-fat cream cheese has too much water and will make your filling runny. Set it out on the counter for at least an hour before you start. Philadelphia is my go-to brand for consistent results.
- 100g (½ cup) granulated sugar — Just enough to sweeten without overwhelming the tang of the cream cheese.
- 2 large eggs, room temperature — Cold eggs will seize the batter and create lumps. If you forgot to take them out ahead of time, place them in a bowl of warm water for 5 minutes.
- 1 teaspoon vanilla extract — Pure vanilla, not imitation. It makes a difference in the depth of flavor.
- 120ml (½ cup) sour cream, room temperature — This is the secret to that ultra-creamy, never-cracked texture. It adds richness and a slight tang that plays beautifully with the Biscoff.
For the Cookie Butter Swirl
- 120g (½ cup) Biscoff spread (cookie butter), slightly warmed — You want it thin enough to drizzle but not hot. Microwave it in 10-second bursts, stirring between each, until it’s loose and pourable. The creamy version works better than the crunchy one here, but either will do in a pinch.
Ingredient Tips & Substitutions
- Gluten-free option: Use gluten-free Biscoff cookies (they are widely available) or substitute with gluten-free graham crackers. The texture will be slightly different but still delicious.
- Dairy-free option: Use dairy-free cream cheese and sour cream alternatives. I’ve had good results with Kite Hill’s cream cheese style spread. The texture is slightly softer, so chill the bars longer before slicing.
- No Biscoff spread?: You can make your own by blending Biscoff cookies into a paste with a little coconut oil, or use a speculoos-style cookie butter from another brand. Trader Joe’s has a good one.
- Egg substitute: For a lighter version, you can use ¼ cup of plain Greek yogurt per egg. The texture will be denser but still creamy.
Equipment Needed
You don’t need a fancy kitchen to make these bars, but a few specific tools make the process smoother.
- 8×8-inch square baking pan — This is the ideal size for thick, generous bars. A 9×9 pan works too, but your bars will be thinner and may bake faster. Adjust the time accordingly.
- Parchment paper — Line your pan with two overlapping strips, leaving overhang on all sides. This creates a sling that lets you lift the entire block of cheesecake out cleanly. Don’t skip this step.
- Food processor or rolling pin — For crushing the cookies. A food processor gives you a finer, more even crumb, but a sealed bag and a rolling pin work fine if you don’t mind a little elbow grease.
- Electric hand mixer or stand mixer — A hand mixer is plenty for this recipe. A stand mixer works too, but be careful not to over-mix. I’ve made these with both, and honestly, the hand mixer gives me better control.
- Rubber spatula — For scraping down the bowl and spreading the batter evenly.
- Small offset spatula or butter knife — For creating the swirl pattern. A toothpick also works if you’re precise.
- Deep baking dish (for water bath alternative) — I don’t use a traditional water bath for these bars, but if you’re nervous about cracking, place a shallow pan of hot water on the lower oven rack while baking. The steam helps keep the cheesecake tender.
Budget-friendly tip: If you don’t have an 8×8 pan, a 9-inch round cake pan works in a pinch. Just adjust the baking time and expect slightly different portion sizes.
Preparation Method
Let’s get into the actual making of these creamy Biscoff cheesecake bars. Follow these steps closely, and you’ll have a pan of something truly special.
- Preheat and prep your pan. Preheat your oven to 325°F (160°C). Line an 8×8-inch baking pan with parchment paper, leaving about 2 inches of overhang on two opposite sides. This will be your sling for lifting the bars out later. Set the pan aside.
- Make the crust. In a food processor, pulse 200g of Biscoff cookies until they become fine crumbs. You should have about 2 cups. Transfer to a medium bowl, add 1 tablespoon of sugar and a pinch of salt, then pour in 85g of melted butter. Stir with a fork until the mixture looks like wet sand and holds together when pressed. If it crumbles apart, add another tablespoon of melted butter.
- Press and bake the crust. Dump the crust mixture into your prepared pan. Press it down firmly and evenly using the bottom of a measuring cup or a flat-bottomed glass. Really pack it in—a loose crust will fall apart when you slice the bars. Bake for 10 minutes at 325°F (160°C). The edges should be just barely golden. Remove from the oven and let cool while you make the filling. Keep the oven on.
- Soften your cream cheese properly. This is the most important step. Your cream cheese should be so soft that when you press it with your finger, it leaves a deep indent with no resistance. If it’s still cold in the center, it will create lumps in your batter. Trust me, I learned this the hard way on batch one.
- Beat the cream cheese and sugar. In a large bowl, beat the softened cream cheese and 100g of sugar together on medium speed until smooth and fluffy, about 2 minutes. Scrape down the sides and bottom of the bowl with a rubber spatula. You want no lumps at all.
- Add the sour cream and vanilla. Add the room-temperature sour cream and vanilla extract, then beat on low speed just until combined. Again, scrape the bowl. Over-mixing at this stage adds too much air, which can cause cracks later.
- Add the eggs one at a time. Crack one egg into the batter, beat on low speed until just incorporated, then add the second egg and repeat. Mix only until the yellow streaks disappear. Do not over-beat. The batter should be smooth, silky, and thick.
- Pour the filling over the crust. Scrape the cheesecake filling onto the pre-baked crust. Use your spatula to spread it into an even layer, reaching all the corners. Tap the pan gently on the counter a few times to release any air bubbles.
- Create the cookie butter swirl. Warm your Biscoff spread in the microwave in 10-second bursts until it’s loose and pourable. Drop spoonfuls of the warm cookie butter randomly over the surface of the cheesecake batter. You should have about 6 to 8 dollops. Then, take a butter knife or small offset spatula and drag it through the batter in gentle figure-eight motions. Don’t over-swirl or you’ll lose the distinct ribbons. A few passes are all you need.
- Bake low and slow. Place the pan in the center of the oven and bake at 325°F (160°C) for 35 to 40 minutes. The edges should look set and slightly puffed, but the center should still have a slight jiggle—like firm Jell-O, not liquid. If the center looks completely still, you’ve over-baked it. At 35 minutes, give the pan a gentle shake. You want a 2-inch circle in the very center to wobble.
- Cool completely, then chill. Remove the pan from the oven and place it on a wire rack. Let it cool to room temperature, about 1 hour. Then, transfer the pan to the refrigerator and chill for at least 4 hours, but overnight is better. This is where the crackle develops and the texture sets properly. Do not rush this step.
- Slice and serve. Once fully chilled, use the parchment sling to lift the entire block of cheesecake out of the pan. Place it on a cutting board. Use a sharp chef’s knife to slice into 9 or 16 bars, wiping the blade clean between cuts for neat edges. Serve cold or at room temperature.
Cooking Tips & Techniques
I’ve made this recipe enough times to know exactly where things can go wrong. Here are the lessons I learned so you don’t have to.
Room temperature is not optional. I know I keep saying this, but it’s because I’ve messed it up myself. Cold cream cheese creates lumps that no amount of mixing will fix. Cold eggs seize the batter and make it grainy. Cold sour cream won’t incorporate smoothly. Take everything out of the fridge at least an hour before you start. Set a timer if you need to. Your future self will thank you.
The swirl technique matters. On my third test batch, I swirled the cookie butter too aggressively, and it completely mixed into the batter. The result was a uniform tan cheesecake with no visible ribbons. Pretty? No. Delicious? Still yes, but it lost the visual wow factor. Use a light hand. A few figure-eight motions are plenty. You want distinct pockets of cookie butter, not a blended batter.
Don’t open the oven door. I know it’s tempting to check on your cheesecake bars, but every time you open the oven, you let out heat and create temperature fluctuations that can cause cracking. Use the oven light and look through the window instead. Trust the timing and the jiggle test.
The jiggle test is your friend. At 35 minutes, gently shake the pan. The edges should be set, and the center should wobble like a firm gelatin dessert. If the entire surface is still liquid, give it 5 more minutes. If the center is completely still, you’ve gone too far. Pull it out immediately.
Chill time is non-negotiable. I know you want to eat these immediately. I get it. But cutting into warm cheesecake is a mess. The bars need at least 4 hours in the fridge to set properly. Overnight is ideal. The crackle on top develops during this time, and the texture becomes silky and sliceable. Patience pays off here.
Clean cuts every time. For those Instagram-worthy slices, use a sharp chef’s knife and wipe it clean with a damp paper towel between each cut. Run the knife under hot water, dry it, then slice. This prevents the cheesecake from dragging and gives you clean, sharp edges.
Variations & Adaptations
Once you’ve mastered the base recipe, here are some ways to make it your own.
Chocolate Biscoff Bars: Add 2 tablespoons of cocoa powder to the crust mixture for a chocolatey base. You can also drizzle melted dark chocolate over the finished bars for an extra layer of richness. I tried this for a friend’s birthday, and it was gone in ten minutes.
Peanut Butter Swirl: Swap the Biscoff spread for creamy peanut butter. Warm it the same way and swirl it into the batter. The combination of peanut butter and the spiced Biscoff crust is surprisingly good. If you love peanut butter desserts, this is your version.
Vegan Version: Use dairy-free cream cheese and sour cream alternatives, and substitute the eggs with ¼ cup of unsweetened applesauce per egg. The texture will be slightly softer, so chill the bars for a full 8 hours before slicing. I’ve tested this with Kite Hill products, and while it’s not identical to the original, it’s still delicious in its own right.
Mini Cheesecake Bites: Press the crust into a mini muffin tin lined with paper liners, fill with cheesecake batter, and bake for 12 to 15 minutes. These are perfect for parties or portion control. They also freeze beautifully.
Seasonal Twist: In the fall, add ½ teaspoon of pumpkin pie spice to the cheesecake batter and top with a drizzle of caramel sauce. In the summer, serve the bars with a side of fresh berries and whipped cream. The base recipe is versatile enough to handle seasonal adaptations without losing its soul.
No-Bake Version: For a no-bake alternative, skip the eggs and use 250g of cream cheese beaten with 100g of powdered sugar and 240ml of heavy cream (whipped to stiff peaks). Fold together gently, pour over the crust, and chill for 6 hours. The texture is lighter and mousse-like, but the flavor is still unmistakably Biscoff.
Serving & Storage Suggestions
These bars are best served cold, straight from the fridge, but they’re also wonderful at room temperature if you let them sit out for 10 minutes. The texture softens slightly, and the cookie butter swirl becomes a little more pronounced.
Serving ideas: Arrange the bars on a platter and dust with a light sprinkle of crushed Biscoff cookies or a drizzle of melted Biscoff spread. A dollop of whipped cream and a few fresh raspberries add color and a tart contrast to the sweetness. For a full dessert spread, pair these with a batch of fluffy strawberry mousse cups for a pink-and-brown theme that looks as good as it tastes.
Beverage pairings: A strong cup of coffee or espresso is the classic choice—the bitterness cuts through the sweetness beautifully. A cold glass of milk works for the kids (or the kid in you). For something more grown-up, a dark stout or a creamy stout like a milk stout complements the spiced cookie notes.
Storage: Store leftover bars in an airtight container in the refrigerator for up to 5 days. Place a sheet of parchment paper between layers if stacking. The crackle on top may soften slightly after a day or two, but the flavor only gets better.
Freezing: These bars freeze exceptionally well. Wrap individual slices tightly in plastic wrap, then place them in a freezer-safe bag or container. Freeze for up to 3 months. To thaw, transfer a slice to the refrigerator overnight or let it sit at room temperature for 30 minutes. Do not microwave to thaw—it will ruin the texture.
Make-ahead tip: These are a fantastic make-ahead dessert for holidays or parties. Prepare the bars up to two days in advance, keep them chilled, and slice just before serving. The flavors meld and deepen over time, so they actually taste better on day two.
Nutritional Information & Benefits
Let’s be honest—these are a treat, not a health food. But knowing what’s in them helps you enjoy them mindfully.
Estimated nutrition per bar (based on 9 servings):
- Calories: 410
- Fat: 28g
- Saturated Fat: 15g
- Carbohydrates: 36g
- Sugar: 24g
- Protein: 6g
- Sodium: 310mg
Health highlights: Cream cheese provides a decent amount of calcium and protein, while the eggs add B vitamins and high-quality protein. The Biscoff cookies and spread are made with wheat flour, so there’s a small amount of fiber. Is it a superfood? No. But it’s a dessert made with real ingredients, and there’s value in that.
Dietary considerations: This recipe contains gluten, dairy, and eggs. For a gluten-free version, use gluten-free Biscoff cookies. For a dairy-free version, use plant-based cream cheese and sour cream alternatives. For a lower-sugar option, reduce the sugar in the filling to 75g and use a sugar-free cookie butter if available.
Allergen note: Biscoff cookies are made in a facility that also processes tree nuts, so if you have severe nut allergies, check the packaging carefully. The spread itself is nut-free, but cross-contamination is possible.
My personal take? I don’t make these every week. They’re a special-occasion dessert, and I treat them as such. But when I do make them, I enjoy every single bite without guilt. That’s the right way to approach food, I think.
Conclusion
These creamy Biscoff cheesecake bars with cookie butter swirl are everything I want in a dessert: impressive without being fussy, rich without being heavy, and simple enough that I can make them on a Tuesday night without breaking a sweat. That crackle on top? It still gets me every time.
I hope you make these and love them as much as I do. And if you tweak them—add a swirl of caramel, swap in peanut butter, or turn them into mini bites—I want to hear about it. That’s the beauty of a good recipe. It gives you a foundation, and then it becomes yours.
Drop a comment below if you try these bars. Tell me what you changed, what you loved, or even what went wrong. (I’ve had plenty of kitchen failures myself, so no judgment here.) And if you share them on social media, tag me—I love seeing your creations. Now go preheat your oven. You’ve got bars to make.
Frequently Asked Questions
Can I use a different cookie for the crust?
Absolutely. Graham crackers, vanilla wafers, or shortbread cookies all work well. The flavor will change, but the structure will be the same. If using a less sweet cookie, add an extra tablespoon of sugar to the crust mixture.
Why did my cheesecake crack on top?
Cracking usually happens from over-baking or sudden temperature changes. Make sure you pull the bars out while the center still has a slight jiggle. Also, let them cool gradually on the counter before moving to the fridge. If cracks do appear, don’t worry—the cookie butter swirl hides them beautifully.
Can I double this recipe?
Yes. Double all ingredients and bake in a 9×13-inch pan. Increase the baking time to 45 to 50 minutes, and check for doneness using the same jiggle test. The bars will be slightly thinner, so adjust your slice size accordingly.
How do I get cleaner swirls?
Warm your Biscoff spread until it’s thin enough to drizzle, but not hot. Drop it in distinct dollops rather than spreading it. Use a knife or skewer to make just 3 to 4 passes through the batter. Less is more when it comes to swirls.
Can I make these without a mixer?
Yes, but you’ll need some arm strength. Use a wooden spoon and a large bowl. Make sure your cream cheese is extremely soft before you start. Beat it vigorously until smooth before adding the other ingredients. The texture won’t be quite as airy, but it will still be delicious.
Pin This Recipe!
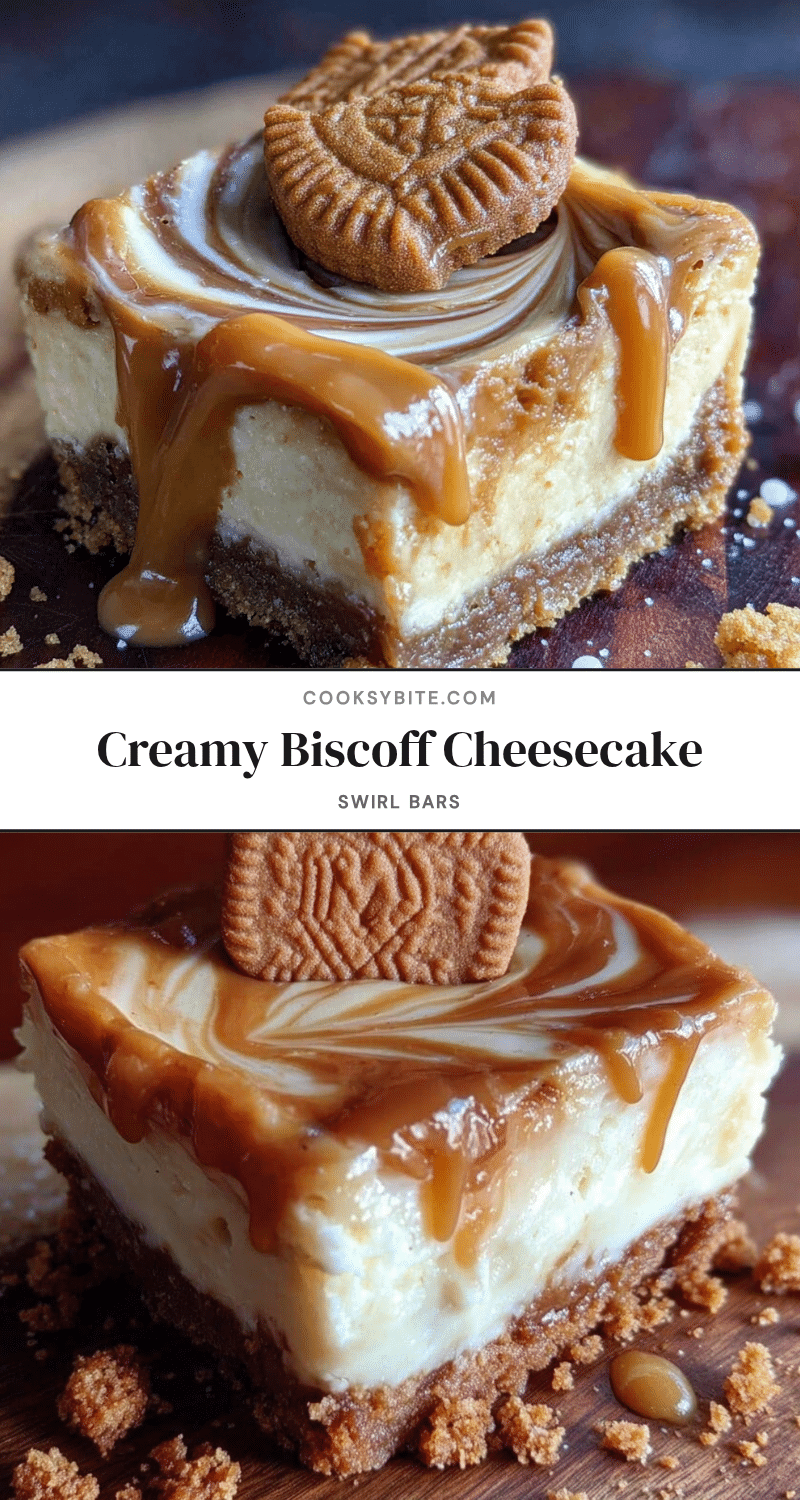
Creamy Biscoff Cheesecake Bars with Easy Cookie Butter Swirl
These creamy Biscoff cheesecake bars feature a crunchy cookie crust, a silky cheesecake filling, and a beautiful cookie butter swirl. They’re quick to prepare, perfect for parties, and deliver that satisfying crackle on top.
- Prep Time: 15 minutes
- Cook Time: 35-40 minutes
- Total Time: 4 hours 50 minutes (includes chilling)
- Yield: 9-16 servings 1x
- Category: Dessert
- Cuisine: American
Ingredients
- 200g (about 2 cups) Biscoff cookie crumbs
- 85g (6 tablespoons) unsalted butter, melted
- 1 tablespoon granulated sugar
- Pinch of salt (if using unsalted butter)
- 450g (2 blocks) full-fat cream cheese, softened to room temperature
- 100g (½ cup) granulated sugar
- 2 large eggs, room temperature
- 1 teaspoon vanilla extract
- 120ml (½ cup) sour cream, room temperature
- 120g (½ cup) Biscoff spread (cookie butter), slightly warmed
Instructions
- Preheat your oven to 325°F (160°C). Line an 8×8-inch baking pan with parchment paper, leaving about 2 inches of overhang on two opposite sides.
- In a food processor, pulse 200g of Biscoff cookies until they become fine crumbs. Transfer to a medium bowl, add 1 tablespoon of sugar and a pinch of salt, then pour in 85g of melted butter. Stir until the mixture looks like wet sand and holds together when pressed.
- Press the crust mixture firmly and evenly into the prepared pan using the bottom of a measuring cup. Bake for 10 minutes at 325°F (160°C). Remove from the oven and let cool while you make the filling. Keep the oven on.
- In a large bowl, beat the softened cream cheese and 100g of sugar together on medium speed until smooth and fluffy, about 2 minutes. Scrape down the sides and bottom of the bowl.
- Add the room-temperature sour cream and vanilla extract, then beat on low speed just until combined. Scrape the bowl again.
- Add the eggs one at a time, beating on low speed after each addition until just incorporated. Do not over-beat.
- Pour the cheesecake filling over the pre-baked crust and spread it into an even layer. Tap the pan gently on the counter a few times to release air bubbles.
- Warm the Biscoff spread in the microwave in 10-second bursts until loose and pourable. Drop spoonfuls randomly over the surface of the cheesecake batter. Use a butter knife or small offset spatula to gently swirl in figure-eight motions. Do not over-swirl.
- Bake at 325°F (160°C) for 35 to 40 minutes. The edges should be set and slightly puffed, but the center should still have a slight jiggle.
- Remove the pan from the oven and place on a wire rack. Let cool to room temperature, about 1 hour. Then transfer to the refrigerator and chill for at least 4 hours, preferably overnight.
- Once fully chilled, use the parchment sling to lift the entire block of cheesecake out of the pan. Place on a cutting board and slice into 9 or 16 bars using a sharp chef’s knife, wiping the blade clean between cuts.
Notes
Room temperature ingredients are crucial for a smooth batter. Do not over-mix the batter to avoid cracks. Chill the bars overnight for the best texture and crackle. For clean cuts, wipe the knife blade between slices.
Nutrition
- Serving Size: 1 bar (based on 9 se
- Calories: 410
- Sugar: 24
- Sodium: 310
- Fat: 28
- Saturated Fat: 15
- Carbohydrates: 36
- Protein: 6
Keywords: Biscoff cheesecake bars, cookie butter swirl, cheesecake bars, Biscoff dessert, easy cheesecake


